oolly Thoughts
INPURSUIT OFCRAFTY MATHEMATICS
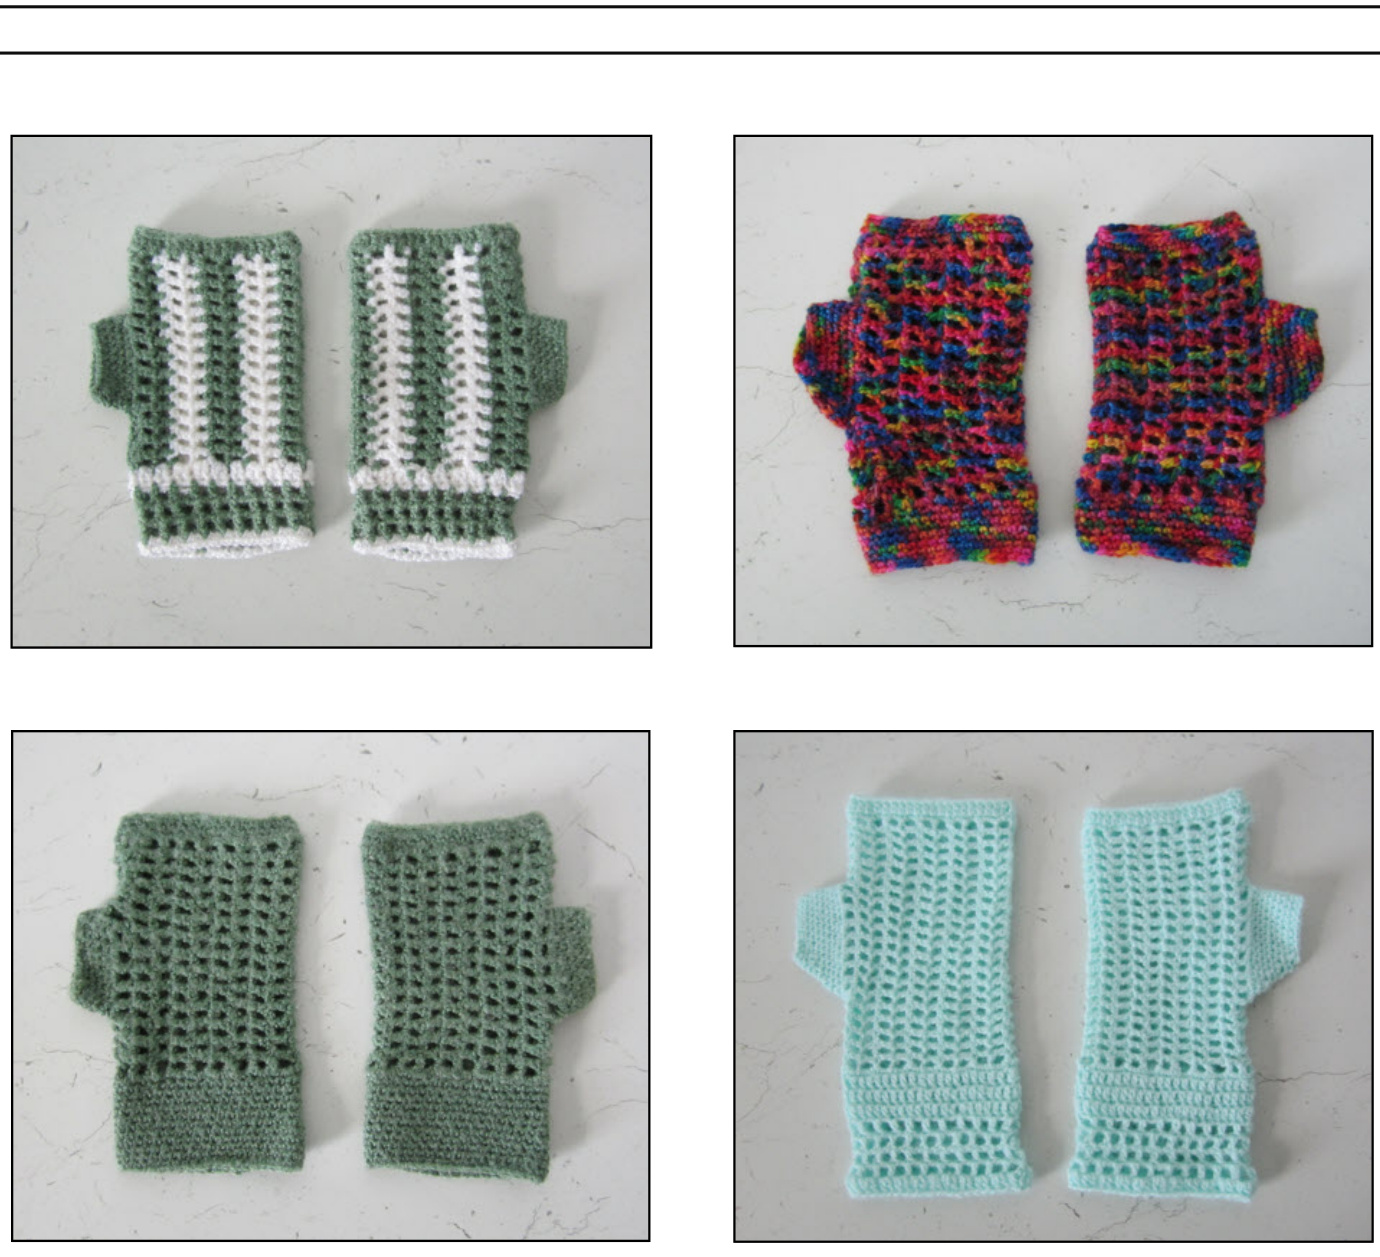
Fits Like A Glove
Crochet fingerless gloves in any yarn of your choice designedby Pat Ashforth& StevePlummer
Fits Like A Glove

This infinitely variable pattern is a foolproof way to create a pair of simple fingerless gloves (or mittens, wrist-warmers or whatever else you want to call them). You can use any yarn and they are guaranted to fit. The pattern is ideal for beginners and experienced knitters. I need to wear gloves every day of the year, for medical reasons. I have many pairs. They are mostly very basic because they need to be suitable for everyday use. They could be embellished in many different ways. The instructions give a general method for making the gloves, rather than specific instructions. Adapt them to suit your needs.
Yarn
Use any yarn you want. I have found that slightly stretchy yarns work best over a period of time because they keep the shape better. If you like fine yarns some of the stretchy sock yarns work well. I find Worsted, DK, and Sports weights the most comfortable to work with and to wear. Thicker yarns make it difficult to shape the thumb satisfactorily. The turquoise gloves shown on the cover were made in 3-ply baby yarn.
Hook
Use the size of hook recommended on the ball band or the size you would normally use for your chosen yarn. If you would like the texture to be firmer you could try a smaller hook.
Size
The gloves are made to your own requirements. The main part of the glove should be tight because the mesh will open up in wear.
Sequence of working
The main (mesh) part is made first, then the top and bottom, then the thumb. This allows you to make adjustments at all stages.
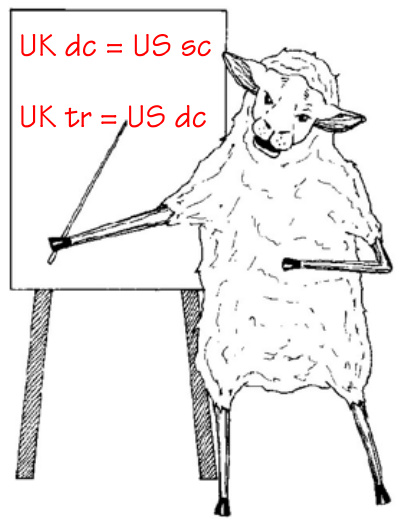
Note
Instructions use UK crochet terminology UK double crochet = US single crochet UK treble = US double crochet
Fits Like A Glove - Method
Measure the length you want the main mesh part of the glove to be. This is the distance from your wrist to the place where you want the glove to finish on your fingers. Later, you will be adding a very narrow piece at the finger end of the glove and this should be taken into account. If you are in doubt, it is better to make the glove shorter than you need, rather than longer, because you can add to it later.
Main part
Foundation: Make a chain longer than the measurement. (You may want to make this with a hook one size bigger than the main hook so that it is not too tight to work into.) Fasten off loosely and break the yarn. Rejoin the yarn at the end where you started the chain. Row 1: Make 4 chains then \*miss 1 dc, work 1 tr into the next stitch, 1 ch\*. Repeat from \*, ending with a tr, until the row of holes is long enough for your hand. Unravel any surplus chains from your foundation. Turn. Row 2: 4 chains \*1 tr into top of next tr, 1 dc\*. Repeat until you reach the last hole . Work the final tr into the space, not directly into the chain. Repeat Row 2 until the piece is big enough to fit round your hand. It should be slightly stretched to fit or it will be too loose when you have finished. Break the yarn. Do not stitch the sides.
Finger edge
Turn the piece sideways and rejoin the yarn to the centre of the finger edge. (It is not essential to break the yarn. You can continue the next part from where you are. Starting again, in the centre, has the advantage of making it easy to create a firm join that holds the glove together for trying on.) Row 1: Work 2 dc into each space all round the glove, bringing the start and finish edges closely together when you reach that point. Join with a slip stitch. Row 2: Work 3 ch then 1 tr into the top of each dc. Join with a slip-stitch. Break the yarn lat you need to add extra length at this end you can add extra rows using any stitch you wa
Wrist edge
Rejoin the yarn to the centre of the wrist edge and work Rows 1 and 2 as for the finger edge. Continue to add rows, using any stitch you want until the glove is the length you need.
Thumb
Try on the glove to establish where the thumb should be. As a general rule it will be a little over a third of the length of the glove, in the centre of the edge. You may have to experiment to find what fits you best. The thumb should be worked entirely in dc in order to be able to fit in the shaping required. Rejoin the yarn at the bottom of where the thumb is to begin. Work 2 dc into each space, going up one side of the thumb and down the other, pulling the two edges closely together where they meet. Join with a slip-stitch. Work another round of dc. You can now work in a spiral. The amount of shaping required depends on the thickness of your yarn and the length of the finished thumb. You could stop now, if you want to. To make a longer thumb, shape only the top edge of the thumb. Where you need to decrease, make a decrease at each side of the centre of the top of the thumb. needed several rows. I did 2 rounds with decreases, 1 round without, 1 with, 1 without, 2 w This was done by trial and error and trying on after every round. When you have finished, fasten off. Stitch the sides to complete the gloves. This is best done from the outside so you can match up the mesh accurately.
Fits Like A Glove - Embellishment
There are many ways to make your gloves more elaborate. Here are a few suggestions: · Make the main part in stripes and add stripes to the two ends · Add flowers to the backs of the gloves (though this stops them being interchangeable) Add fancy stitches to the two ends of the gloves · Thread ribbons through some rows of holes and tie in bows · Work surface crochet through the mesh on the back of the gloves Add frills to the ends by adding extra stitches instead of working flat rows