Ohmay Designs Pattern
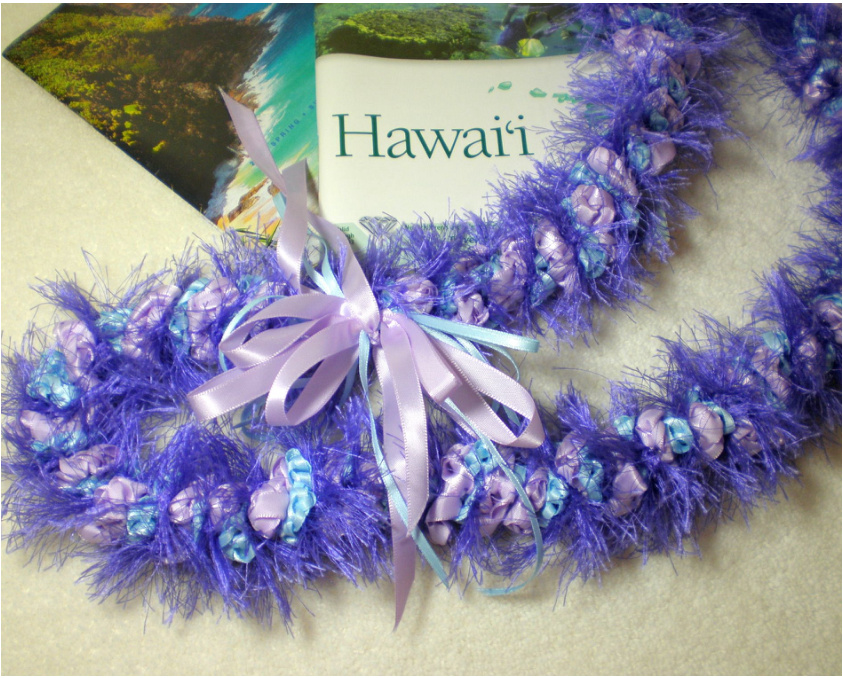
Forever Lei The leis are fun and easy to make and you can make them in whatever colors you wish to fit your special occasion. The length of the base ribbon willgive you approximately a 36" finished lei.
You will need:
$1~\%$ yards of Grosgrain ribbon - 3/8" wide for the base 30 yards - Satin Ribbon - 3/8" wide (color A) 30 yards - Satin Ribbon - 3/8" wide (color B) 1 ball Eyelash yarn - one in each color (colors C) 2 - 2" or larger Safety pins Crochet hook size J or K
Instructions:
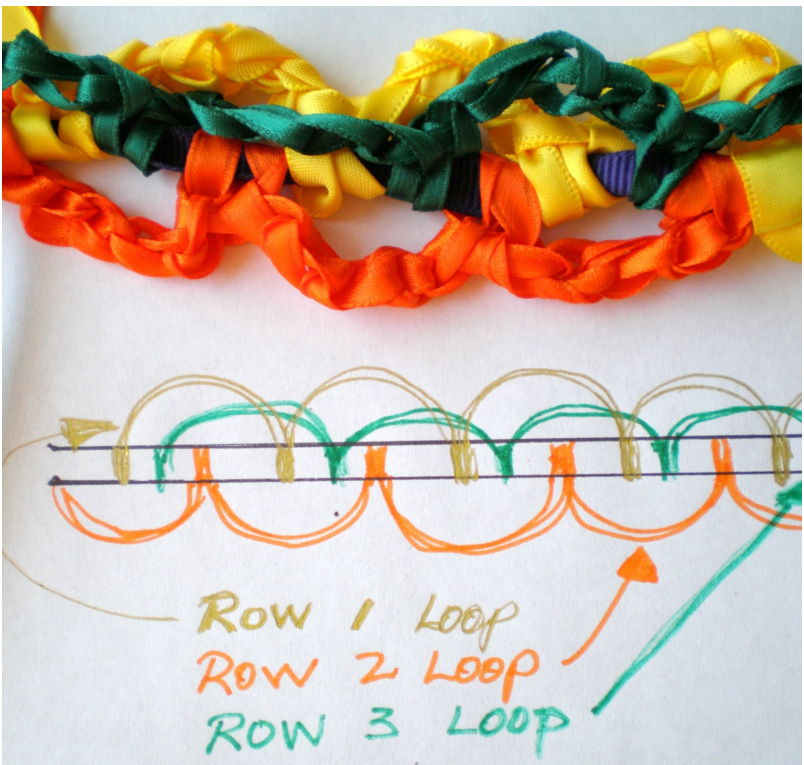
\*+ Starting with the grosgrain ribbon to use as your base. \*Leave about a 4"tail, pin each end of the base ribbon with the safety pins, so that your work won't slip Of. +All rows are worked the same. Just where you place the single crochet on the base ribbon varies. Work as follows for Row 1 (color A): 1. Start by making a single crochet on the base ribbon. (leave a 4" tail) 2. Chain 4 to 6 stitches, loop made (alternate the number of stitches as you go) 3. Single crochet to the base ribbon. 4. Repeat # 2 and #3 until you have 125 to 130 loops. 5. End with a single crochet, cut ribbon leaving about $4"$ 6. Leave space between the loops for the other ribbon layers/rows. Row 2 (color B): From the beginning of color A,repeat the above instructions placing the single crochet on the base ribbon between each loop of the first row.
Ohmay Designs Pattern
Row 3 (color C): From the end of the last row completed, repeat the above instructions placing the single crochet after skipping 2 single crochets (colors A & B) NOTE: You can use 2 strands of the eyelash yarn for a fluffier lei.
Finishing
1. Holding the two ends of the base ribbon, push the layers of crochet ribbons (loops) together towards the center. 2.Pack tightly 3. Hold one end of the work and start twisting the gathered ribons in one direction. This will give you the spiral look. 4. Twist until you are satisfied with the look. Push the loops together again. 5.Tie the base ribbon together. Then tie the other ribbon ends together to hold the twist. 6. Using additional ribbon, make a bow or embellish as you wish.

YOU ARE NOW READY TO PARTY!!!
The below picture is to give you a visual aid to assist you in the placement of the rows on the base/anchor ribon.