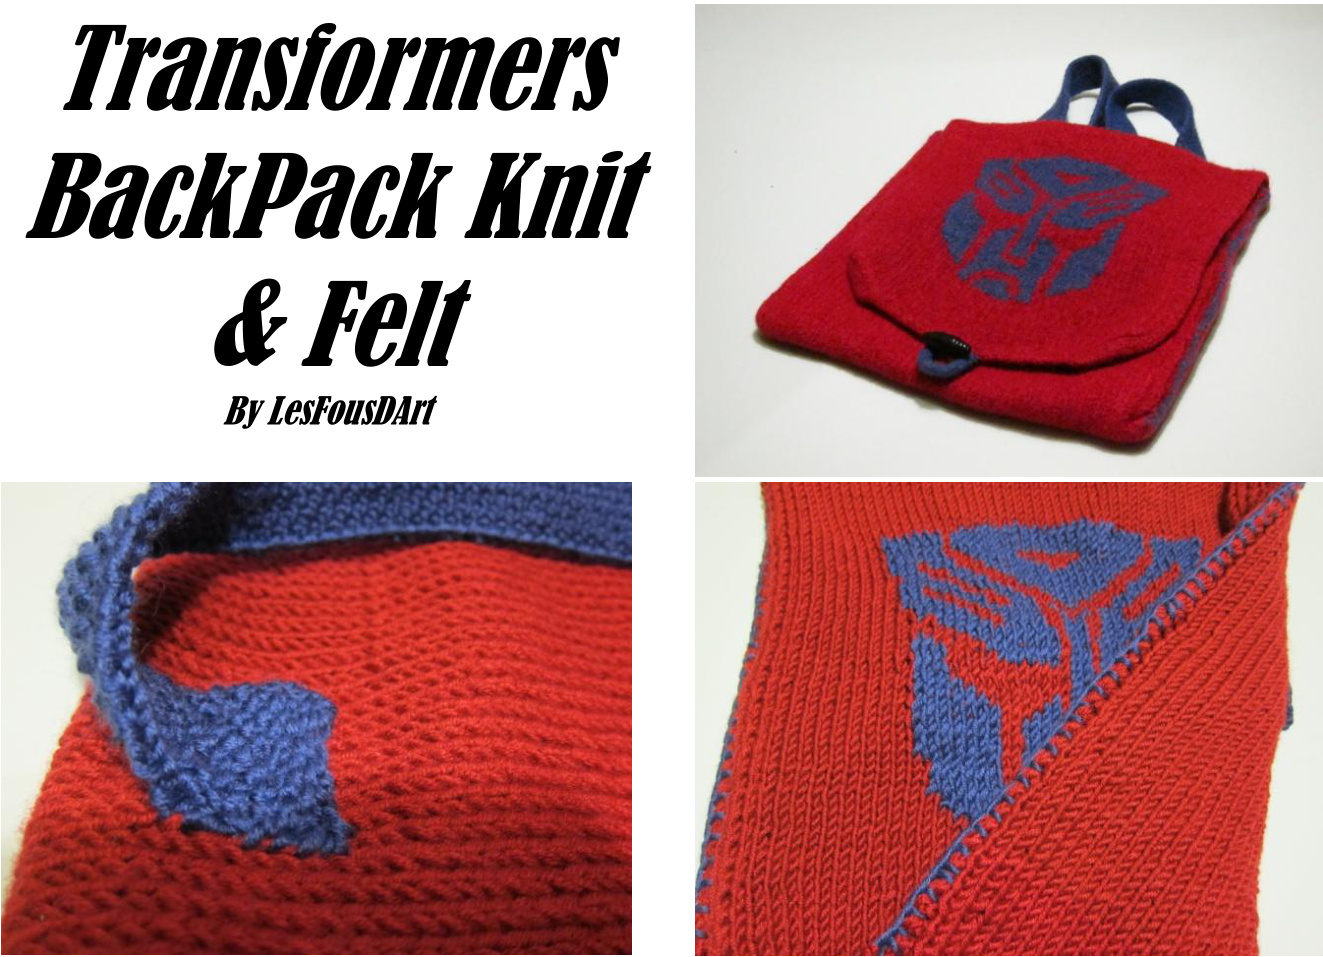
Material :
60 cm or 24 inches Circular Needle size 6,5mm or 10,5 US DPN 4mm or 7 US Tapestry needle A buttom Pillow Slip Yarns : 2 balls Red Heart Eco-Ways Bamboo Wool color 3845 Twilight ( 50 g (1,76oz) 80m (87 yrs) 4 balls Red Heart Eco-Ways Bamboo Wool color 3920 Cayenne ( 50 g (1,76oz) 80m (87 yrs) The gauge is not so important in this project. Just to be sure to not knit to loose. If it's your case, use a smaller needle size. Bag's Size after felting : 10 X 11 inches Abbreviations : YF : Yarn in front YB : Yarn in back SI : Slip SSK : Slip knitwise, slip knitwise, with the left needle, take the 2 sts on the right needle and K2tog. SSP : Slip knitwise, slip knitwise, with the left needle, take the 2 sts on the right needle and P2tog.
The Bag :
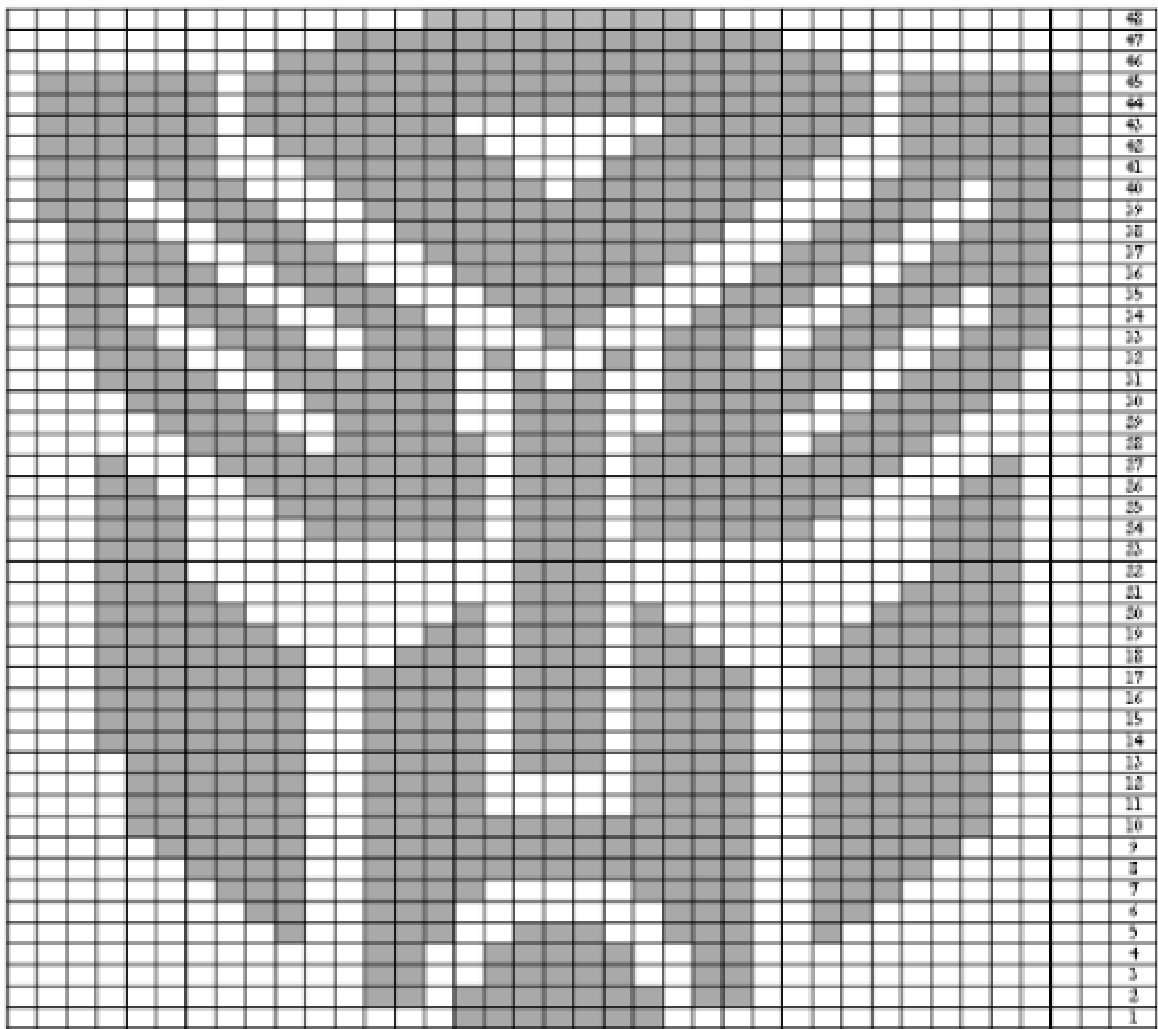
With the 6,5mm (10,5 US) Circular Needle CO 60 sts. Be carreful to always Sl the first st of each row (Selvedge stitch) Row 1 : K1, P1, K1, P1, K to the 4 last sts. P1, K1, P1, K1. Row 2 : P1, K1, P1, K1, P to the 4 last sts, K1, P1, K1, P1. Rep. the rows 1 and 2 until you get 220 rows. Transformers Chart (start by the top of the chart on page 7) Row 1 :K1, P1, K1, P1, K7, K the Transformers Chart (row 48 on the chart), K7, P1, K1, P1, K1. Row 2 : P1. K1, P1, K1, P7, P the Transformers Chart (row 47 on the chart), P7, K1, P1, K1, P1 Rep. the rows 1 and 2 until you finish the Transformers Chart (48 rows) Row 3 : K1, P1, K1, P1, K to the 4 last sts. P1, K1, P1, K1. Row 4 : P1, K1, P1, K1, P to the 4 last sts, K1, P1, K1, P1. Rep. 3 times the rows 3 and 4. Cover curves (dim each sides ) : Row 1 :Sl1, K1, P1, K1, SSP, K to the 6 last sts, SSK, K1, P1, K1, P1. Row 2 : Sl1, P1, K1, P1, SSK, P to the 6 last sts, SSP, P1,K1, P1, K1. Rep 7 times rows 1 and 2.
Ribs 1X1 :
Row 1 : Sl1, \*P1, K1\*, rep from \* to \* to the end of the row. Row 2 : Sl1, \*K1, P1\*, rep from \* to \* to the end of the row. Bag's Size after knitting : 16 X 53 inches
Ganses (make 2) :
CO 11 sts. Row1 : K1,\* YF Sl1, P1\*. Rep from \* to \* until the end of the row. Row 2 : P2, \*YB Sl1, P1\*, Rep from \* to \* until the end of the row. Rep those two rows until you have 24 inches.
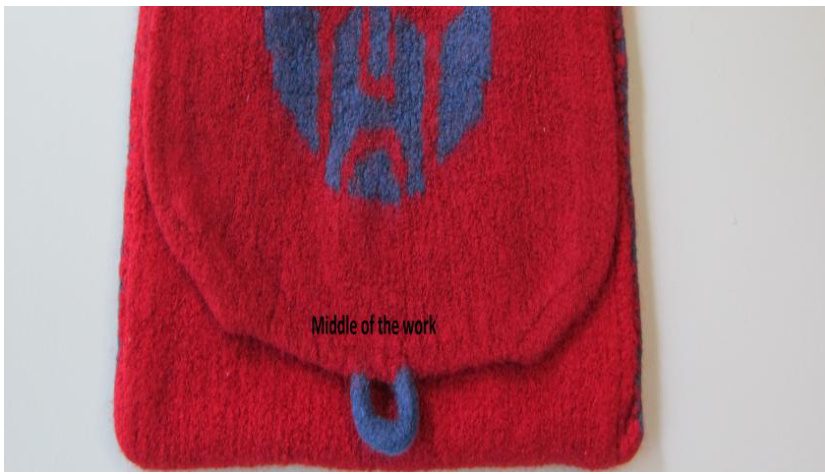
Loop:
Find the middle of the back pack flip part. (See the draw on the next page)
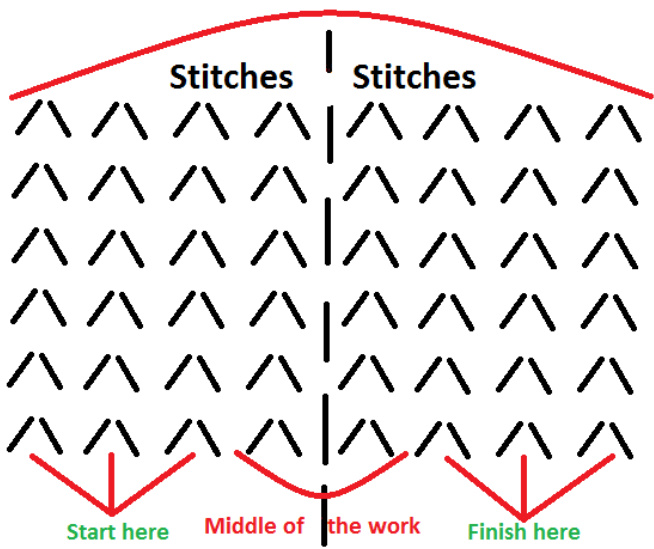
With the DPN 4,5 mm or 7 mm, start with the 3 left sts. You just insert the DPN in the sts and use them like sts. With the Icord technique, you will K the 3 sts. Slide the sts to the end of the needle and knit them. Rep. Until you get 10 cm (4' )'. Use the Kitchener Stitch to sew it on the 3 sts on your DPN with the 3 sts on the right side of the 2 middle sts. Insert a second DPN in the 3 right sts of the flip part of the bag. Now you have 2 DPN with 3 sts on each. Place the one with the Icord in front and the one with the bag one the bag. Cut the yarn. With the tapestry needle, do the Kitchener Stitch. Insert the threaded tapestry needle into the first stitch on the needle closest to you as if to purl and pull it through, leaving the stitch on the needle. Then insert the needle into the first stitch on the back needle as if to knit, leaving the stitch on the needle. Pull the yarn through. These first two steps are preparatory and are only done once. Insert knitwise the needle into the first stitch on the front needle, while slipping it off the end of the needle. Insert purlwise the needle into the next stitch on the front needle, but this time, leave it on the needle. Gently pull the yarn through. Insert the needle purlwise into the first stitch on the back needle, and slip it off the end of the needle. Insert the needle knitwise into the next stitch on the back needlet, and leave it on the needle. Pull the yarnthrough. Repeat steps 1-4 on all the sts. Secure the cut yarns.
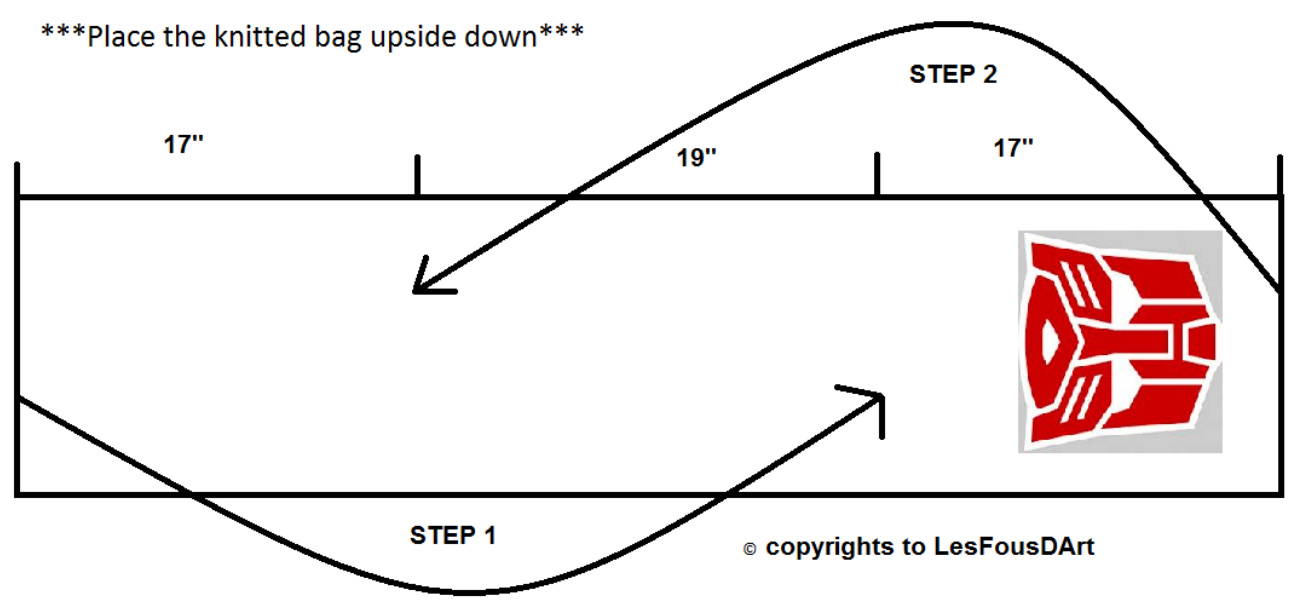
Assembling time :
It's important to place the rectangle upside down. Mesure the three parts of the bag (18", 18" and 17") and put needles to mark ther Step 1 : Take the left side of the rectangle and fold it on the rignt side. The side it's suppose to arrive on the needles between the 18" middle part and the right part (17"). Step 2 : Take the right side (the one with the logo part) and fold it to left (on the 2 others parts). You are suppose to arrive 2 inches higher to the bottom of the bag (left side).
Sewing time :
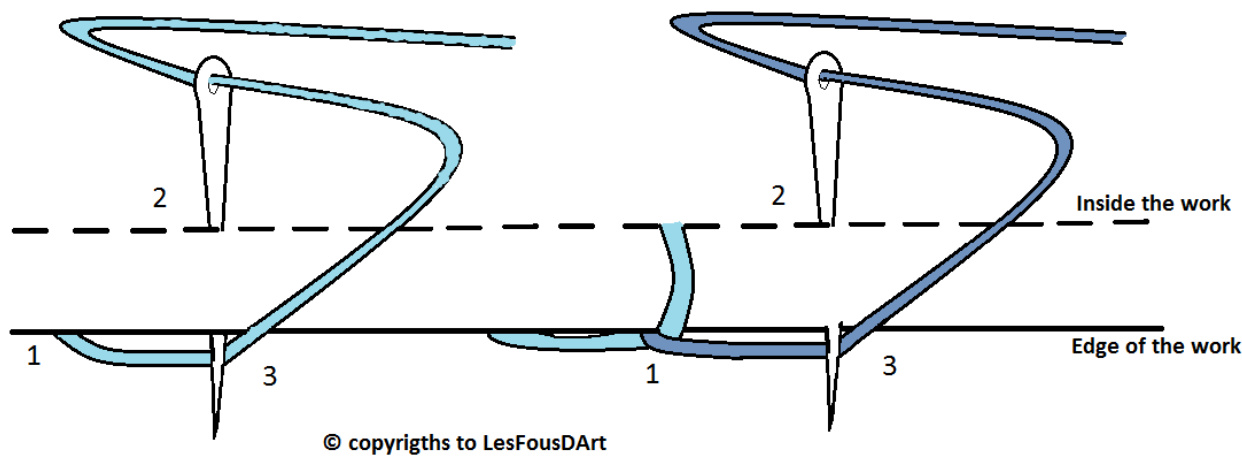
Sew with the Blanket Stitch point the two sides together with the logo color. Be sure to place correctly the two sides. Use needles to secure it. First, you have to tie a knot in your thread. Usually,to hide it easyly, I put it between the two sides of thebag. Come up through the two sides of the bag starting at point 1 and insert needle down at point 2 coming up at point 3 and ensuring that your thread is under the needle when you pullit tight. Continue from left to right in the same way, keeping the height and the width of your stitches. When you arrive to the bag's hole (on the top), continue with only the top piece. Continue the Blanket Stitch on the two sides of the blanket.
Blanket stitch :
Felting time :
I put the finish Transformers Backpak in a pillow slip and I tie d it. I washed it 5 times with towels and soap in the hotest water possible. I recommand a cycle using hot and cold water because the fleting will appear faster. Add some soap to your water. When the bag is as felt as you wish, block it on a towel or a carpet puzzle foam. I will be happy to see your creations on Ravely! If you have any question or see a error on the pattern, please, let me know! Have fun! lesfousdart@gmail.com Thank you!
@ LesFousDArt
AUTOBOTCHART
With the Autorisation of Lori Magnus yesimadethat. blogspot.com Copyright 2007


