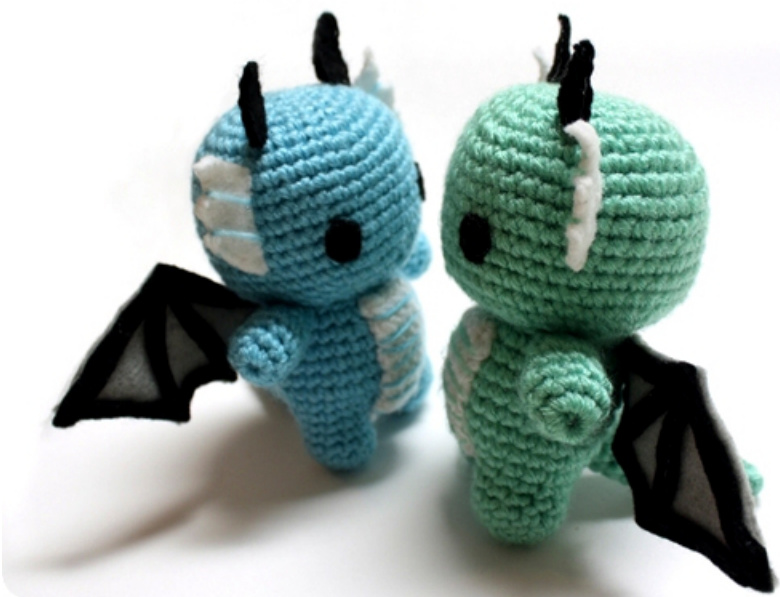
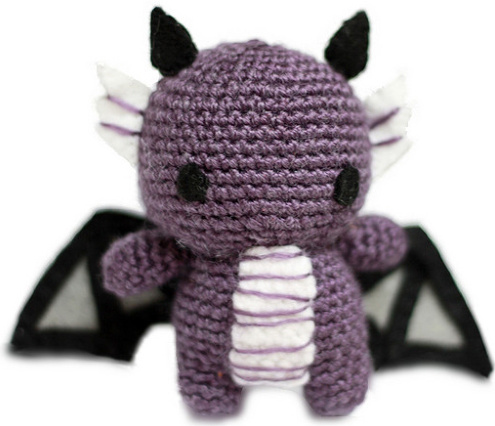
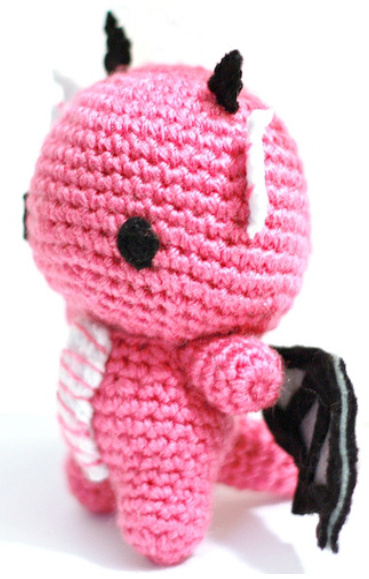
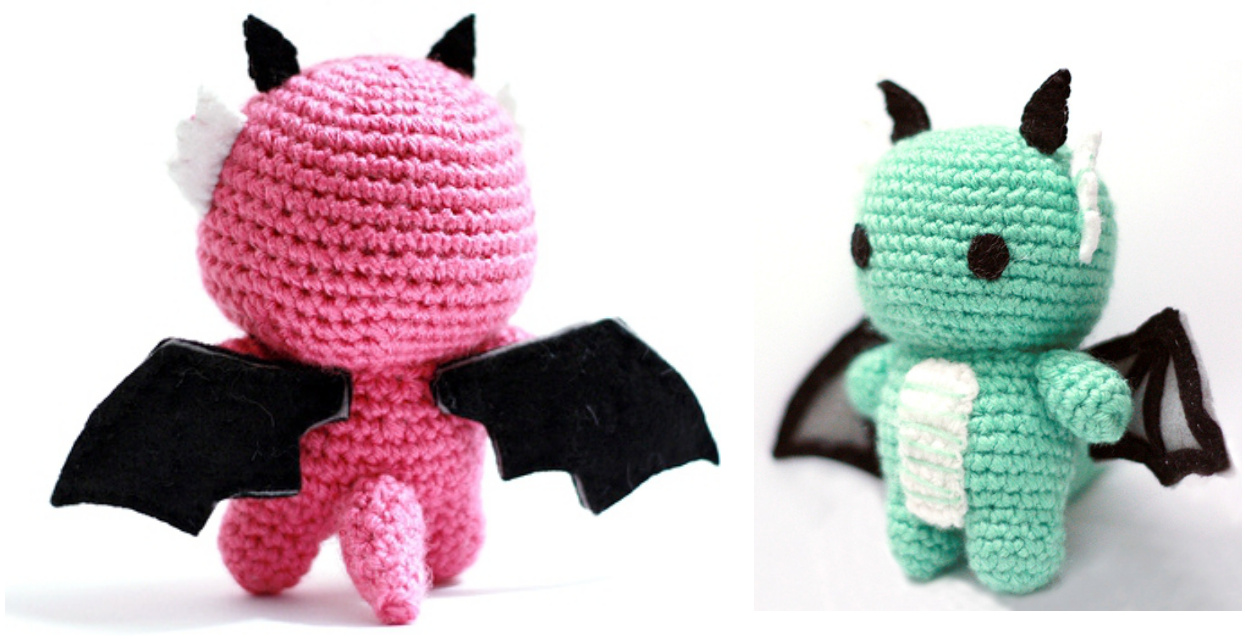
Baby Dragon Amigurumi
Hello! :) I hope you enjoy this pattern! I tried very hard to make this pattern as accurate and easy to understand as possible! I've had it tested by several people of different skill/experience levels for errors, the clarity of the instructions, and the photography. I made the felt piece template by taking a photo of my pieces and tracing them in Photoshop. I printed out the page and resized the pieces in Photoshop until they came out the same size as my own pieces. I have also used the printed page templates many times. Please email me with any questions and comments: theearlessowl@gmail.com
Size:
It will be approximately 4.5-5" (11-12.5cm) tall and 2.5-3" (6-7.5cm) wide from arm to arm. \* Results may vary depending on your tension and your yarn & hook choices.
Materials:
Worsted weight yarn in a color of your choice (main color) and in white(contrasting color) Some suggestions: Lion Brand Vanna's Choice, Lion Brand Vanna's Choice Baby, Loops & Threads Impeccable Solids, Red Heart EcoWays, Red Heart Soft Yarn, Caron Simply Soft E hook (3.5mm)
Black, gray, and white felt Yarn needle and embroidery needle Embroidery thread in black and white Stuffing of your choice
Abbreviations:
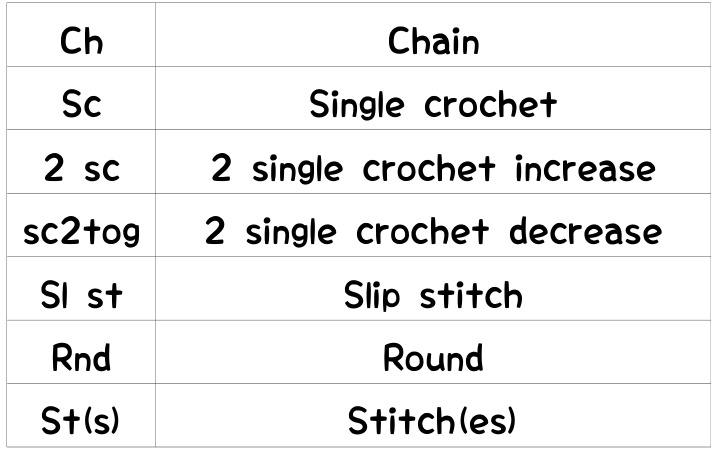
Stitches:
Chain - Yarn over and draw through loop on the hook. Single crochet - Insert the hook into the stitch, yarn over, draw up a loop, yarn over, and draw yarn through both loops on the hook. 2 single crochet increase - Two single crochet stitches into one stitch. 2 single crochet decrease - Yarn over, draw up a loop in each of the next two stitches, yarn over, and draw yarn through all three loops on thehook. Slip stitch - Insert hook into the stitch, yarn over, draw up a loop, draw through loop on the hook.
Magic Ring:
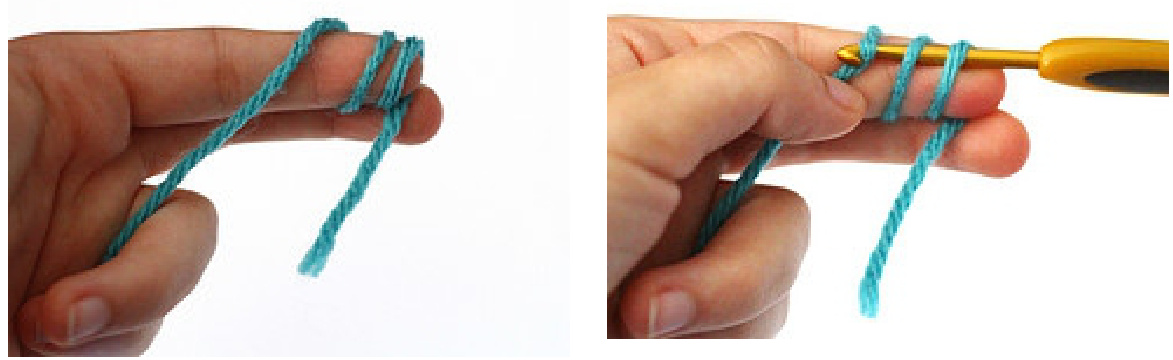
A few inches from the end of the yarn, wrap two loops over your forefinger. While the loops still on your finger, insert the hook from right to left and pull the working yarn through.
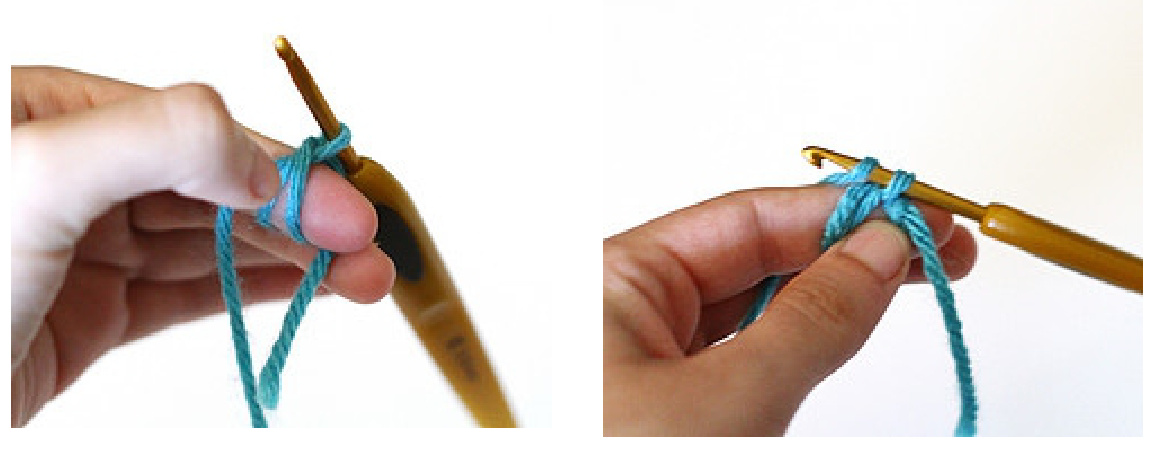
Carefully take the loops off your fingers and chain one.
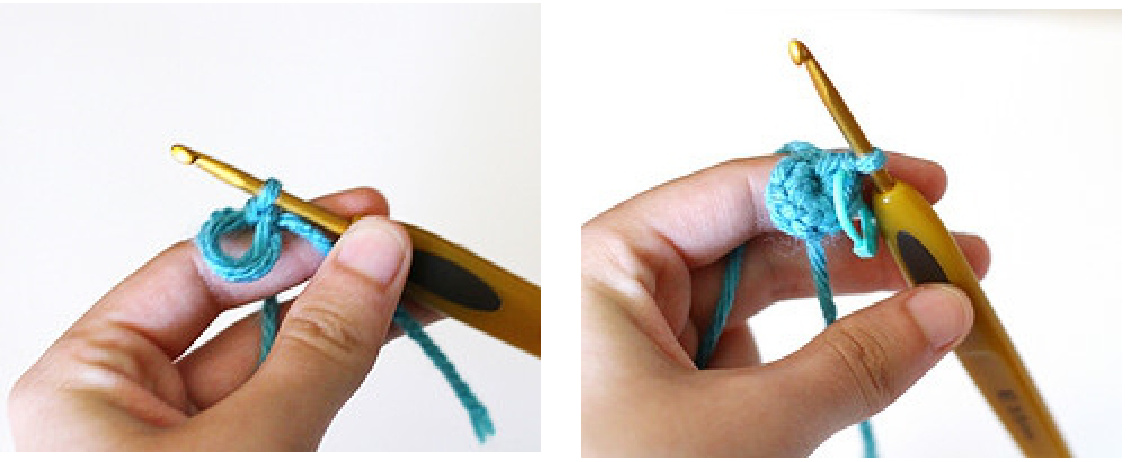
Insert the hook into the loops and pull up a loop. Yarn over and draw yarn through both loops. This is the first single crochet stitch. Continue for the rest of the stitches. Then grab the yarn tail to close the hole.
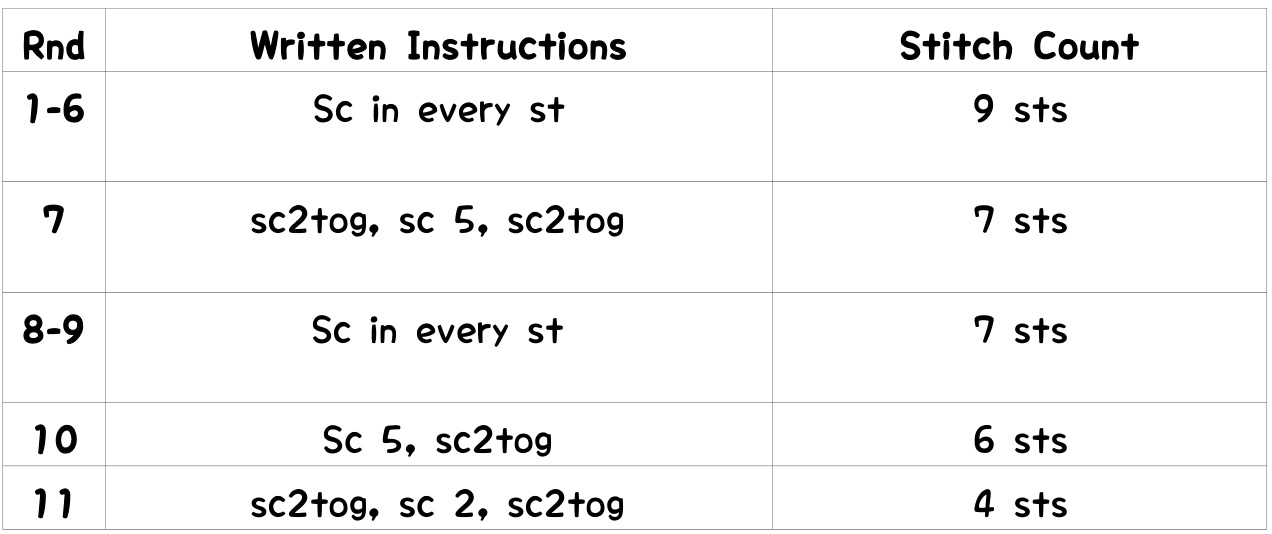
Head:
With main color, 6 sc into ring.

Cut yarn and stuff.
Legs (Make 2):
With main color, 6 sc into ring.

Sl st in next st. Cut yarn, leave 3" (7.5cm) tails for sewing.
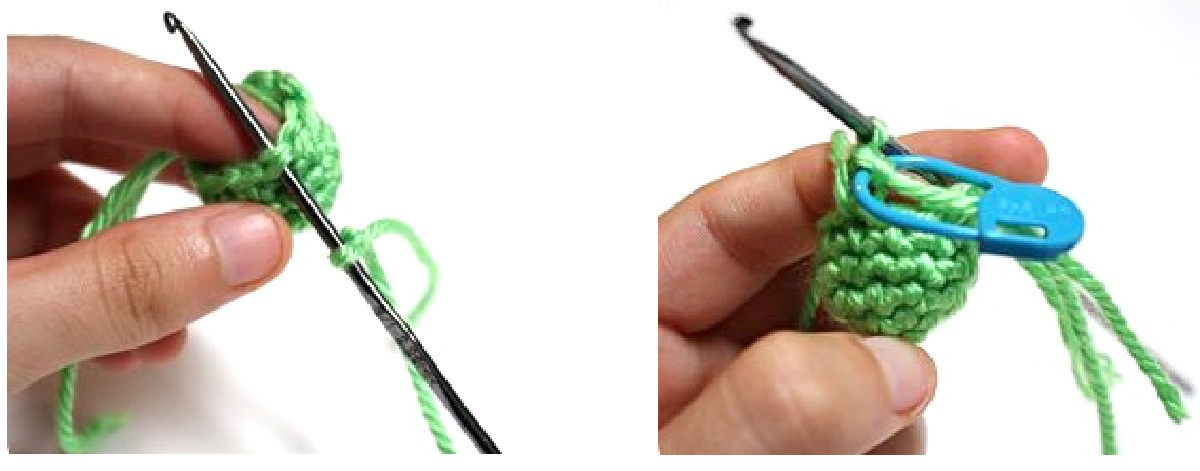
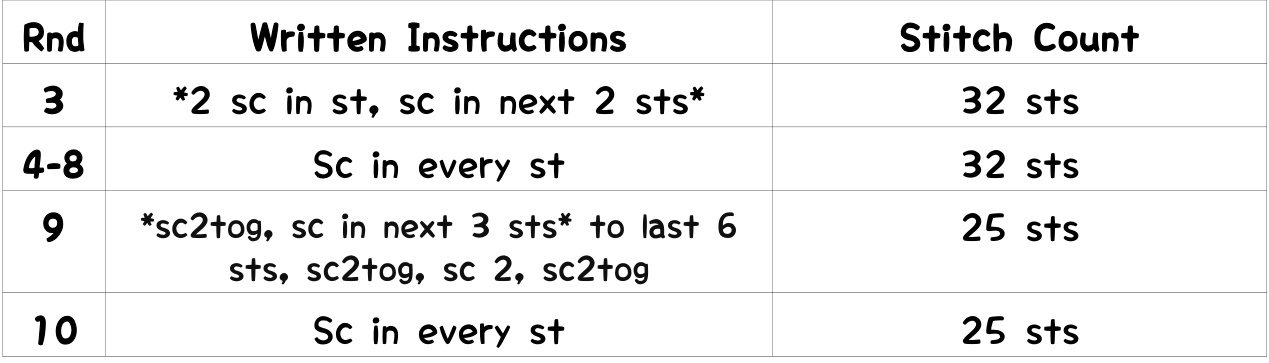
Body:
With main color, 6 sc into ring. Sl st in next st. Cut yarn.

Rnd 2: Make a slipknot on the hook. On one of the legs, insert the hook into the $3^{r\mathsf{d}}$ st from the left of the sl st. Place a marker in that st.
Sc in next 8 sts.

On the body piece, sc in the $3^{r\mathsf{d}}$ st on the left of the sl st. Sc in next 2 sts. Sc in the $3^{r d}$ st from the left of the sl st of the other leg.
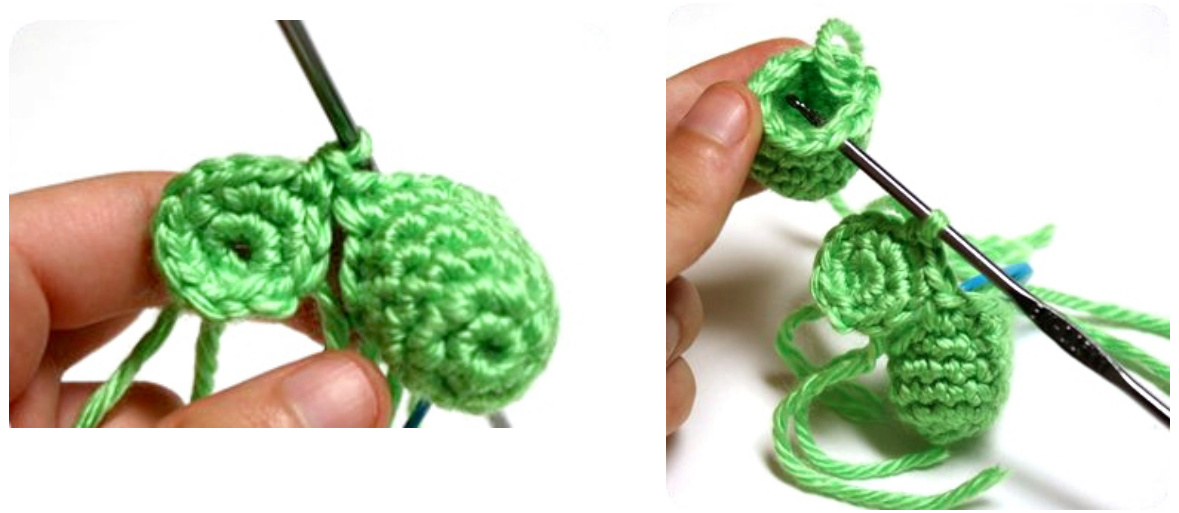
Sc in next 8 sts. Sc in the 3 sts in the center on the body piece, then sc in the marked st to complete the rnd. (24 sts)
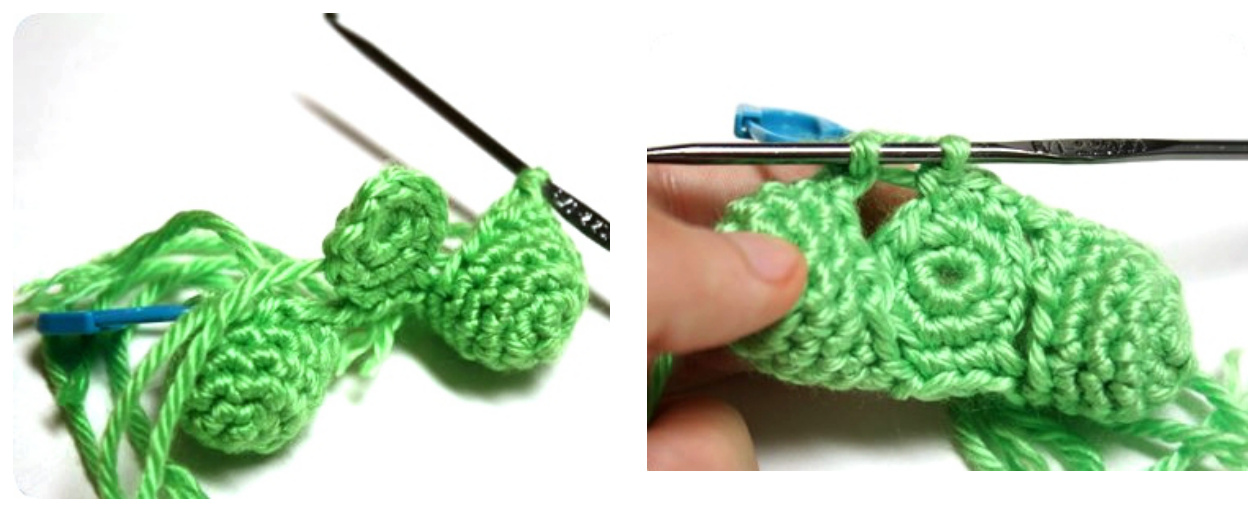
Sew together the holes with the yarn tails.
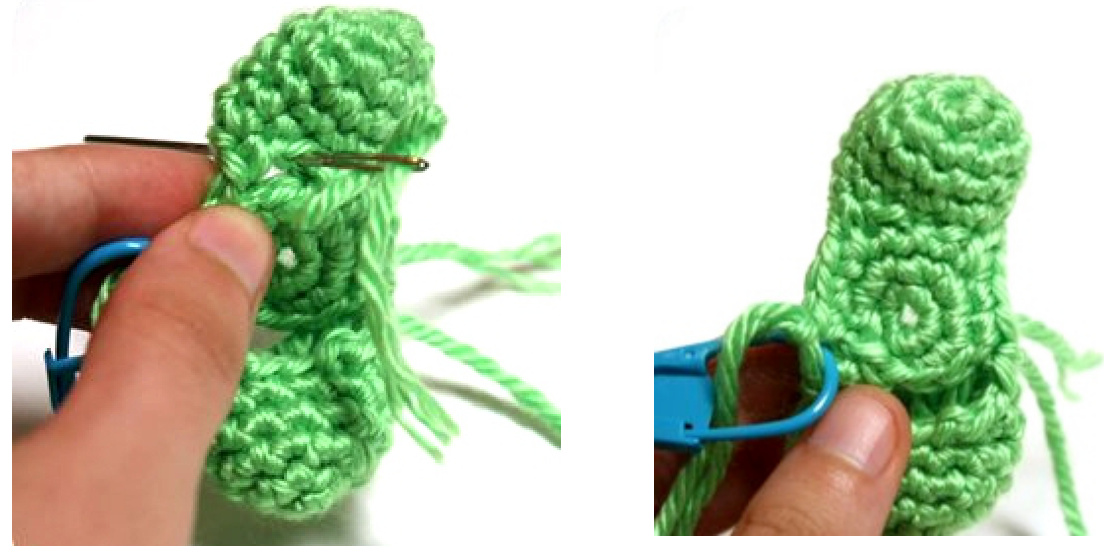
Sl st in next 3 sts and cut yarn. Stuff.
Scales:
With white, ch 5.

& Cut yarn. Use one strand of the main color yarn and sew horizontal lines in between each row.
Arms (Make 2):
With main color, 9 sc into ring. " Cut yarn and stuff.
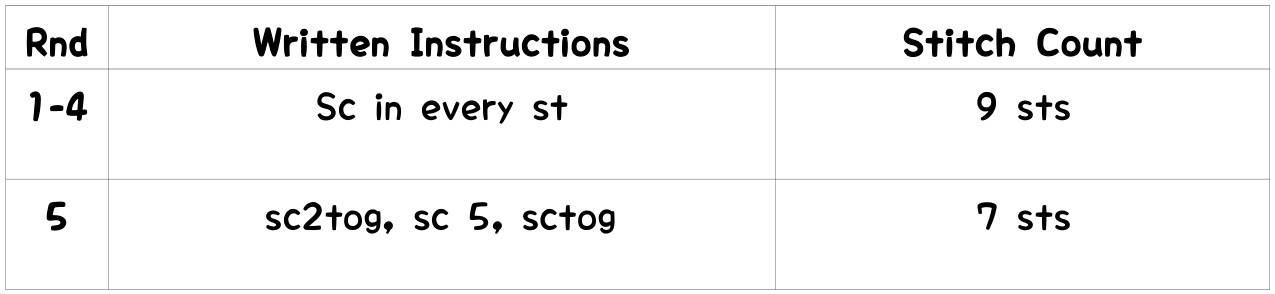
Tail: With main color, 9 sc into ring. Sl st into next st. Cut yarn and stuff.
Assembly:
Sew on the scales, arms, and tail onto the body. See page 10 for felt templates. & Sew on the eyes using black embroidery thread. & Sew the horns together with blanket stitch using black embroidery thread. Sew the gills together with blanket stitch using white embroidery thread. Then, use a strand of the main color yarn to sew 2 horizontal lines on the gills. & Sew the horns and gills onto the head. Note: The pieces for the wings appear to not align properly, but you are to sew the pieces into place. I made them this way for easier cutting as well as to save some felt. Hold the big gray and black piece together (with the gray facing you) and then sew the bottom outlining piece onto the wings with running stitches through both the gray and black felt. Then sew two black vertical pieces in the middle only through the gray felt. Sew the top black outlining piece through both the gray and black felt。 Sew the head onto the body. Sew the wings onto the back of the dragon, right below the head.

@ Anda Molina 2009 - theearlessowl@gmail.com This pattern is for personal use only. Please don't redistribute/resell the pattern in any way or form without my permission.


