Apothecary's Pocket drawstring bag by Alison Hawke (QuantumTea)
The Apothecary's Pocket is a small drawstring bag designed to carry those things that you need. In my case, it carries my vitamin pills, or a lip balm and tape measure, or some loose change for the parking meter. This pattern includes instructions for two variations, a single drawstring with toggle, and a double drawstring with sewn flaps.
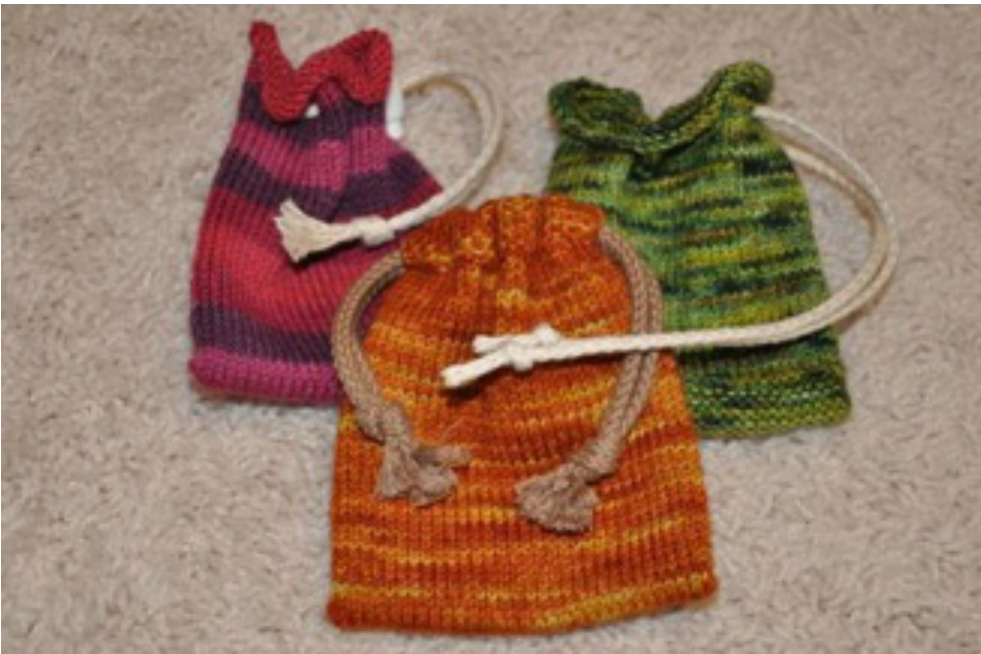
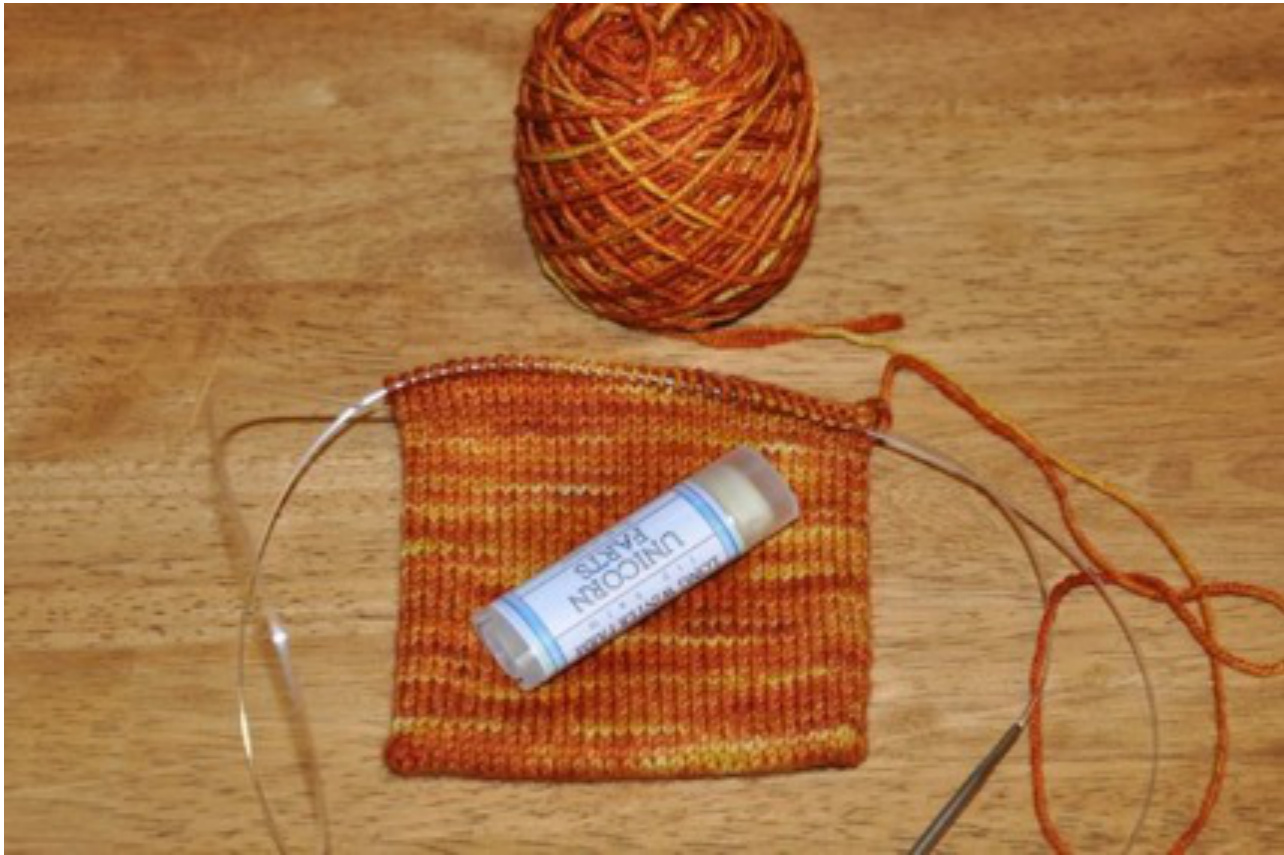
The drawstring versions require non-elastic woven cord, which you can find in a fabric store along with the toggle. The sewn version needs cord that can be up to 1/4 inch wide, the toggle version needs 1/8 in cord. All bags can be made with leftover sock yarn. Skills required: provisional crochet cast on, knitting in the round, m1 using the bar between stitches. Gauge: exact gauge not required Needles: US1 and US2 circulars or double points, stitch holder, crochet hook. Materials: 30 yards of sock yarn, scrap yarn in a contrasting colour, and either one yard of 1/4in woven cord, or half a yard of 1/8in woven cord and an optional drawstring toggle (available from fabric stores).
Notes:
Whatever needle size you normally use for knitting socks, go up one size to make the Apothecary's Pocket as it does not need to be as tightly-knit as a sock does. There is a video of Lucy Neatby demonstrating the provisional crochet cast-on here, she explains it better than I could: https://www.youtube.com/watch?v=R3J-sUx whE With US2 needles, using scrap yarn in a contrasting colour and the provisional crochet caston method, cast on 33st. Switch to your main yarn and knit 5 rows in stocking stitch (knit one row, purl the next). Take a pair of US1 double pointed needles and carefully pick up the 32 provisional stitches, then remove the crochet cast-on. Start knitting in the round, and on the next round, increase one stitch on the half with 32 stitches. In the middle of that side, pick up the bar between stitches and knit into the back of it, so you have a total of 66 stitches. he bag is big enough. For me, this means a bag that is about 3in to 3.5in deef
Drawstring and Toggle version
In the next round, you will create holes for the drawstring to go through. Round 1: K3, (YO, k2tog, K4), repeat the brackets four times, K4, (YO, K2tog, K4) repeat to end (you will end with K3 not K4). You will have six YO holes for the drawstring
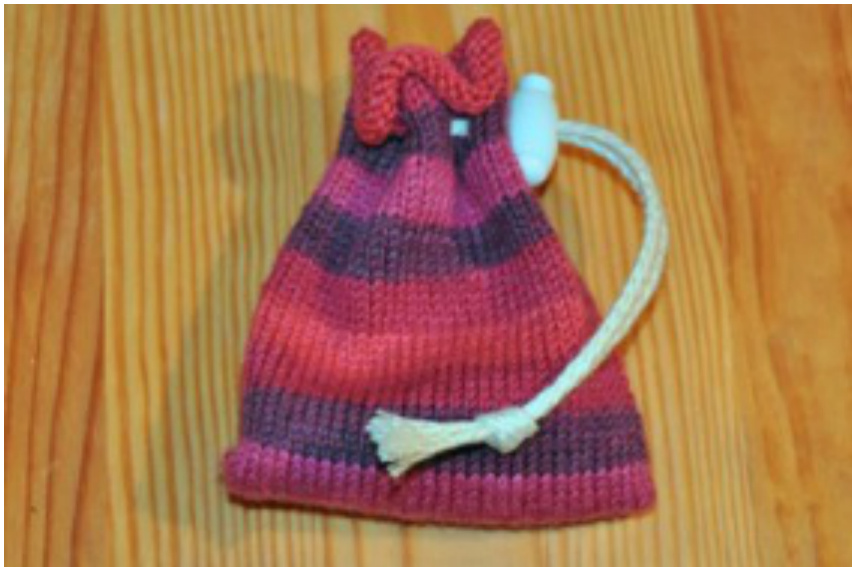
Switch back to knitting all stitches, and continue until you have 3/4in of fabric above the holes. Place a marker for the start of the round, then knit half a round. If you like the look of something similar to an i-cord bind off, knit one round of purl, then cast off. This will help prevent the top of the bag from rolling. Otherwise, just cast off.
This puts the start and end of the cast off at the other end of the bag from the toggle or knot, giving you a neater appearance. Thread your cord in and out of the holes, and thread both ends of the cord through the hole of the drawstring toggle. To make it easier to get the cord ends through the toggle, use sticky tape Apothecary's Pocket and tape the two ends together as tightly as you can. Once the two ends are through the drawstring, knot them together. The ends will fray as the bag is used, but the knot will stop the fraying going further. Alternatively, you can make the drawstring longer and knot the two ends to close the bag. Weave in the two yarn ends, and your bag is complete.
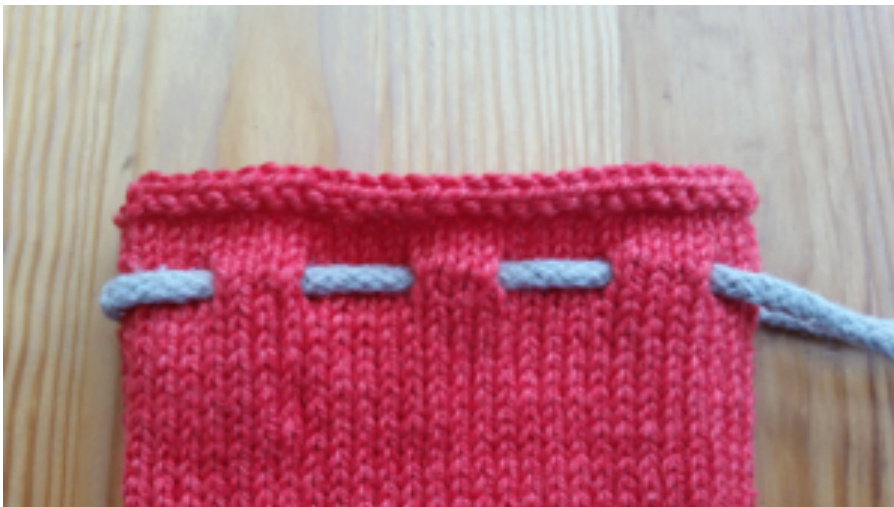
Double drawstring version
Leaving half of the stitches on a holder, work back and forth on 33st using Linen Stitch as follows: Row 1: \*Knit 1, slip 1 with yarn in front. Repeat from \* across, ending with a knit 1. Row 2: P1, \*Purl 1, slip 1 with yarn in back. Repeat from \* across, ending with a purl 2. Work in Linen Stitch until you have a flap that is slightly more than double the width of your cord. Cast off and cut the yarn leaving a tail long enough to sew down the flap (I suggest at least 10in). Knit the remaining 33st the same way, so you have two identical flaps. Take two lengths of cord knotted close to the ends and arrange them in loops as below, with one knot on each side of the bag. Each flap will contain two pieces of cord, one from each loop, and when you pull on the two drawstrings, the bag will close.
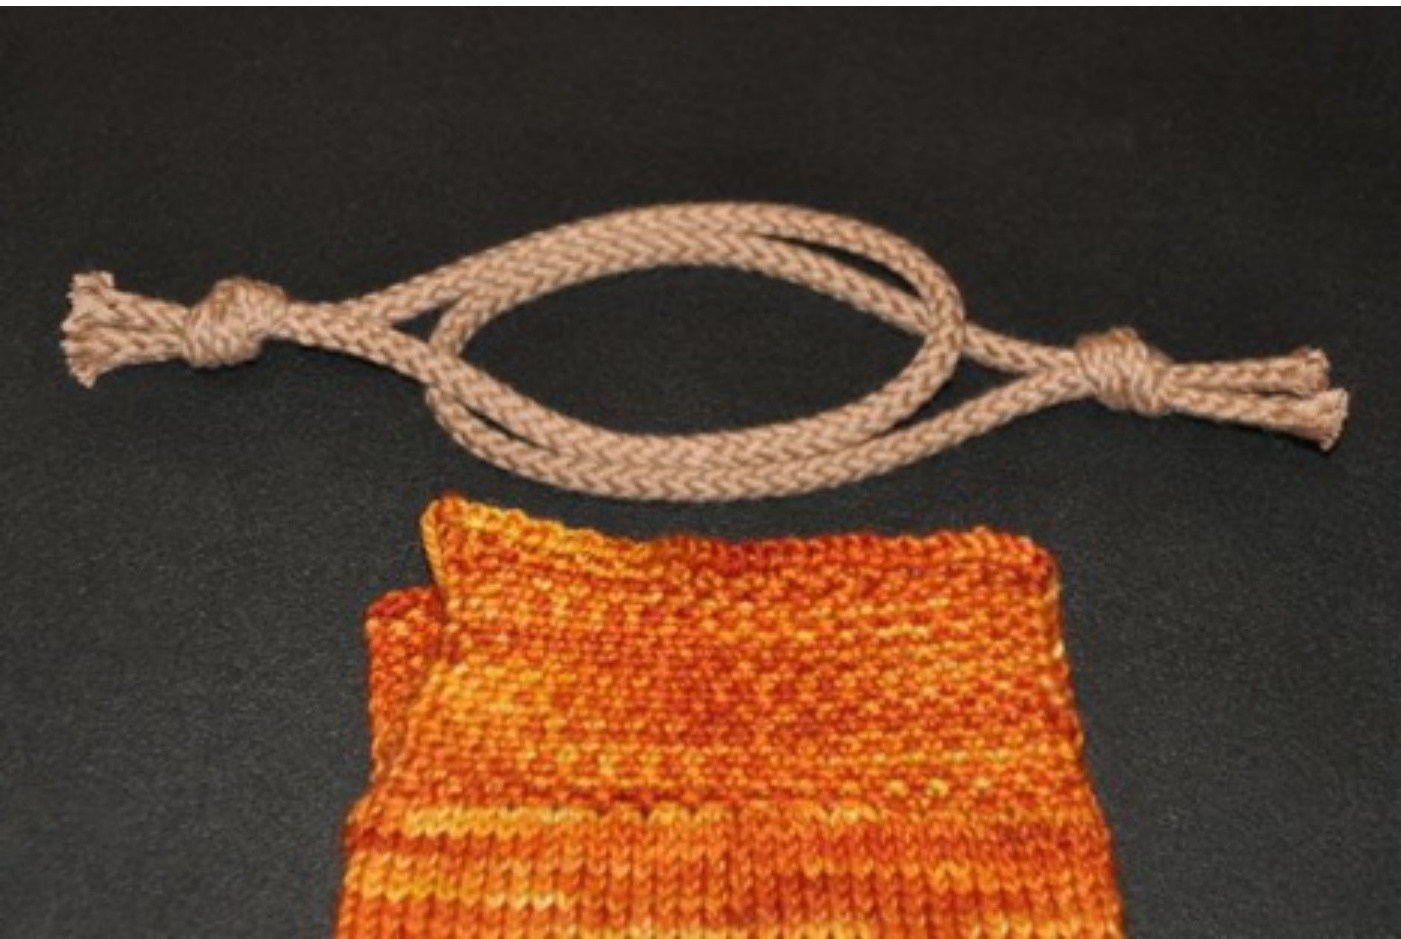
Fold the flaps down inside the bag and sew them in place using the tail of the yarn. Tie the ends of each cord together, weave in the yarn ends, and your bag is complete.


