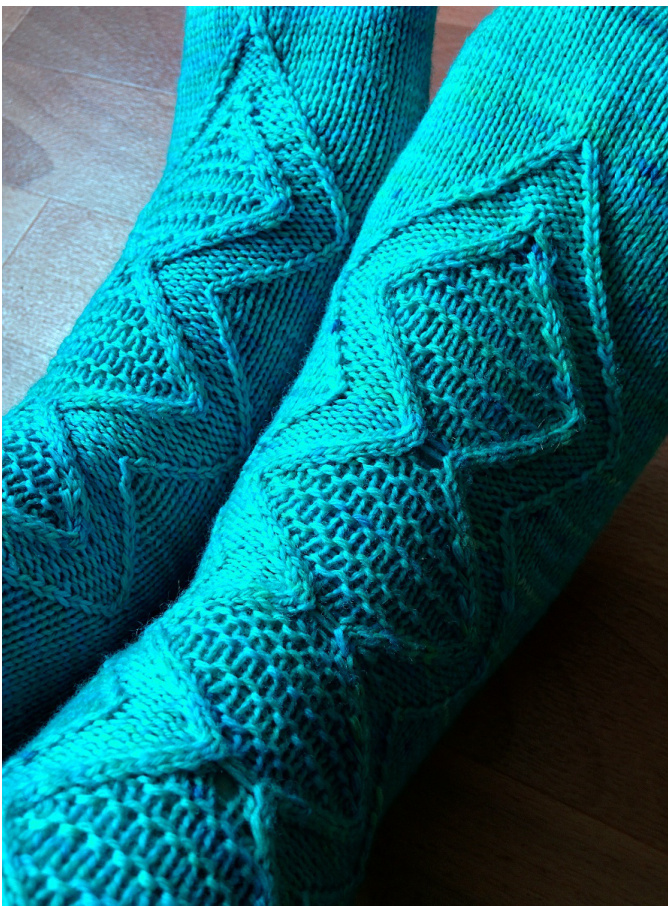
Azurdrache
Size L
EU size 44/45, 68 stitches
Materials
100g sock yarn, DPNs or magic loop in 2.5mm, cable needle, tapestry needle
Abbreviations
k knit p purl SI slip ktog knit 2 together ptog purl 2 together ssk slip 2 stitches as if to knit, knit the 2 stitches together
Techniques
long tail cast-on, cables, increases, decreases, kitchener stitch
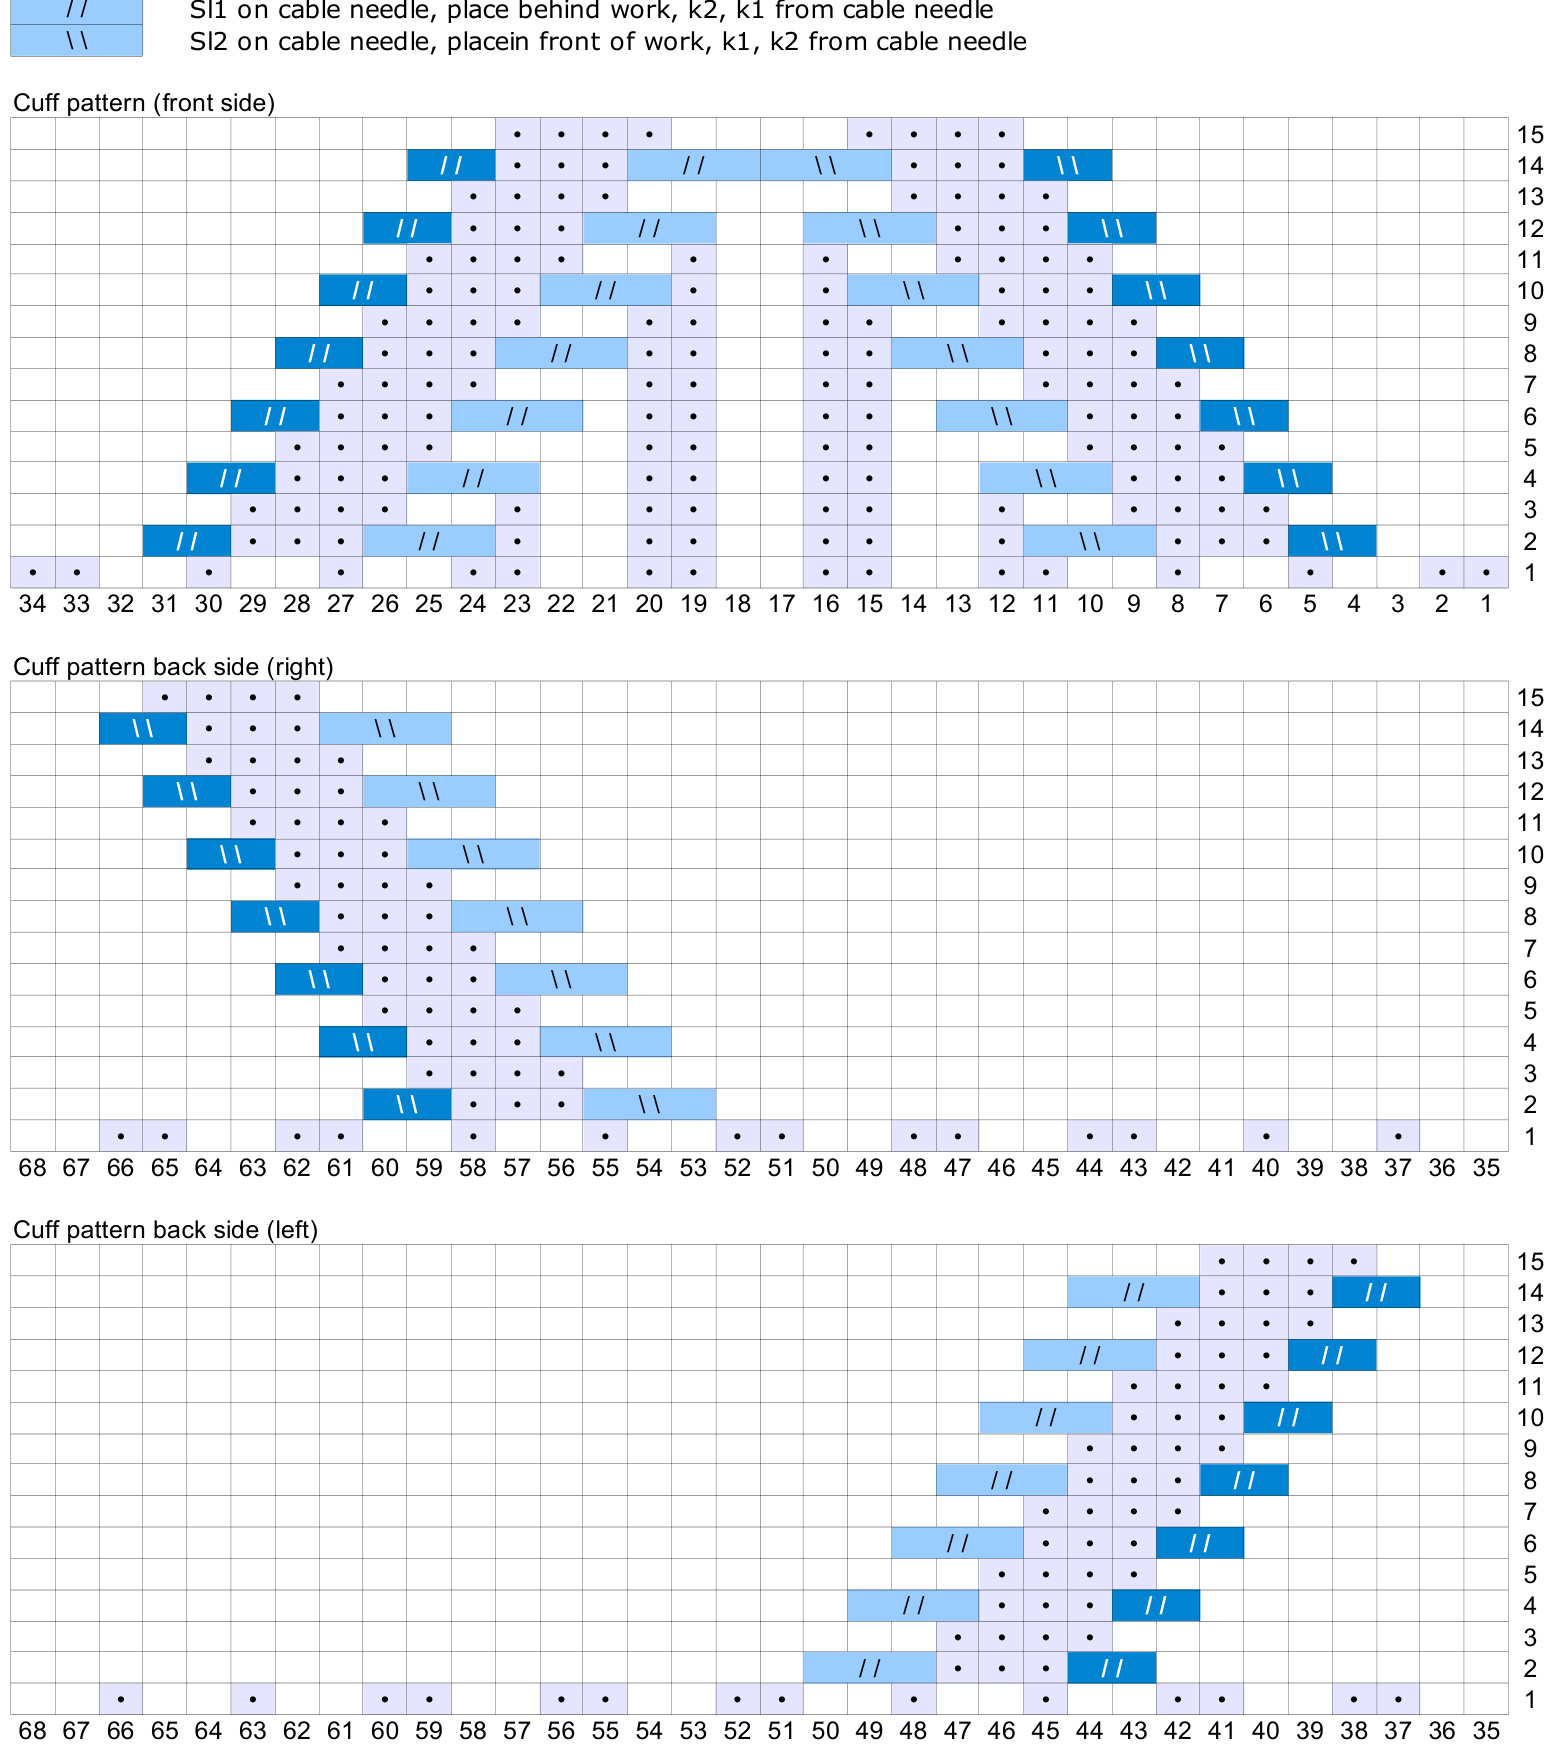
Cuff
CO 68 stitches, close the round (be careful not to twist). Divide the stitches: Right sock: 17 stitches per needle Left sock: 17 stitches per needle The stitches on needle 1+2 make the upper side of the sock. The stitches on needle 3+4 are the sole. Knit the charts marked with "right" for the right sock. Knit the charts marked with "left" for the left sock K round 1 of the cuff pattern. (Is the actual cuff) Repeat round 1 until the cuff has the desired length. K round 2 - 15 of the cuff pattern once.
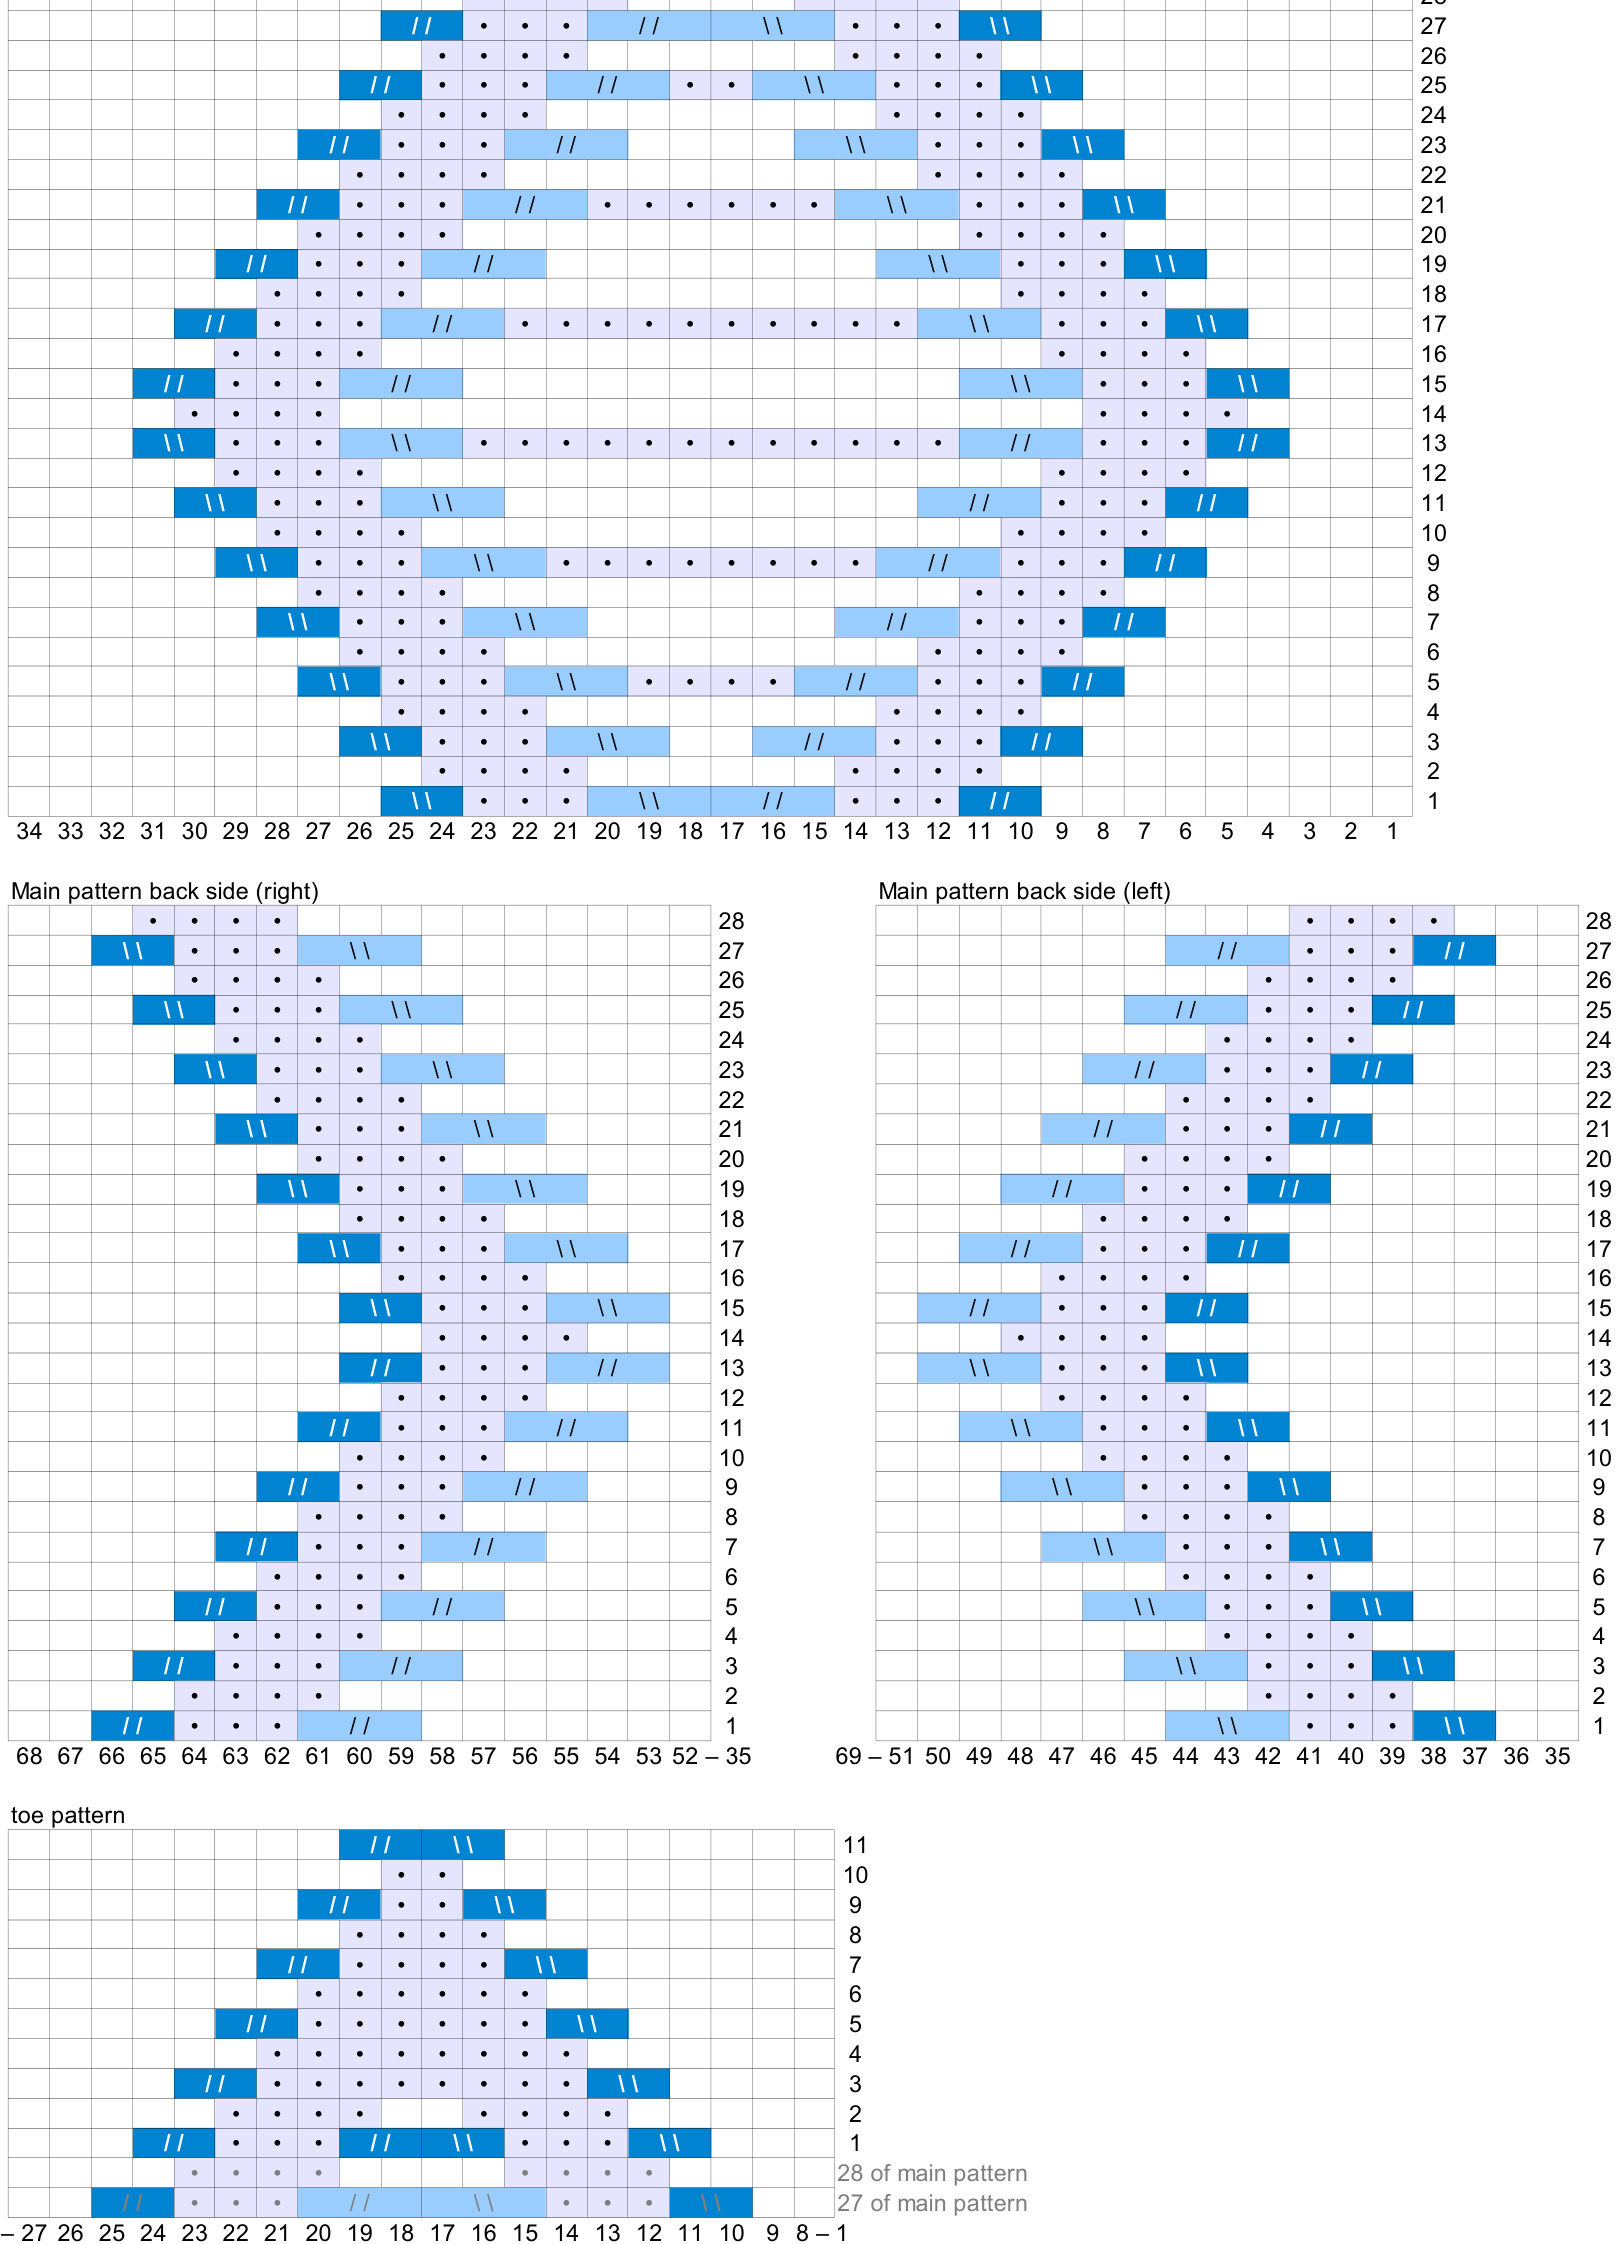
Leg
K main pattern. Repeat until the desired leg length is reached. End after an even round Preparation for the heel: K34 from the main pattern (the next uneven round). Mark this round in the pattern, the main pattern will be continued at this point after the heel flap is finished. If you are knitting with very colorful yarn you should consider knitting the insides of the diamonds in stockinette, or continue the ribbing pattern from the cuff pattern.
Heel Flap
The heel flap is worked flat over 34 stitches. (needle 3+4) Row 1: K34 of the main pattern's back side, turn. Row 2 (Wrong side): Sl1 with the yarn front, K33 of the main pattern's back side, turn. Row 3: Sl1 with the yarn back, K33 of the main pattern's back side, turn. Repeat row 2 & 3 until 32 rows of the heel are knit. The last row is worked on he wrong side.
Heel Turn
Row 1: Sl1 with yarn back, k18, ssk, k1, turn. Row 2: Sl1 with yarn front, p5, ptog, p1, turn. Row 3: Sl1 with yarn back, k to the gap, ssk, k1, turn. Row 4: Sl1 with yarn front, p to the gap, ptog, p1, turn. Repeat Row 3&4 until all stitches are worked. (20 stitches are left on needle 3+4)
jusset
The main pattern continues on the upper side of the sock (needle 1+2). The sole is worked in stockinette stitch (needle 3+4). New beginning of the round: Sl1 with yarn front, k19, pick up and knit the stitches along the edge of the heel flap. Mark this spot as the new beginning. Round 1: K34 in main pattern, pick up and knit the stitches along the edge of the heel flap (same count as the other side), k to the last 3 stitches of the round, ktog, k1. Round 2: K34 in main pattern, k1, ssk, k to the end of the round. und 3 : K34 in main pattern, k to the last 3 stitches of the round, ktog, k1 Repeat Round 2 & 3 until 68 stitches are left on all needles.
Foot
K34 in main pattern, k34. Repeat until the foot has the desired length. The toe is \~4cm long. (If you want to calculate your exact toe length, it is worked over 18 rounds) Toe Pattern: Measure the sock after every round 28 of the main pattern. When less then 9cm of the desired length are missing, knit the toe pattern once starting with round 1. The last 2 rounds of the main pattern are shown in the chart for orientation. After the toe pattern is complete: knit the remaining rounds in stockinette.
Toe
Follow the instructions for the main and toe pattern as described in the Foot section. Round 1: (needle 1+2) K1, ssk, k main pattern to the last 3 stitches on needle 2, ktog, k1, (needle 3+4) k1, ssk, k to the last 3 stitches on needle 4, ktog, k1. Round 2: (needle 1+2) K2, k main pattern to the last 2 stitches on needle 2, k2, (needle 3+4) k to end. Repeat round 1 & 2 until 52 stitches are left. Repeat round 1 until 16 stitches are left.
Finishing
Break yarn, close the toe with kitchener stitch. Weave in all ends.
Copyright
Commercial use is forbidden. tions? Thoughts? Errors? Contact me: my username on ravelry is "Zauberscha Or email: nerdsheep.patterns@gmail.com k1 on right side / p1 on wrong side p1 on right side / k1 on wrong side Sl1 on cable needle, place behind work, k1, k1 from cable needle Sl1 on cable needle, placein front of work, k1, k1 from cable needle