Vicarno's mama
Free crochet pattern : summer shrug
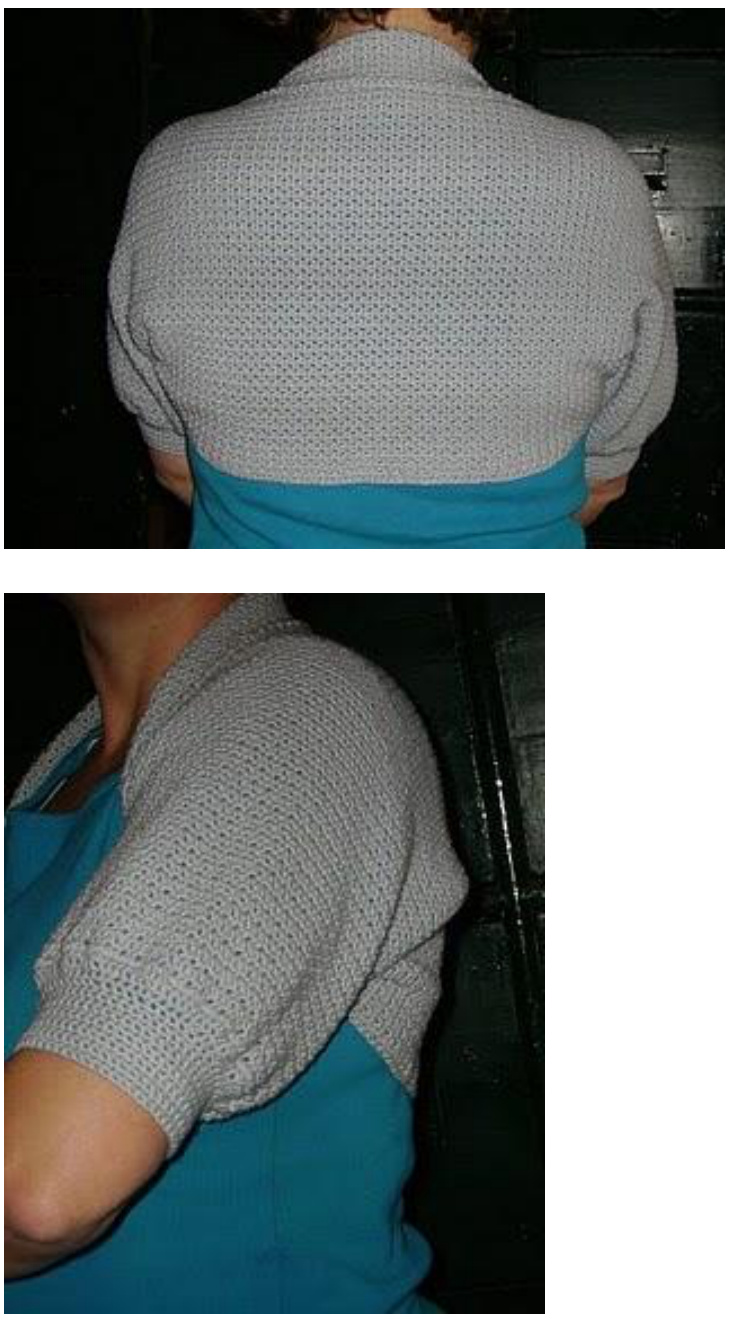
What do you need + info This pattern I easily adjustable to any size you want and to any hook size. I used hook size 3.5 mm Define your own gauge : by making a small swatch : 10 cm x 10 cm = ? stitches x ? rows : this will make it easier later.(mine was = 25 single crochets x 13 rows = 10 x 10 cm) Used stitches : slipstitch, single crochet (sc), the used 'rosette pattern' is explained at the beginning of the pattern. Yarn : I used Lanagrossa Bio-Cotton, 7 skeins x 50 grams = I think I used about 1000 meters of yarn. (Il am not really sure anymore, I have made this shrug some time ago, so please buy enough yarn!) Tapestry needle : to weave in all ends at the end A tape measure. With this tape measure we are going to define the size of the shrug by taking a few measurements. 1. Choose the 'width' of the shrug : you do it like this : measure from your neckbeginning of the shoulders down towards your back : I choose 40 cm. Because the shrug is crocheted from one side to another, we will start with this choosen width. Now start calculating how much stitches you need to obtain the choosen cm, s0 25 sc x 4 = 100 stitches) 2. Choose the length' of the shrug : measure from one side to another. Choose where you want your shrug to start at your arms : My shrug begins just behind my elbow. Measure over your shoulders, your back (IN A STRAIGHT LINE!) to the other side : my shrug is 80 cm (without the finishing off edges). Don' t forget that at the end of the pattern we will add a nice border or edge to the arms, to make nice 'sleeves', so keep that in mind when calculating : so exclude the borders from your measurement. 3. Measure your chest : mine is 100 cm. And divide by 2. So for me it was 50 cm.
Pattern
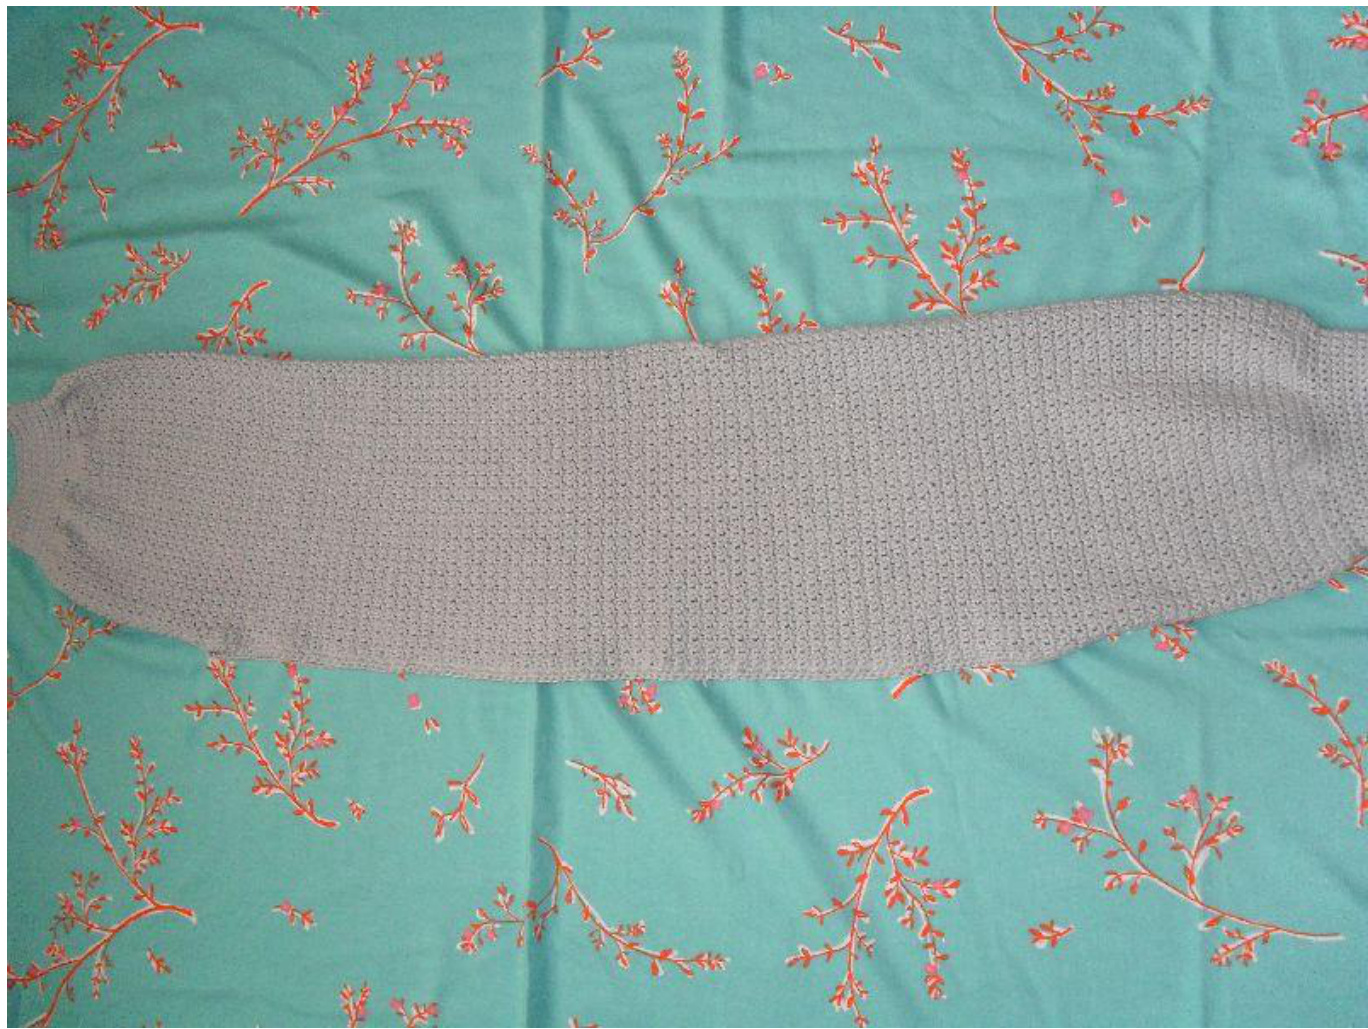
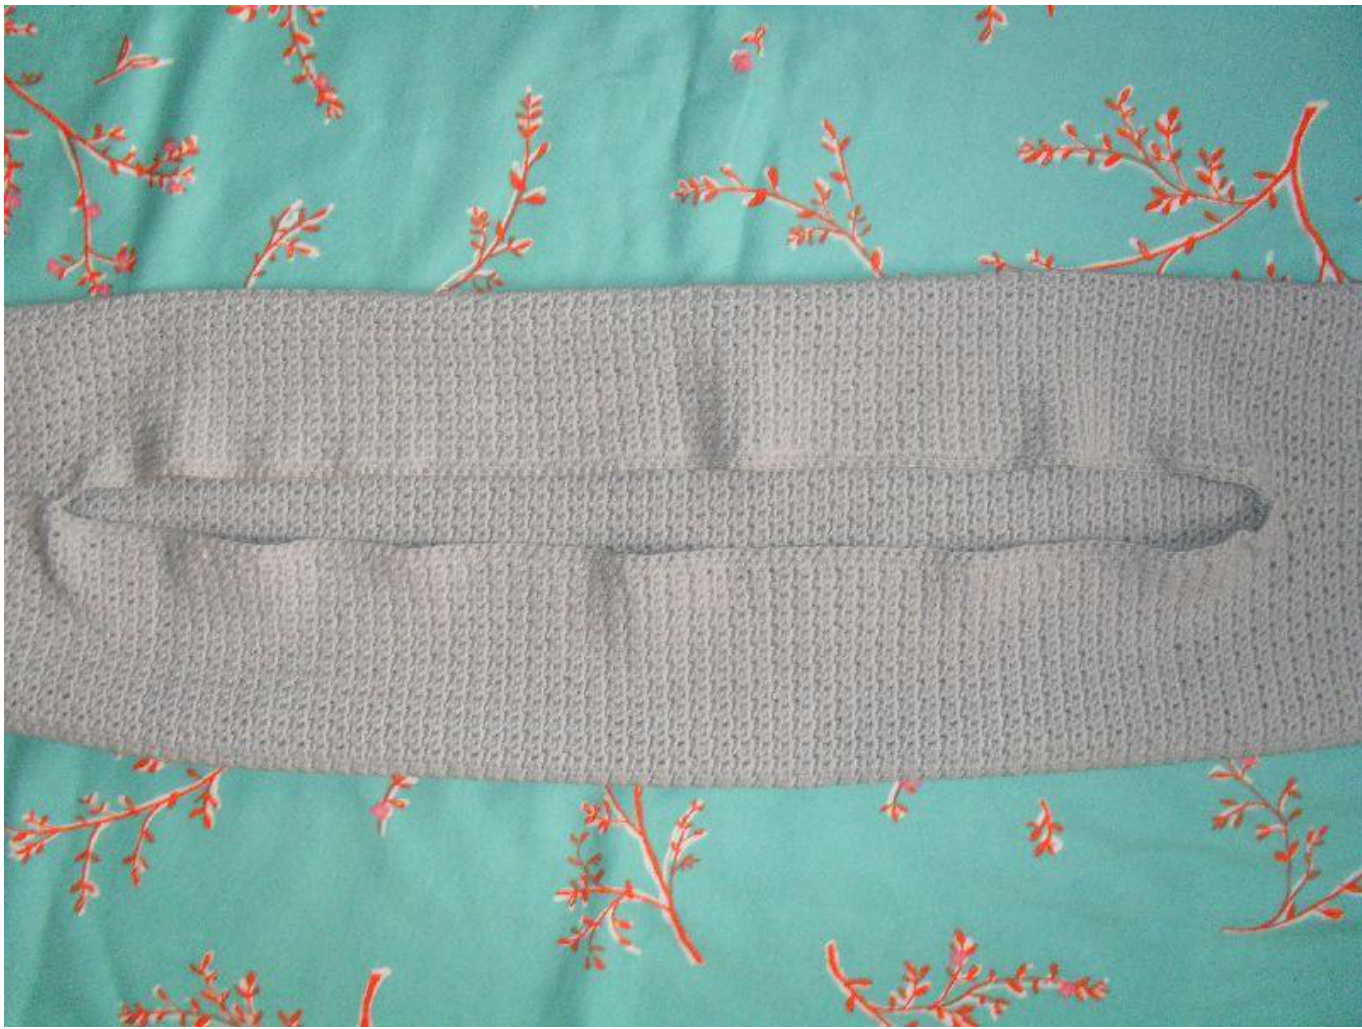
1. With the hook size of your choice, chain the number of stitches you defined in your first calculation, the width of the shrug. So for me it was 100 chains. (now it is important that your number of stitches can be divided by 2 + 2 stitches. So for me, it was ok. If not, add a few stitches to obtain the right number of stitches. If for example you have calculated 121 stitches : you change this into 122 stitches. 2. Row 1 : we will start the lovely rosette pattern here : skip the first 3 chains, make 2 sc in the next chain, (skip 1 chain, make 2 sc in the next chain), repeat () until end of row. Chain 2 and turn. 3. Row 2 : (skip 1 sc, make 2 sc in next sc), repeat until end of row, chain 2 and turn. 4. Repeat row 2. Keep repeating row 2 until desired length. (mine was 80 cm) Cut yarn. 5. Place the rectangle you have made before you, right side up, with the longest side of the rectangle in front of you. Fold it in 2 (right side on the inside). Now start closing the seams on both sides , leaving an opening in the middle. The opening in the middle = chest size + a few extra centimeters. (so for me it was 52 cm) Turn the shrug, right side out and try it on. If it is still a bit width, close the seams a bit more.
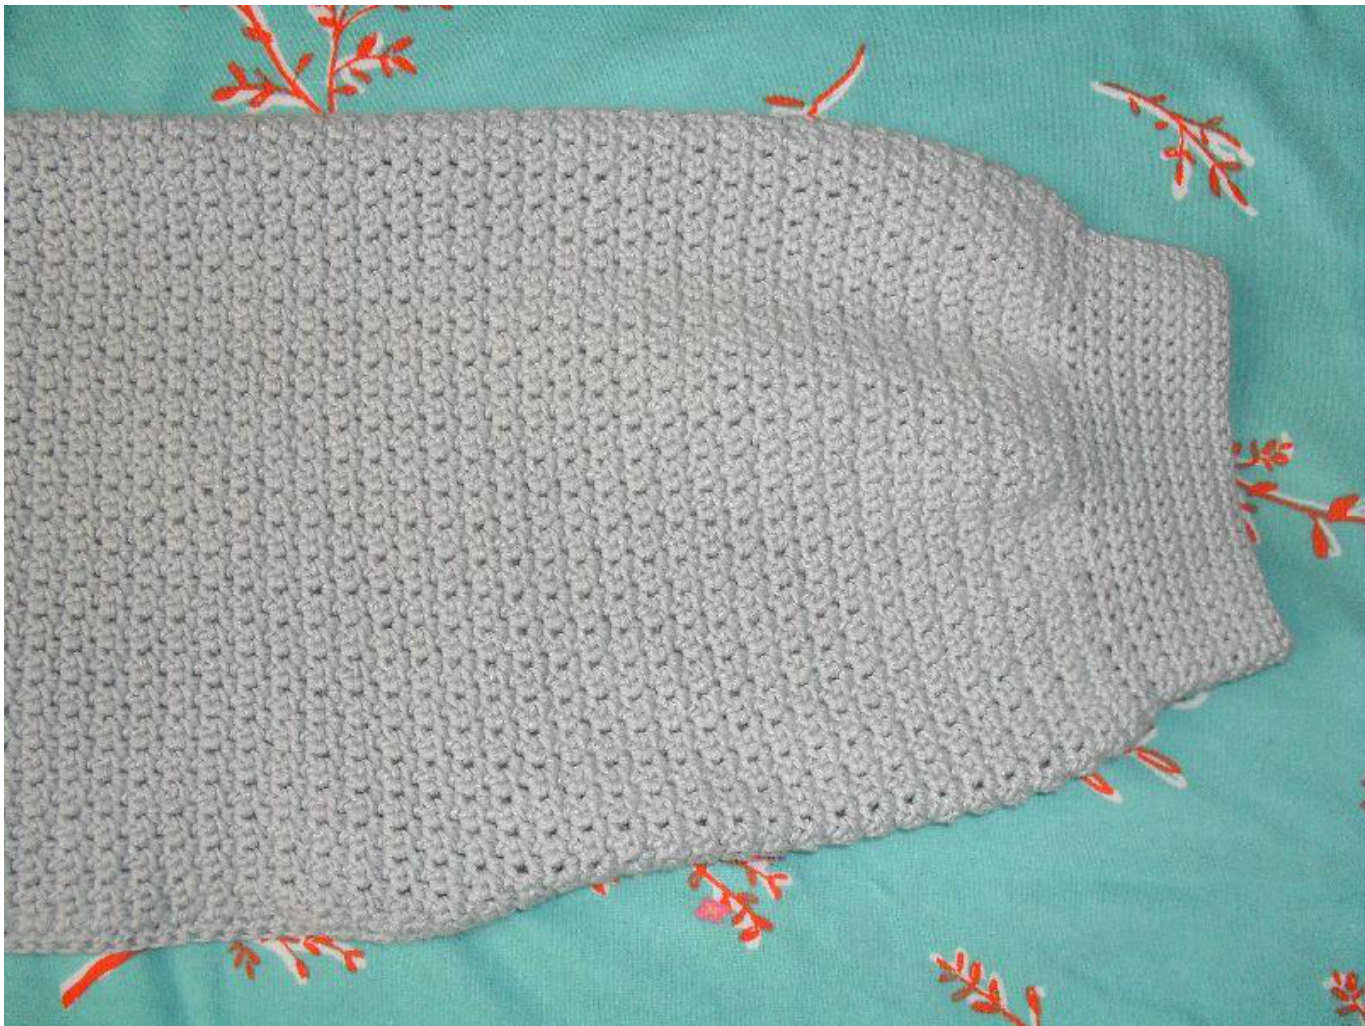
6. Now, next step is : finishing off the chest opening. With right side facing, start making single crochet (see picture) in every opening. Make 1 round, close it with a slipstitch, chain 1 and turn. Try the shrug on : if the finishing off round looks nice for you, make a 2nd round of sc in every sc of the previous row, and cut yarn. If the finishing off round is a bit too loose, 'flubby', you do as follows in the second round : sc 3, sc 2 together, sc 3, sc 2 together, repeat this for the entire round, close it with slipstitch and cut yarn. (this will make the finishing off a bit tighter)
7. Making of the sleeves : Try the shrug on and look at the arm openings. We will make a border to them. I like a tight border, so the sleeve becomes a bit 'puffy'. I did it like this :
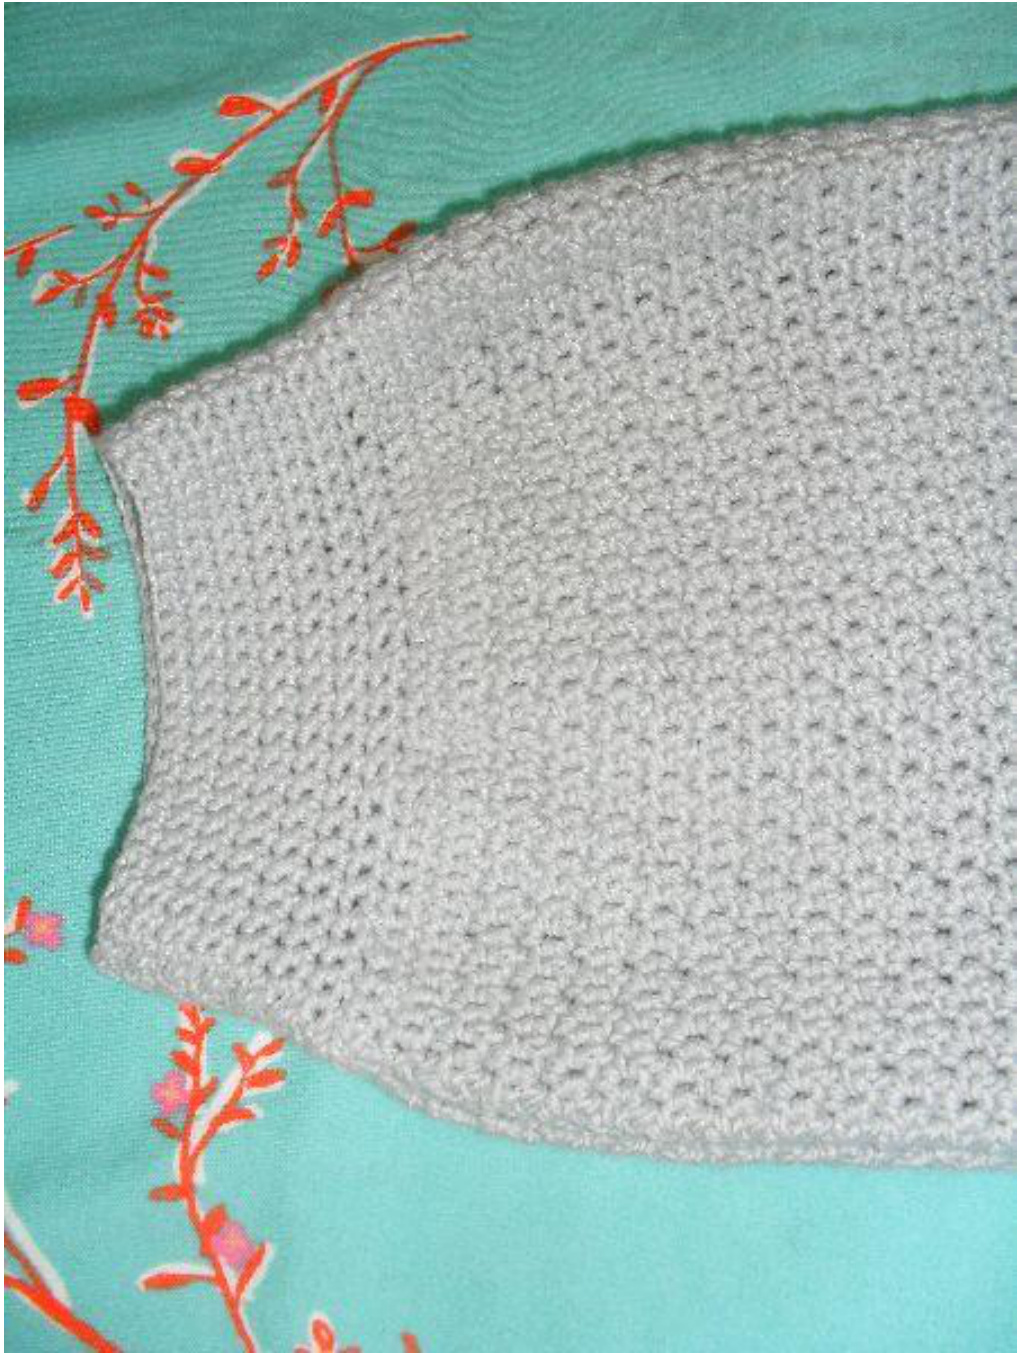
8. First row of the sleeve finishing off : right side facing, start crocheting in the round : make 1 round of single crochet in every stitch, close round with slipstitch, chain 1 andturn. 9. Second row of the sleeve finishing off : (sc 5, sc 2 together), repeat, make last stitches of round, close round with slipstitch, chain 1 and turn. 10. Third row of the sleeve finishing off : the same as row 2 11. Fourth row of sleeve finishing off : make 1 sc in every sc of previous row, close round with slipstitch, chain 1 and turn. 12. For the sleeve finishing off : you will probably have to find your own way... My way is a good indication of how to do it.
13. Nearly finished! Weave in all ends. 14. Put your shrug on, and fold it over at your neck, so you have a nice collar! Enjoy your lovely summer shrug! This is a free pattern from Vicarno's mama. Please do not sell shrugs made from this pattern without my permission! For questions, or information or just to say hi, you can send me a mail : vicarnosmama@gmail.com


