by Midknight Designs
Customizable Patchwork Scarf
Jennifer L Christensen
I created this scarf with my beginner students in mind. It's a very simple pattern consisting of joining “patches" of single and double crochet into strips and embellish any way that you want!
Customizable Patchwork Scarf
Rated: Beginner/Easy
Materials:
Worsted weight yarn - approx. 8 oz - (anywhere from 1 to 32 colors, if you wish. This is a great “stash-buster” project if you do each patch in a different color) Size H/5.00mm hook, or as needed for gauge Tapestry needle Pins to hold strips together for seaming Optional: Additional yarn, any weight or embroidery floss for embellishments in contrasting colors, any other embellishment: as desired
Gauge:
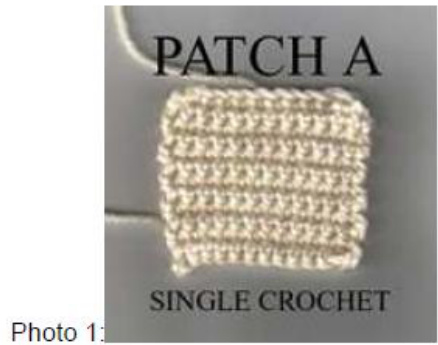
Single crochet (patch A) - 4 sc = 1" & 3 rows = 1" Double crochet (patch B) - 4 dc = 1" & 2 rows = 1" Patch A - 3" x 3 1%4 “ Patch B - 6" x 3 % “
Finished length:
Approx. 72" (The length can be varied by making more or less of the patches, keeping the patch count an even number) Abbreviations: Chain Stitch - ch Single crochet - sc Double crochet - dc
Instructions:
(Note: Leave 1 tail long, at least 6 inches, on every patch, for sewing patches together later. Chains at the beginning of every row is also called turning chains, whether or not the chain is considered the first stitch of the row) Patch A: (Single crochet patch, photo 1) make 16 for 72”’ scarf: Chain (Ch) 13 Row 1: Single crochet (Sc) in 2nd chain (ch) from hook and in each chain (ch) across (12 single crochet) Row 2 - 12: Chain (Ch) 1 (chain DOES NOT count as a stitch), turn work, single crochet (sc) in each single crochet (sc) across (12 single crochet) Finish off. Patch B: (Double Crochet patch, photo 2) make 16 for 72”' scarf: Chain (Ch) 14 Row 1: Double crochet (Dc) in 4th chain (ch) from hook and in each chain (ch) across (12 double crochet) Row 2 - 12: Chain (Ch) 3 (Chain COUNTS as the 1st stitch in every row), turn work, skip first double crochet (dc) in previous row, double crochet (dc) in next double crochet (dc) and in each double crochet (dc) across (12 double crochet) Note: when you reach the last stitch in the previous row, the chain 3 (turning chain), make your last double crochet in the 3rd (top) chain. Finish off
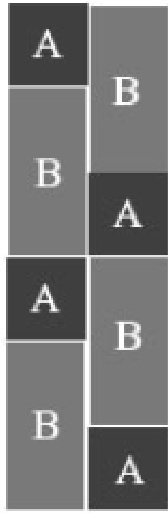
Assembly: Make 2 strips:
Alternating 8 of Patch A (photo 1) and 8 of Patch B (photo 2) (for 72" scarf), using the long tail on one of the patches, whip stitch end to end together forming a strip. When strips are completed, join yarn in any corner of a strip, 3 sc in corner. Sc evenly around strip with 3 sc n each corner, joining with a slip stitch in 1st sc and finish off. Repeat with 2nd strip. Weave in ends. Tip: excluding the 3 sc in each corner, there should be 12 sc along the long side of the sc patches (A) and 24 sc along the long side of the dc patches. There should be 2 sc per post of the dc's (B)

The scarf pattern should start looking like this:
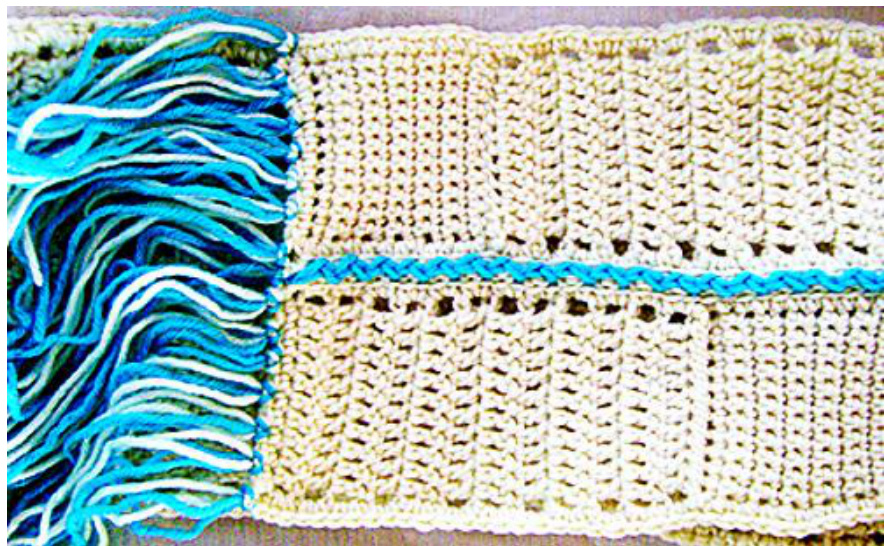
Once both strips are aligned and pinned together, whip stitch or slip stitch strips together. Weave all remaining ends into the scarf.
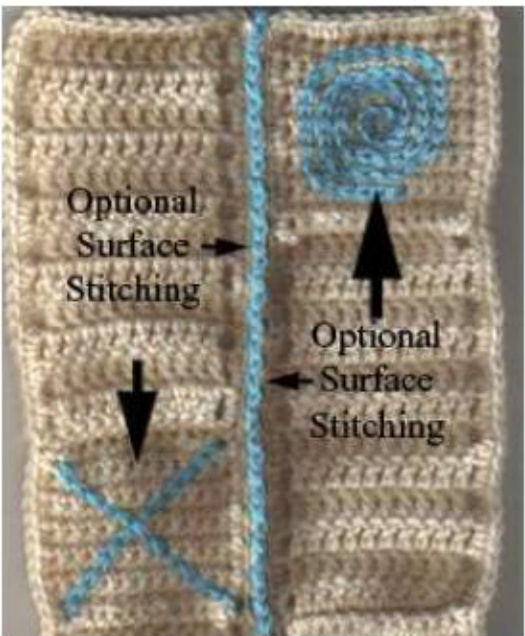
OptionalEmbellishment:
If desired,using additional yarn or embroidery floss, make zigzag orcross stitches along all of the seams. Embroider flowers, pictures or letters or top chain stitch (or surface stitching) patterns on any or all of thePatchA's.Addanykindofotherembellishments asdesired. Add fringe or tassels to ends of scarfif desired.