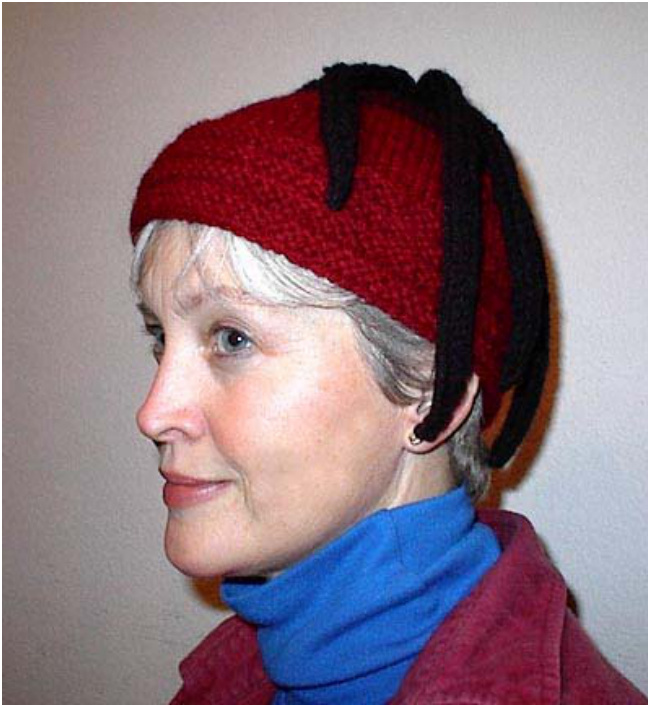
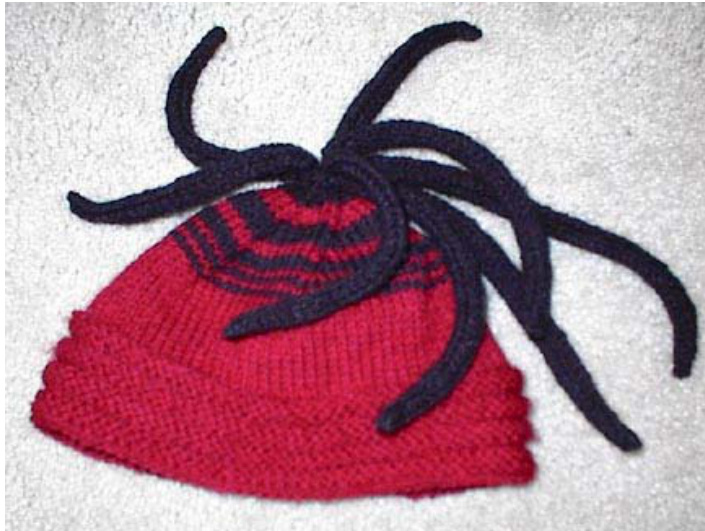
THE DREADED CAP
NEEDFUL THINGS:
US#6 16 inch circular needles US#6 double pointed needles US#7 needles (short) for icord Stitch markers Tapestry needle for weaving ends YARN: 4 oz ball worsted weight yarn for the main color, and 2 ounces of a contrast. (The test was cap knitted in Monsanto Berella 4, but any worsted weight yarn can be used. Just cast on 20 stitches, and knit in stockinette stitch for about two inches and measure. Match gauge by moving up or down in needle size, or just shape your own hat by following the instructions) GAUGE: on US#6 needles, 4.75 stitches/ inch, 7 rows/inch SIZE: Size is given for a 21 inch circumfer
ence head, but directions are given for adjusting this hat to fit ANY size. LET's BEGIN: Cast on 96 stitches using the circular needle. (Measure head, and sub
tract 1 inch. Multiply this number by your gauge, and cast on) Join and purl two rows. (band) Knit for three rows Purl for three rows (first welt) FIRST DECREASE ROW: Knit around, decreasing three stitches (by k2tog = knit two stitches together) evenly spaced. Knit for two rows Purl for three rows (second welt) Knit for three rows Purl for three rows (third welt) EASE ROW: Knit around, decreasing three stitches (by k2tog) evenly Continue knitting each round, (stockinette stitch in the round) until the hat length measures three inches from cast on edge to the stitches on the needles. THIRD DECREASE ROW: Knit around, decreasing 3 stitches (by k2tog) evenly spaced. Knit three rows. LAST DECREASE ROUND: Check the number or stitches on your needle. If they are an even multiple of six, continue knitting for size, then move to the crown shaping. If not, knit one round decreasing the number of stitches needed to get an even multiple of SlX on your needles. With a cast on of 96 stitches and three rows of decreases I had 87 stitches left. I had to knit a decrease round, decreasing evenly by 3 stitches for a total stitch count of 84, which is evenly divided by 6. The crown is shaped by a 6- spiral decrease and it needs to be knitted evenly. If your number of stitches is already divisible by 6, then skip this decrease round. Now. Here is where you have to do some calculations. How many rows you knit between this last decrease round, and the crown shaping, is determined by how you want the hat to FiT. I made my hat to fit just over the top of my ears. I can also pick it up at the welt and it will sit just above my ears. I like the way it looks. Some people may want the welted band to cover their ears entirely MOST CROWN SHAPINGS will take about 2 3/4 inches.... So, measure the distance from the crown of your head to where you want the hat to sit. Be generous, as it is better to slightly over estimate than under estimate. Subtract about 3 inches for the crown shaping and you have the length to knit from the cast on row. Once you have knitted the required length, start the Crown Shaping. On my test cap, I measured from the crown to just over the tips of my ears. About 7 12 inches. So I knitted until it measured 4 1/4 inches by adding stockinette rows (knit every row when knitting in the round) after the last decrease. The formula for the CROWN SHAPING is below. This is determined by the total number of stitches (divisible by 6) that are on your needles after the last decrease round. Total # stitches divided by 6 = X Row 1: \*K2tog, K (X-2) \* repeat around (CLARIFICATION: If the total number of stitches divided by 6 = 15, then the first row would be “K2tog, K (15 minus 2, or 13), plug the number 15 where the X is) Row 2: Knit Row 3: \*K2tog, K (X-3) \* repeat around (Here, it would be “K2tog, K (15 minus 3, or 12.... And so forth) Row 4: Knit Row 5: \*K2tog, K (X-4) \* repeat around Row 6: Knit Row 7: \*K2tog, K (X-5) \* repeat around Continue in this manner until you have decreased the total number of stitches by half, ending with a knit row. From here on, you will continue the decreases as before, but decrease on EACH ROUND until you have 6 stitches left. NOTE: You will need to change to double pointed needles when the stitch count gets too low and too few for the circulars. Cut the yarn leaving a 12 inch tail. Run this tail through the loops a couple of time, pull through the center and tie off securely. For the SAMPLE Hat, here is the CROWN SHAPING, row by row. We have 84 stitches. 84 divided by 6 is 14. So based on the formula shown above here is how it develops... (knit all even rounds) Row1: k2tog, K12, repeat around Row3: K2tog, K11, repeat around Row5: K2tog, K10, repeat around Row7: K2tog, K9, repeat around Row9: K2tog, K8, repeat around Row11: K2tog, K7, repeat around Row13: K2tog, K6, repeat around (this round decreases the stitches by half, down to 42 from 84) Row14: Knit (remember, end with the knit round) Begin decreasing on each row. Row15: K2tog, K5, repeat around Row16: K2tog, K4, repeat around Row17: K2tog, K3, repeat around Row18: K2tog, K2, repeat around Row19: K2tog, K1, repeat around Row20: K2 around, six stitches on needles.
DREADS:
Size US#7 needles Black contrast yarn, or any color you choose. You can even make them in rainbow col Ors!
These are made by knitting I-cord.
Begin by casting on two stitches. I made my increases by knitting into the front and back of the same stitch. ROW1: K2, slide to the end ROW2: Inc in first stitch, K1, slide to end ROW3: K3, slide to end ROW4: K1, increase in second stitch, K1, slide to end ROW5: K4 slide to end ROW6: K2, increase in third stitch, K 1, slide to end ROW7: K5, slide to end Continue kniting in plain I-cord until the piece measures (5 %, 6, 7 %2, 8, 9) inches Taper the ends by decreasing as follows: ROW1: K1, K2tog, K2, slide to end ROW2: K4, slide to end ROW3: K1, K2tog, K1, slide to end ROW4: K3, slide to end ROW5: K1, K2tog, slide to end ROW6: K2, slide to end ROW7: K2, slide to end ROW8: K2tog, cut yarn pull through loops, and finish. I made 2 dreadlocks at 5 % inches, 2 at 6 inches, 2 at 7 % inches, one at eight inches, and one at nine inches. Total of eight. Take the ends of all the dreads, and using a tapestry needle connect them all together then attach them to the hat..... Cute, huh? You can make them removable if you wish or sew them permanently
FUN STUFF:
In my sample hat, you will notice from the picture that I used some black stripes in the CROWN SHAPINGS. There are many things you can do to make this hat very individual. You can add all kinds of colors, and color patterns. You have a canvas in which to work between the last welt row, all the way to the crown shaping. Another attractive look is to use two different colors in the welt band. Use one color for the Purl welts, and a bright color for the knit spaces between the welts. You can make the dreads multi-colors, and use as little and as few as you like. There is no way you can mess up the i-cord. They can all look different, by different sizes and end finishes. Have fun and play with it! Each one can be different! For questions or information on this pattern, email: leef@appleleeffarm.com Or go to our farm website, APPLE LEEF FARM, at: http://appleleeffarm.com/ More FREE PATTERNS and file downloads are on the Fiber & Fiberarts page of thefarmwebsite.


