
Introduction
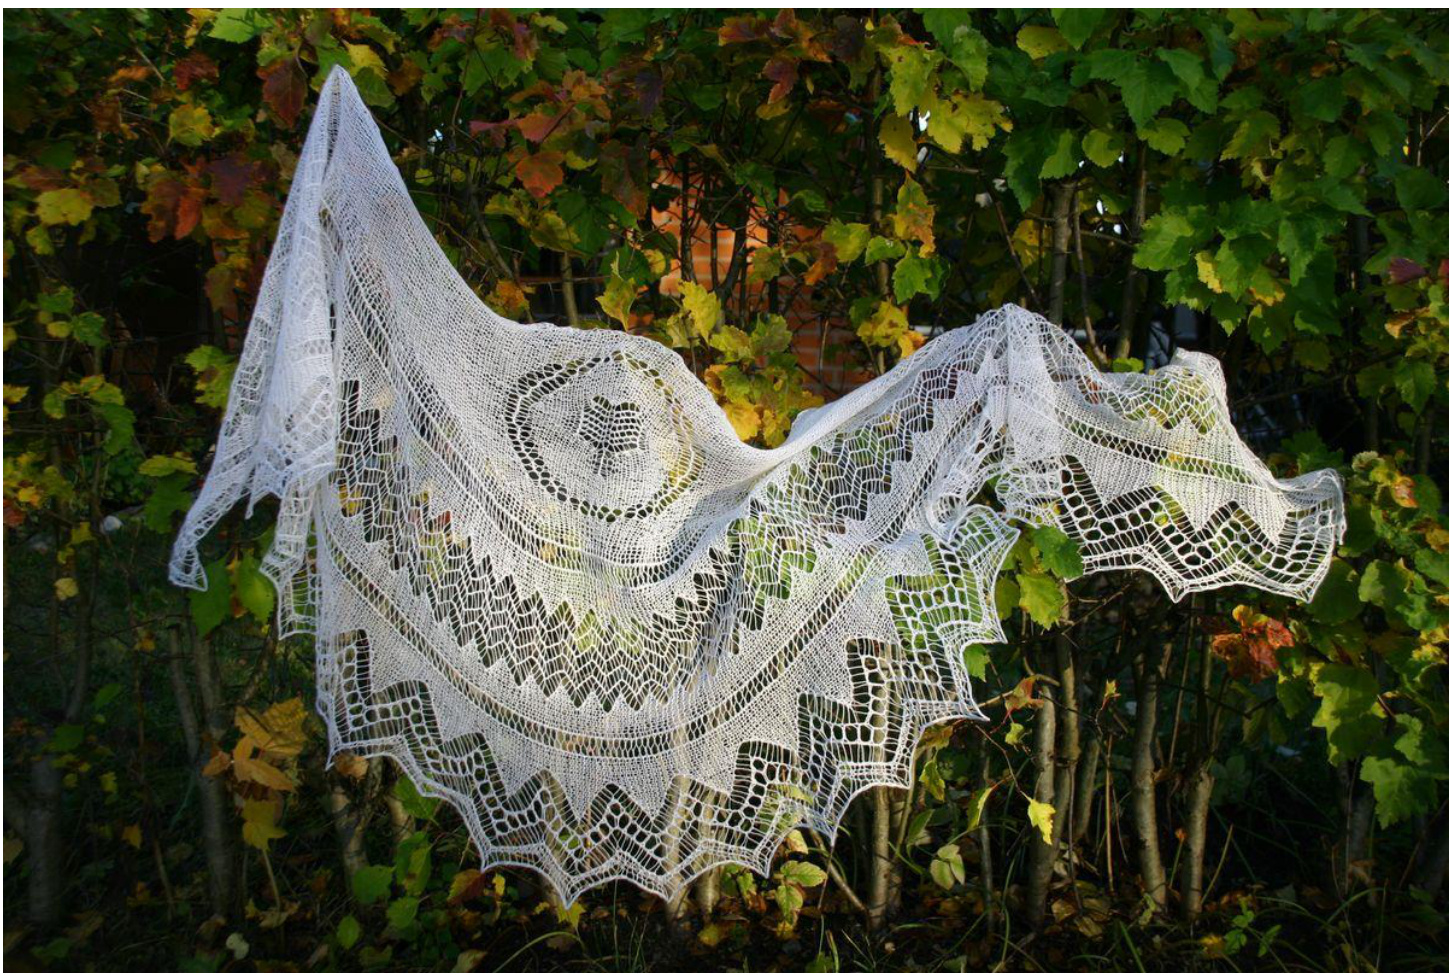
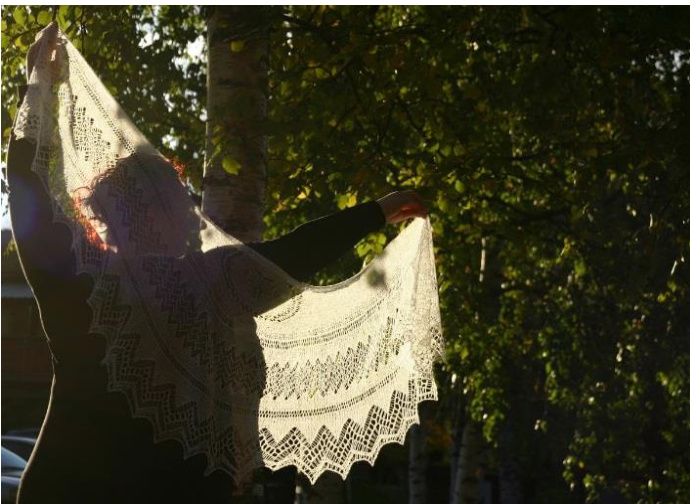
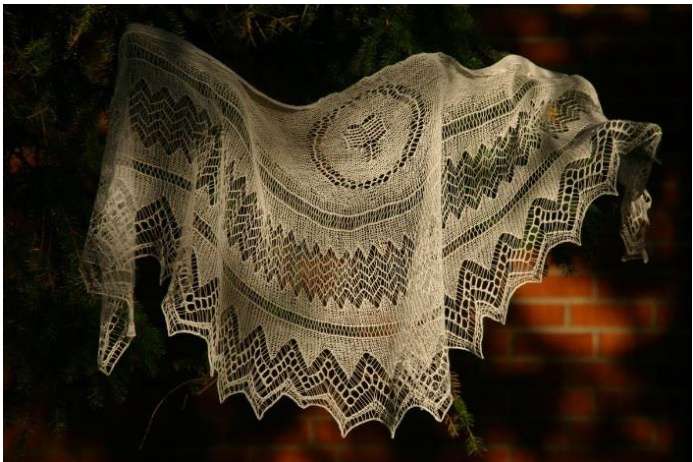
The planning of this shawl ended a long inspirationless phase in my life and spawned the (so far) five-part “Fell shawls" series. Instructions for all shawls will be published one after another, first in Finnish on ullaneule.net, followed by translations in English and German on Ravelry. The first shawl in the series is called Ailigas. Ailigas means "holy" in Saame, and in the municipality of Utsjoki in Northern Finland there are three fells with this name. The shawl is knitted in garter stitch, honoring the Shetland Lace technique. The edging is knit first; in its points you can see Northern Lapland's rows of fells, and above them the firmament, where the Northern Lights shine. The stitches for the shawl's main part are picked up from the edging. In the center the full moon shines, inside of which I added the
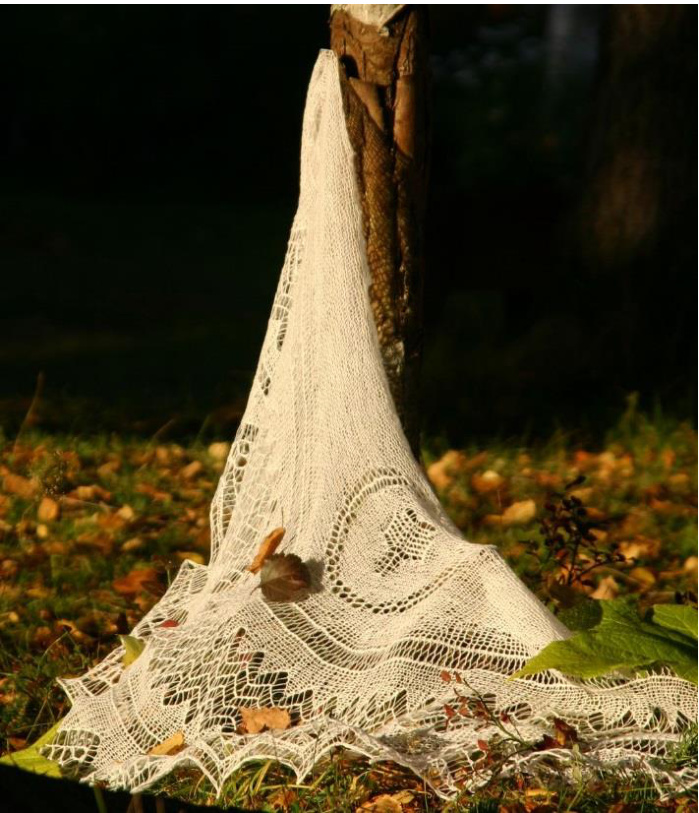
dwarf birch, which is important to me. The main part is modernly crescent-shaped using shortrows.
Yarn
BC Garn Kamgarn; 100% Merino wool; 1360 yd (1250 m) / 3.5 oz (100 g). Yardage 766 - 820 yd (700 - 750 m) / 2 oz (55 g).
Gauge
17 sts and 46 rows = 4 in (10 cm) gst, blocked. Gauge is not really important, it will of course affect the size of the finished shawl as well as the yardage.
Needles
Min. 20 in (60 cm) long circular needles, size US 6 (4 mm). I knit very tightly, so US 2%2 - 4 (3.0 - 3.5 mm) is probably a good choice for most people. Additionally you need size US 9 (5.5 mm) needles for binding off the edging.
Other materials
3 stitch markers (1 removable and 2 closed). You can also use marker yarn.
Size
nter 20.5 in (52 cm), wingspan 61 in (154 cm). Edging width 14.6 in (37 cm
Directions
Before you start
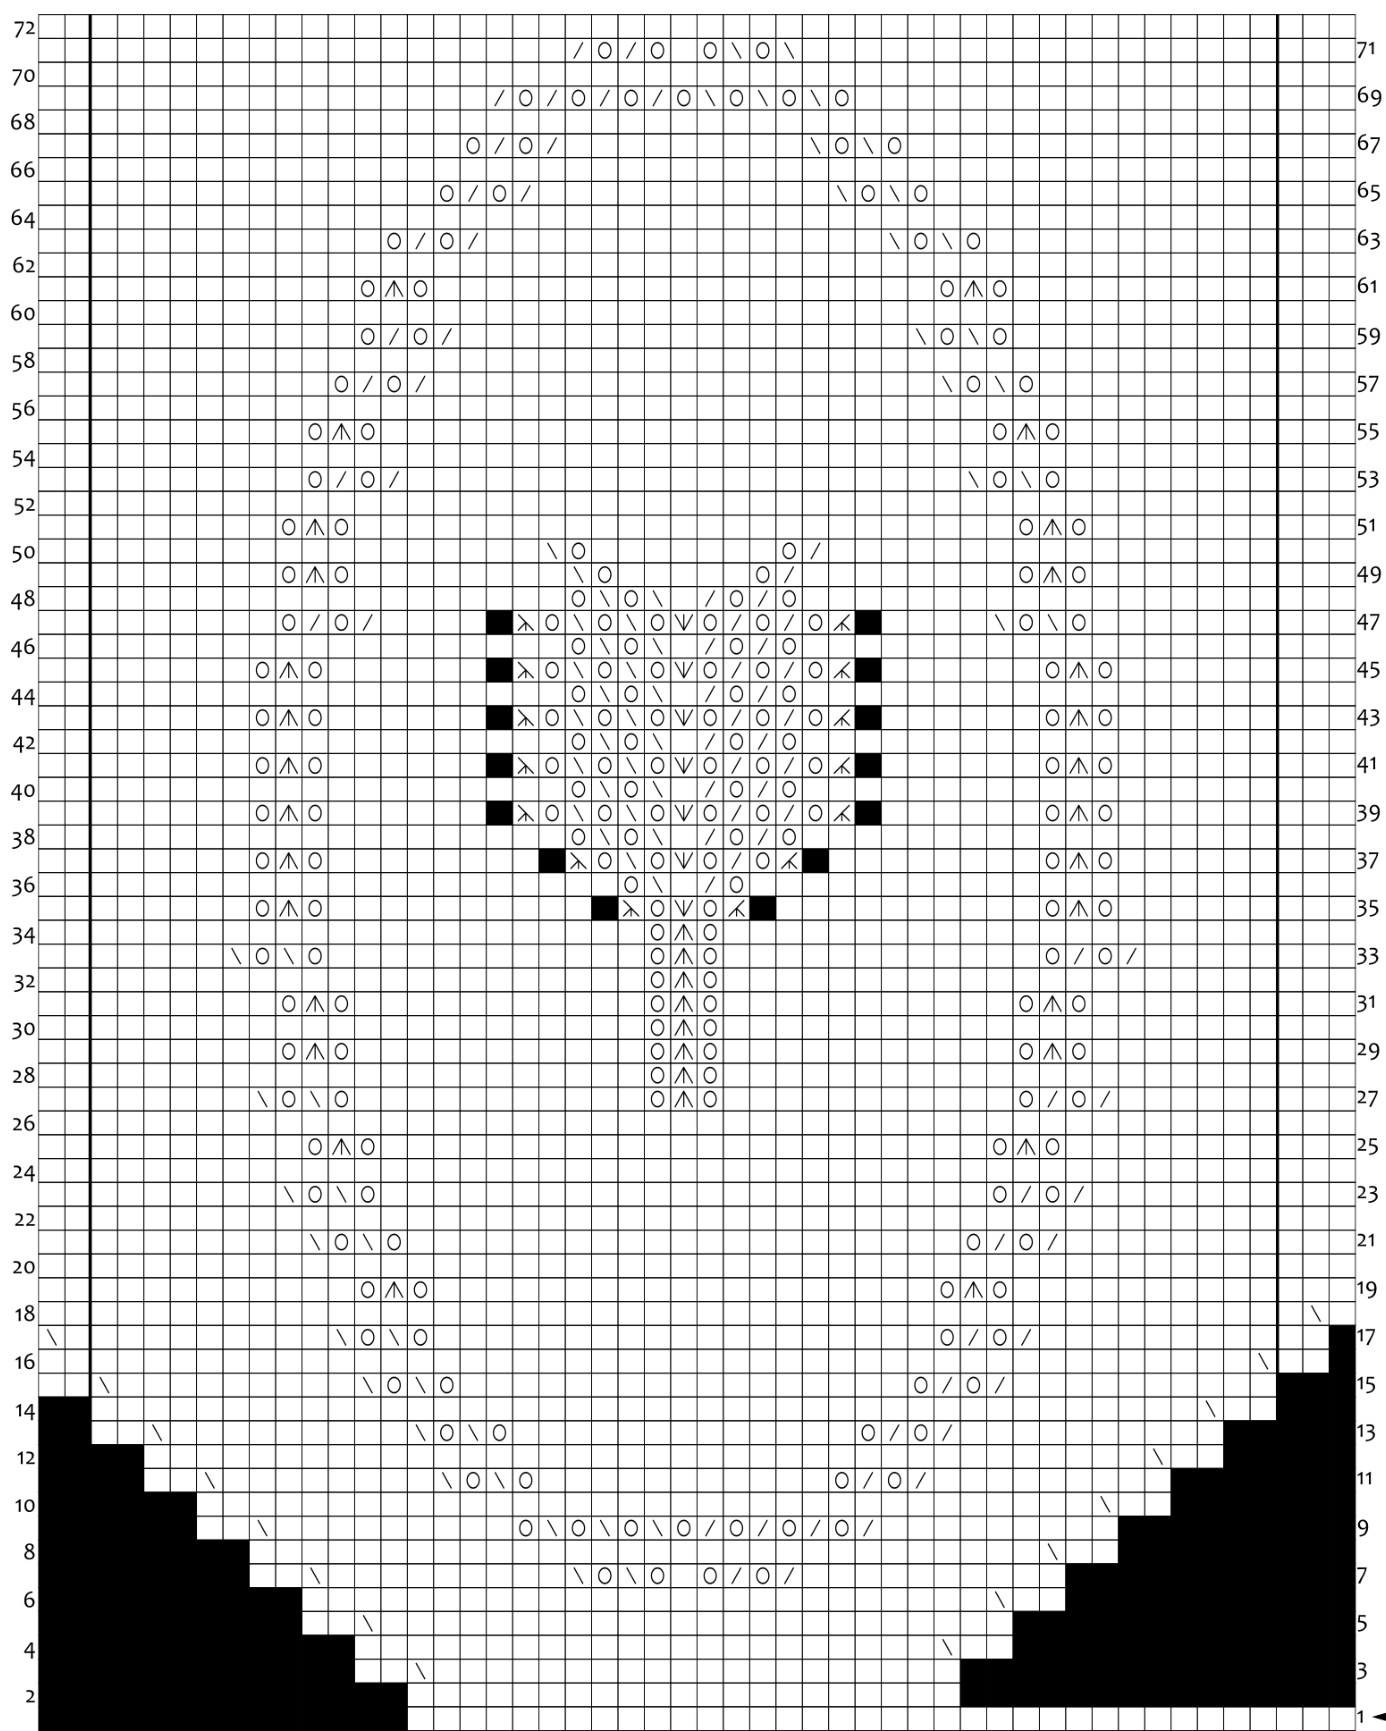
Read the instructions, patterns, key and abbreviations carefully before you start knitting. Notice that while the shawl is knit in garter stitch, decreases are different on RS and WS, as is typical for Shetland Lace. I recommend marking the shaw's RS already while knitting the edging, e.g., using a different colored piece of yarn or a stitch marker. In fig. 2 only part of the short rows is shown; their pattern is repeated outside the borders. The most important information in fig. 2 is the lace pattern, which is located on both sides of the center stitch. You can make reading fig. 1a and 1b easier by printing them to paper, cutting them out and gluing them together in a more readable form. Unfortunately the patterns are quite big, so I had to separate them. bered rows are always RS rows, even-numbered rows are always WS row
Edging
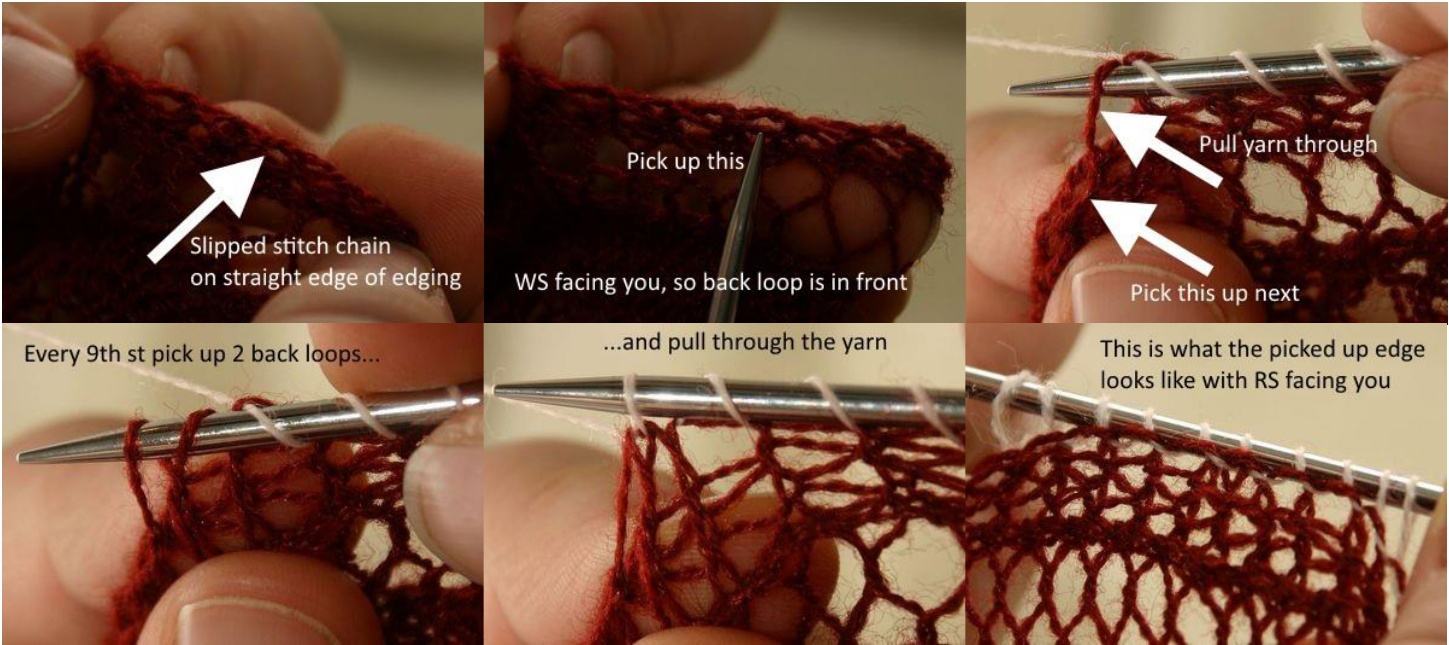
On the straight edge (beginning of RS rows), always sl1p. This way, a nice chain of stitches will be formed; this is where the main part's stitches are picked up from. On the pointed edge (beginning of WS rows), always p1. A dense chain of stitches will be formed, which yields well when blocking. CO 52 sts. P1 and k rem (WS) Start knitting the edging from fig. 1a, row 1 and cont straight to fig. 1b, row 1. Turn the work around. Knit fig. 1b, row 2 and cont with fig. 1a, row 2. Turn the work around.
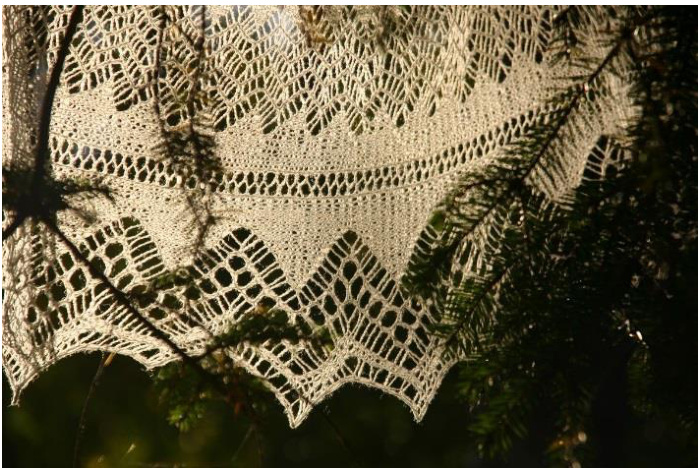
Continue knitting as described above until the end of fig. 1a and 1b. Rows 1-20 are repeated 30 times = 30 points. When you have knit row 20 for the last time, knit both figures' row 1 once more and afterwards knit one more row on WS. Using a big needle, BO on RS as follows: K2, \*lift the first stitch over the last stitch you knit, k1\*. Rep \*-\* until the end of the row. Break yarn and pull through last st. The edging's edge doesn't have to yield very much.
Main part and short rows
There are now 303 sts on the edging's straight edge. Pick these up from WS by picking up the back loop from the chain of stitches and pulling the yarn through. Every 9th st pick up back loops from 2 sts before pulling through the yarn. A total of 273 sts are picked up in this way. See image series.
Sl1p and k135, k1 (= center st) and mark with a removable stitch marker, k136. Sl1p and k rem (WS). The stitch mark shows the RS as well as the center st. Move it upwards as needed while knitting. K111 and cont with fig. 2 row 1 (RS): K36, turn the work around Row 2 (WS): K21, turn the work around Row 3 (RS): K20, ssk, k2, turn the work around Row 4 (WS): K22, k2tog, k2, turn the work around Row 5 (RS): K24, ssk, k2, turn the work around Row 6 (WS): K26, k2tog, k2, turn the work around i.e., on every row the preceding row's first st is knit together with a st resting on the needle, so no holes will form. After that, 2 more sts are knit and the work is turned around. Every row's first st is knit (except on the last short row, see below). Continue in the same way, knitting short rows in gst, while placing the pattern in fig. 2 on both sides of the center st. On row 15 of fig. 2 slip the stitch markers onto the needles at the spots marked by a line. This helps placing the pattern around the center stitch. After the end of fig. 2, cont with gst and short rows, until all sts are used. On the last short row (WS) sl1p, continue with gst. You should now have 189 sts on the needle.
Binding off
K2. \*Slip 2 sts back onto the left needle and k2tog. K1.\* Rep \*-\* until the end of the row. Break yarn and pull through last st.
Finishing
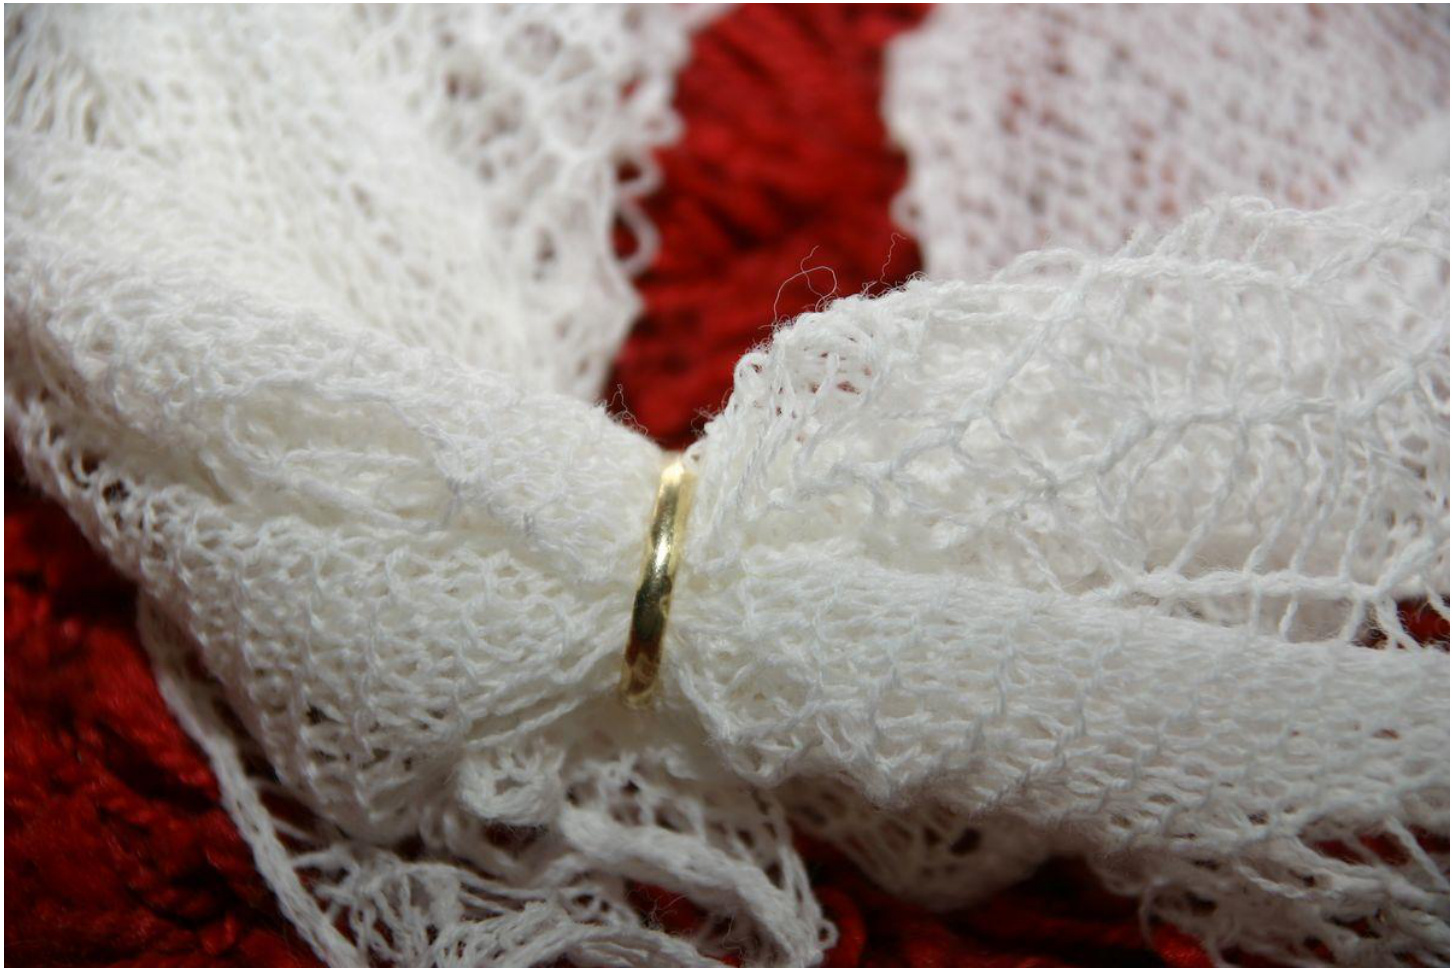
Wet the shawl, dry with clean towel and block to measurements. Weave in ends. A last bit of information: an authentic Shetland Lace shawl fits easily through a wedding ring!
Figures Figure 1a
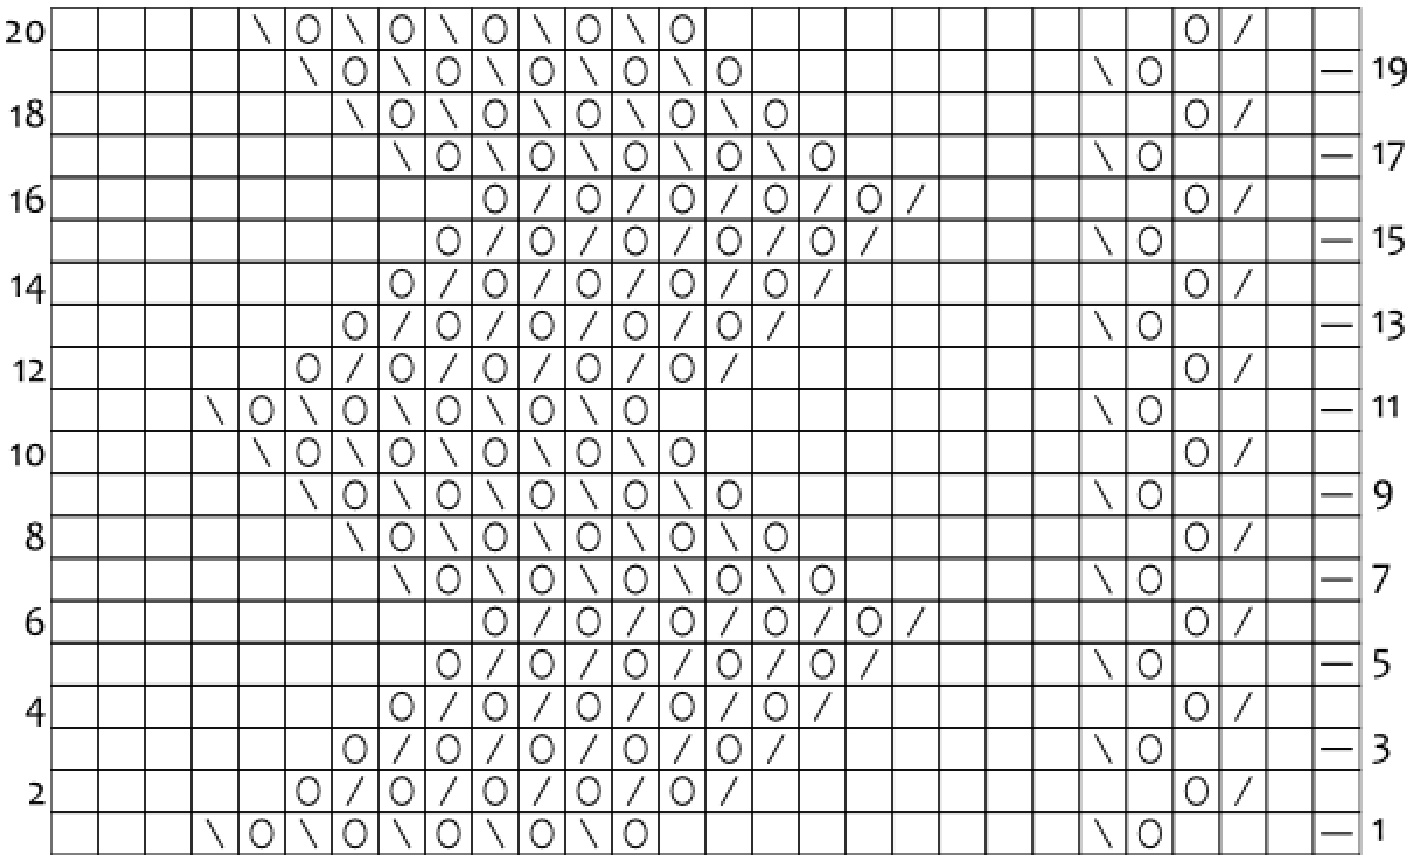
Figure 1b
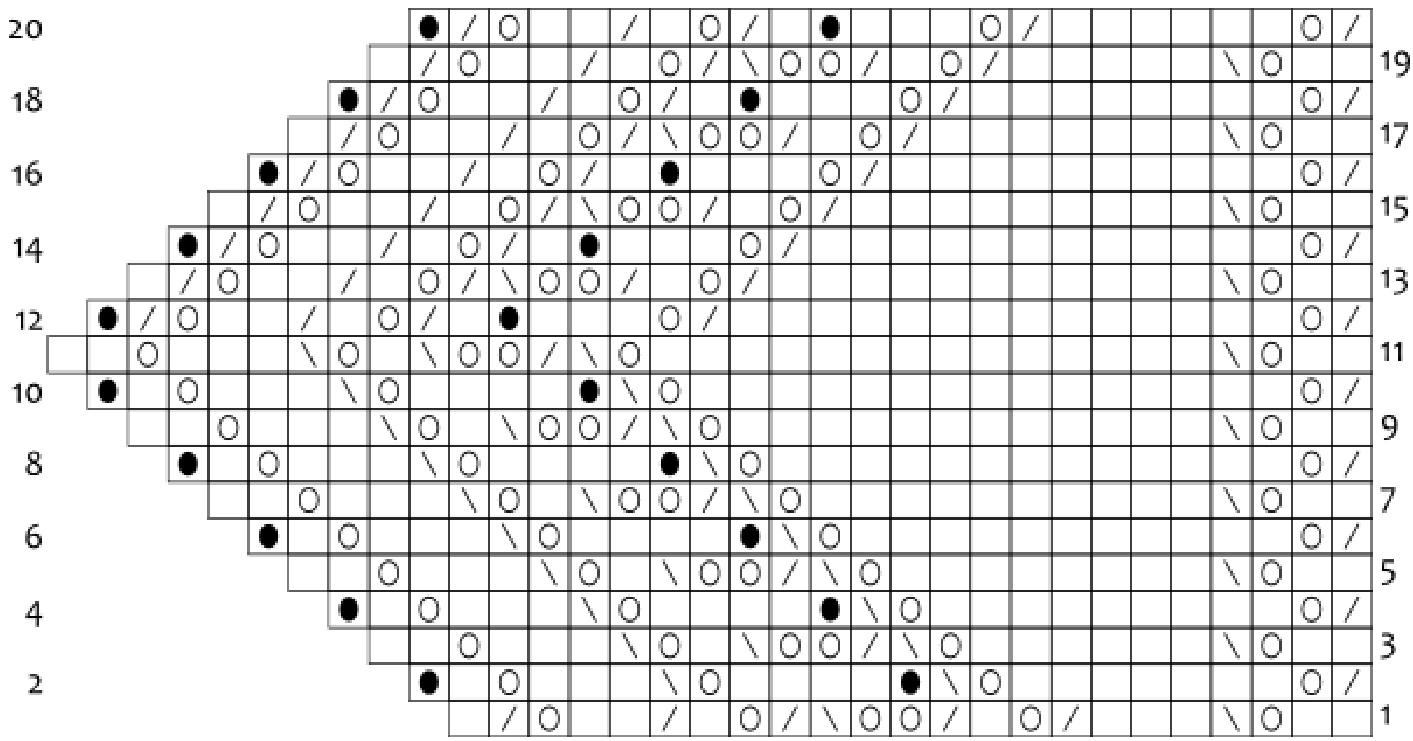
Figure 2
Key
: knit on RS and WS :purl on RS and WS : empty (no stitch) : RS: ssk WS: k2tog : RS: k2tog WS: ssk 回: YO : Sl2 as if knit together, k1, p2sso W: in the same stitch, k1, yo, k1 (2 sts increased) : Sl1, k2tog, psso : K3tog :S1p line: shows stitch marker's place odd rows are RS rows
Abbreviations
BO bind off rem remaining cast on rep repeat cont continue RS right side gst garter stitch sl slip k knit sl1p slip 1 purlwise k2tog knit 2 stitches together ssk slip 2 knitwise, insert left as one needle into slipped stitches k3tog knit 3 stitches together and knit through back loop as one st stitch p purl sts stitches psso slip 1 knitwise, knit 2 together, WS wrong side pull slipped stitch over yo yarnover p2sso slip 2 knitwise, knit 1, pull both slipped stitches over


