Matryoshka
Skill Level
by Sharon Maher laughing purple goldfish designs Easy
Yarn Used
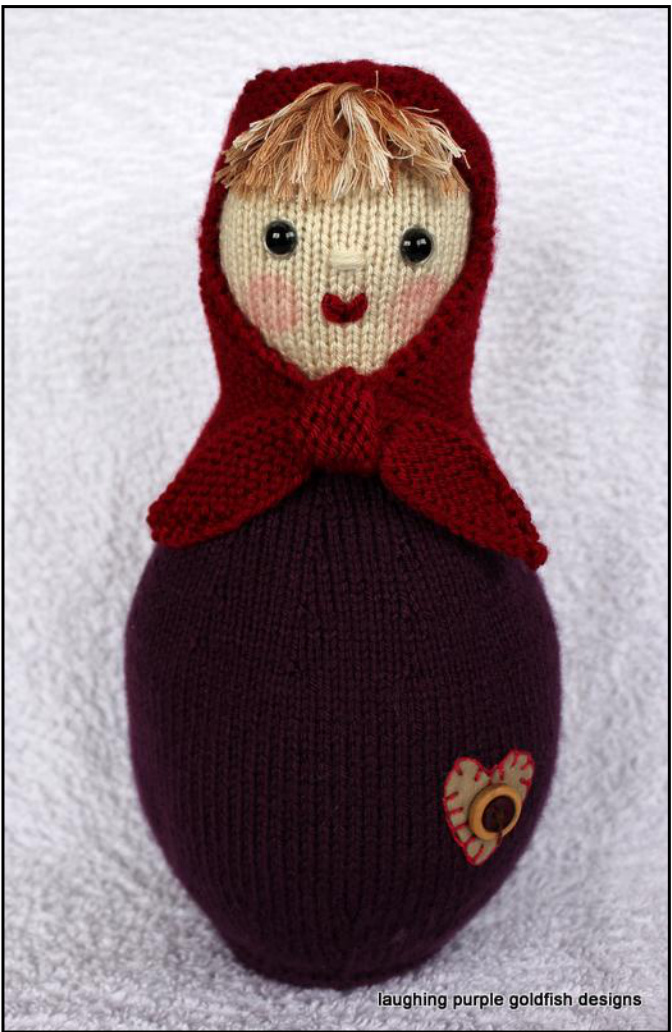
Matryoshka is foreign and exotic, yet homey and charming, all at the same time. With bold colours and intricate designs you can let your imagination run wild as you embellish this simple pattern. Carnival Soft 8ply (DK) 100% Acrylic 80g/153m, 2.80z/167yds MC Purple #3729, 1 ball CC1 Beige #4601, 1 ball CC2 Red #4608, 1 ball
Notions
3 mm knitting needles (US 2 I) Wool needle Stitch markers 12mm safety eyes (2) Red pencil, for cheeks Yarn scraps, for hair Embellishments, for body Polyfill stuffing, 200g Circle of plastic, 7 cm (2 %4 in) in diameter (cut from plastic ice cream tub)
Finished Size
Doll stands 31 cm (12 %4 in) tall body circumference is 42 cm (16 2 in) at widest point Matryoshka - by Sharon Maher of laughing purple goldfish designs @2012
Gauge (tension)
For the sample, 21 sts and 34 rows measure 10 x 10 cm / 4 x 4 in, in stocking stitch using 3 mm needles. Exact gauge is not important, but stuffing in the finished doll should not be visible between your stitches. If necessary, change the needle size to suit your tension.
Abbreviations
Standard abbreviations are used.
Special Stitches
There are two different types of increase used in this pattern. Please read the instructions for each increase carefully.
Increase - inc
· Knit into the front and back of next stitch.
Make 1 - M1
·This method creates a neat, invisible increase, with no hole. · Identify the horizontal bar of yarn which lies between the stitch just worked and the next stitch. · Lift this bar using the needle with your unworked stitches on it. · Knit into the back of this loop.
Pattern notes
The matryoshka doll is worked flat in one piece from the head down to the base, and joined with a seam at the centre back. There is a circle of plastic inside the base of the doll, which allows her to stand beautifully. Her scarf is worked separately and attached later. Please note that buttons are not recommended on toys for children under three years of age. Head and body Begin at top of head. Matryoshka - by Sharon Maher of laughing purple goldfish designs' @2012
| Start | Using CC1 (beige), cast on 12 sts. |
| Row 1 | Inc. K wise into every st - 24. |
| Row 2 | P across - 24. |
| Row 3 | Inc. K wise into every st - 48. |
| Continue | Work a further I5 rows in st-st, beginning with a P row. |
| Place marker | Mark the centre point of this last row, as a guide for facial features. |
| Continue | Work a further I6 rows in st-st, beginning with a K row. |
| Shape neck | K2tog to end - 24. |
| Finish neck | Work a further 3 rows in st-st, beginning with a P row. |
| Change colour | Break off CC1 (beige) leaving a 45 cm (18 in) tail which will later be |
| used to seam the head. Join on MC (purple). | |
| Begin body | Work 2 rows in st-st, beginning with a K row. |
| Shape shoulders | Inc. K wise into every st - 48. |
| Continue | Work a further 9 rows in st-st, beginning with a P row. |
| Begin body increases | K2, [M1, K4] 11 times; M1, K2 - 6O. |
| Continue | Work a further 5 rows in st-st, beginning with a P row. |
| increase | K2,[M1, K5] 11 times; M1,K3 - 72. |
| Continue | Work a further 5 rows in st-st, beginning with a P row. |
| increase | K2,[M1, K6] 11 times; M1,K4 - 84. |
| Continue | Work a further 5 rows in st-st, beginning with a P row. |
| Increase | K2, [M1, K7] 11 times; M1, K5 - 96. |
| Continue | mo d v yaim iiag as-as u! so 5 any o om |
| Begin body decreases | [K6, K2tog] 12 times - 84. |
| Continue | Work a further 5 rows in st-st, beginning with a P row. |
| Decrease | [K5, K2tog] 12 times - 72. |
| Continue | Work a further 5 rows in st-st, beginning with a P row. |
| Decrease | [K4, K2tog] 12 times - 60. |
| Next row | P across - 60. |
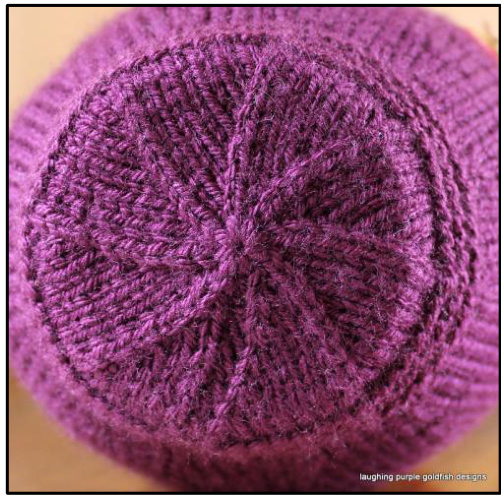
| Create hemline | Work 6 rows in g-st. |
| Decrease | To form base of doll. |
| Row 1 | [K13, K2tog] 4 times - 56. |
| Row 2 and every following alternate row | P across. |
| Row 3 | [K5, K2tog] 8 times - 48. |
| Row 5 | [K4, K2tog] 8 times - 40. |
| Row 7 | [K3, K2tog] 8 times - 32. |
| Row9 | [K2, K2tog] 8 times - 24. |
| Row 11 | [K1, K2tog] 8 times - 16. |
| Row13 | [K2tog] 8 times - 8. |
| Finishoff | Break off yarn, leaving a 45 cm (18 in) tail. Use the wool needle to thread the tail through the remaining 8 sts on the knitting needle. Gather together tightly, then thread the tail through the sts again to secure. |
Face
Insert eyes.
Return to your stitch marker on the face. Insert an eye 4 sts to each side of this point. There should be approx. 6 sts visible between the eyes. when confident that the eyes are in the correct position, click the safety ring onto the back of each. Eyes cannot be re-positioned after this step. Nose. Use CC1 (beige) Move 2 rows down from the stitch marker, and one st to the left. work a line 2 sts wide to form the nose. work over these sts a couple more times to accentuate the nose.
Mouth.
Move 8 rows down from the stitch marker. This point is the centre base of the mouth. Make 2 chain sts from this point. Each chain st should stand 2 knitted sts tall, and 1 knitted st wide.
Cheeks.
Use a red pencil to colour a circle directly under each eye.
Seam and stuff
Join row ends along the base of the doll, the g-st hem, and half way up the body. lnsert the circle of plastic at the base, then stuff the lower part of the body with fiberfill. Continue seaming until you reach the neck. Secure tails of yarn and finish stuffing the body. Join row ends of the head using the long tail of MC (beige), stuffing as you go. Run a gathering stitch along the cast on edge at the top of the head, and pull to close the hole. Secure any remaining tails of yarn.
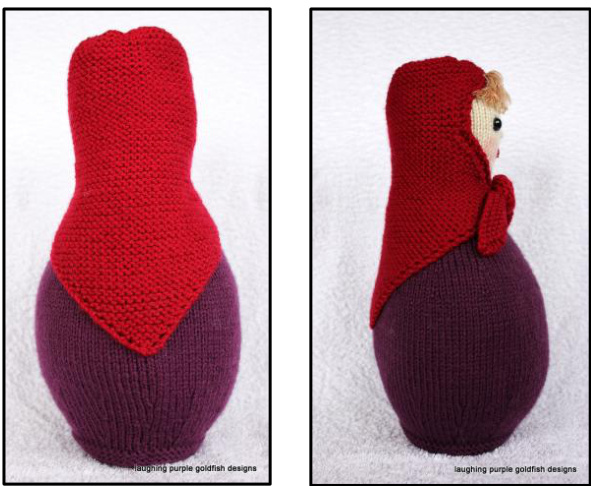
Scarf
Begin at centre back.
| Start | Using CC2 (red), cast on 3 sts. |
| Row 1 | K1, yfwd, K to end. |
| Increase | Repeat row 1 until there are 52 sts. |
Matryoshka - by Sharon Maher of laughing purple goldfish designs' @2012
| Next row | K1, yfwd, K2tog; K to end - 52. |
| No shaping | Repeat last row a further 9 times - 52. |
| Begin face opening | K1, yfwd, K3tog; K to end. |
| Continue decreasing | Repeat last row until there are 36 sts. |
| Next row | K1, yfwd, K2tog; K to end - 36. |
| No shaping | Repeat last row a further 7 times - 36. |
| Close face opening | KI, yfwd, K to end. |
| Continue increasing | Repeat last row until there are 50 sts. |
| Place marker | Mark beginning of next row. |
| No shaping, No eyelets | Work 4 rows g-st. |
| Decrease | To form crown. |
| Row 1 | [K3, K2tog] 10 times - 40. |
| Row 2 and every following alternate row | K across. |
| Row 3 | [K2, K2tog] 10 times - 30. |
| Row 5 | [K1, K2tog] 10 times - 20. |
| Row 7 | [K2tog] 10 times - 10. |
| Row 8 | K across - 10. |
| Finish off | Break off yarn, leaving a 45 cm (18 in) tail. Use the wool needle to thread the tail through the remaining 1o sts on the knitting needle. Gather together tightly, then thread the tail through the sts again to secure. Keep needle threaded and join the row ends from the top of the scarf down to the marker, where the face opening begins. |
Bow
Using CC2 (red) cast on 35 sts. Row I: Kl, yfwd; K to end. Repeat this row until there are 45 sts. Cast off. Tie this bow piece into a single knot.
Position scarf.
Place the doll so that the seam of the body is centre back. Position the scarf on the head, pin closed below the chin, but do NOT stitch in place yet.
Hair
Attach short lengths of scrap yarn to the forehead, anchoring them just above the scarf line, so that only the fringe ends are visible.
Finish scarf
Use the wool needle and CC2 (red) to stitch the scarf closed under the chin. Then stitch the bow firmly in place. Work some additional stitches to secure the scarf all the way around the face and the body Matryoshka - by Sharon Maher of laughing purple goldfish designs' @2012


