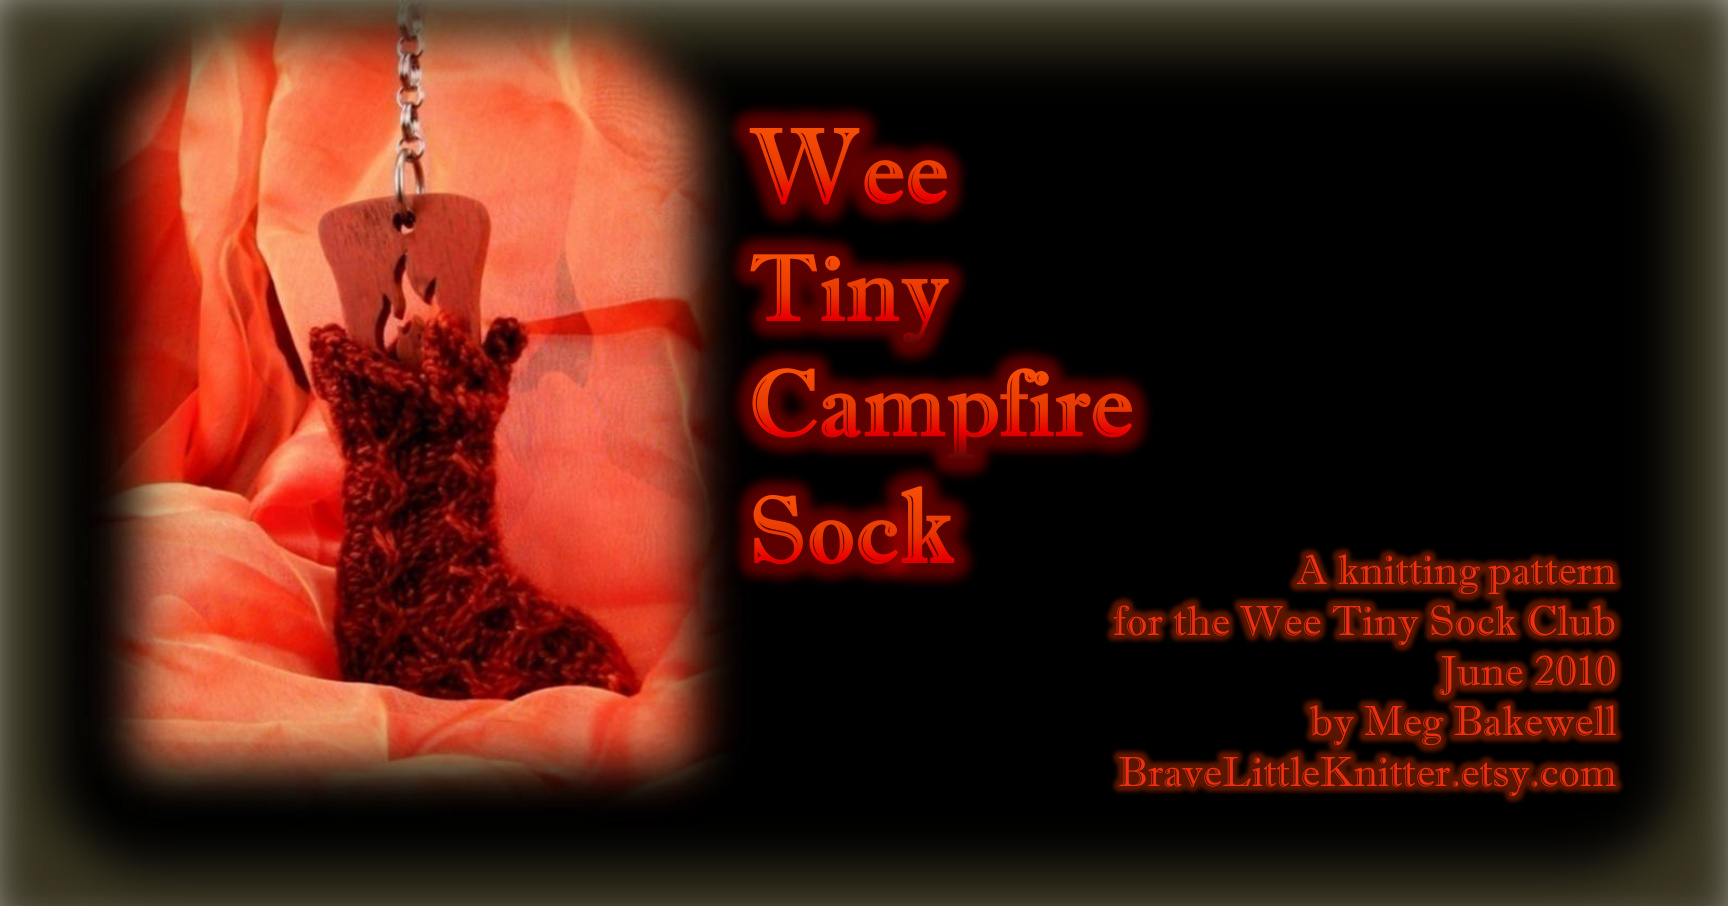
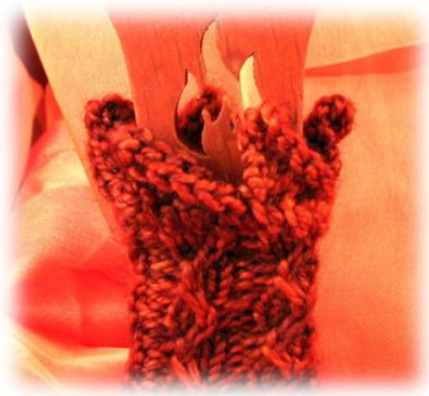
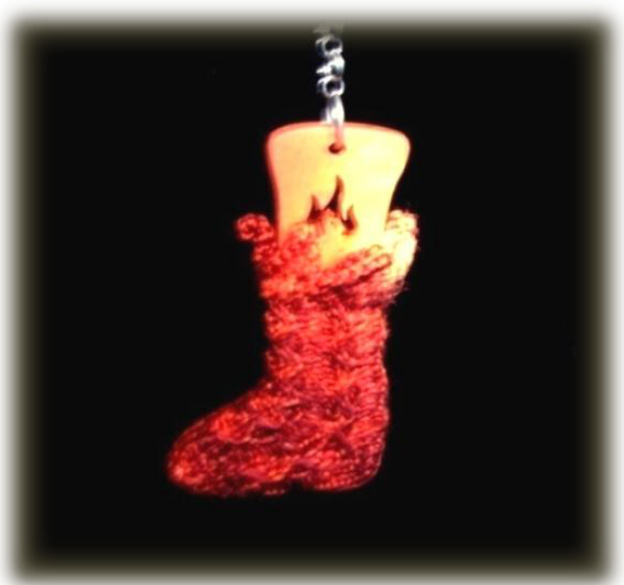
The Wee Tiny Campfire Sock was inspired by a beautiful limited edition colorway from Sundara Yarn. The deep oranges and hot reds tinged with just a bit of darkness remind me of the glowing embers of a dying campfire. A twisted rib stitch pattern imitates flickering flames on the foot and leg of this toe-up sock. Slipped stitches in the pattern show off the subtle color variations of the yarn. The blaze continues along the top edge with a knitted on edging. All these fiery stitches look their best after being soaked in water for a few minutes and blocked.
Materials
Sundara Sock $100\%$ Superwash Merino, fingering weight yarn about 14 yards/13 meters, colorway “Feet to be Tickled" Set of 4 US size 1/2.25 mm DPNs or size to obtain gauge Cable needle (an extra DPN works fine, especially if it's wood) Suggested gauge: 7.5 sts and 14 rows per 1"/2.5cm in stockinette Note: The slipped sts and cables in this pattern make the knitting less stretchy, so it may be a tight fit on the sock blocker if your gauge is tighter than recommended.
Abbreviations
Sl: Slip st, purlwise unless otherwise indicated. SSK: slip, slip, knit. (slip 2 sts knitwise, individually, and knit them together through the back loop.) W&T: wrap and turn. WYIB: With yarn in back. YO: Yarn over. LC: Slip 1 st to cable needle and hold in front. Knit 2 sts from the working needle, then knit 1 st from cable needle. RC: Slip 2 sts to cable needle and hold in back. Knit 1 st from the working needle, then knit 2 sts from cable needle. pattern $\circledcirc$ 2010 Meg Bakewell, for personal use only.
Begin pattern
Cast on 8 sts using the cable cast on. Row 1: (K1, sl 1) four times. Row 2: Repeat row 1. Next, transfer 4 stitches to each of 2 DPNs, alternating between the 2 needles for each stitch. In other words, transfer the first stitch to needle #1, the second to needle #2, the third to needle #1, the fourth to needle #2, and so on. Now if you hold the 2 needles side by side and look at the knitting you have done, you will see that one side has a clear ridge from the cast-on, while the other side is smooth. The side with the ridge is the inside of the sock. Using a third DPN, divide the stitches on needle #2 so that each needle has 2 sts. Begin working in the round. Round 1, 3, 5, 7: K all sts. Round 2: (Kfb, k1) four times. 12 sts. Round 4: (Kfb, k3, kfb, k1) twice. 16 sts. Round 6: (Kfb, k5, kfb, k1) twice. 20 sts. Rearrange sts so there are 5 sts on the first needle, 7 sts on the second needle and 8 sts on the third needle. Round 8: (P1, k3) five times. Round 9: (P1, sl1, k2) five times. Round 10: Repeat round 9. Round 11: (P1, LC) five times. Round 12: Repeat round 8. Round 13: (P1, k2, sl1) five times. Round 14: Repeat round 13. Round 15: (P1, RC) five times. Rounds 16-19: Repeat rounds 8-11. Round 20: (P1, k3) twice, P1, K1. (10 sts of the round haven't been worked yet. These will now begin the short row heel.)
Short Row Heel
K9, w&t, p8, w&t, k7, w&t, p6, w&t, k5, w&t, p4 w&t, K5, w&t, p6, w&t, k7, w&t, p8, w&t, k9. Pick up one st in the gap between the heel and the instep. This st will be purled together with the first instep st. (end of heel)
Leg
Important Note: In round 1 only, remember to purl the picked up st together with the first st right after the heel is finished. Round 1: (P1, k2, sl1) five times. Round 2: Repeat round 1.
Leg, continued
Round 3: (P1, RC) five times. Round 4: (P1, k3) five times. Round 5: (P1, sl1, k2) five times. Round 6: Repeat round 5. Round 7: (P1, LC) five times. Round 8: Repeat round 4. Rounds 9-24: Repeat rounds 1-8 two more times. Rounds 25-28: Repeat rounds 1-4 one more time.
Cuff
The cuff is finished with a knitted on edging. This means you will not bind off in the normal way, but rather will knit an edging that travels around the top of the sock. The edging is connected to the top of the sock by SSKs that are formed using one st from the edging and one st from the sock. Also, the edging is worked back and forth in rows rather than in the round, so you will turn work at the end of each row. Using the backward loop method, cast on 2 sts. Turn work so yot can work back across the two sts you just cast on. Row 1: K1, ssk. (2 edging sts) Row 2: SI1 WYIB, YO, kfb. (4 edging sts) Row 3: K1, p2, ssk. Row 4: SI1 WYIB, YO, k2, kfb. (6 edging sts) Row 5: K1, p4, ssk. Row 6: SI1 WYIB, YO, k5. (7 edging sts) Row 7: Bind off 5 knitwise, ssk. (back to 2 edging sts) Row 8: SI1 WYIR. k1. Repeat rows 1-8 four more times. On the final row 8, you will be back to the starting point. Pick up 1 st from the base of the first repeat of the edging, and knit the 2 remaining edging sts together with the picked up st through the back loop. Break the yarn and thread through the last remaining st. Weave in ends and wet block For each of the points of the edging, pull it upward and twist clockwise to create the look of flames leaping up from the fire. Time for some S'mores!


