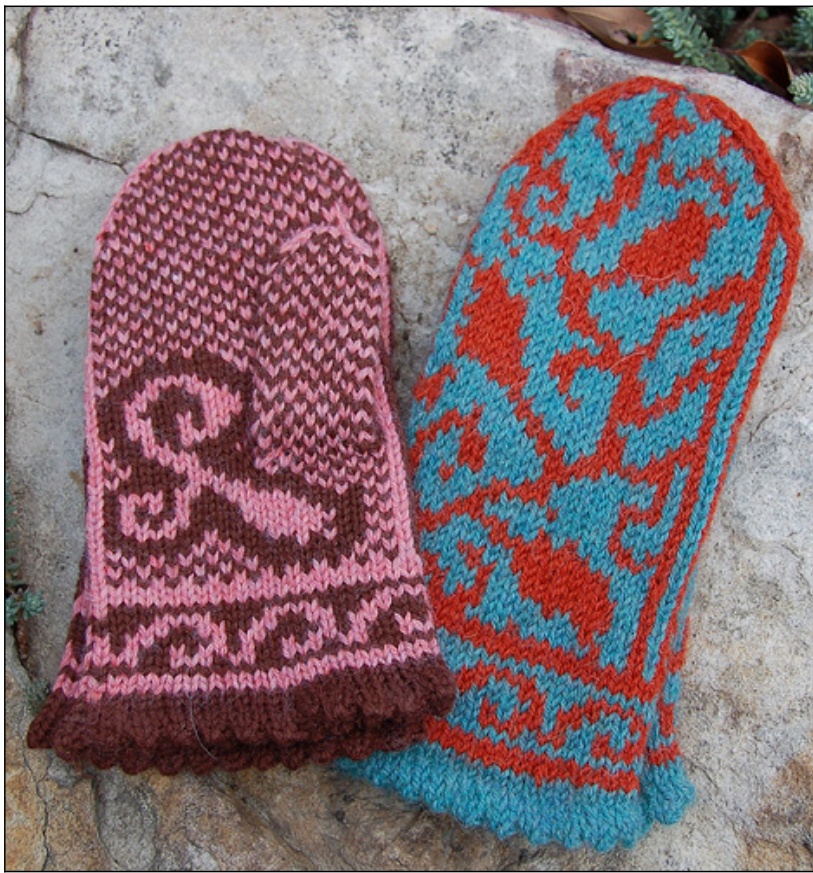
VINELAND MITTENS
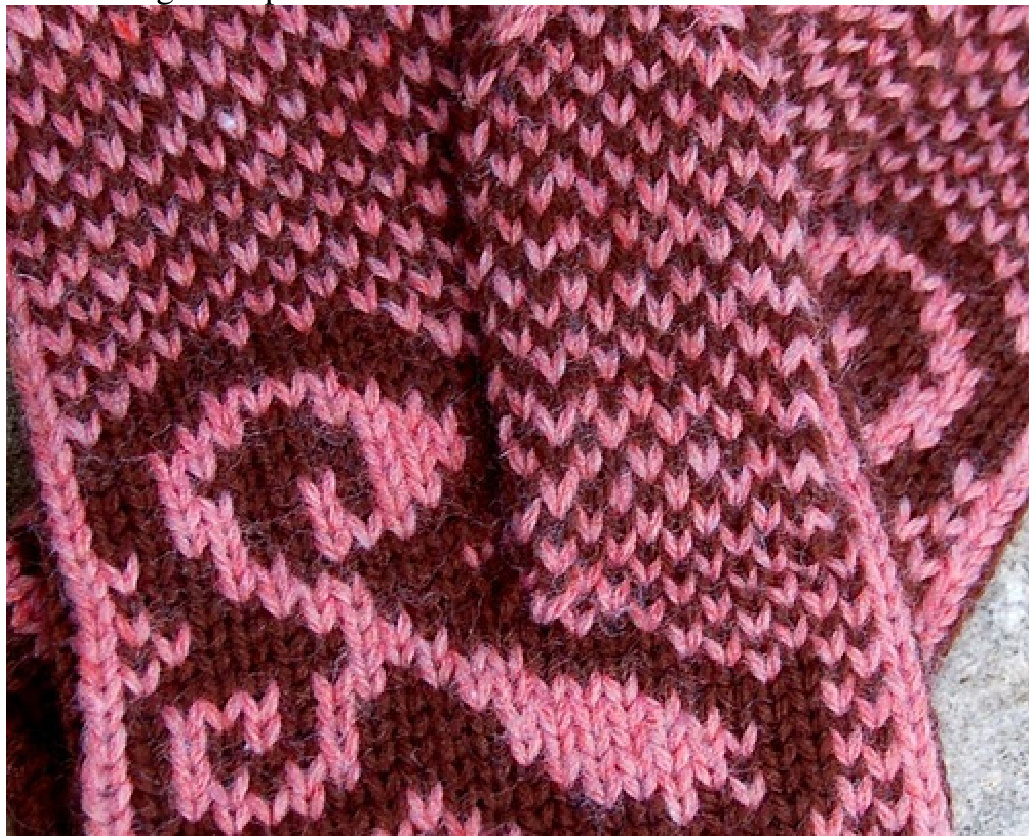
By: Jody Scofield These mittens were inspired by a visit to the Shenandoah Valley in Virginia. We visited several vineyards full of coiling vines and plump with fruit. SKILL LEVEL: Intermediate
YARN REQUIREMENTS:
2 colors of Worsted Weight yarn. Solid colored yarn will work best for this pattern Yarn used in this pattern $=$ Berroco Ultra Alpaca for orange and teal and Cascade 220 for pink and brown
SIZE
Dependent upon gauge...t's important to swatch!! Note: Both mittens in the picture to the right were knit on size 5 needles!
GAUGE:
To determine your gauge, work a 4 inch square in pattern. 4 inches equals: Small $=24$ sts across and 29 sts in height Medium $=22.5$ sts across and 27.5 sts in height Large $=20$ sts across and 24 sts in height
NEEDLES AND NOTIONS:
- Set of two circular needles size US 4, 5 or 6 (or size needed to achieve gauge) or a set of size US 4, 5 or 6 DPNs - Darning needle - Waste yarn for thumb
PATTERN NOTES:
When knitting more than 5 stitches in a row of one color, it is a good idea to twist your working yarn around the non-working yarn. This will help keep your two strands together and allow your tension to remain constant.
Overall Directions:
CO 48 stitches in Main Color (MC) Work picot edging in MC Work Mitten chart in MC and CC Place thumb stitches on scrap yarn Continue Mitten chart through row 60 Kitchener top of mitten Finish thumb Kitchener thumb Weave in all ends
Work Picot Edging: Use the Main Color (MC) for the entire hem
Rows 1-3: Knit Row 2: Knit Row 4: (Yo, K2tog) repeat around Rows 5-7: Knit
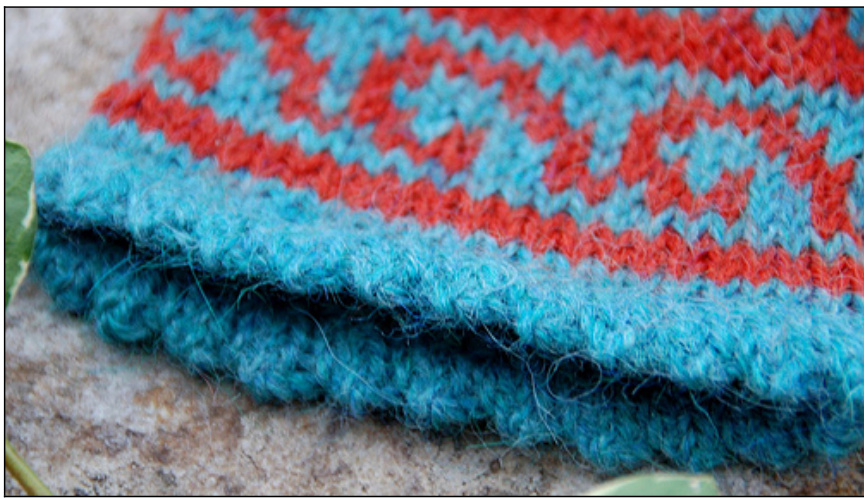
Row 8: Fold your work so that row 4 (the Yo, K2tog row) is in the middle and the first 3 three rows are on the inside of the mitten. You will now knit a row to join the first row with the current working row and create the picot hem. As you slide the needle through the first stitch, as if to knit, slide the needle through the first cast on stitch as well and knit them together. Repeat for all stitches around the mitten. This creates the hem.
Row 9: Knit 1 more round in MC
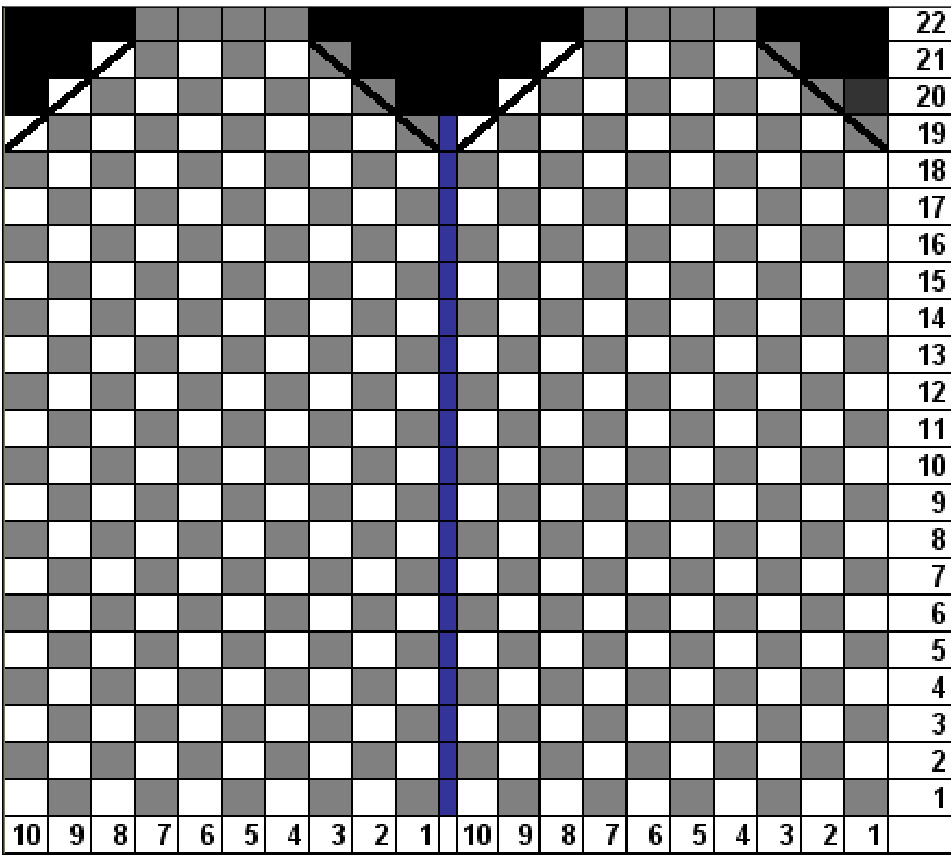
Work Mitten chart:
·Add in Contrast Color (CC), and begin knitting Chart A for the left mitten Note: When knitting more than 5 stitches in a row of one color, it is a good idea to twist your working yarn around the non-working yarn. This will help keep your two strands together and allow your tension to remain constant
Place thumb stitches on scrap yarn
When you get to row 25 with the red line showing the thumb placement, knit the 9 stitches with scrap yarn, then put those stitches back on the left needle and knit them again in pattern with CC and MC.
Continue Mitten chart
·Continue working Chart A to end - beginning your decreases at row 49 After completing your decreases you will be left with 6 stitches on each side (12 stitches total).
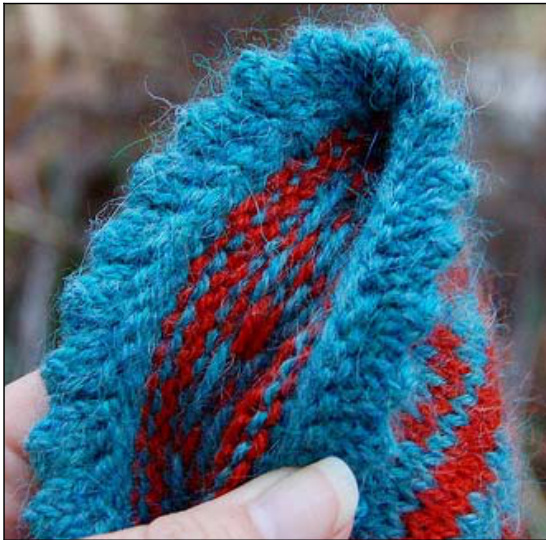
Kitchener top of mitten
Kitchener the top of the mittens using CC.
Finish thumb
●After finishing the mittens, carefully pick up the 18 thumb stitches from the scrap yarn. Pick up one additional stitch on each side to close the gaps for a total of 20 stitches. Finish the thumb by following Chart B.
Kitchener thumb
After completing Chart B, Kitchener the thumb using CC. Weave in all ends.
Make a second mitten - following Chart A for Right Mitten
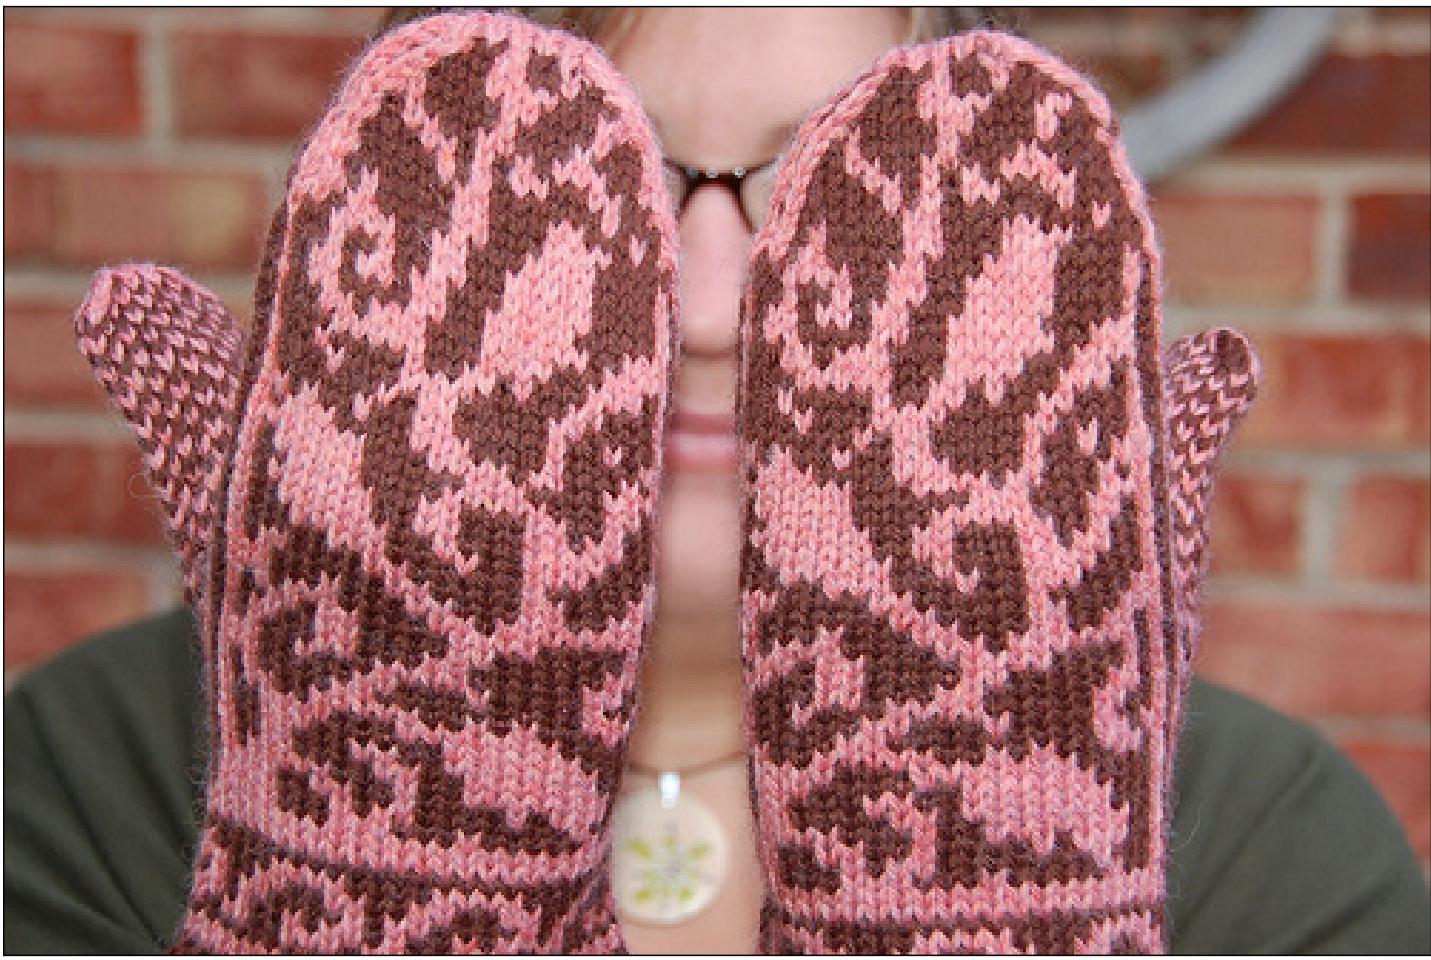

Chart A - Left Mitten
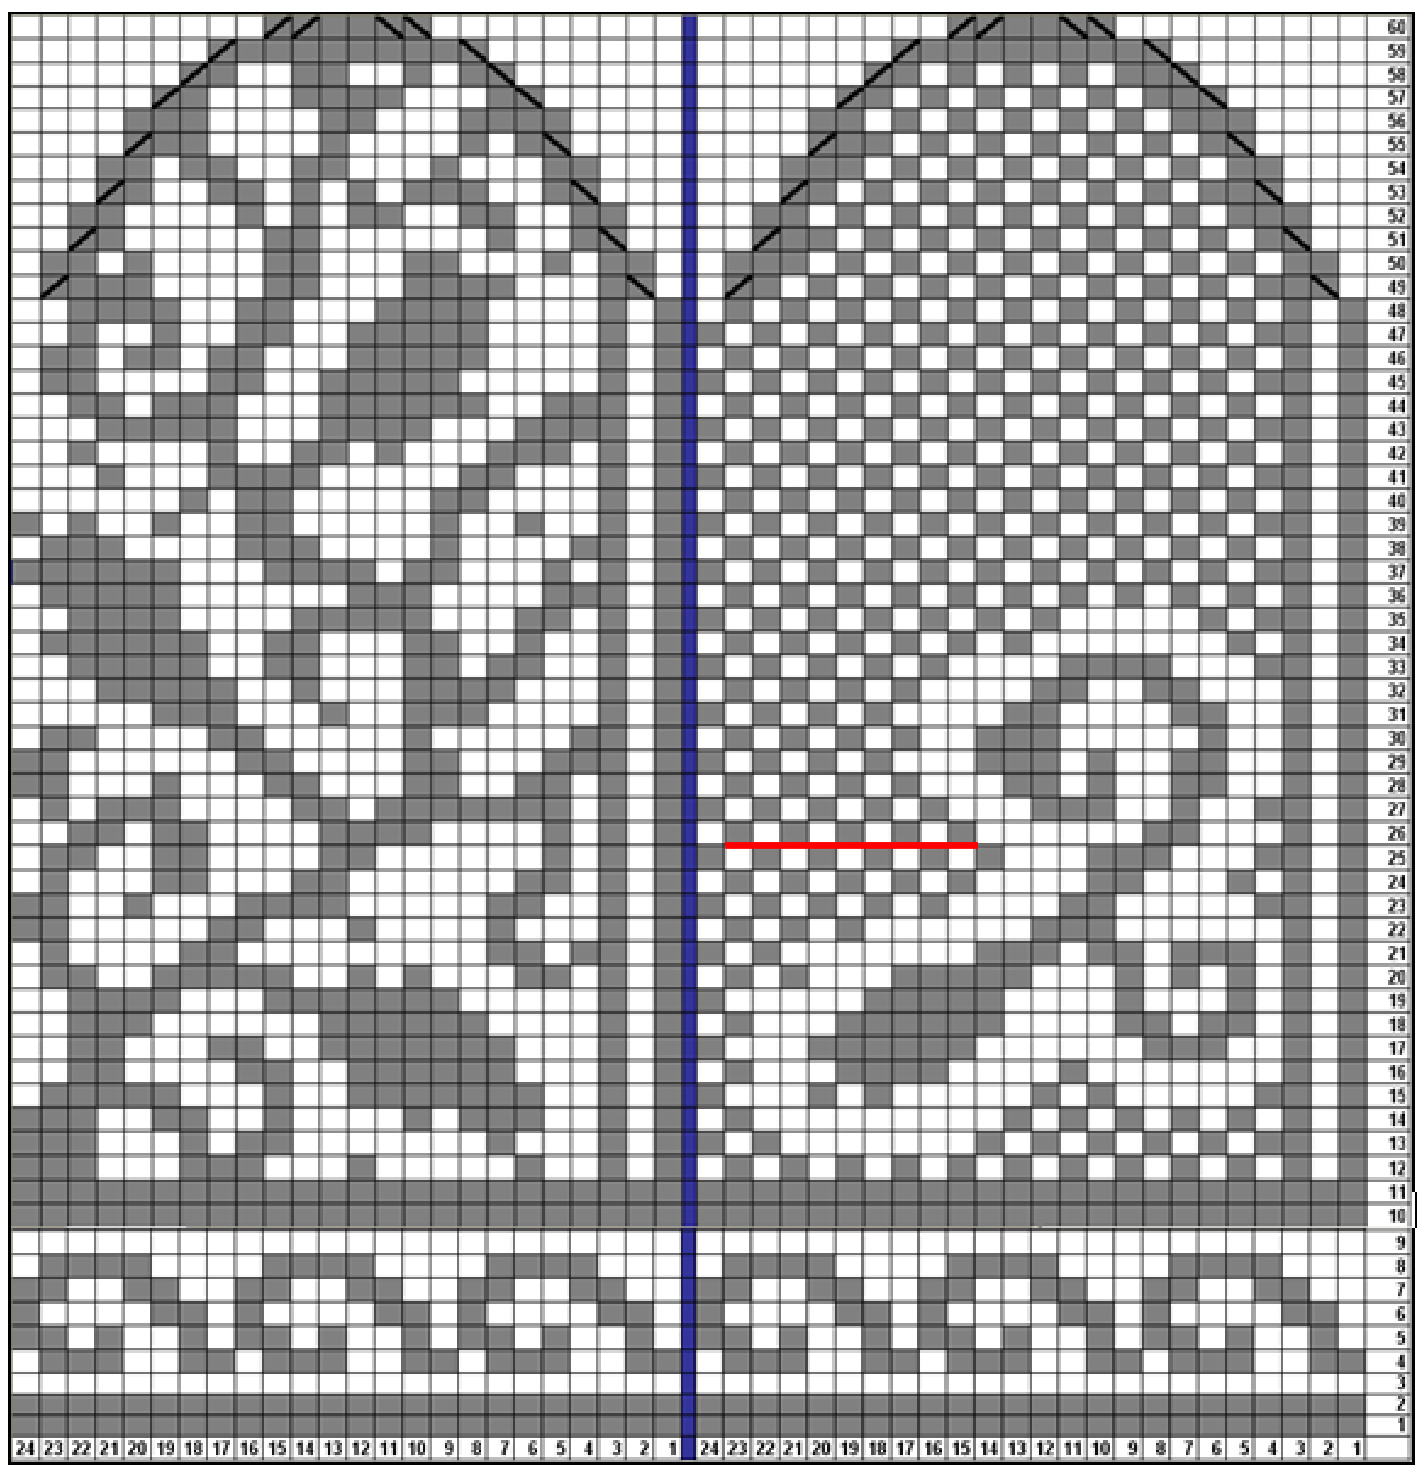

Chart A - Right Mitten
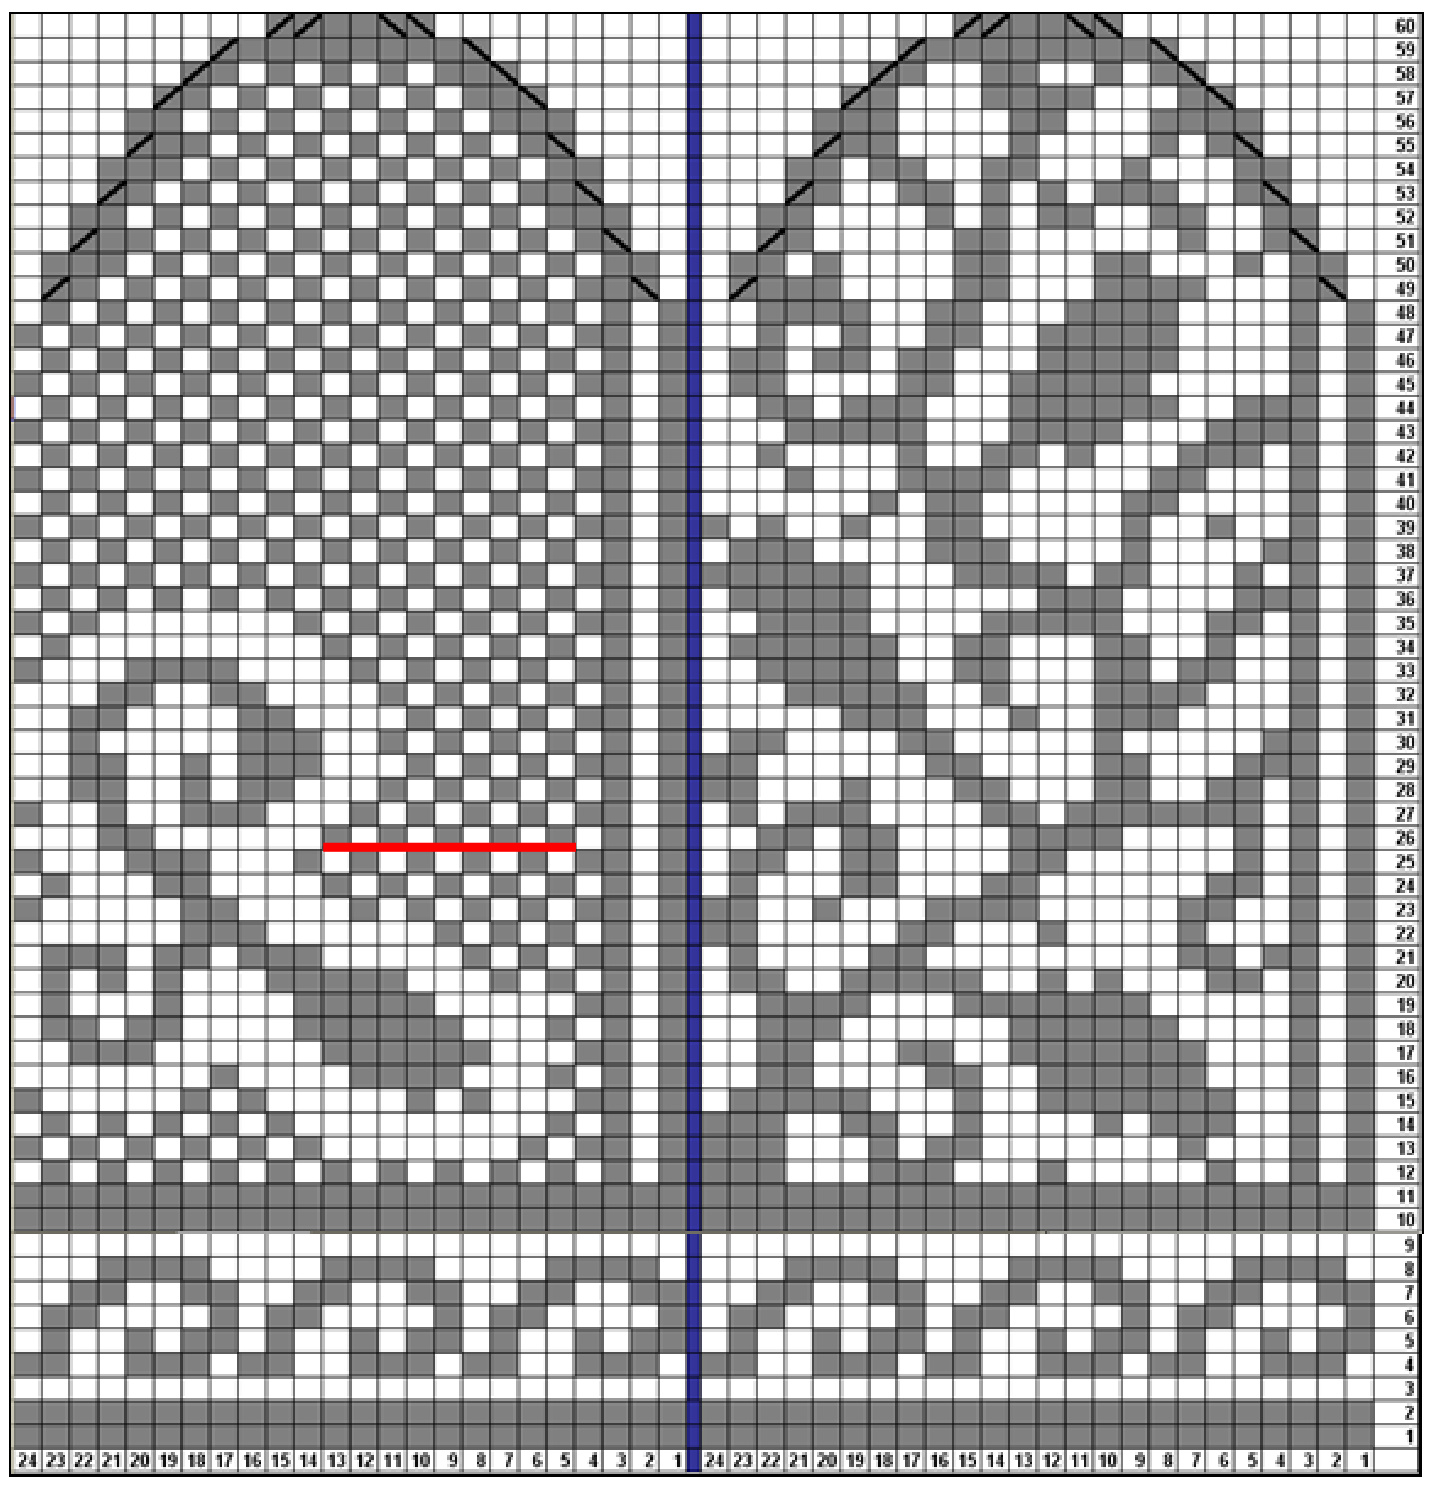
Chart B - Thumb