Meg
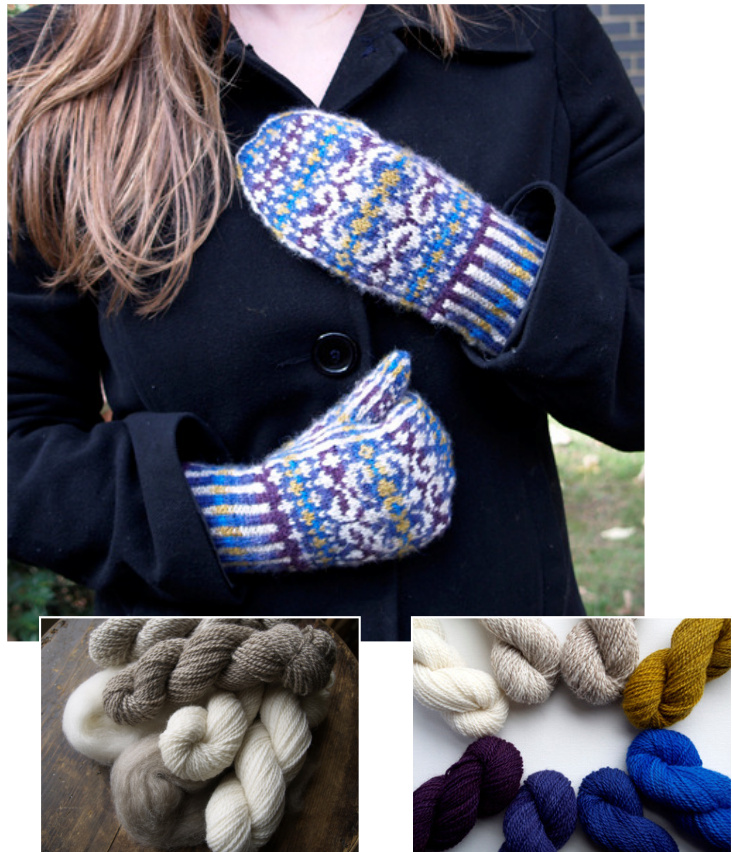
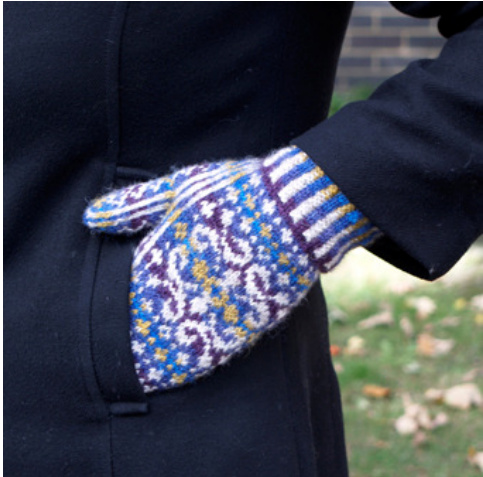
Spin A traditional Shetland yarn Dye A palette of glowing colours Knit These stunning Fair Isle mittens
I have always been intrigued and inspired by the beautiful colourwork patterns originating in Scotland's Fair Isle. Although two-colour patterns can be striking, I especially love the designs which are composed from a range of colours in sequence - blended and graduated to create a beautifully subtle but glowing effect. This tutorial takes you through the theory and process involved in dyeing the Fair Isle-inspired palette for these mittens. Also included are tips on creating a different colourway in your choice of shades. The mittens, knitted from soft handspun Shetland yarn, will definitely turn heads as they keep your fingers toasty and warm this winter. Full colour charts are included, along with detailed instructions.
Project File
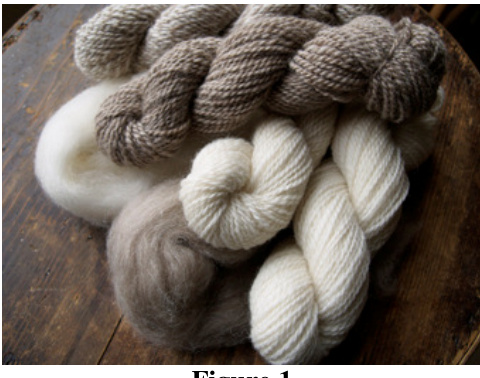
Fibre $160\mathrm{g}$ white Shetland tops $50\mathrm{g}$ light brown Shetland tops Equipment Hand cards; dyeing equipment; Dyes Landscape acid dyes in ‘Salmon Gum', Marine', and “Chamomile'.
Singles ratio: 8:1
Plying ratio: 11:1 Singles wpi: 30 Plied wpi: 14 Plied twist angle: approx 30 degrees Gauge: 8 sts and $8\,\mathrm{rows}=1$ inch in stranded pattern. Yardage: small amounts (approx $40\mathrm{m}$ of each of eight colours. $3\mathrm{mm}$ circular or double-pointed needles for your preferred method of knitting in the round; stitch markers; yarn needle; smooth waste yarn. lscuOiz Women's medium: to fit hand circumference of up to 8 inches. Notes are included for adjusting size further. ends loose inside a garment rather than weaving them all in. Fine Shetland tops work best for this project, but any medium fibre, such as BFL, could be substituted. If using a very smooth fibre, or smooth commercial yarn, be aware that you may need to darn or weave in all the colour change ends rather than leaving them to felt to the inside of the mitten. We will be spinning eight skeins of 2-ply yarn, each weighing $25\mathrm{g}$ . This is far more than you will need to knit the mittens, however, working with smaller amounts makes measuring the dyes rather more fiddly. Use the leftovers for a second pair or a matching hat or neck-warmer! For the four main colours, and CC1, plain white Shetland tops are used. For the remaining contrast colours, combine the white and light brown tops as follows: CC2: Using hand cards, blend 50/50 white and brown to create pale brown. Ply one single of white with one single of pale brown. CC3: Ply one single of white with one single of brown.
CC4: Ply two singles of brown.
Spinning
Traditional Fair Isle colour knitting uses Shetland wool, a soft, hairy fibre with a fineness of between 23 and 30 microns. The resulting stranded fabric is soft and warm and the slight halo of the yarn causes the stitches to meld together.
This clinginess in the yarn is also what makes it possible to use traditional steeking techniques, and to leave short For each skein, spin a smooth semi- worsted single and 2-ply for a resulting yarn measuring 14 wpi. Keep the twist angle fairly low when spinning and plying, this will optimise the melding of the stitches in the colour pattern. To finish, soak the skeins in warm water with a little fibre rinse added. Snap once or twice to distribute the twist evenly and align the strands. Leave to dry or proceed immediately to dyeing.
Dyeing
Colour patterns are used in many different ways in stranded knitting, from plain black and white patterns through to gloriously coloured garments with many different colours and shades. Traditional Fair Isle knitting which uses groups of progressively shaded colours can be absolutely stunning. By graduating the colours in both the foreground and the background we will create a deep, rich palette in which the colours truly glow.
The theory behind the colours
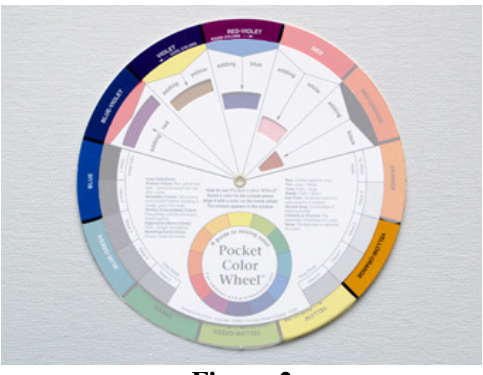
The colours we are working with draw on the Fair Isle technique of using a range of related colours which tone together, and then adding a striking accent colour to give life to the pattern. The colour sequence is arranged around the centre of the pattern, with the colours reflected in the same way as the symmetrical stranded pattern. Looking at the colour wheel (figure 2) you can see that the background colours are taken from one side of the wheel, and the accent - the gold - from the opposite side. Using colours from too many different areas of the wheel, or too much of any contrast colour, results in an overall effect which can look muddy and unharmonious.
A different colour range, with just as striking an effect, can be created by applying this idea to the colour wheel in a different position (figure 3).
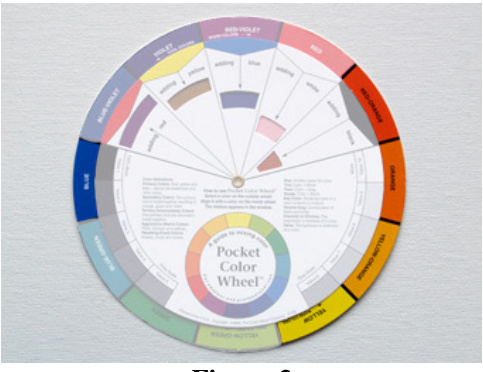
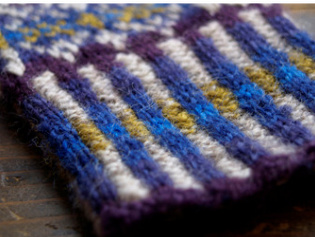
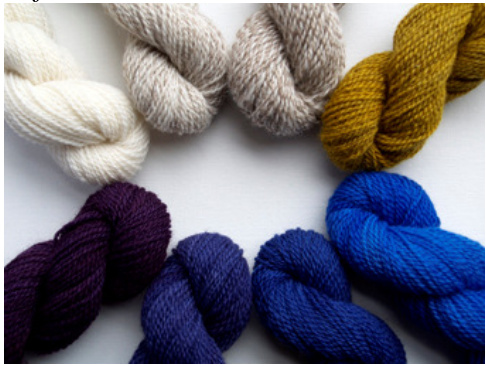
While the background blends in sequence from blue through to purple, the pattern colours also work in sequence, blending from white through to medium brown and then gold. The value of the colours also changes in sequence, varying from dark purple through to lighter blue, and in reverse from bright white through to the rich, dull gold.
Dyeing
MC1 to MC4 are dyed with varying proportions of Salmon Gum and Marine from Landscape to create the graduated hue sequence (substitute a cool blue and cool red from another brand if desired). CC4 is a skein of natural brown Shetland overdyed with warm yellow (Chamomile) to achieve the dull gold colour. Prepare stock solutions using $\%$ tsp (2.5 ml) dye powder to $500\;\mathrm{ml}$ water. Remember: if using a different brand, check the dye quantities recommended by the manufacturer. Mix the stock solutions together for each skein according to the table below (note how the total amount of solution varies from MC1 to MC4 to achieve the variation in value in the colours). Colour Marine Salmon Gum MC1 300 ml 300 ml MC2 375 ml 125 ml MC3 350 ml 50 ml MC4 375 ml CC4 500 ml Chamomile Dyeing: 1. Soak the skeins in water and half a cup of vinegar for half an hour. Drain off excess water. Ensure that the skeins are tied loosely to allow the dye to penetrate under the ties (remember tie-dyeing!) 2. Using small oven-proof dishes, lay out the wet skeins and pour over the dyes. Check that all the yarn is completely covered by the dye. 3. Seal with aluminium foil and bake at $150^{\circ}\mathrm{C}$ for 45 minutes. Leave to cool completely before rinsing carefully in tepid water with a little fibre rinse added. Squeeze out excess water gently and leave to dry. Safety Note: As always, when dealing with chemical dyes, remember safety considerations. Never use utensils or equipment which are used to prepare food, always wear gloves and cover kitchen surfaces with disposable paper. When using the oven method, be particularly careful of escaping steam. Before:
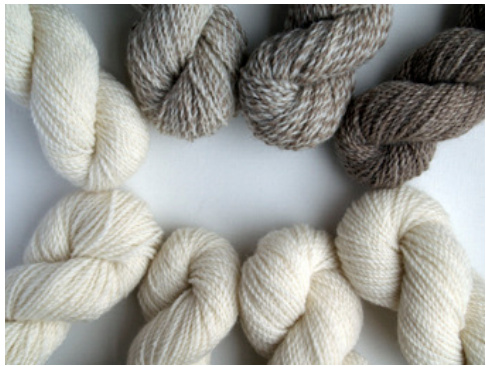
And after:
Dyeing a different palette
Don't be afraid to experiment with different colours when dyeing for colourwork designs. The principles outlined here can give a range of possibilities with the help of the colour wheel, but they are certainly not the limit of your options. Bright, variegated yarns look striking against a dark, solid background. Or try two or three colours only for a less muted effect. Tip: When mixing colours to dye your handspun, practice on fibre or plain commercial yarn first. It may take a while to find the exact proportions you like and it would be a shame to waste your yarn. I dyed batches of purple fibre for weeks before finally settling on the colours used here!
Pattern
Pattern Notes
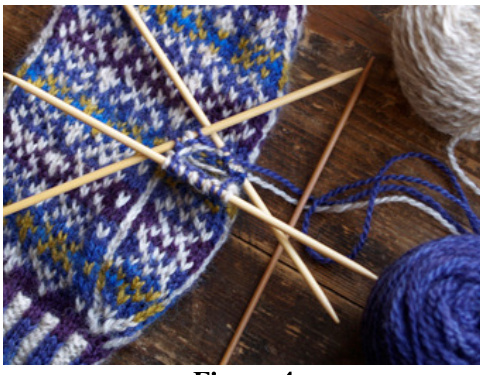
The mittens are knitted from the cuff upwards entirely in the round. Using the magic loop method or two circular needles makes it easy to distinguish the palm and back of the mitten, place stitch markers to help keep your place if working with dpns. The thumb is shaped in the Norwegian style, combining an increased gusset with casting on of extra stitches for the back of the thumb. This technique gives a close fit, while making it possible to continue the palm pattern on both sides of the thumb. Full colour symbol charts are included, along with black and white charts for those working with two colours or variegated yarn. For this design, the contrast colour is intended to be dominant, i.e. coming from below. Regardless of which way you choose to assign dominance, be sure to remain consistent throughout. At each colour change simply break yarn with approx 1 inch tail and tie on the new colour with a square knot. As long as you are using a fuzzy yarn such as Shetland, these ends will simply felt to the inside of the mitten and will not come undone.
Requirements
Yarn: $15{-}20\mathrm{g}$ each of eight different colours of 2-ply Shetland yarn, or $100\mathrm{g}$ in total if using a different colour range. Needles and notions: $3\mathrm{mm}$ circular or double-pointed needles for your preferred method of knitting in the round; stitch markers; yarn needle; smooth waste yarn.
Abbreviations
MC1 - Purple CC1 - White MC2 - Purple-blue CC2 - Light brown MC3 - Blue-purple CC3 - Med brown MC4 - Blue CC4 - Gold sl - slip m1 - make one stitch using a firm backwards loop. k2tog - knit two together ssk - slip next two sts as if to knit, return to left needle and knit tog through back loops.
Instructions
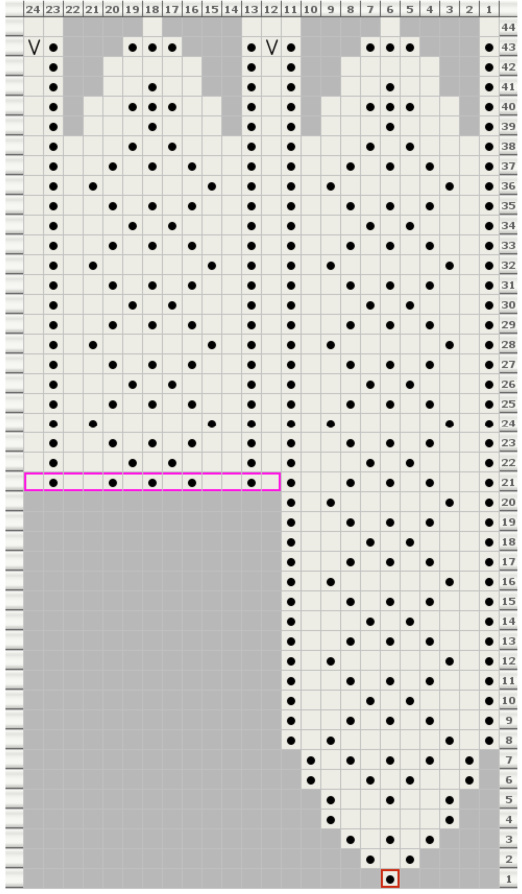
Note: Charts B and C are identical for each mitten. Chart A - Palm is shown for right mitten only. When working left mitten, reverse Chart A so that thumb gusset falls on sts 24-30 of chart. Using MC1, cast on 56 sts. Use a purled cable cast on or doubled long-tail cast on to prevent the cuff rolling. Work back along the cast on for round one, then join in the round, being careful not to twist. Round 1: k2 MC, k2 CC, rpt to end. Round 2: k2 MC, p2 CC, rpt to end. Continue working round 2 in ribbing as set, and following the colour sequence below: Cuff colour sequence: Round 1: MC1 CC1 Round 2: MC1 CC2 Rounds 3-5: MC2 CC2 Round 6: MC2 CC3 Rounds 7-9: MC3 CC3 Round 10: MC3 CC4 Rounds 11-12: MC4 CC4 Round 13: MC3 CC4 Rounds 14-16: MC3 CC3 Round 17: MC2 CC3 Rounds 18-20: MC2 CC2 Round 21: MC1 CC2 Round 22: MC1 CC1 For a shorter cuff, omit rounds 4, 8, 15 and 19. Next round: using MC1, knit, increasing 1 st at either side of cuff (58sts). Next round: using MC1, knit.
Commence pattern:
Round 1: Attach MC2 and CC2 and work across row one of Chart A - Palm (27 sts). The stitch outlined in red marks the beginning of the thumb gusset, place a marker either side of this stitch. Work across the 31 sts of Chart B - Back. Round 2: Work across Chart A to the first marker, m1 in CC, k1 in MC, m1 in CC. Work remainder of round 2 in pattern. Round 3: Join CC3 and work across Chart A to the first marker, k1 in CC, m1 in MC, work in pattern from Chart C - Thumb until one st before next marker, m1 in MC, k1 in CC. Work remainder of round 3 in pattern. Continue working each round of the three charts in this manner, increasing the thumb gusset when indicated on Chart C. The thumb is outlined by knitted sts in CC, make each new st in MC adjacent to the knitted outline sts. Work in pattern until end of round 20. Round 21: Work 3 sts in pattern, slip 11 sts of thumb chart onto waste yarn, cast on 7 sts in pattern across gap (outlined in green on Chart A). Work remainder of round 21 in pattern (64 sts). Continue working in pattern from Charts A and B until end of round 35.
Decrease mitten top:
Round 36: k1 in MC, ssk in CC, work in pattern to last 3 sts of Chart A, k2tog in CC, k1 in MC, ssk in CC, work in pattern to last 2 sts of Chart B, k2tog in CC (60 sts). Continue decreasing in this manner where indicated on the charts, working all decrease sts in CC, until end of round 53 (32 sts). Round 54: working in MC only, kl, sll, ssk, k to last 4 sts of Chart A, k2tog, sl1, k1, sll1, ssk, kto last 3 sts of Chart B, k2tog, sl1 (28 sts). Round 55: working in CC only, sl1, ssk, k to last 3 sts of Chart A, k2tog, sl1, ssk, k to last 2 sts of Chart B, k2tog (24 sts). Round 56: working in MC only, k1, ssk, k to last 3 sts of Chart A, k2tog, k1, ssk, k to last 2 sts of Chart B, k2tog (20 sts). Break yarn leaving a long tail. Slip one st from palm to back to leave 10sts on each of two needles. Turn mitten inside out and join sts using a 3-needle bind off.
Thumb:
Slip thumb sts from waste yarn back onto needle. Join yarns and work in pattern across first 11 sts of row 21 of Chart C. Pick up and knit 13 sts in pattern from sides of thumb and cast on sts (outlined in pink on Chart C).
Work in pattern to end of round 34. Check thumb length and work four more rounds if necessary before decreasing. Work thumb decreases according to Chart C in the same way as for mitten top. Work slip-stitch round 43 in CC only (12 sts). Work round 44 in MC only (8 sts). Break yarn leaving a tail, thread yarn through remaining 8 sts at top of thumb and draw tight. Repeat instructions for left mitten, remembering to reverse Chart A so that thumb is on opposite side. To Adjust Size Blocking colourwork gives a great deal of flexibility in sizing, bend your wire frame to fit your desired finished size and stretch the mitten over it. By using a larger needle (e.g. $3.25\mathrm{mm})$ or slightly heavier yarn, the entire mitten can be graded up by one or two sizes. You could also alter the pattern in various ways as follows: To add width: A few extra stitches added at the sides will have no effect on the design. Add one extra MC st on either side of Chart B, and one extra CC st either side of Chart A if desired. The same can be done for the thumb, increasing the gusset by a couple more sts at round 9. To add length to mitten: Add one further pattern repeat (12 rounds) after working round 35, before starting decreases. To add length to thumb: Place the thumb gusset higher by working four more rounds after round 20 and before placing thumb stitches on waste yarn. Increase the length of the thumb by working extra rounds in multiples of four. Note: when lengthening pattern, remember to keep colour sequence correct. Colour pattern repeats over 15 rows, from round 14 to round 28.
Finishing
Darn in ends on cuff for the first inch so they do not show at cuff edge. If using Shetland or similar yarn,the remaining ends can be left hanging. Check that knots are firm, and clip ends shorter (minimum half an inch) if desired. Darn in loose ends left at top of mitten and bottom and base of thumb. Use tails to close any gaps at base of thumb. Soak mittens in warm water and fibre rinse for 10 mins then block over a wire frame to size (a bent coat-hanger works well). Use a yarn needle to neaten any uneven stitches in the colourwork. This tutorial and accompanying pattern are copyright $\copyright$ 2008 to Diane Mulholland and sold for your own personal non-commercial use only. No distribution or reproduction, electronic or otherwise, is permitted without express written permission of the copyright owner. If you have any questions or queries related to this Spin! publication please do not hesitate to contact me, I'm happy to help! Photographs: Diane Mulholland and Michelle Lieberson Notes: Red border -Marks first stitch of thumb gore chart. Green border $^-$ In pattern, cast on indicatd no of sts. Pink border - In pattern, pick up and knit indicated no of sts.
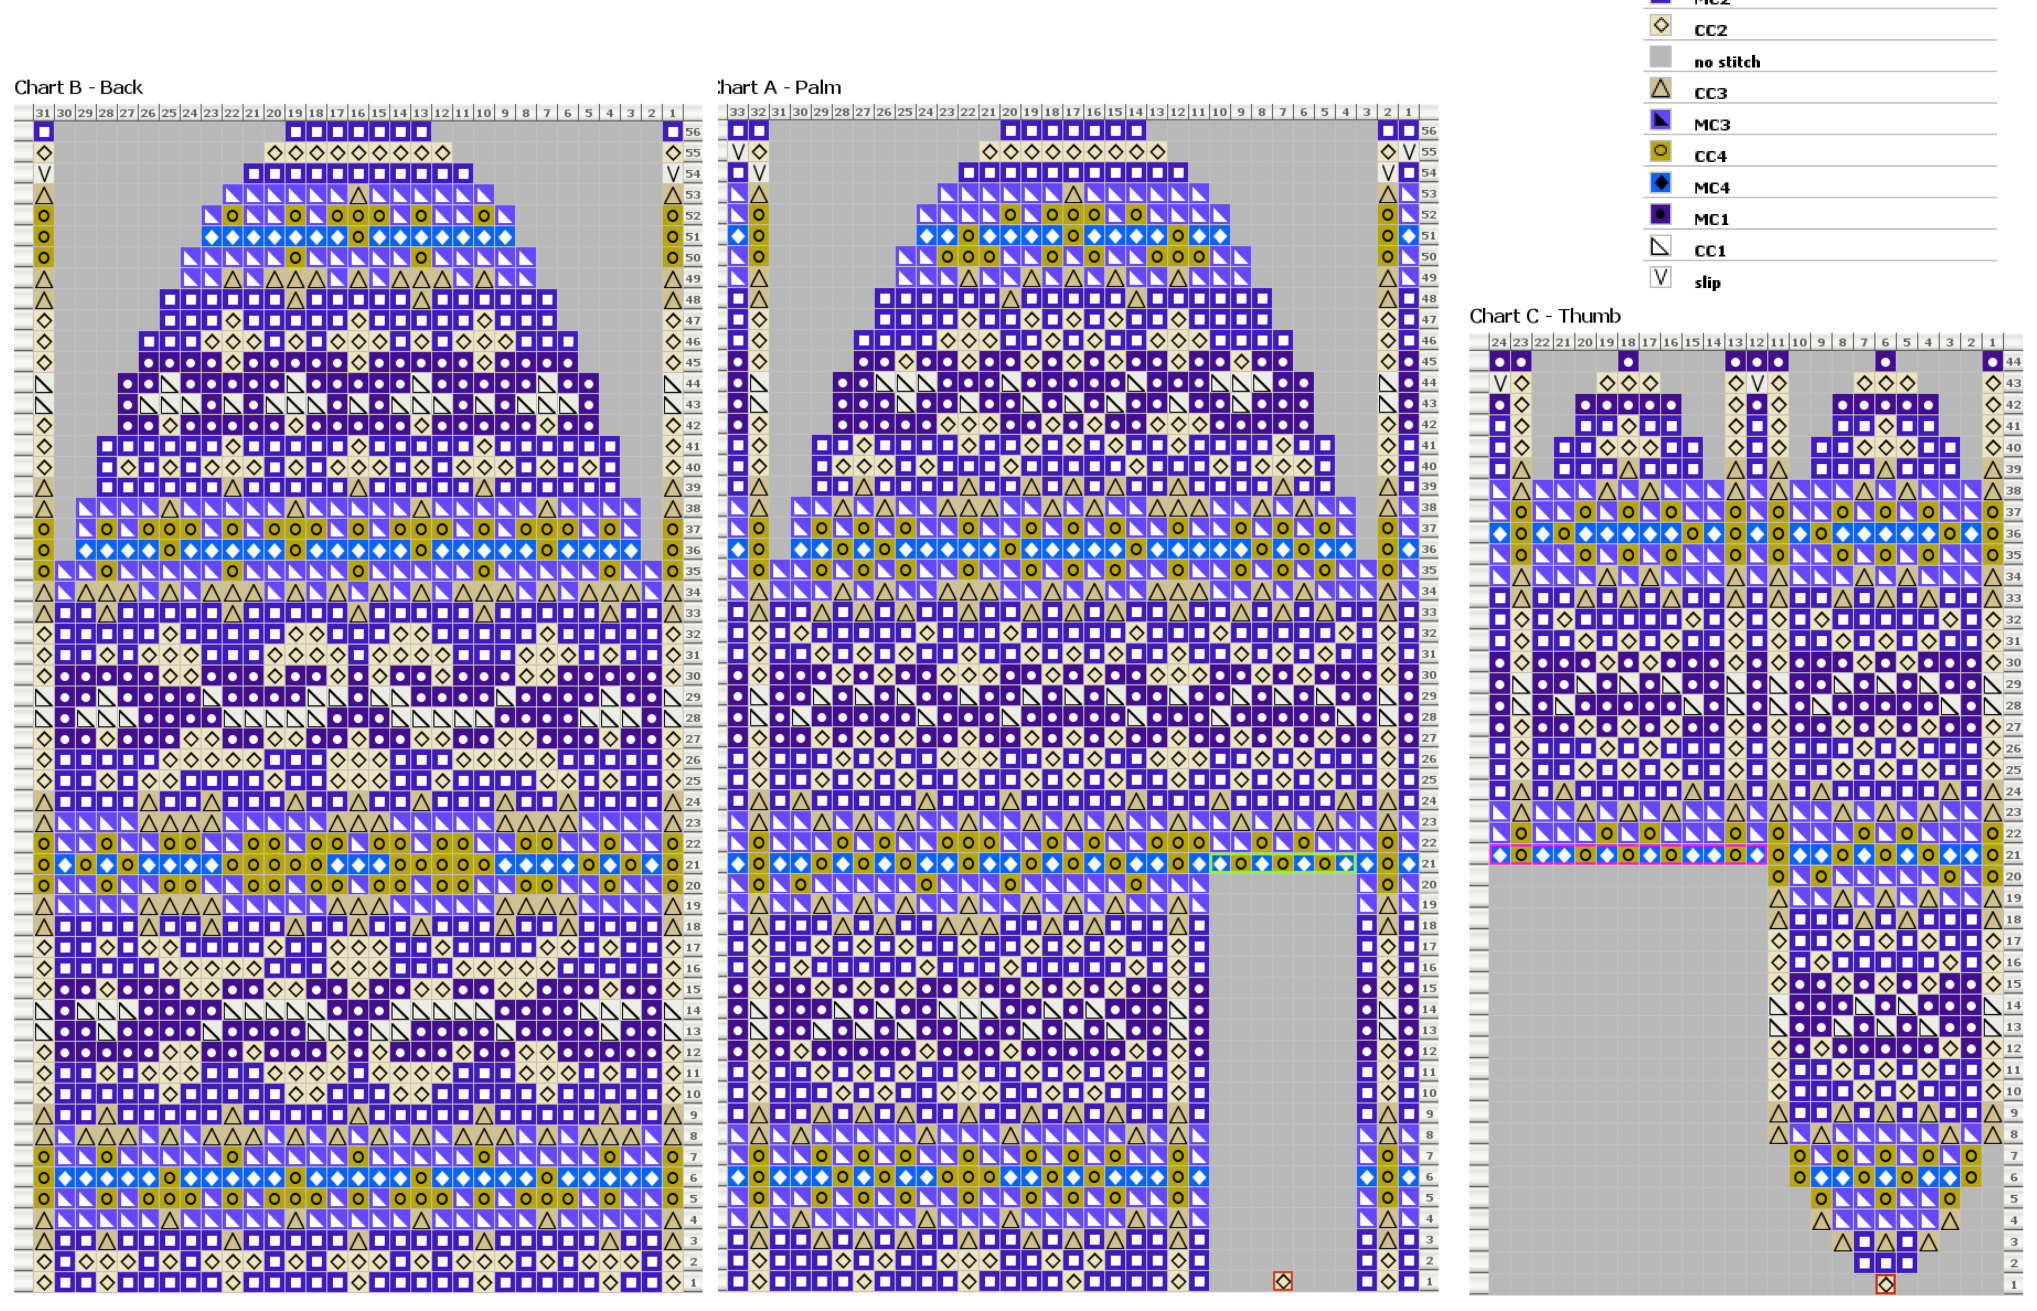
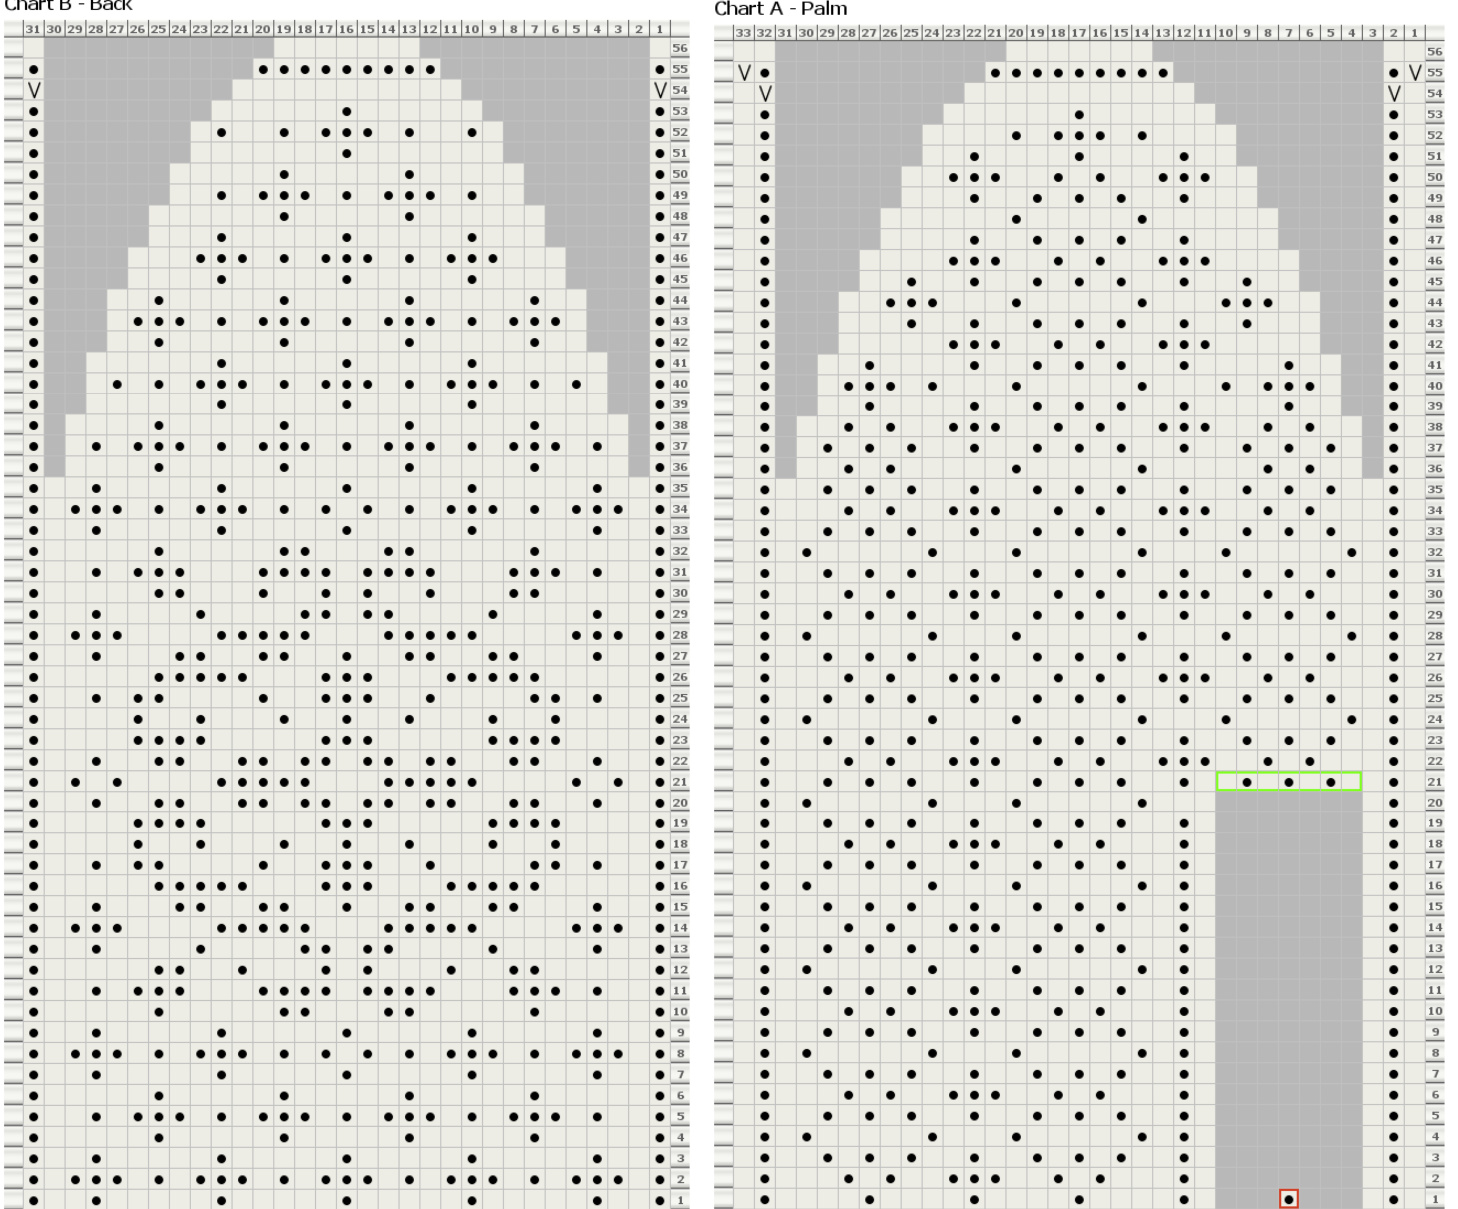
Chart C - Thumb