Quilted-Look Knitted Beanie Pattern
By Rhea Allais This beanie is very simple to knit, and can be made with any weight of yarn, just be sure to knit to a tight gauge. You will want to use a size smaller needle than you are used to using with any given yarn. For example, I normally knit a super bulky yarn, like Lion Brand Wool-Ease Thick & Quick with a size 13 needle, but for this pattern, I use a size 11. The instructions are the same for all yarn weights— you may cast on any multiple of 4 to get the size you want, the suggested numbers given will create a hat to fit 20-22 inch head sizes.
MATERIALS
For Super Bulky weight yarn: 160 yards of super bulky yarn, such as Lion Brand Wool-Ease Thick & Quick, Hobby Lobby Effortless Super Bulky, or Loops & ThreadsCozyWool Size 11 US 16 inch circular needle Size 11 US double point needles For Chunky weight yarn: 200 yards of bulky weight yarn, such as Lion Brand Wool-Ease Chunky, Brown Sheep Lamb's Pride Superwash Bulky, or Brown SheepShepherd'sShades Size 10 US 16 inch circular needle Size 10 US double point needles For Worsted weight yarn: 250 yards of worsted weight yarn, such as Lion Brand WoolEase Worsted, Brown Sheep Lamb's Pride Superwash Worsted, Patons ClassicWool Worsted,or Cascade 220 Size 7 Us 16 inch circular needles Size 7 US double point needles For all sizes/weights: Scissors, yarn needle, stitch marker, and 3" pom pom maker (optional)
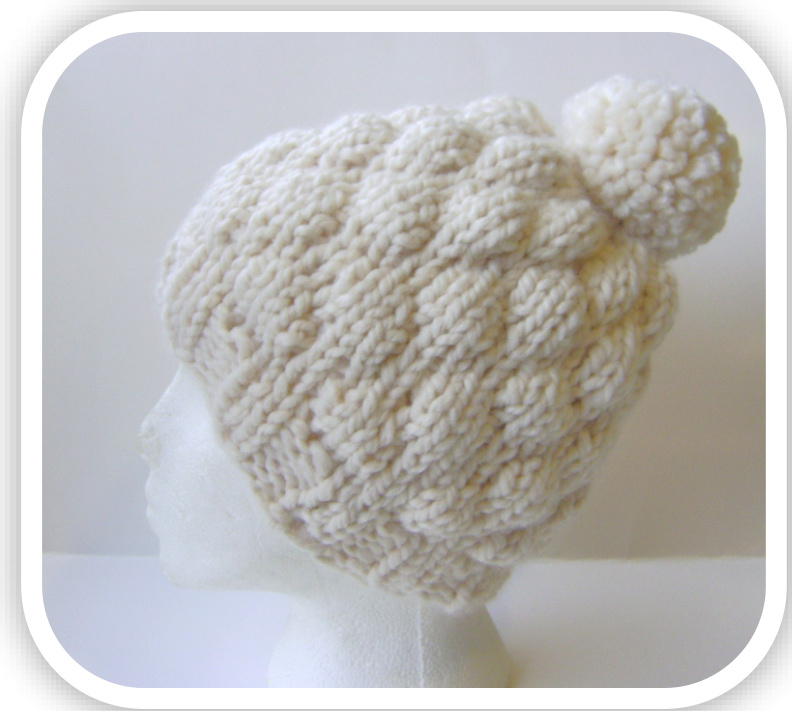
Knit with Lion Brand Wool-Ease Thick & Quick, Fisherman

Legend: K: knit P: purl Drop 5 stitch (D5S): counting the stitch on the needle as #1, the one below it from the last row as #2, insert your needle into #5 and knit into that stitch. Your work will have a more uniform look if you do not remove #1 from the needle, simply go on to the next stitch, and let #1 slide off the needle as you work the next stitch and slide it off the needle. You may unravel the dropped stitches as you go along, or do them all when finishing. K2tog: knit two stitches together
INSTRUCTIONS:
Starting with your circular needle, cast on: 48 stitches with Super Bulky yarn OR 60 stitches with Chunky yarn OR 88 stitches with Worsted weight yarn Join and begin knitting in the round, placing marker at end of row: Row 1: \*K2, P2\* to end of row Continue working in 2 x 2 rib for 1-2 inches until brim is desired length. Now, for the body of the hat: Row 1-5: knit around Row 6: \*D5S, k3\*repeat to end of row Row 7-11: knit around Row 12: k2, \*D5S, k3\* repeat to last two stitches, D5S, k1 Repeat rows 1-12 until this section is at least 6 inches long, ending with row 6 or 12 of pattern before starting decreases. For a more slouchy version, work in pattern for at least 8 inches. For the hats that are pictured, I knit 36 total rows in the body for the super bulky, 42 for the chunky, and 48 for the worsted.
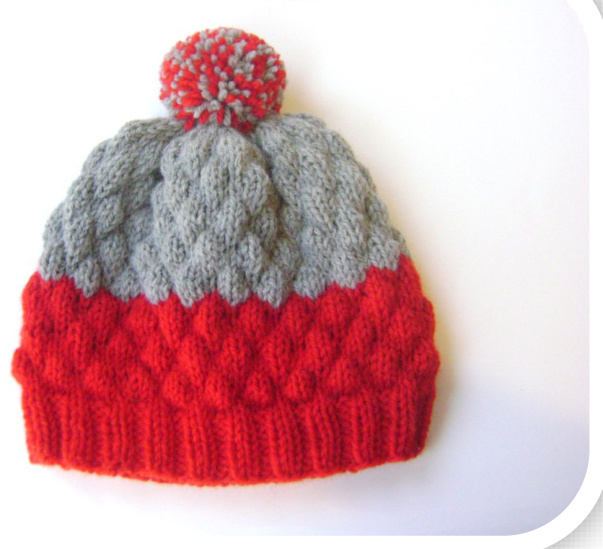
Knit in Patons Classic Wool Worsted, Bright Red and Gray Mix. If you would like to incorporate stripes or color changes into your hat, you should change yarn colors on row 1,2, 7 or 8 of the pattern stitches. This hat also has a 2-1/2" pom pom, slightly smaller than the others shown.
Decreases:
Row 1: knit around Row 2: k2tog all around (switch to magic loop or DPNs) Row 3: knit around Row 4: k2tog around Row 5: knit around (stop here for super bulky & chunky versions) Row 6: (worsted version only) k2tog around Break off yarn with at least a 12 inch tail. Using a yarn needle, thread end through all the remaining loops, pull snug, and fasten off. Weave in ends. With hat inside out, unravel three of the dropped stitches from each D5s. If desired, make a pom pom (a 3" pom pom is shown, made with a Clover pom pom maker), and stitch to the top of the hat.
In progress photo: this is what the hat looks like before you unravel the dropped stitches.
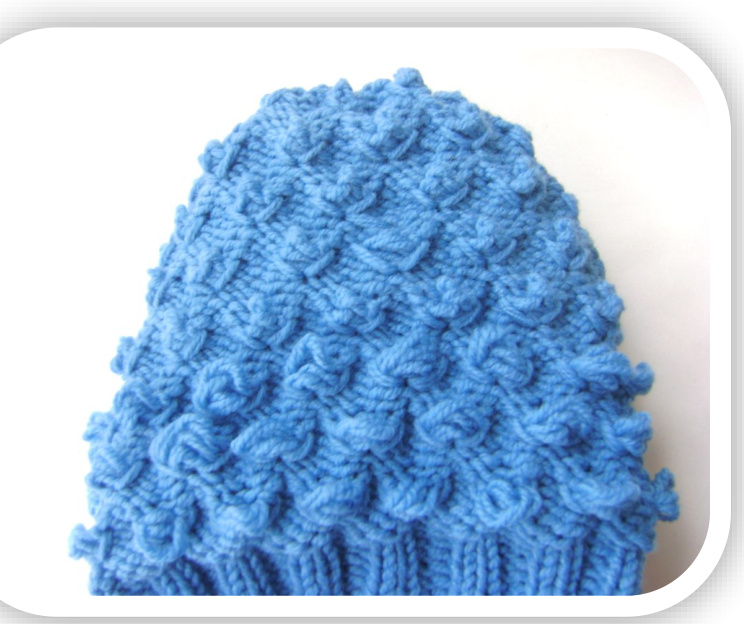
In progress: this is how the inside of the hat appears. The first three rows of dropped stitches have been unraveled, the upper 4 rows still need to be unraveled.
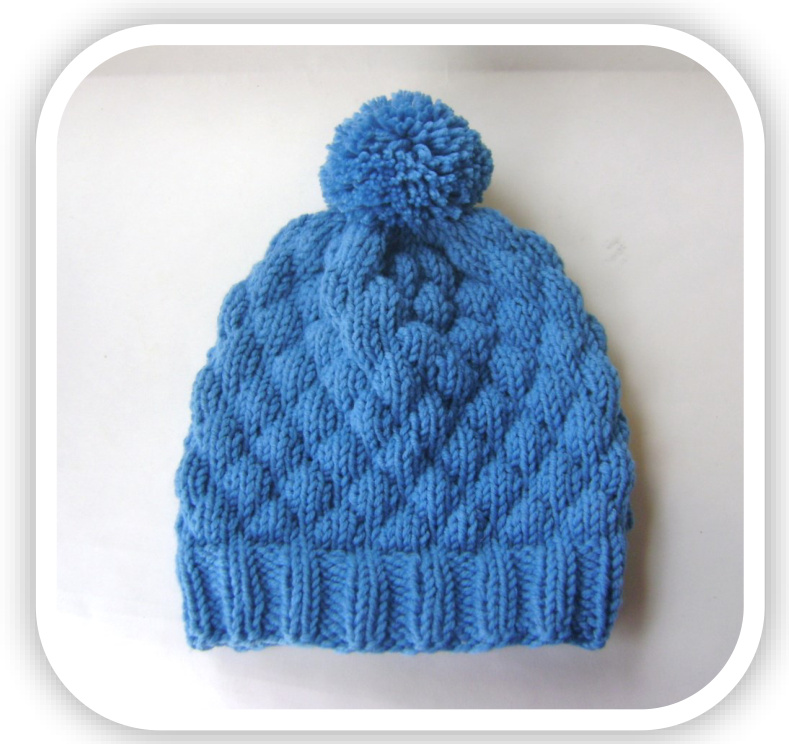
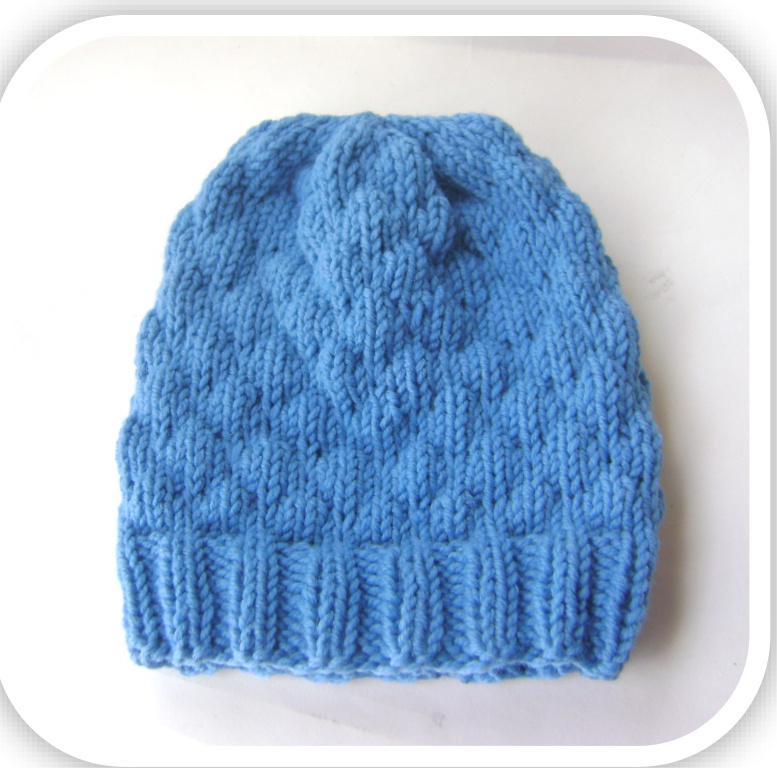
And, this is the hat after all the dropped stitches have been unraveled, and the pom pom attached. Copyright 2014, Rhea Allais. This pattern and photos may not be re-produced in any media or reprinted without permission from the author.


