Twisted Mirrors by Crafts Meow
:n Clark, Ravelry ID: TheCraftsMeow - buy yarn at CraftsMeow.etsy.co This is the PERFECT sock for someone just learning socks with cables or for toting with you because there is no complicated pattern or counting involved. It is also a great pattern to learn to do toe-up, two-at-a-time Magic Loop. I always knit socks 2-at-a-time because I lose focus easily and I'd never do the 2nd sock. Give 2-at-a-time a try.. you may never go back to DPNs and if you suffer from SSS, it may just cure you of the disease! What you need: 47" circular needles, size 1.5 or size needed to get 8 to 8 1/2 stitches per inch. I used one needle size smaller than that for the toe and got 9 /2 stitches per inch. I prefer knitting the toe with a smaller needle just because I like the toe gauge to be tighter. 4 stitch markers, and a cable needle (I use a dpn as a cable needle) BUY HAND-DYED CRAFTSMEOWYARN,ALLDESSERT-INSPIRED,AT CRAFTSMEOW.ETSY.COM. THESE SOCKS WILL LOOK BEST KNITIN A MONOTONEORSEMI-SOLIDYARN. The socks pictured were knit with the recipient's yarn, which was Regia Galaxy Color in grey/black. Because this particular yarn pools in a Saturn-y type of swirl pattern, and we wanted the socks to be true mirror images, we knit one sock pulling from the center of the skein and the other sock pulling the yarn from the outside of the skein. Voila! The swirls are reversed too. Abbreviation key: pm = place marker sm = slip marker kfb = knit into the front and back of stitch cn = cable needle SSS = Single Sock Syndrome (a disease nobody wants) Socks are designed toe-up using Judy's Magic Cast On. See http://www.knitty.com/ISSUEspring06/FEATmagiccaston.html for detailed instructions. These are EASY to do two-at a time! If you haven't tried this method, I urge you to do so. To avoid “laddering” be sure to pull the 2"d stitch really tight each time you flip the needles to do the next set of stitches... Step 1 (Toe): Using smaller needles and Judy's Magic cast on (or your preferred toe-up cast on), CO 24 stitches, 12 per needle, from the first ball of yarn. Then repeat the process with the second ball of yarn. Work 1 round even on each sock, pulling ends tight to avoid gaps at toe. The biggest challenge when you're first learning to do 2-at-a-time is getting the yarn “stuck” in between the needles. If you do this, ignore it... when you get back to that point you'll be able to free it up and continue. Increase Row: Kfb, k to last 2 stitches, kfb, k1. Repeat for bottom of foot. Repeat this increase row every row until there are 44 stitches, 22 per needle. I know that many toe-up patterns call for increasing every other row. I prefer this method, increasing every row for the first 10, because it gives a more rounded toe that is more comfortable to wear.
Even Round: work even
Repeat the Increase and Even rounds until you have 64 stitches, 32 for the instep and 32 for the bottom of the foot. \*\*This pattern is easy to customize for size. If you need fewer stitches or more stitches to obtain proper fit, simply adjust the number of stitches to what you need. Keep the cable panel set 11 stitches though...and remember when you get to the heel you will need to adjust from the written pattern to accommodate the number of stitches you use.
Begin Pattern:
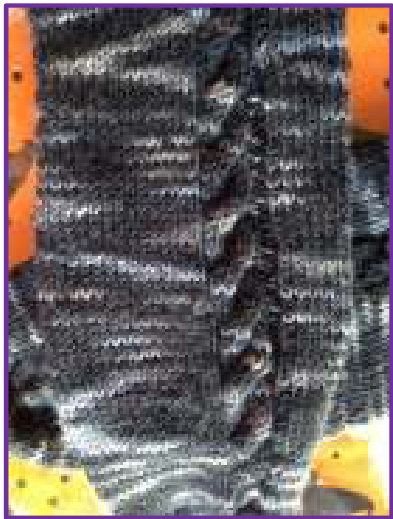
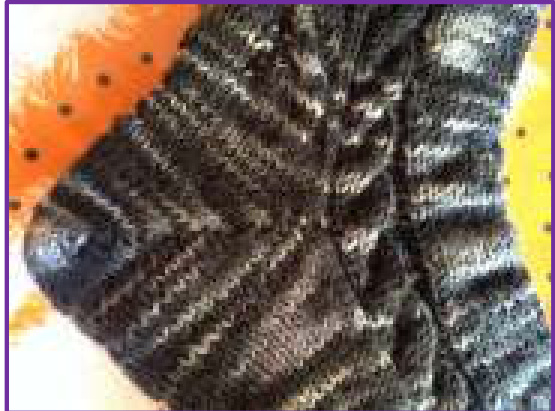
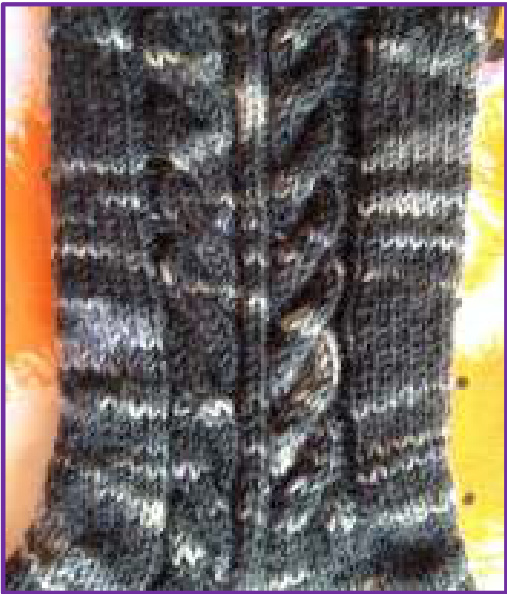
Note\*\*Pattern is worked over 11 stitches on the outside of the foot and leg, and are mirror images of each other. The remaining 21 stitches of instep are stockinette, as are the 32 sole stitches. The marker is used simply to separate the 11 pattern stitches from the other 21 on the instep, to avoid having to count.
Left sock:
Cable Round: k1, p2, slip 3 stitches to a cn and hold in front, k3, k3 from the cn, p2, place marker, k21 Plain Rounds: k1, p2, k6, p2, sm, k21 Knit all sole stitches Repeat the Cable Round followed by 6 Plain Rounds until the sock measures 1.5’ shorter than you want it.
Right sock:
Cable Round: k21, place marker, p2, slip 3 stitches to a cn and hold in back, k3, k3 from the cn, p2, k1 Plain Rounds: k21, sm, p2, k6, p2, k1 Knit all sole stitches Repeat the Cable Round followed by 6 Plain Rounds until the sock measures 1.5” shorter than you want it.
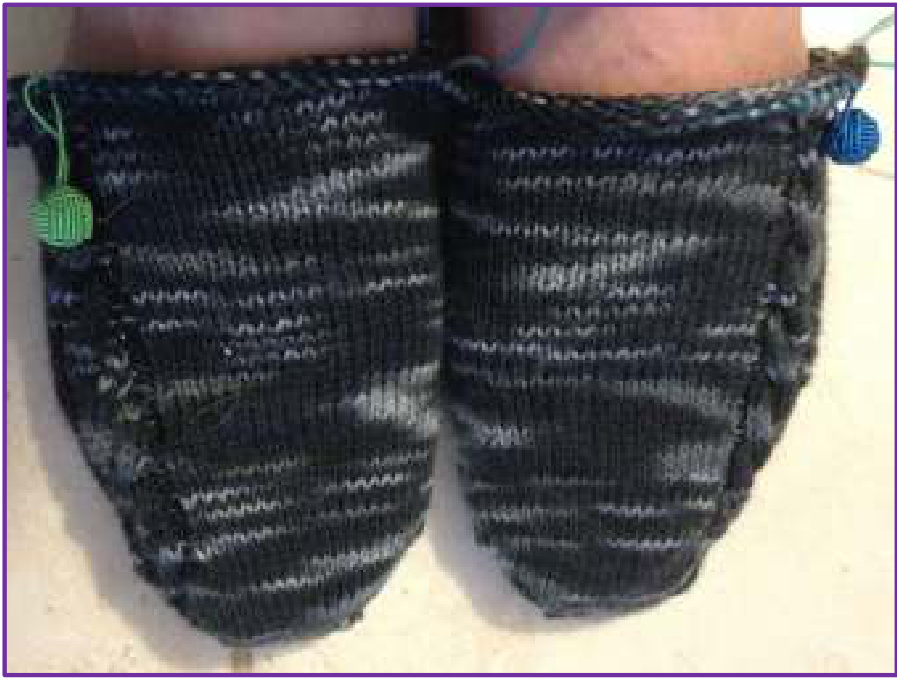
Short-Row Heel: Working only on sole stitches and just one sock (let the other sock hang on the cable and it won't be in the way). Bottom half of the heel: Knit across first 31 stitches of the sole, wrap and turn the last stitch (bring yarn forward between the needles, slip the stitch purl-wise, wrap the yarn around that stitch and slip it back to the left needle. Turn. When you turn, you have one un-worked stitch on what is now the right needle, and the working yarn wrapped around it.) Purl the first 30 stitches, wrap and turn the last stitch as you did before, but this time bring the working yarn to the back between the needles, slip the last stitch, wrap the yarn around the stitch and then slip it back, turn. You now have one un-worked stitch on the right needle with the working yarn wrapped around it.) Repeat this process, each time wrapping the last stitch next to the last wrapped stitch. Continue in this manner until you have 11 wrapped stitches on each side and 10 live stitches in the middle. Top half of the heel: You should have ended on a WS row, so beginning on the RS, knit until you get to the first wrapped stitch. Lift its wrap so that both the stitch and its wrap are on the right needle, place them both back on the left needle, and knit them together as you would normally knit a stitch (through the front). Wrap the next stitch (it will have 2 wraps), and turn. Purl across to the first wrapped stitch. As before lift its wrap and the stitch so they are both on the right needle, place them back on the left needle, and purl them together through the back. The reason for this is to hide the wrap and make both sides look the same. It twists the stitch so that the wrap is on the inside of the sock. Continue in this manner, each time knitting the double-wrapped stitch and wrapping the next, until all stitches have been knit (or purled through the back) and you have 32 sole stitches live on the needle. Repeat the heel on the right sock, and you should end ready to begin work going up the legs, once again working both socks at the same time and working in rounds.
Go back to the pattern for the front of the socks, and when you get to the back, begin with the same row you're on in the front, and knit the pattern in reverse as follows (this gives you the cables on only the outside of the foot/leg):
Right sock:
Cable Round: k1, p2, slip 3 stitches to a cn and hold in front, k3, k3 from the cn, p2, place marker, k21 Plain Rounds: k1, p2, k6, p2, sm, k21
Left sock:
Cable Round: k21, place marker, p2, slip 3 stitches to a cn and hold in back, k3, k3 from the cn, p2,k1 Plain Rounds: k21, sm, p2, k6, p2, k1 Continue working the leg of the socks until they are the height you want them to be. Using the cable panel as a guide (the p2 on each side of the cable should continue), top off the socks with a k2p2 rib. Do not do the ribbing in the cable panel; instead, continue the cable all the way to the top. The sample socks pictured have one pattern repeat and the ribbing measures / inch. Bind off loosely - I've found Elizabeth Zimmerman’s sewn bind-off to be the loosest without being sloppy. It is never too tight or constricting. You can find instructions here: http://www.youtube.com/watch?v=MfnavSY2Rug
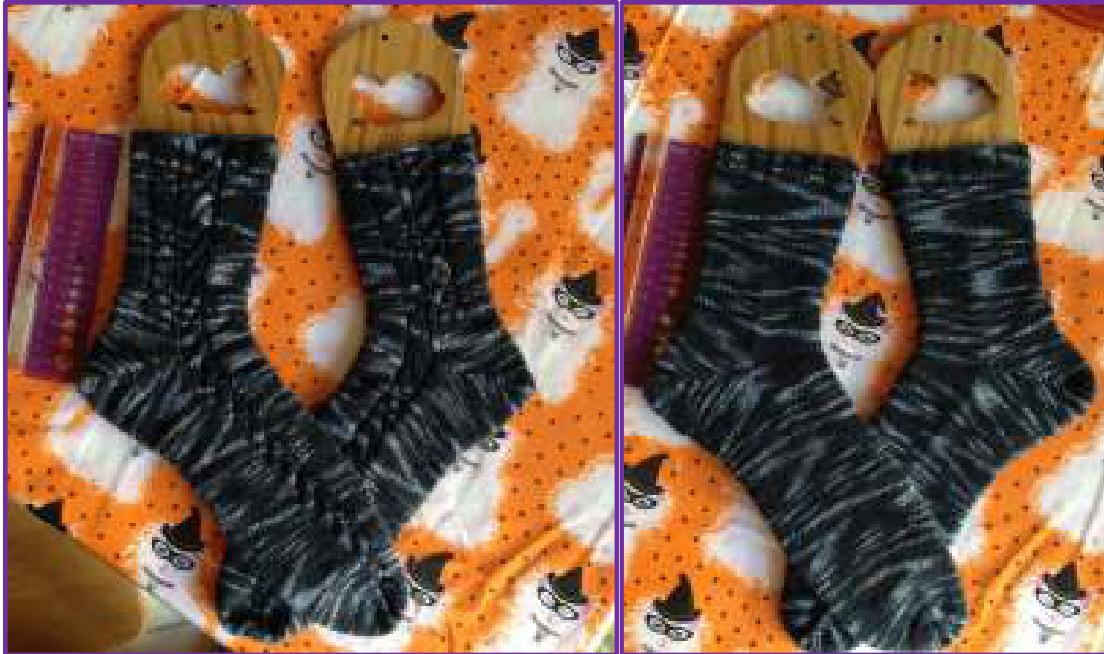
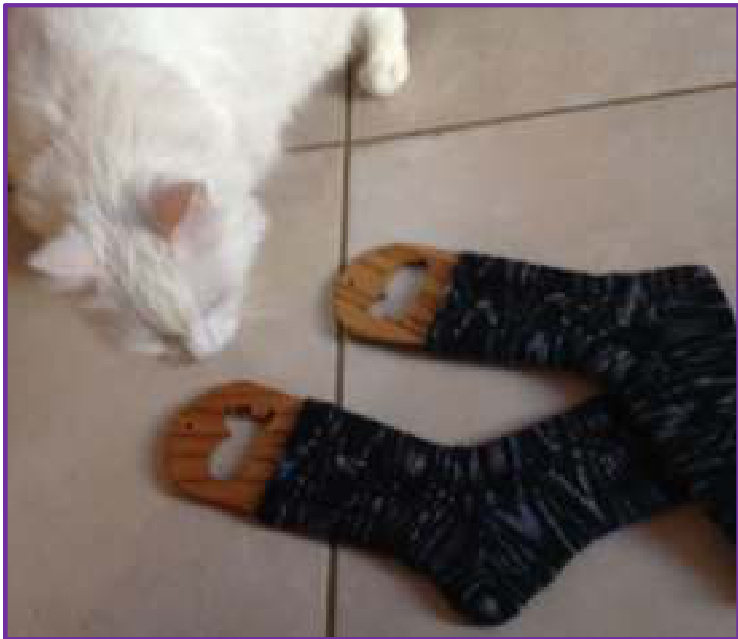
And of course, Chanel is the final QC: