Frosted Hazel Leaf
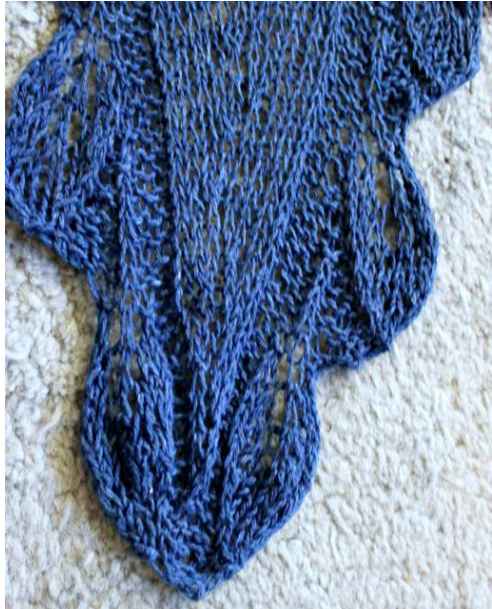
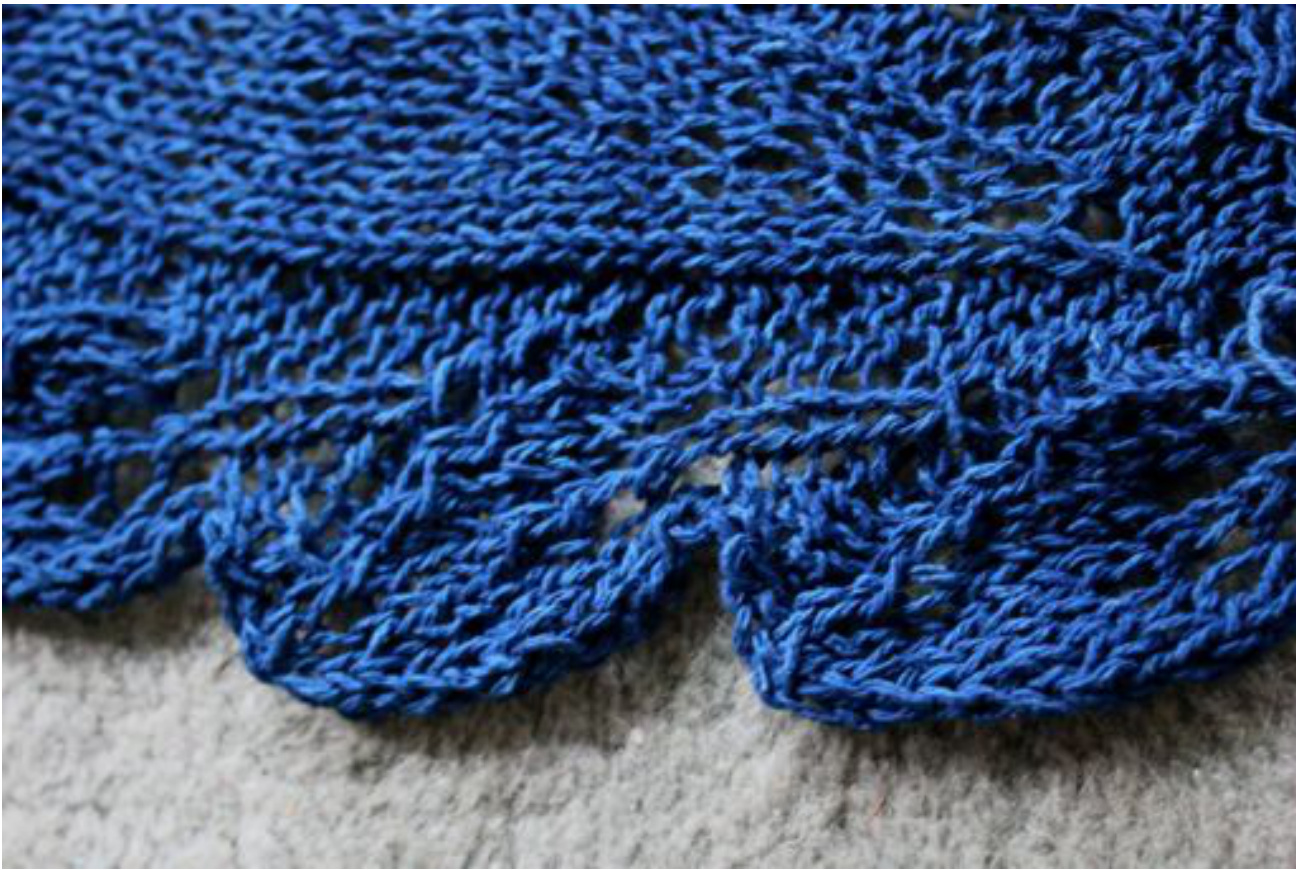
I have a special thing for leaf motifs in lace. They always enchant me, because they are often surprising in how life-like they are; and at the same timethey showcaselace techniques, such as yarn over eyelets, slanting decreases, and knit-purl textures. So ever since I finished dyeing my very first batch of raw silk and started looking for a scarf pattern for it, I looked for something supple, fresh, a plant motif that is memorable and also easy to knit. I found the leaf edging in a stitch dictionary, made a reverse version of it so it can line both sides of the scarf symmetrically, and tadam! Frosted Hazel Leaf was born, a
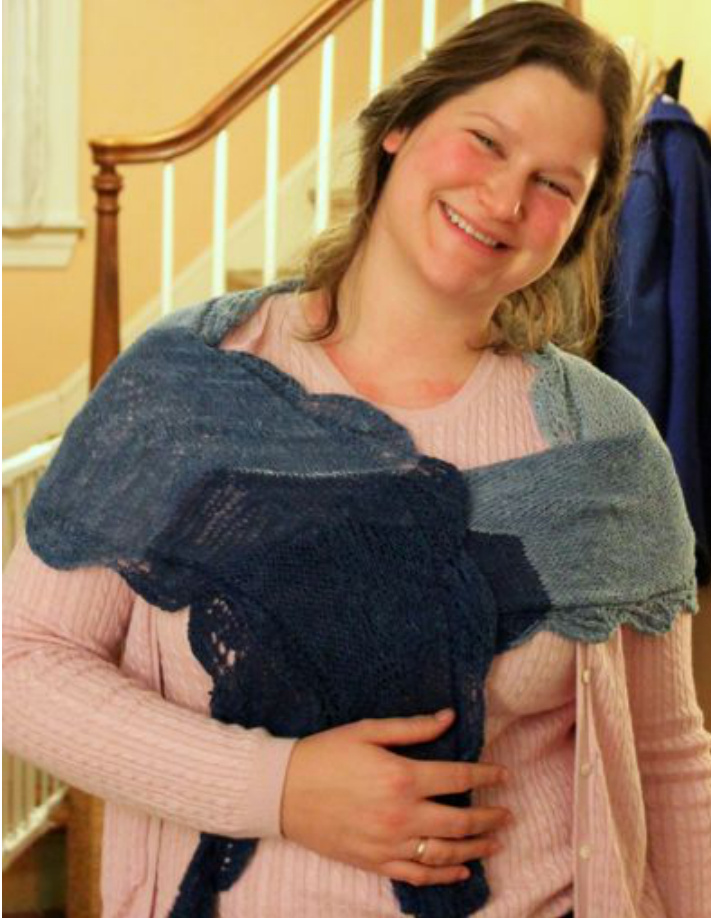
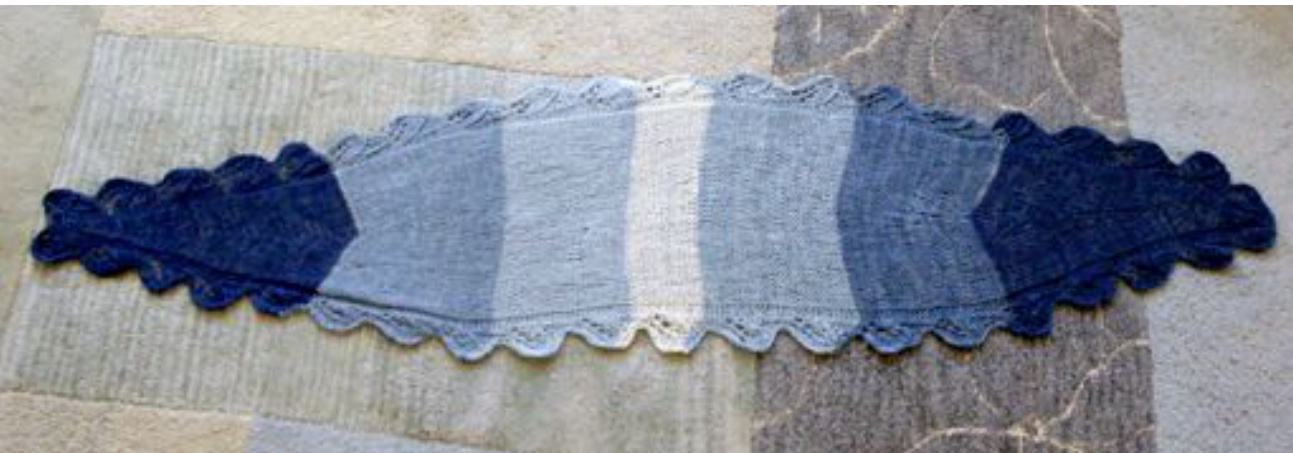
long oval silk scarf in an open lacy pattern, wide enough in the center to warm my arms as a light shawl, but warm enough to warm my neck when wrapped around. The yarn, Artemis, is a textured pure raw silk yarn, fingering weight. I used the colorway Glacier, which is dyed in a long self striping pattern, where the color transitions from a deep dark indigo through lighter shades of blue to a natural cream color over the whole hank. I used two hanks joined by their light end. I started the first hank at its dark end, knit to the light end, joined the next hank at its light end, and finished in dark blue again. This way the scarf has two blue ends and a creamy white middle.
www.BlueEarthDyeworks.com
Finished size: Approx. 70 inches (177 cm) long, 15 inches (38 cm) wide Skills needed: Basic lace increases and decreases
Tools:
US 6 (4 mm) straight needles, tapestry needle for weaving in ends, stitch marker or waste yarn
Materials:
Blue Earth Dyeworks Artemis (Raw Silk) 50 g Glacier colorway - 2 hanks (100 g total), or other fingering weight silk yarn Gauge: The example has 5 stitches and 5 rows in stockinette stitch, but gauge is not critical for this project
Pattern Notes
Structure: The scarf starts with 4 stitches on one end, and continues to increase and decrease an oval center panel in stockinette stitch flanked by two symmetrical garlands of leaves, separated by 2-stitch purl columns.
Abbreviations
CO - cast on, beg - beginning, k - knit, p - purl, RS - right side, WS - wrong side, pm - place marker, sl m - slip marker, yo - yarn over, mlp - make 1 in purl, LLinc - Left lifted increase (see explanation below), RLinc - right lifted increase (see below) , sts - stitches, kfb - knit into front and back, k2tog - knit 2 together, ssk - slip slip knit, sk2togp - slip 1 stitch, knit 2 together, then pass slipped stitch over them (2 sts decreased); ssskp - slip 1 stitch, slip slip knit, pass slipped stitch over (2 sts decreased), p2tog - purl 2 together, BO - bind off.
Definitions:
LLinc (Left lifted increase) - lift the stitch below the stitch you just knit on the right needle, and knit it. RLinc - (Right lifted increase) - lift the stitch below the stitch on the left needle, and knit it. www.BlueEarthDyeworks.com You can find illustrated demonstrations here: www.knitty.com/ISSUEwinter09/FEATwin09TT.php Written Instructions: Setup rows: CO 4 P2, pm, p2 Your marker will mark the center of your row throughout the piece. You will continue to increase and later decrease 1 stitch on alternating sides of the marker in each RS row to shape the oval center panel. Begin increasing: 1: RS: k, yo, k, mlp, sm, k, yo, k - end with 7 st on needle 2. WS: p3, sm, k, p3 - 7 sts 3. RS: k, yo, k3, sm, mlp, k2, y0, k - 10 st 4. WS: p4, k2, p4 , slipping marker - 10 sts Begin Leaf pattern below. Instructions for the center panel given in [] as those will change with pattern repeats, instructions for the leaf edges remain the same and are repeated identically up to the very last repeat. 5. RS: k2, yo, kl, yo, k- [Center: p, mlp, sm, p,] - kl, yo, kl, yo, k2 - 15 st 6. WS: p5, kfb - [Center: k3] - kfb, p5 - 17 st 7. RS: k3, yo, kl, yo, k2, pl, - [Center: p2, mlp, sm, pl] -p1, k2, yo, kl, yo, k3 -22 st 8. WS: p8, kfb, - [Center: k4,] - kfb, p8 - 22 sts 9. RS: k4, yo, kl, yo, k3, p2,- [Center: p2, RLinc, sm, p2, ]- p2, k3, yo, kl, yo, k4 - 29 sts 10. WS: p10, kfb, k1 - [k2, p1, k2,] -k1, kfb, p10 - 31 sts 11. RS: k1, ssk, k5, k2tog, p3, - [p2, kl, sm, LLinc, p2] - p3, ssk, k5, k2tog, k1 - 28 sts 12. WS: p8, kfb, p1, k1 - [k2, p2, k2,] -k1, p1, kfb, p8 - 30 sts 13. RS: k1, ssk, k3, k2tog, p2, kl, pl, - [p2, kl, RLinc, sm, kl, p2]- p1, kl, p2, ssk, k3, k2tog, k1 - 27 sts 14. WS: p6, kfb, k1, pl, k1 - [k2, p3, k2,] -kl, p1, k1, kfb, p6 - 29 sts 15. RS: kl, ssk, kl, k2tog, p3, kl, pl, - [p2, k2, , sm, LLinc, kl, p2] - pl, kl, p3, ssk, k1, k2tog, k1 - 26 sts 16. WS: p4, kfb, k2, p1, k1 - [k2, p4 k2] -k1, p1, k2, kfb, p4 - 28 sts 17. RS: sk2togp, BO4 in knit, p, kl, pl,- [p2, k2, RLinc, sm, k2, p2] -pl, k1, p4, ssskp, k1 - 21 sts 18. WS: bind off 4 stitches in purl, kl, p1, k1 - [k2, p5, k2] -kl, pl, k2, - 18 sts
www.BlueEarthDyeworks.com
Repeat the leaf pattern in rows 5-18, while continuing to increase in the center, 1 stitch in each RS row on alternating sides of the marker, until you reach 40 knit sts in center panel, or desired width is reached. (in the sample, this took 7 repeats) Remove marker and work straight, repeating the leaf patterns in rows 5-18 with no increases 7 times, or as desired. Decreasing: Start decreases in center panel at the beg of a pattern repeat (here: after the 14"h leaf on the edge), mid-way through the blue section before the last. Place marker between 2 center sts (after 20t# knit st in center panel) Decrease 1 st in each RS row on alternating sides of the marker. Use decreases that slant toward the marker (ssk when decreasing before slipping the marker, k2tog when decreasing after) Continue working in the edge pattern, decreasing in the center for 7 pattern repeats, until you have 18 sts on your needle at the end of a pattern repeat. The last pattern repeat of the leaf pattern is different from the previous ones to make it lean toward the center .
LASTPATTERNREPEAT
18 sts on needle; 4_2_6_2_4 (2+6+2 in center panel) 1. RS: begin leaf - k2, yo, kl, yo, k- [Center: p2, kl, ssk, sm, k3, p2,] - k1, yo k1, yo, k2 2. WS: p6 - [k2,p5, k2] -p6 3. RS: k3, yo, k1, yo, k2, - [p2, k2, sm ,k2tog, k2, p2]-k2, yo, kl, yo, k3 4. WS: p8, - [k2, p4, k2] - p8 - 5. RS: k4, yo, kl, yo, k3, - [p2, ssk, sm, k2, p2]- k3, yo, kl, yo, k4 - 6. WS: p10, -[k2,p3, k2]-p10 - 7. RS: k1, ssk, k5, k2tog, - [p2, k, sm, k2tog, p2] - ssk, k5, k2tog, k1 - 8. WS: p8,- [k2, p2, k2] - p8 - 22 sts 9. RS: kl, ssk, k3, k2tog, pl, - [p2, ssk, sm, p2]- ssk, k3, k2tog, k1 - 17 sts 10. WS: p6, - [k2,p, k2] - p6 - 17 sts 11. RS: k1, ssk, kl, k2tog,- [p, sm, p2tog, p2]- ssk, kl, k2tog, k1 - 12 sts 12. WS: p4, - [k4 - p4 - 12 sts 13. RS: ssskp, k1, - [p2tog, remove marker, p2tog] - k, sk2togp - 6 sts 14. WS: p2tog, k2, p2tog - 4 sts 15. RS: ssk, k2tog, pass the two stitches back to the left needle and k2tog Fasten off, weave in ends, wash and block. Enjoy!
Free for personal use. Do not sell, do no distribute without permission. All rights reserved, Blue Earth Dyeworks, 2012.


