Crochet-a-Cookie
By: Heather Perkins
Materials: Worsted Weight Yarn H hook
Abbreviations and stitches used:
Ch -chain (chs-chains) sl st - slip stitch sC - single crochet hdc - half double crochet le needed. You can use a bigger or smaller hook to make a bigger or smaller cookie.
Flower Frosted Sugar Cookie Instructions:
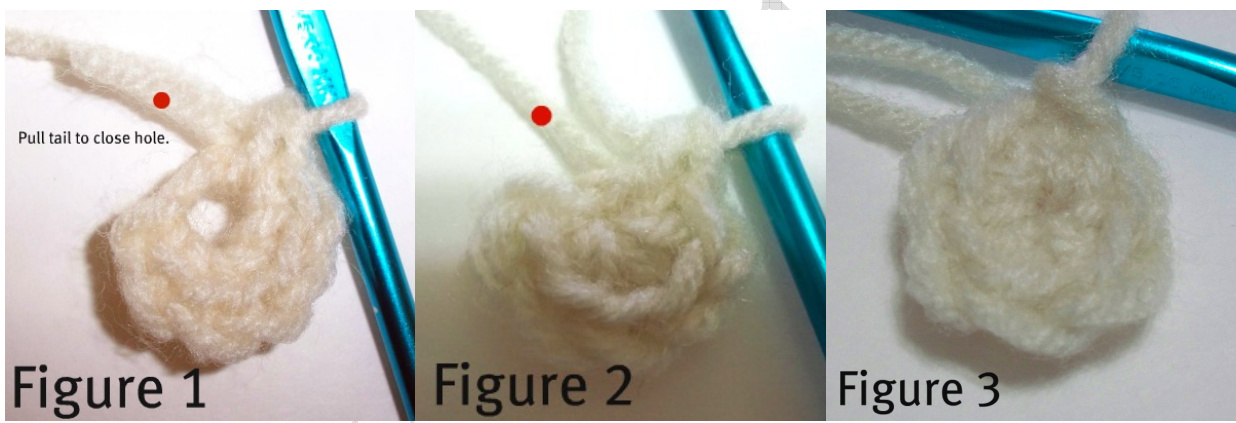
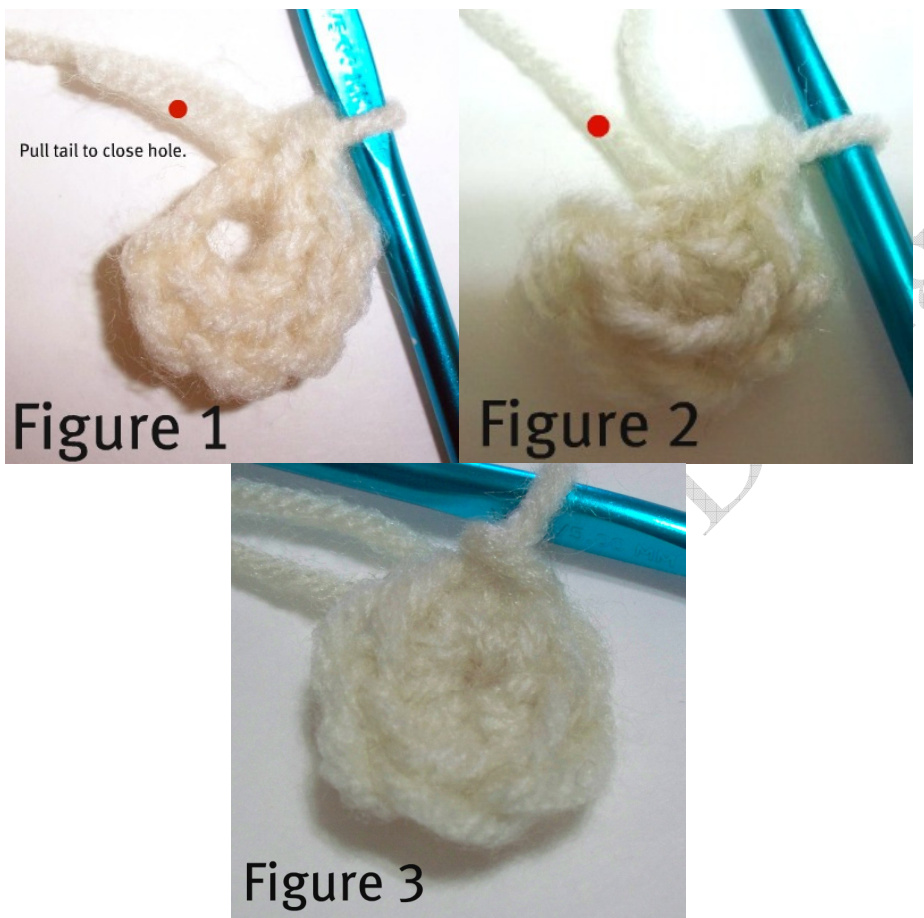
For each cookie work 2, DO NOT fasten off after round 4 on second cookie piece. Chain 2 Rnd1: 6 sc in 2nd Ch from hook. Join with sl st to firs sc. Pulltail piece to close up the hole see figure 1 and 2 and figure 3 for joining.
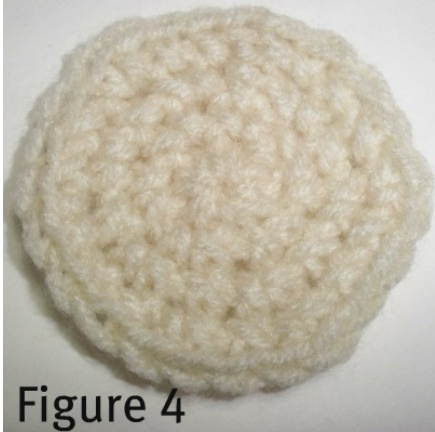
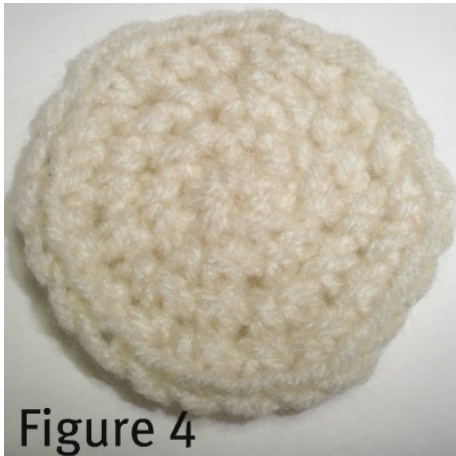
Rnd 2: ch 1. 2 sc in each sc around. Join with sl st to first sc. (12 sc) Rnd 3: Ch 1. \*1 sc in next sc, 2 sc in next\* repeat from \* around. Join with sl st to first sc. (18 sc) Rnd 4: Ch 1. \*1 sc in next 2 sc, 2 sc in next\* Repeat from \* around. Join with sl st to first sc. Fast off and weave in ends on first cookie piece see figure 4 (24 sc)
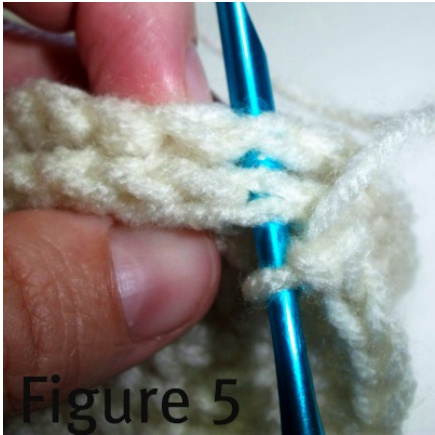
Rnd 5: With both pieces wrongs sides facing each other, right sides facing_ out. Ch 1. sc in each sC around going through all four loops to join pieces together see figure 5. (24 sc). fasten off weaveinends.
Tip: You could add chocolate chips or M&M's now by cutting out felt circles and sewing on or stitching on with yarn.
Flower Frosting:
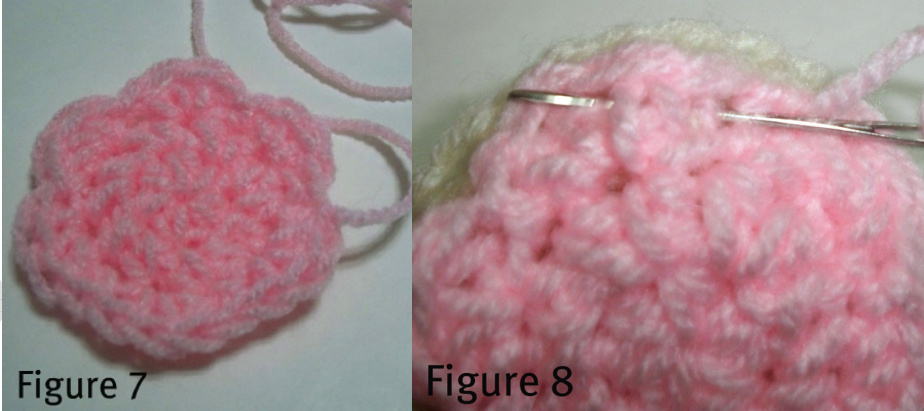
Ch 2 Rnd 1: 6 hdc in 2nd ch from hook. Join with sl st to to first hdc. Rnd 2: Ch 1. 2 hdc in each hdc around. Join with sl st to first hdc. (12 hdc) Rnd 3: Ch 1. \*sl st in first hdc, 3 hdc in next hdc.\* repeat from \* around. Join with sl st to first sl st. Fasten off leaving a long tail for sewing frosting to cookie see figure 7. (18 hdc) (See figure 8 for attaching frosting, sew through frosting and top layer of cookie around).
Creme Cookie Instruction:
Chain 2 Rnd1: 6 sc in 2nd Ch from hook. Join with sl st to firs sc. Pull tail piece to close up the hole (see figure 1 and 2 and figure 3 for joining).
Rnd 2: ch 1. 2 sc in each sc around. Join with sl st to first sc. (12 sc) 1. \*1 sc in next sc, 2 sc in next\* repeat from \* around. Join with sl st to first sc. (18 s Rnd 4: Ch 1. \*1 sc in next 2 sc, 2 sc in next\* Repeat from \* around. Join with sl st to first sc. Fast off and weave in ends on first cookie piece (see figure 4) on second cookie piece fasten off and leave a long tail for sewing. (24 sc)

So Chic Crochet DesignsFeb. 2011 Contact sochiccrochetdesigns@gmail.com. You may not resell this pattern. You may sell items made from this pattern in local boutiques. For selling online please contact designer.
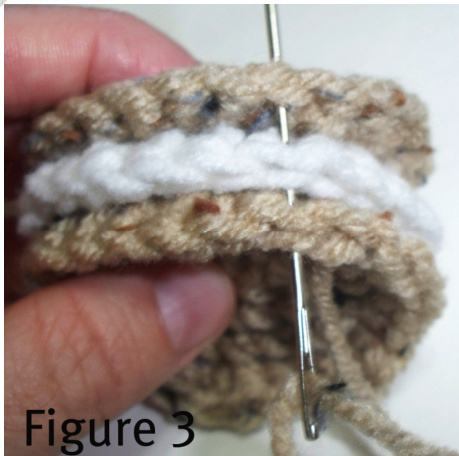
Creme Cookie Assembly:
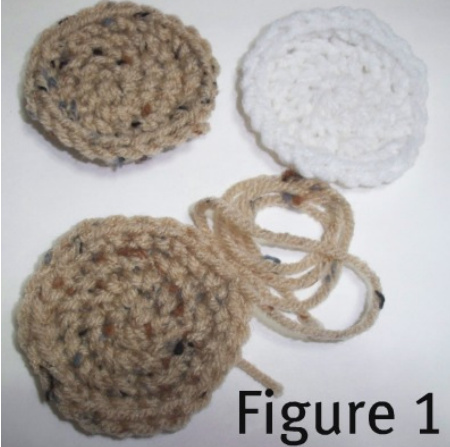
Step 1: Gather all your pieces you should have a creme piece and two outside cookie pieces, one with a long tail (See figure 1).
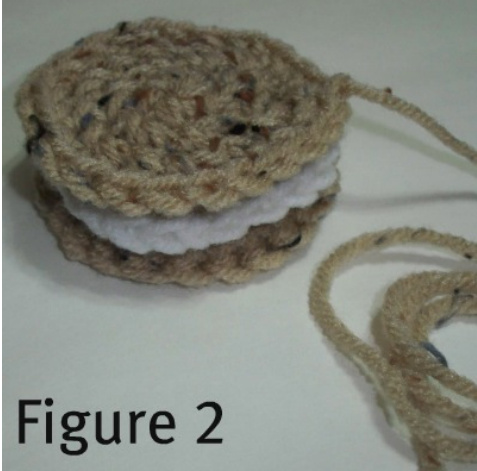
Step 2: Sandwich your pieces together cookie piece, creme piece and cookie piece with cookie pieces right sides facing outward (see figure 2).

Step 3: Sew together stitching through all three pieces going up and down all the way around (see figure 3).