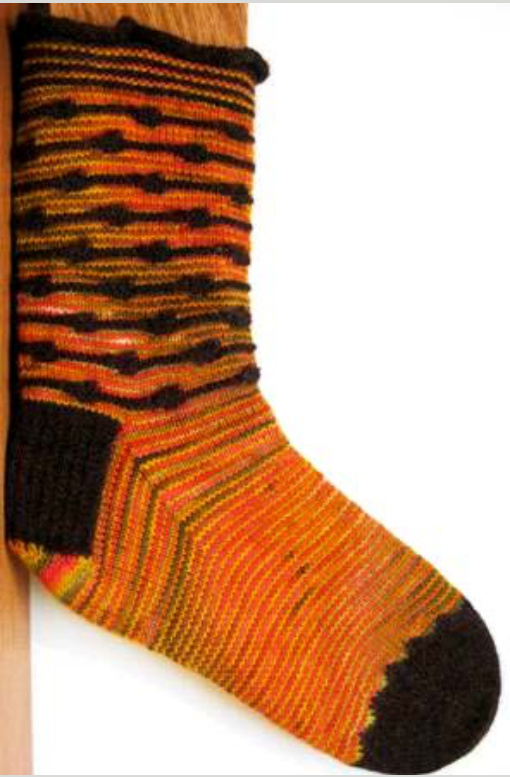
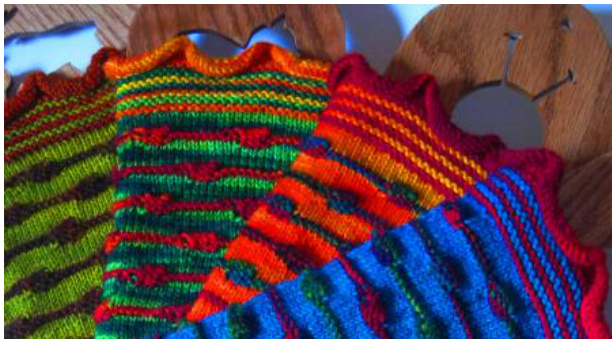
Macchia di Colore
Materials:
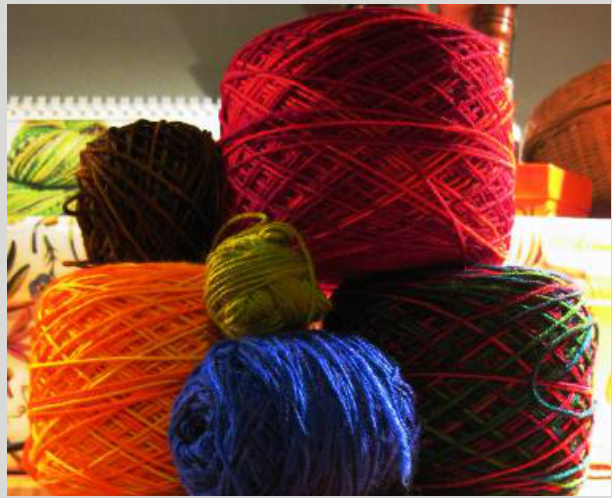
3 colours of Wollmeise Sock yarn Or other fingering weight: To make a pair in size large C1: 16g, C2: 60g, C3:52g (these are generous amounts) Needles and Notions: 2.00mm DPNS 2.50mm circular needles or DPNS Stitch Markers
Size:
Small (36/37) 7.5"/19Cm Medium (38/39) 8.25"/21cm Large (40/41) 9"/23Cm
Gauge:
by Riotous Assembly 32sts per 4"/1ocm st st 4 2.5mm 40 rows per 4"71ocm st st 4 2.5mm Abbreviations: CO: Cast On C1, c2, c3: C0l0ur1,2,3 RHN: Right hand needle LHN: Left hand needle K: Knit P: Purl St st: Stocking stitCh Gt st: Garter stitch St(s): stitch (es) Rem: remain Rep: Repeat PM: Place marker Dec: Decrease Inc: Increase K2tog: Knit 2 sts together SSK: slip 2 stitches as if t0 knit, knit those 2 stitches together tbl Tbl: through back of loop Turn: turn work 4 continue in the opposite direction Wyib: with yarn in back Sl2: slip stitch purlwise
SWT: slip, wrap, turn
Slip st purlwise to RHN, yarn forward, move slipped stitCh baCk to the LHN, turn work. There will now be a wrap around the slipped stitch
Instructions: Ruffled top Cuff
Using 2.5mm needles and C1 cast on 120 / 132/ 144 sts and join into a circle.PM at beginning of round. R1) - R4) knit all sts R5) k2tog to end of row [60 / 66 / 72 sts rem] R6) knit all sts
Garter
R1) knit all (C1) R2) purl all (C1) R3) knit all (C2) R4) purl all (C2)
then work R1 & R2, Total of 14 rows garter st (= 7 ridges)
Leg: Work 5 rows C2
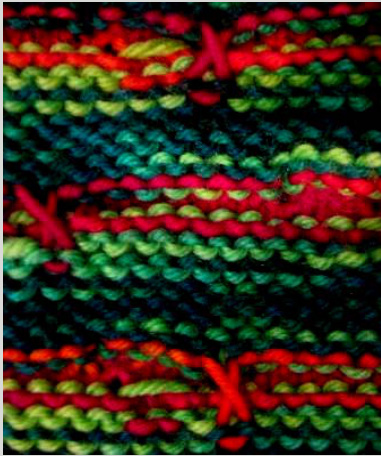
R6) [Macchia row] Using C3 K 11 / 10 / 11 \* turn; sl1 wyib, K3, turn; P4, k12 / 11 / 12; rep from \* to last st; k1 R7) [Macchia row] Using C3 P 11 / 10 / 11 (i.e. to the end of the first macchia); \* turn, k4, turn; sl1, p3, p12 / 11 / 12, rep from \* to last st, p1
R8) Using C2
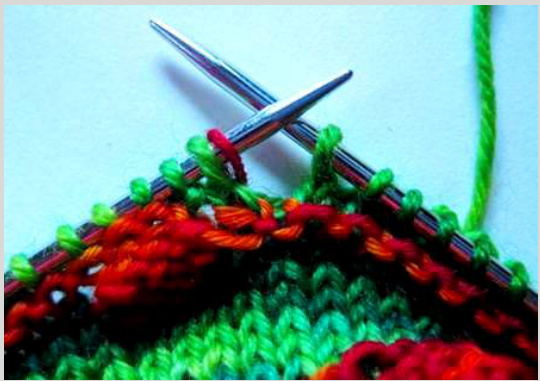
k8 / 7 / 8 \* sl2 wyib, K10 / 9 / 10 (last of these sts is the1st st of a macchia) rep from \* to last 4 sts, sl2 wyib, k2 R9) knit all using C2 R10) All sts are knit. But... there is a special technique for knitting the stitch before each macchia. There will be a small hole or loose stitch to the RHS of each macchia. These are tightened as follows; 1 Knit to the stitch before the macchia stitch
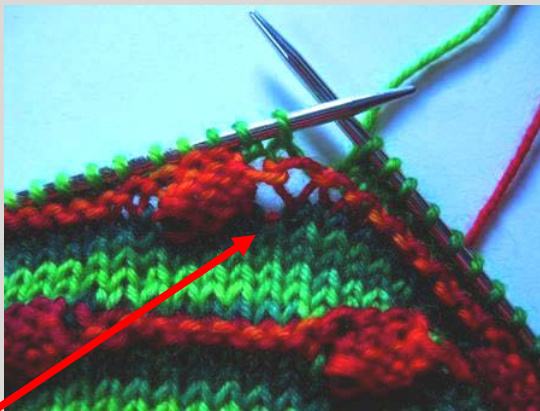
2 With the tip of the RH needle, pick up the purl bump below the hole on the WS of the work (the purl bump will be the same colour as the macchia)
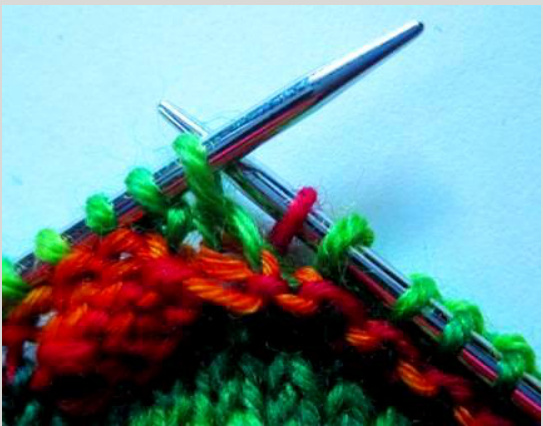
4 Knit picked up stitch together with the next stitch (the first macchia stitch).
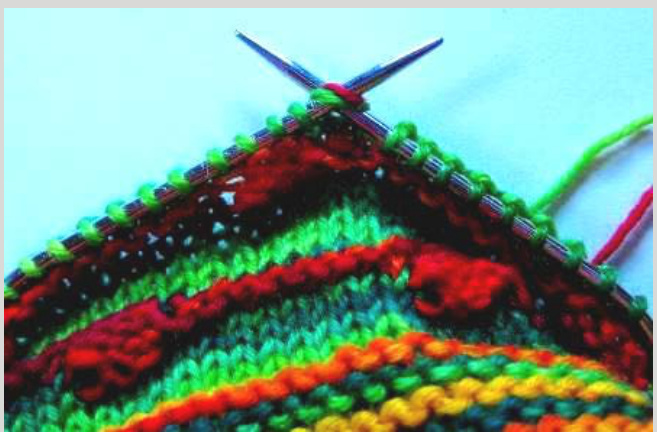
5 This will tighten the loose stitch at the edge of the macchia.
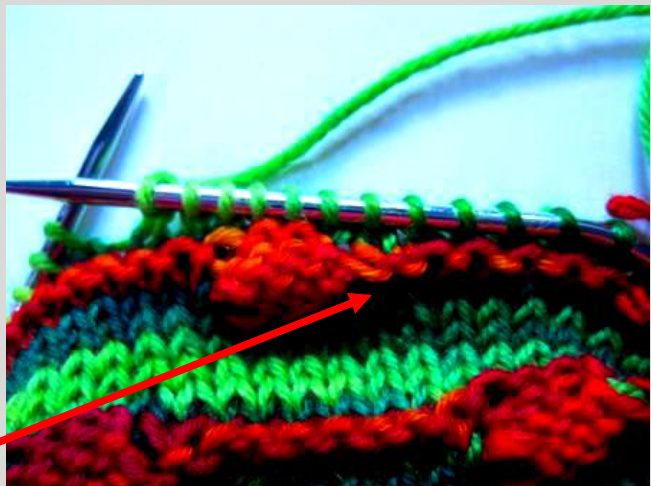
3 Then place it on the tip of the LHN, twisting it as you do. 6 And this is what it looks like on the back
R11) - R13) knit all using C2
R14) [Macchia row] Using C3
K5 / 4/5,\* turn, sl1 wyib, k3, turn, p4, k12 / 11 / 12, rep from \* to last 7 sts, K7
R15) [Macchia row] Using C3
P5 / 4 / 5 (ie to the end of the first macchia);\* turn, k4, turn; sl1, p3, p12 /11 / 12, rep from \* to last 7 sts, p7 R16) Using C2 k2 / 1 / 2 [2nd st= 1st macchia st] \*sl2 wyib, k10 / 9 / 10, rep from \* to last 8 sts, k8 R17) - R21) repeat rows 9-13 Work rows 1-21 once; Repeat rows 6-21 (3 times more) Then work rows 6-13 once more Work 1 row st st in C2 finishing 3 / 4 / 4 sts before end of row
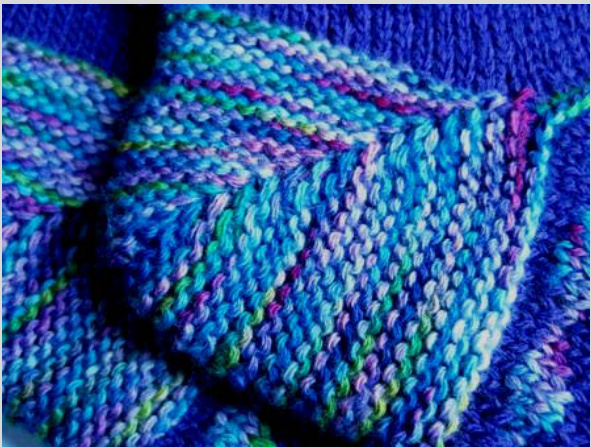
Garter stitch short row heel:
Worked over 60% of total stitches i.e.; [ 36 / 40 / 44sts] Heel Decrease section: Using C3 & 2.00mm DPNS R1) knit 35 / 39 / 43 sts (ie to last stitch) then, SWT the last stitch R2) knit 34 / 38 / 42 ,(ie to last stitch) SWT the last stitch
R3) knit to the stitch before the wrapped st, SWT, Repeat R3 until 8/10/10 sts left unwrapped in the centre of the heel
Heel Increase Section:
Knit across to first wrapped stitch, knit wrapped stitch (but don't knit into the wrap at the base). Then SWT i.e.; wrap the next stitch on the LHN and turn. This means that you will be wrapping stitches a second time as they were already wrapped in the decrease section Continue until all heel stitches have been worked
Foot pattern: Change to 2.5mm needle
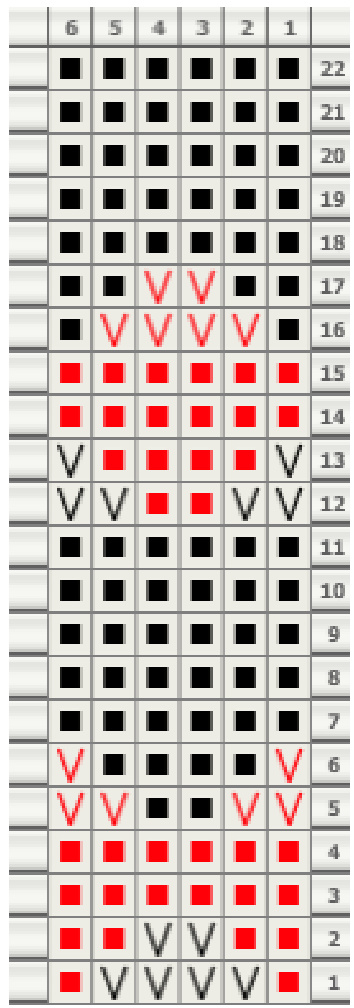
Work 1 row k all in C3 Work 1 row p all in C3 Work 3 rows k all sts in C2 Work foot pattern from chart for 3 repeats or until 1.75"/2"/2.25" [4.5/5/5.5cm] less than foot length required. Finish foot pattern with row 4 or row 15. On final row, knit 3 /4 /4 sts past marker (into next row) to align stitches for toe decreases V = sl st purlwise (C2) = knit (C2) V=sl st purlwise (C3) = knit (C3)
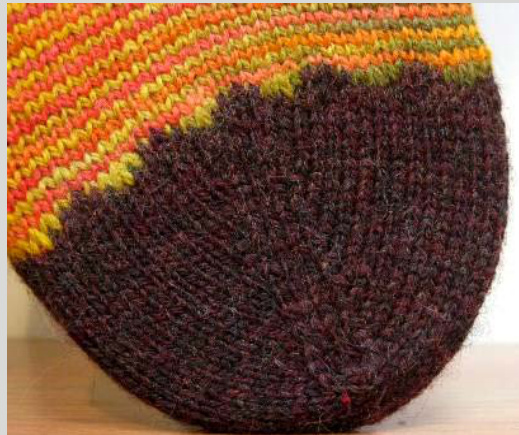
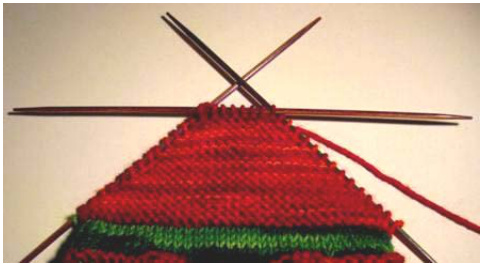
Toe: Using C3 and 2.00mm DPNS arrange stitches as follows: Needle #1 30/33/36 sts Needle #2 15/16/18sts Needle #3 15/17/18 sts Small size Work 2 rows knitting all sts without decreasing Medium size Work 3 rows knitting all sts without decreasing Large size Work 3 rows knitting all sts without decreasing All sizes: Decrease next and every 3rd row to 44/50/52 sts
R1) Decrease row
Needle #1 knit1, ssk, knit to last 3 sts, k2tog, k1 Needle # 2 knit1, ssk, knit to end Needle #3 knit to last 3 sts, k2tog, k1 R2) knit all sts R3) knit all sts Then decrease next and every 2nd row to 32/38/40sts Decrease every row to 16/22/24 sts Graft toe
About the designer...
Sue Grandfield (RiotousAssembly) first learnt to knit at the age of four when her grandmother taught her, hoping it would keep her out of trouble. It didn't and she's still knitting... Questions?Mistakes PleaseE-Mail me! RiotousAssembly@gmail.com
DK Version:
Made with Marta's Yarns DK. I knit the instructions for the small size on 3.5mm 4 3.25mm needles, but with fewer pattern repeats (3x for leg, 2x for foot. They knit to the same dimensions as a large size made in fingering weight. Flap Heel: Made with Wendy Dennis Polwarth 4ply 4 knit Picks Palette. The cuff and leg are exactly the same as written. Standard flap heel worked over 50% of sts, worked plain st st foot to toe, then 4 rows of slip stitch pattern and rest of toe as written.