
A DesigningVashti Crochet Article
Questions, comments? yashtibraha@gmail.com http://designingvashti.com
How to Crochet Slip Stitch Short Rows
Item #9-103011SV An earlier, obsolete edition was blogged at Crochet Pattern Companion in 2011 Click bere to see this short row technique used in these designs: Slip Slope Scarf, Slip For me, short rowing adds just enough spice to keep me slip stitching late into the night, especially with a fun color following pages. Download it here to follow along with hook and yarn in hand. Slip stitch ribbing in short rows makes a deliciously soft, stretchy scarf! It than you might
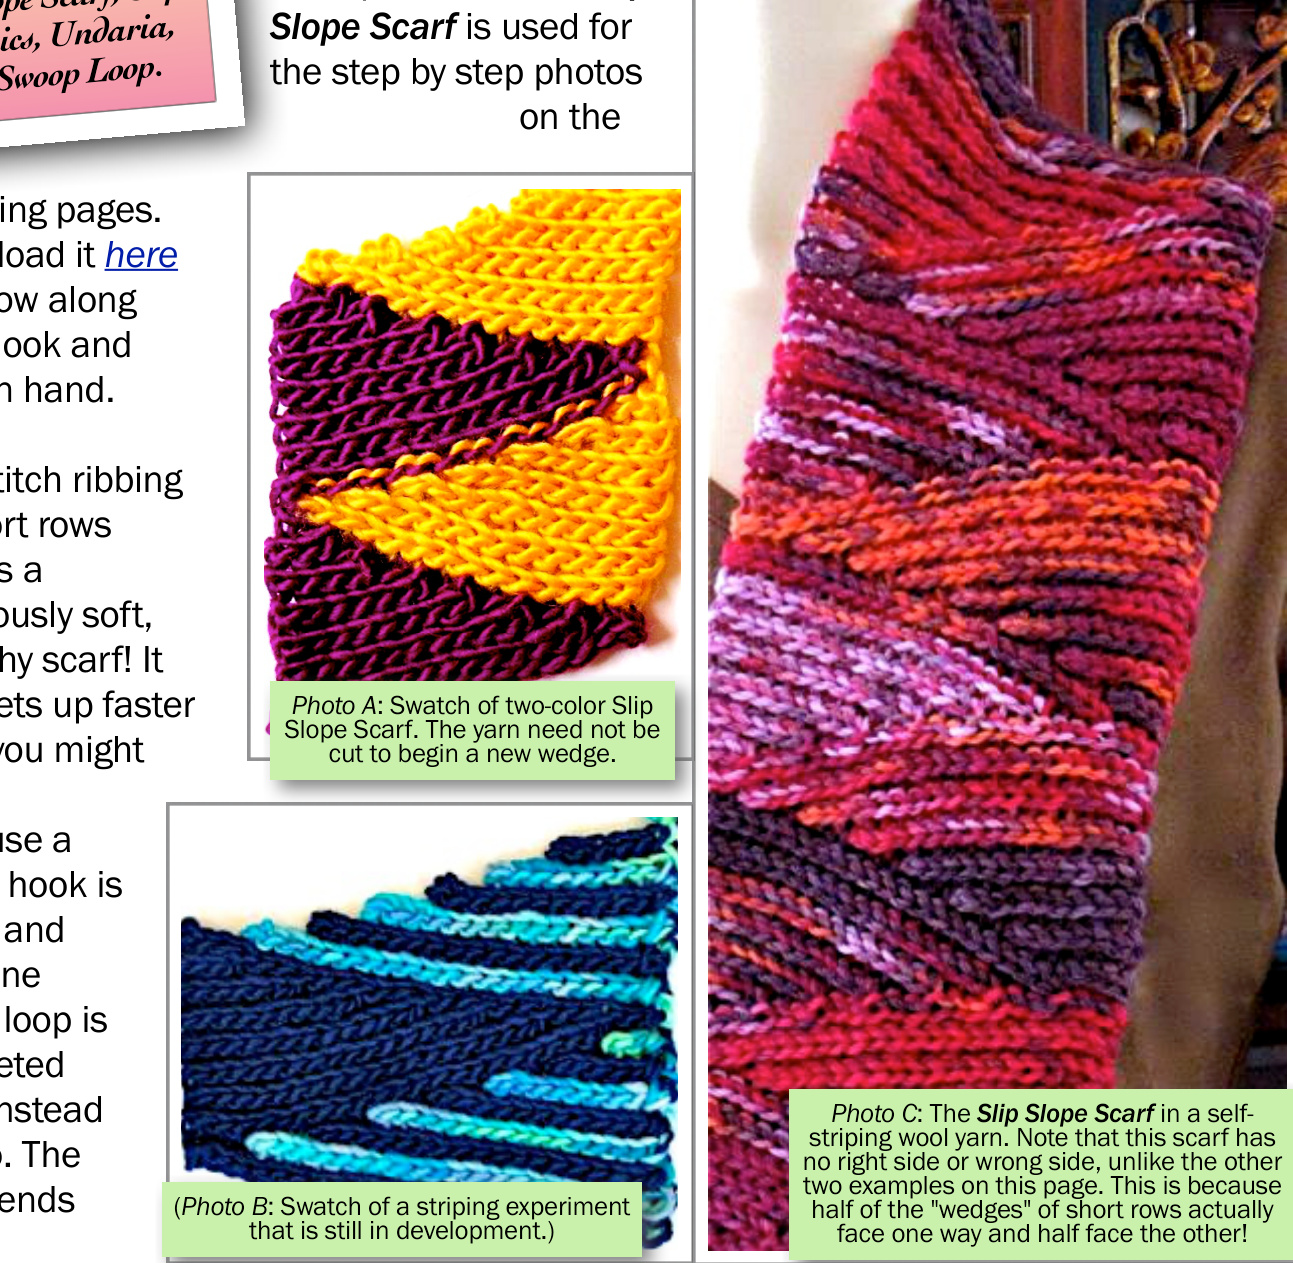
think because a larger hook is used, and only one stitch loop is crocheted into, instead of two. The scarf ends will come out slightly angled because of how the short row "wedges" stack and drape. Although crocheting short rows is not complicated for this fancy look, it might take some getting used to for some crocheters. After all, short rows are more commonly used in knitting than with regular crochet. I've seen some beautiful examples of Tunisian crochet short rows! I'm especially enjoying a whole new world of slip stitches in short rows!
Helpful Terms
Bss: Slip stitch worked in the back loop only. I now use this Bss abbreviation in my newer patterns (instead of "BLOslst") because it helps to keep abbreviations for its inverse and twisted variations much shorter. This stitch is also called "slip stitch rib" or "back loop slip stitch." You can easily do front loop slip stitch (Fss) in short rows too. The Slip Tectonics design combines Bss short row wedges with Fss short row wedges. Rib and row pair: Each "rib" of Bss might look like one row, but it's really a pair of rows. Long row or longest row: My shorthand way to refer to a full-length row, in contrast to a short row. A long row has the full number of stitches in it; no stitches are left unworked. Short Row Wedge: The triangular shape that results when the next row pair is shorter than the one before. This tutorial shows you how to make "wedges" of short rows. We start with the longest row pair and then stack up gradually shorter and

Photos 1a & 1b show the first complete short row wedge. Notice that each wedge has a sloping side and a straight side. Notice also how the ends of the short rows look like a slope of bumps. This is mainly caused by the turning chains. Photo 2 shows how they melt into the next rows. They build in stretch.
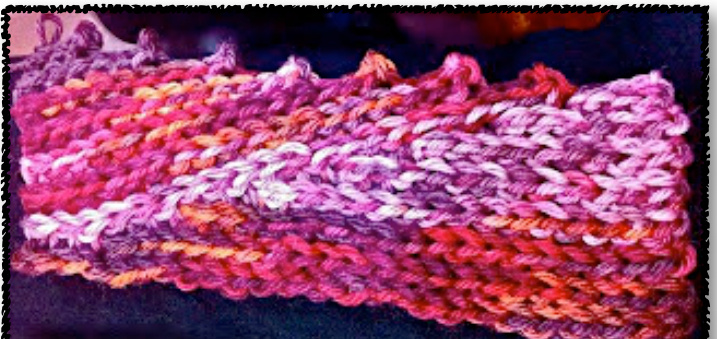
Photo #3: two "wedges" of stacked short rows. For all of these photos showing the Slip Slope Scarf in progress, I used a 6.5mm hook (K/US10.5) with worsted weight wool yarn (a.k.a. "#4 Medium Weight" or "Aran" or "Afghan weight"), as stated in the scarf pattern.
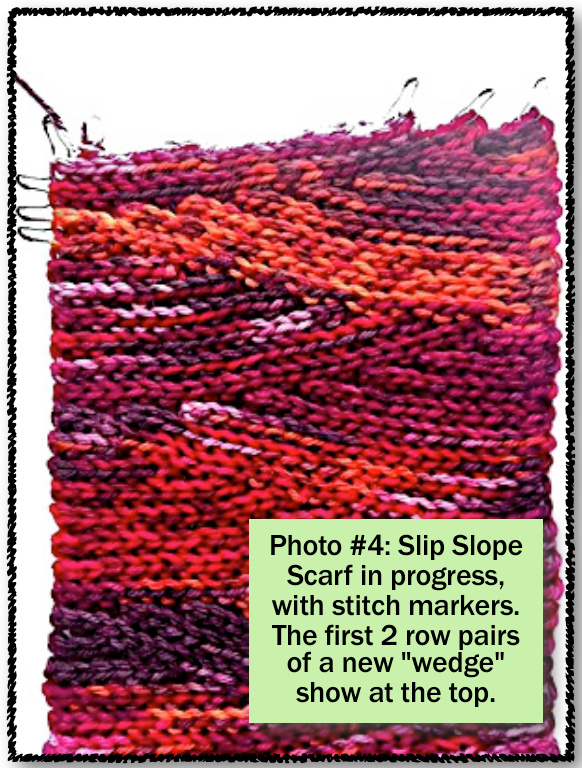
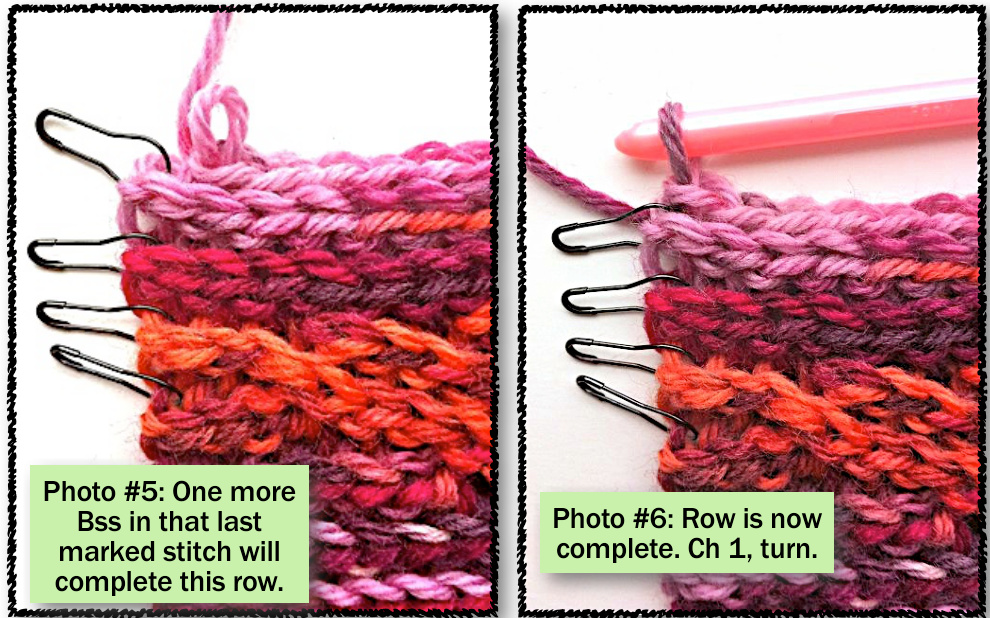
In photo #3, a second wedge is now stacked onto the slope of the first wedge. Even though you don't actually crochet into the turning chain bumps, they blend in nicely. If this rib stitch didn't look the same on both sides, it would be easier to see in photo #3 that the back of the first wedge is facing and the front of the second one is facing. In photos #5 and 6, compare how it looks when you have one stitch left to work into at the end of a row along the straight side of the wedge. For regular full-length slip stitch rows (no short rows), most students in my classes need to use stitch markers in just the first slip stitch of each new row. I still do whenever I start a slip stitch project in a new-to-me yarn. After a little while it's easier to recognize where the true last slip stitch of the previous row is.
@ 2o13 by Vashti Braha, All rights reserved. Licensing inquiries: yashtibraha@gmail.com Thank youfor your support of independent crochet designers & publishers!
For short rows, you might not need all of the stitch markers pictured, only along one straight side (such as in photos #5 &6).
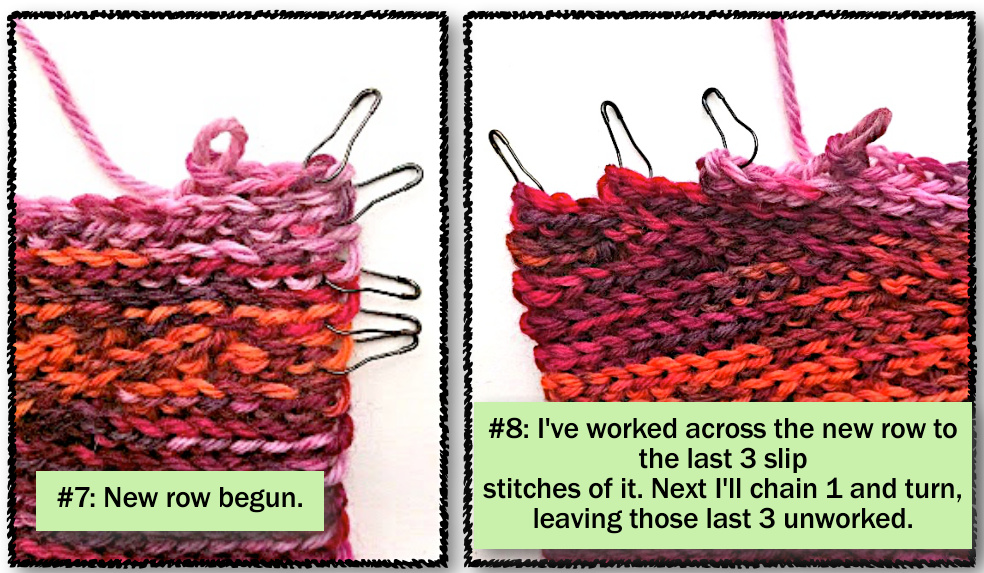
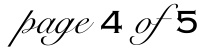
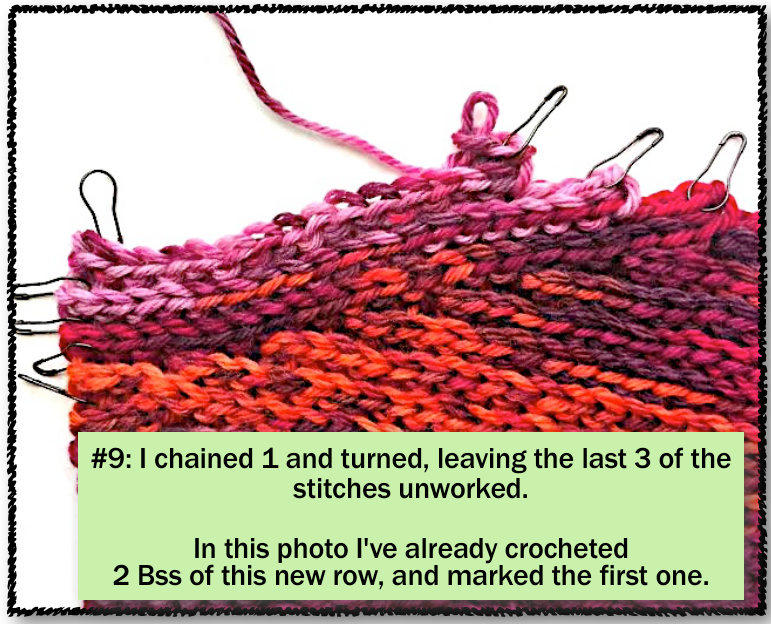
In photo #7 I chained 1 and turned, and then worked a Bss in each of the first four slip stitches. I placed a marker in the front loop of the first slip stitch of this new row. This row will be shorter; see photo #8. Photo #9 gives you a bigger picture of how the sloped side is developing, while along the left is a straight edge--the stitches are only decreased when you reach the sloping edge. Make sense? Photos #10 & 11 give another big picture: the current wedge has been completed. The last row pair has only 3 stitches in it! Finally, photo #12 shows you how the stitch markers might come in handy when you crochet a long row to begin another wedge.
@ 2o13 by vashti Braha, All rights reserved. licensing inquiries: yashtibraha@gmail.com Thank youfor your support of independent crochet designers & publishers!
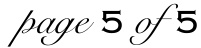
It's easy without them, though, because you know you need to find three stitches to work into in each short row as you complete the long row. This makes them easy to find for me. The markers mainly help to make the photos easier to understand. There's more than one way to crochet slip stitch short rows. I hope you'll experiment; for example you could change the number of stitches that you leave unworked in each short row. Instead of 3, a different number would create a different kind of slope. Short row wedges are responsible for the soft ruffles of Undaria. Notched gores of short rows give the
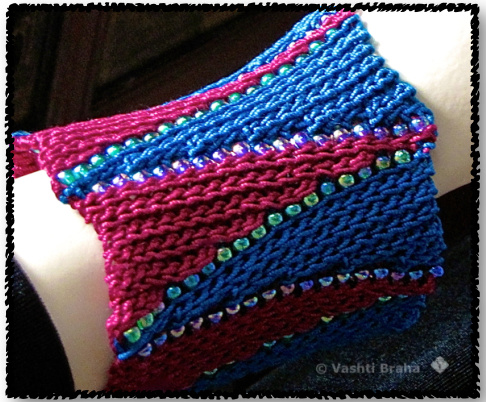
Thaxton Cowl its flaring edge. At right: short row wedges are beaded in Bivector Bangle (in development). With the Slip Swoop Loop I was surprised when alternating some chains with the slip stitches crated swirling paisley-like shapes!
About theDesigner
Vashti Braha lives in Florida and has been designing professionally since 2004.