Patterns & Instructions by Sfappy Patty Orochet
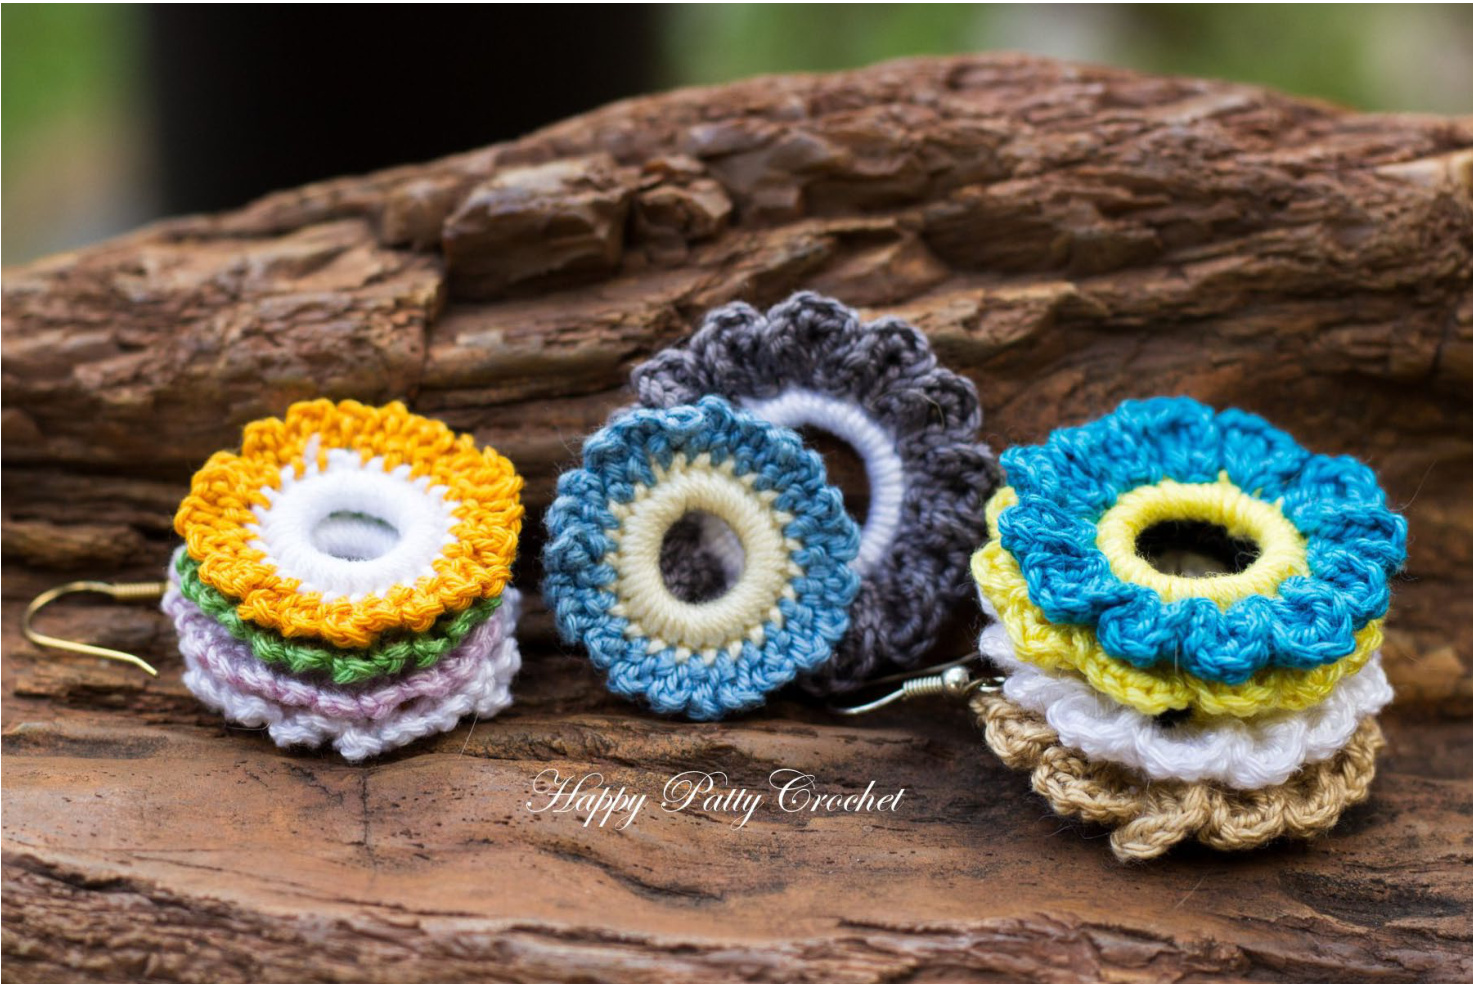
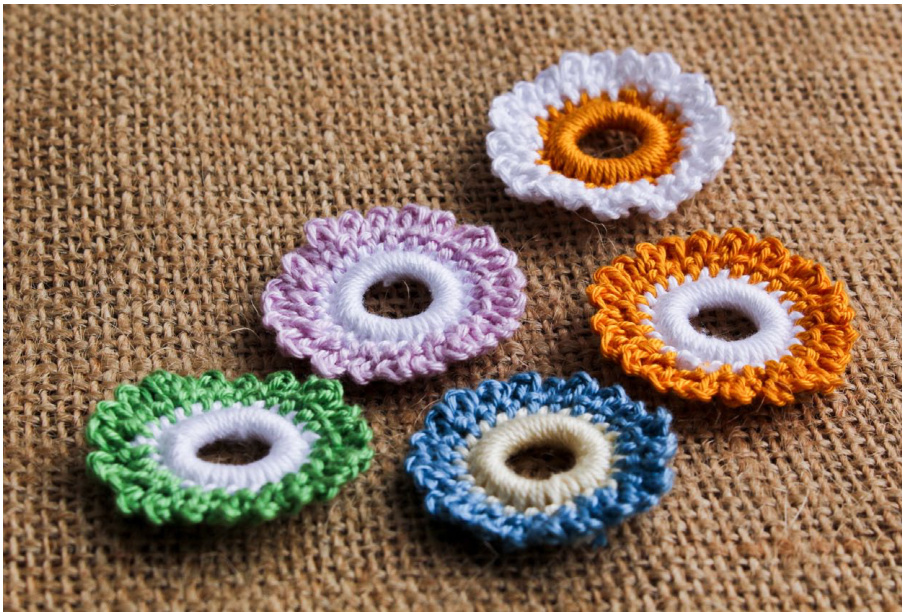
Ring Flowers
Beginner Skill Needed Crochet
Introduction
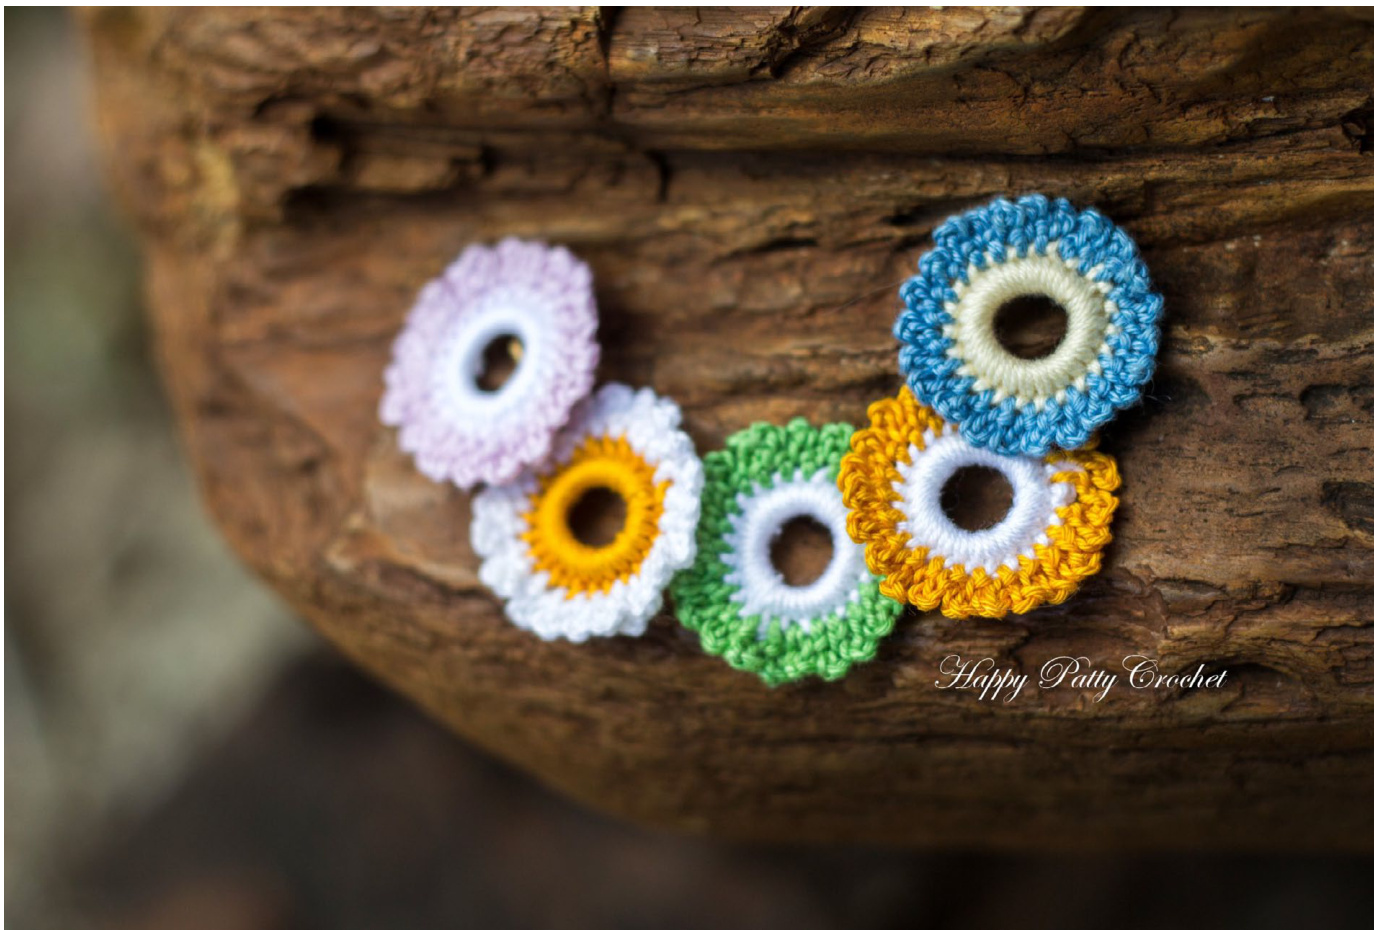
In here you will find pattern and instructions for my ring flowers. This are not exactly flowers, but more a floral-esque applique. They are in the shape of a ring, with plenty petals. In this booklet you'll find patterns and instructions for 2 different flowers. This lovely mini appliques are ideal as an earring, necklace or decor. The patterns included can be easily enlarged to create larger flowers, a combination of this flowers in different sizes will make a beautiful appliques for clothing, bags, hats and many more projects.
Materials
- Crochet Thread Size #20 / #40 (Your choice of color). - Crochet Hook Size 1.0mm/1.5mm
Pattern notes
The e-book starts with pattern diagram and then the instructions follows (in American Standard Terms, See appendix for conversion to British).
Materials Note :
I recommend using a 100% mercerized cotton thread in
Sizes #20 & #40. I've used thread from "Venus" brand, but the more popular Lizbeth, DMC or Anchor brands have sizes #20 & #40 thread that can be used and should be easier to find (or any other brand for that matter). I've created a page in my Blog where I updated a list of recommended tested threads - see here. \* If you have problem finding the material needed, don't hesitate to contact me and Ill do my best to help.
Abbreviations
sl-st - Slip Stich ch - Chain sc - Single Crochet 2-st dc inc - 2 Stitch sc Increase hdc - Half Double Crochet dc - Double Crochet inc - Increase yo - Yarn over sk - Skip beg - Beginning
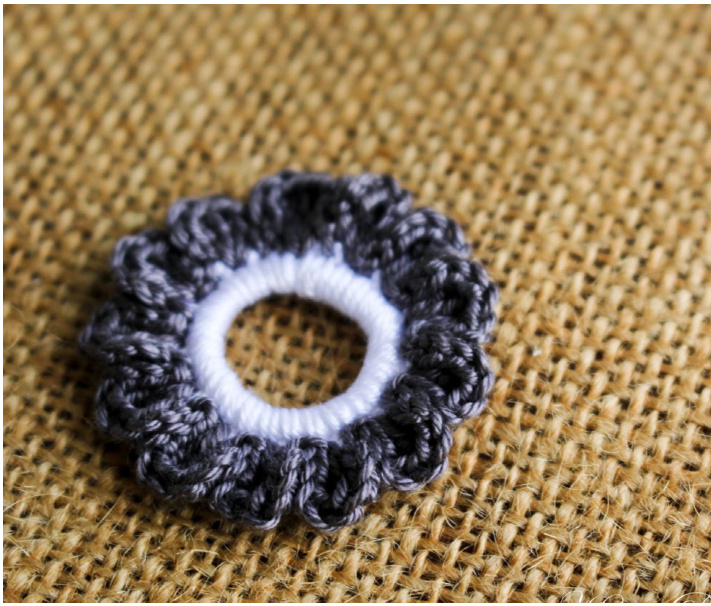
Ring Flower #1
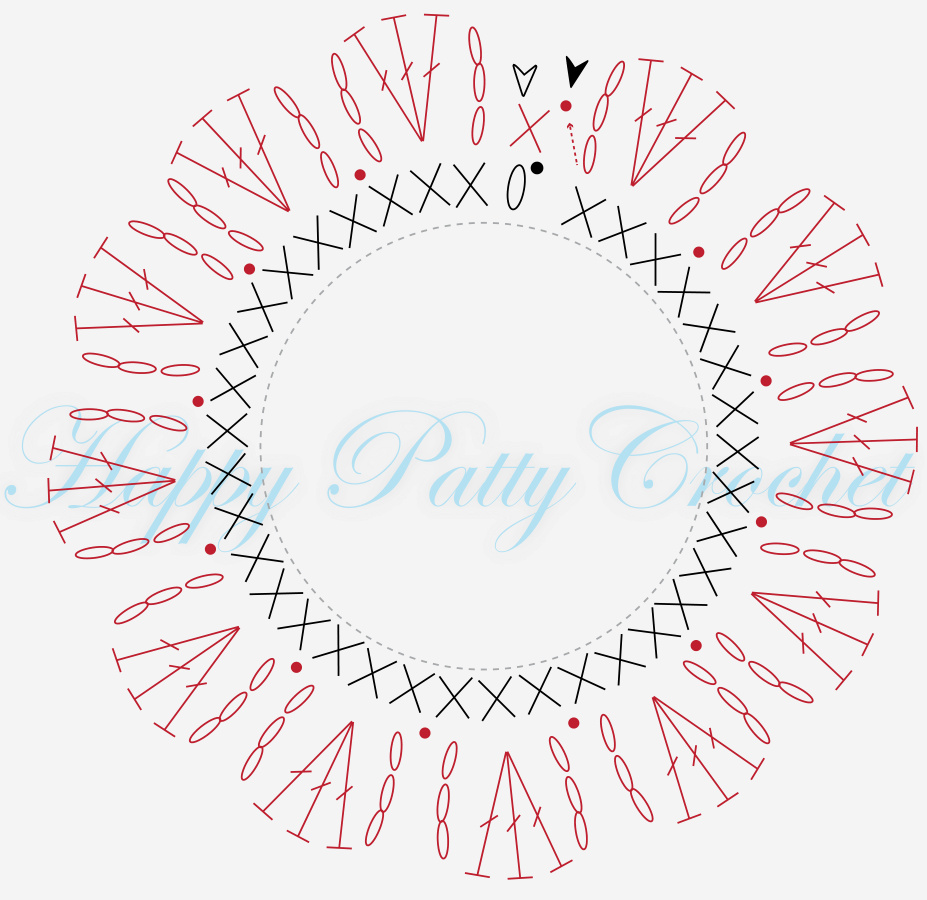
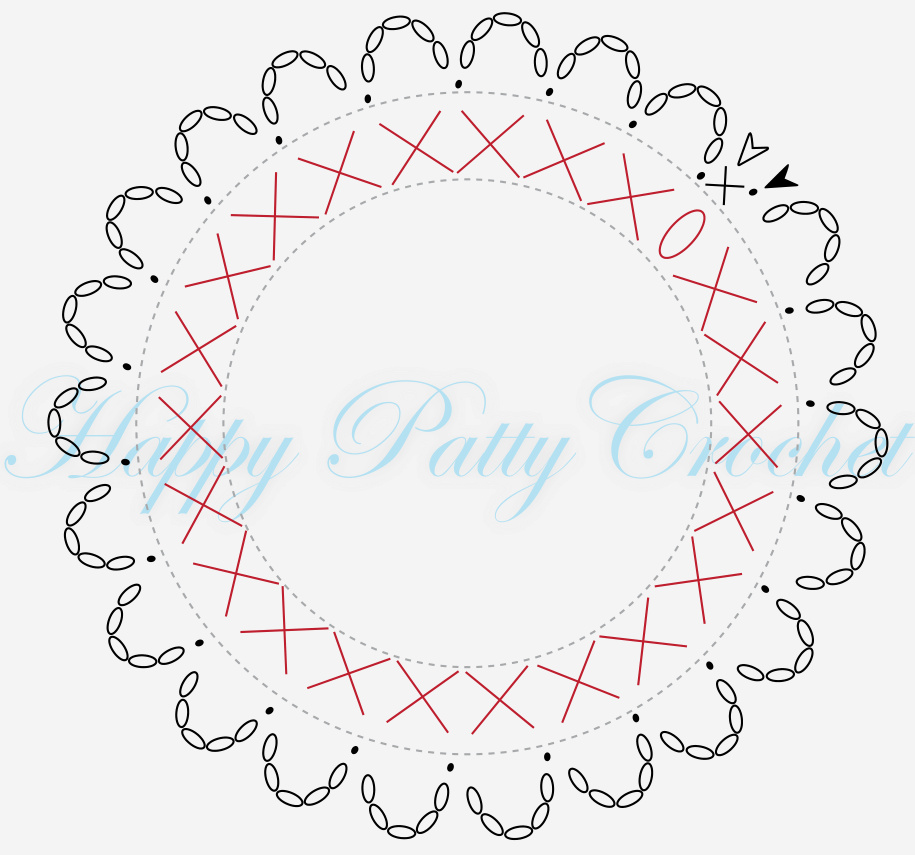
Stitch Key / Abbreviations
- Chain (ch) - Slip Stich (sl st) ? - Single Crochet (sc) 3 Double Crochet Increase (3-dc inc) -Cut Start new color InstructionS (see instructions for the base ring in the next pages) For base ring use Thread size #40 / Steel hook size 0.6mm. For petals use Thread size #20 / Steel hook size 1.0mm. Rnd 1 (Base Ring) : Ch 1, sc 36 times 0ver ring, join with sl st to beg ch. Fasten off, and change color. Rnd 2 : sc 1 time through the lower sc with the new thread, [Ch 3 times, 3-dc inc, Ch 3 times, join with sl st to lower sc and repeat] 12 times, last sl-st to beg sc and fasten off.
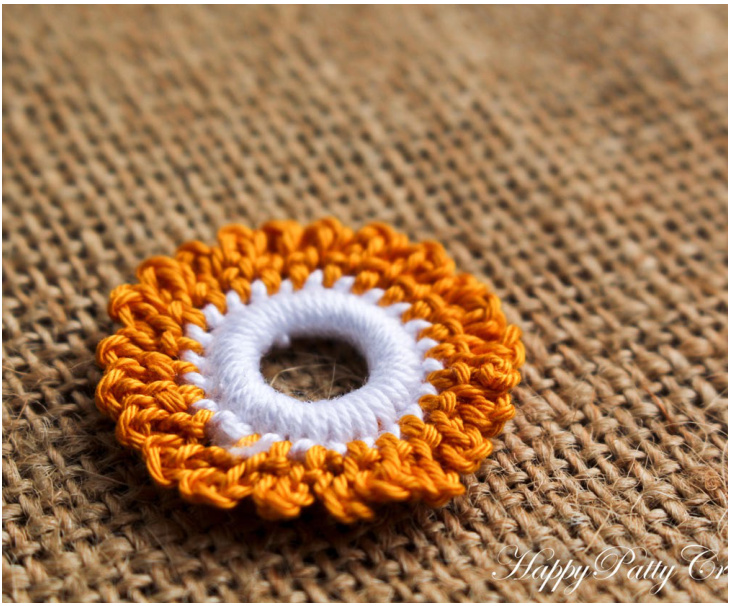
Ring Flower #2
Stitch Key / Abbreviations
- Chain (ch) - Slip Stich (sl st) X - Single Crochet (sc) 3 Double Crochet Increase (3-dc inc) -Cut Start new color InstructionS (se instructions for the base ring in the next pages) Thread size #40 / Steel hook size 0.6mm. (Base Ring) : Ch 1, sc 22 times over ring, join with sl st to beg ch Fasten off, and change color. Rnd 2 : Sc new thread through lower ring sc join sl st and start repeated petals, [Ch 5 times, join with sl st to lower sc and repeat] 22 times, lastly join with sl st to beg sc and fasten off.
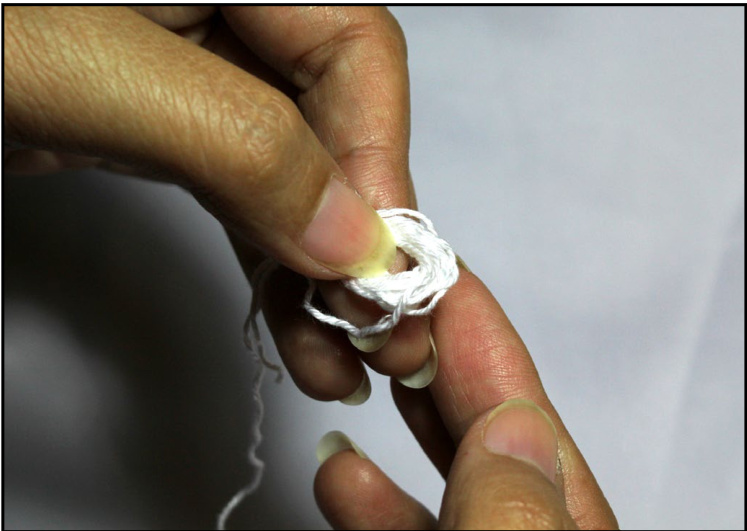
Making the Base Ring
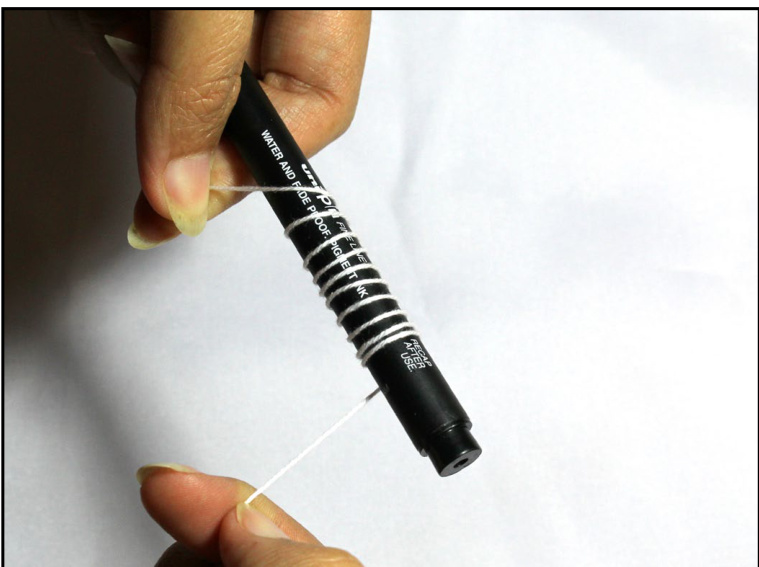
Crocheting the base ring is a crucial part for completing the ring flowers, it is the head of the flower where all the petals are attached to. Once you master the technique below, you can crochet any size of head you want. The technique below will produce a \~0.5" head (1.3cm). To make the base ring we need something cylindrical (I used a pen in the photos), we'll tightly circle the pen with our base color (10 times) - take the ring shaped thread out, and do single crochet around it. Here is a photo tutorial for the entire process :
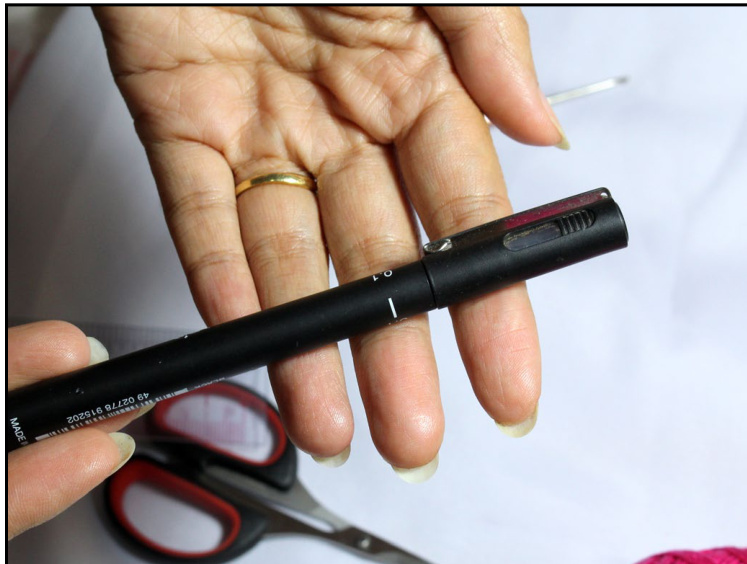
Step 1 - Pick your cylindrical object
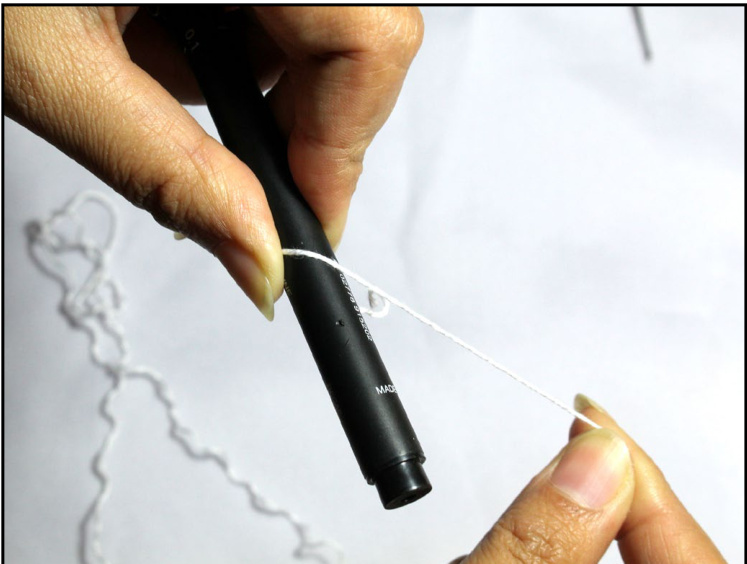
Step 2 - Tighten your head thread around it
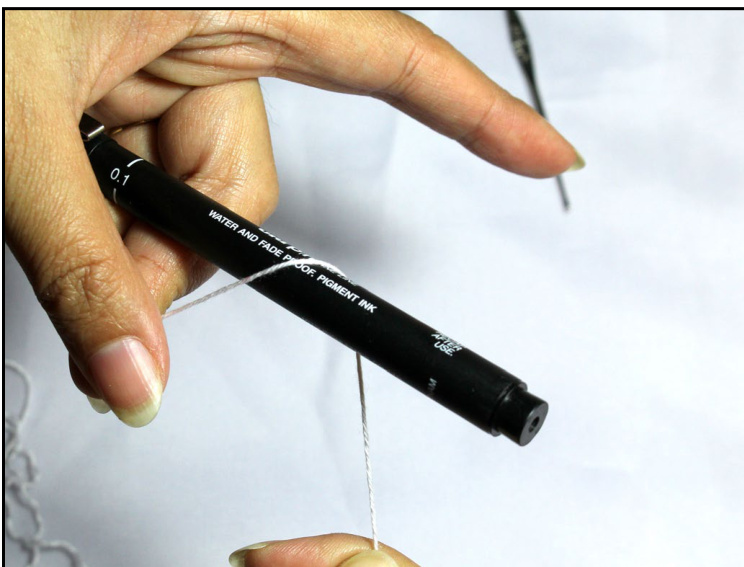
Step 3 - Try to keep it tight, but not too tight, as it will be difficult to take it out later.
Step 4 - Make 10 loops
Making the Base Ring (#2)
Step 5 - Slide the thread out
Step 6 - Keep the original shape
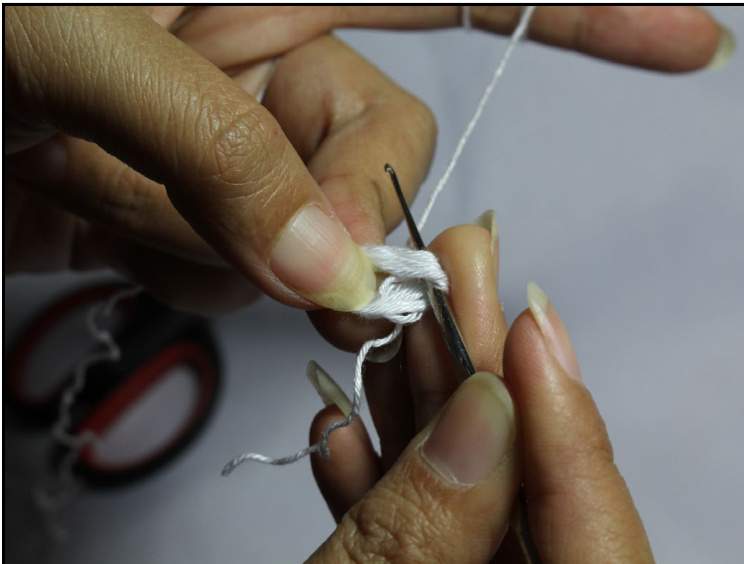
Step 7 - Slide the hook inside the ring
Step 8 - Create a single crochet through the ring
Step 9 - Complete the Single Crochet

Step 10 - Tighten the Single crochet and continue to make the next single crochet
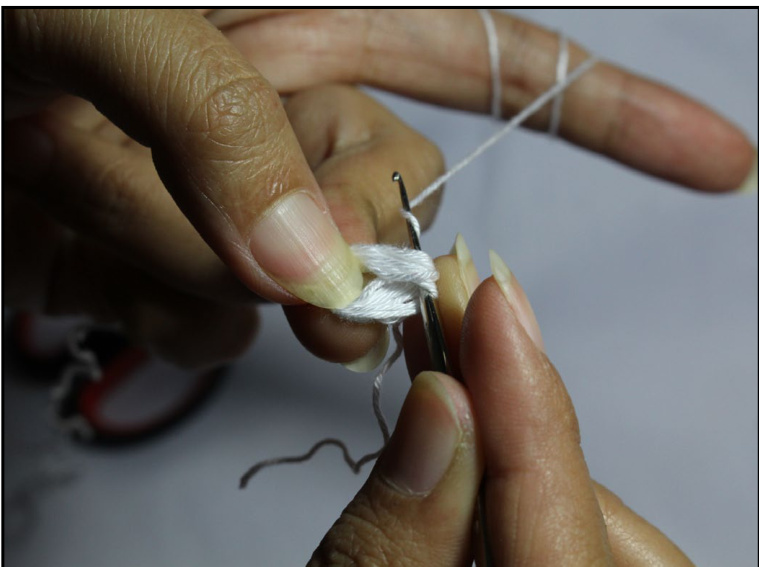
Making the Base Ring (#3)
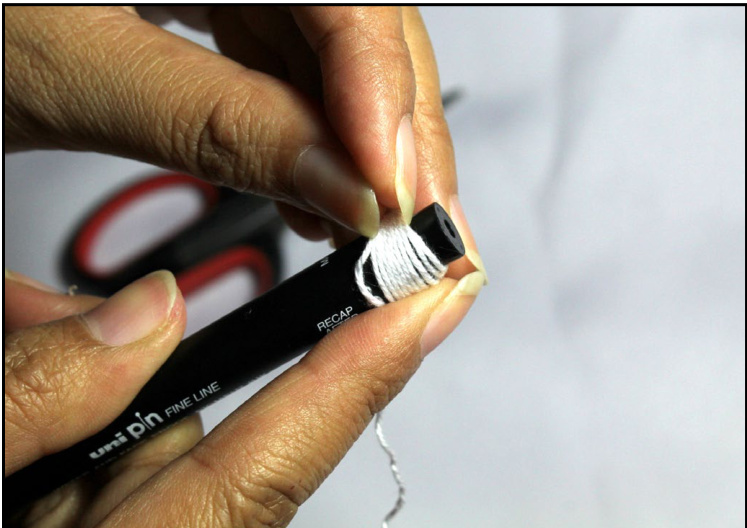
Step 11 - Keep doing single crochets
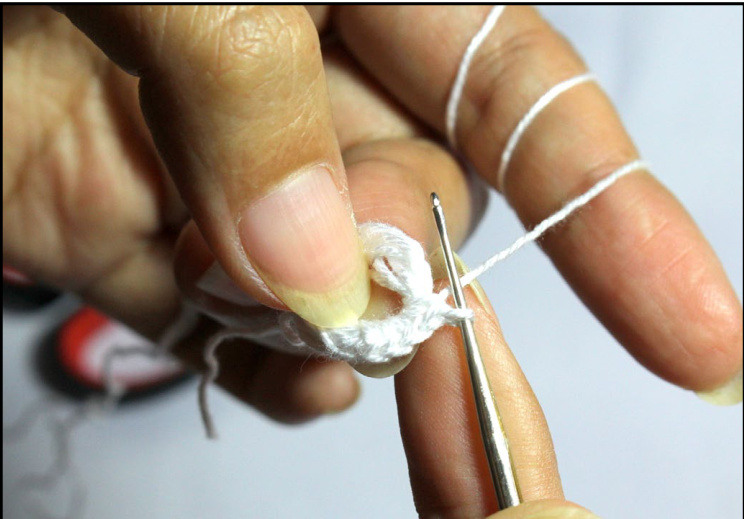
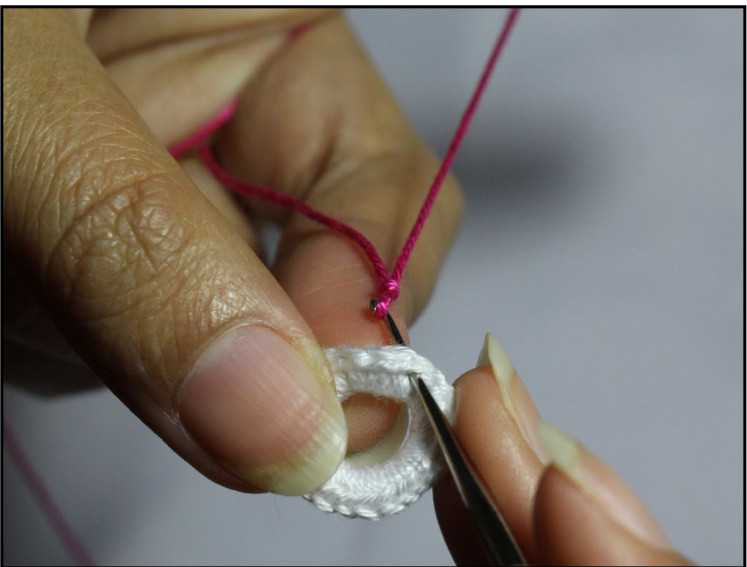
Step 13 - Finish the ring by tightening the extra thread (can be done with a needle), then cut thread.
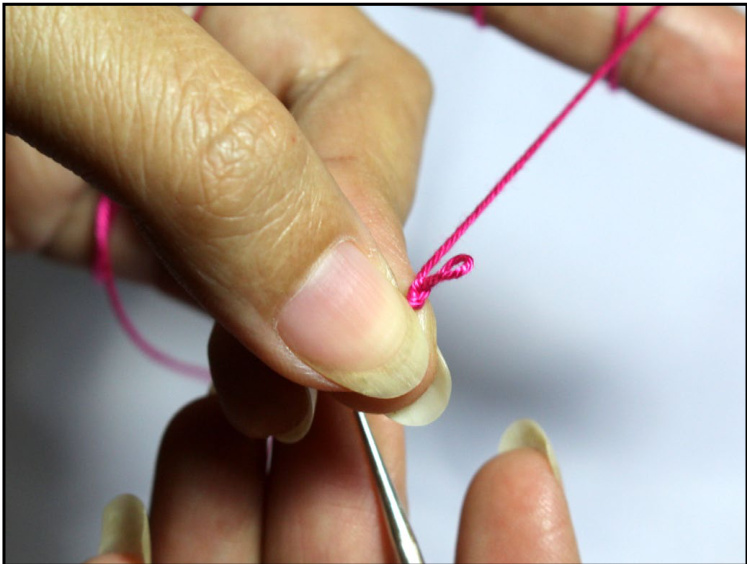
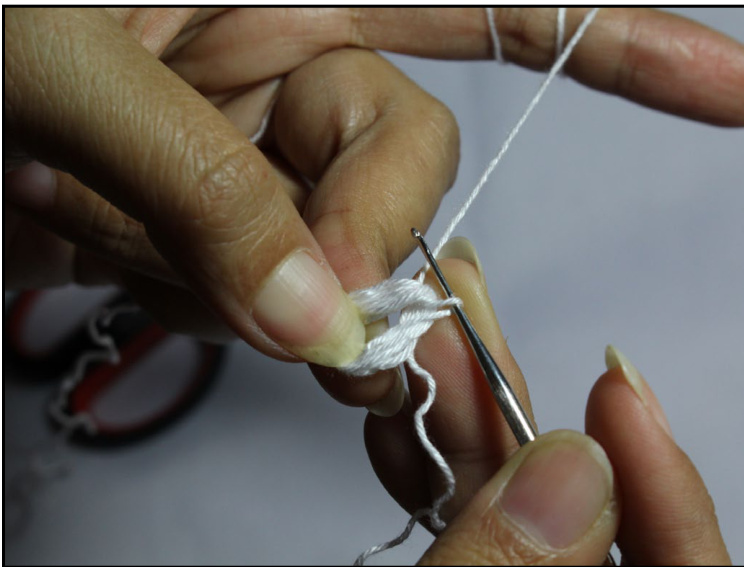
Step 15 - Create a loop
Step 12 - This how it looks after half of the ring
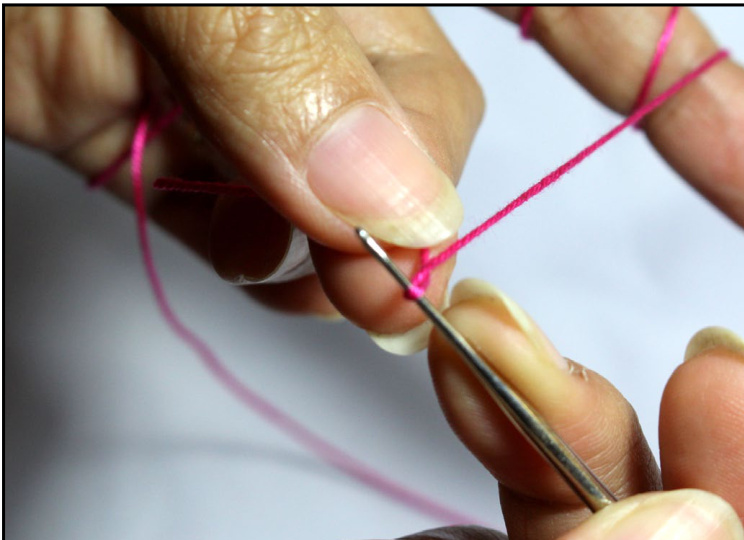
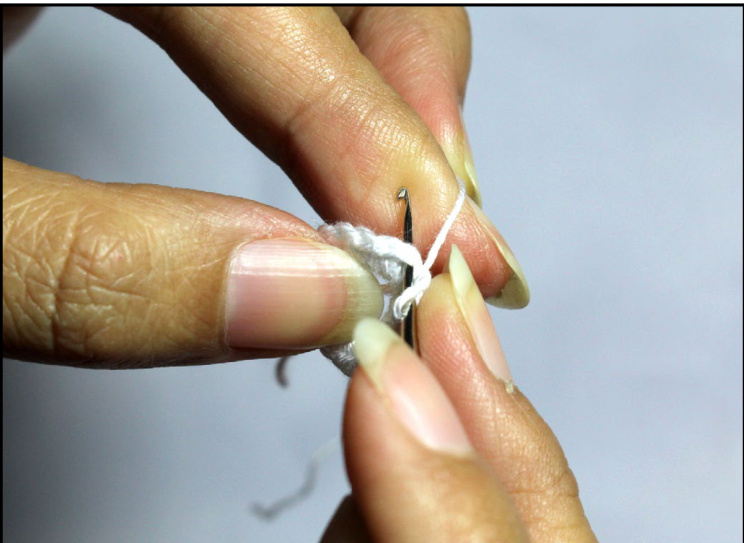
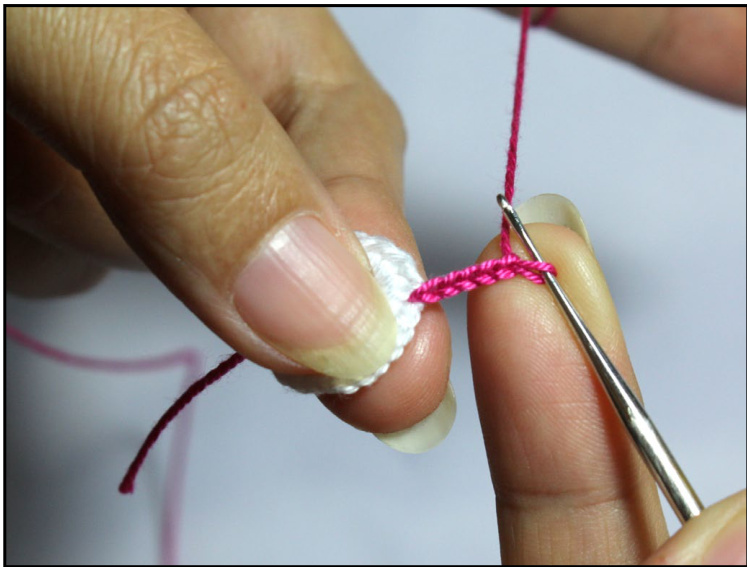
Step 14 - For the Petals, take your petals thread
Step 14 - Slide the hook through the scin the ring. and grab the loop
Making the Base Ring (#4)
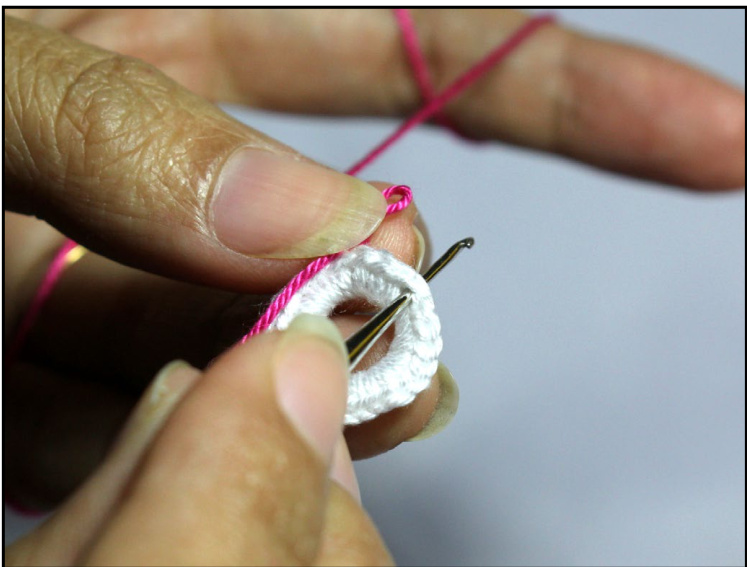
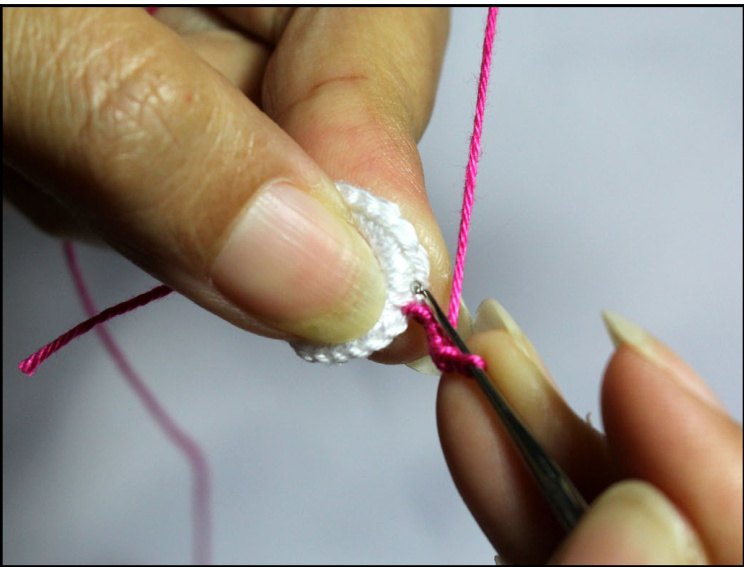
Step 17 - Grab the loop and slide back and complete the single crochet
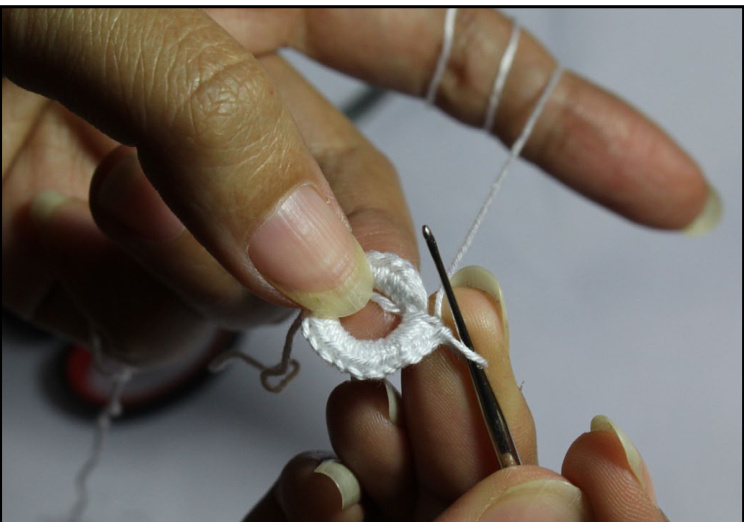
Step 12 - Complete the Single Crochet and start doing the channels (if you make ring flower #2)
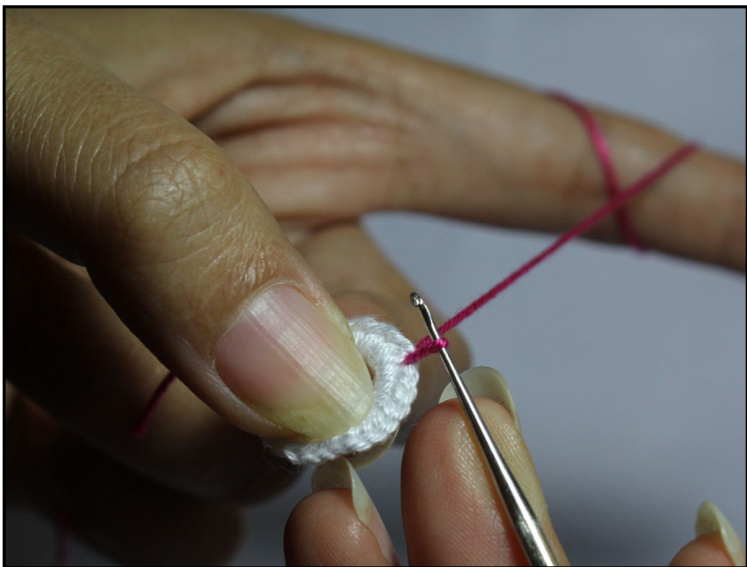
Step 13 - After finish the 5 channels
Step 14 - Connect to the sc in the ring, and keep crocheting the petals That's it :) Enjoy using your beautiful new ring flowers in any of your projects, try them a jewelry applique, table, wall or mirror decor, clothing applique and many many more creative projects.
I really hope you enjoyed making this lovely flowers. If you have any question, please let me know and I'l do my best to help. Thanks and enjoy crocheting! Happy Patty :)
Copyright Notice / Terms of Use
This Pattern is my original and unique design, please do not resell, redistribute, copy or rewrite this file, its text content or the included patterns/photos. Feel free to include the finished flower in any project that you want, either for private use or for sell. If you choose to sell the flower, please include a link to my shop and credit Happy Patty Crochet as the original designer. Thank you for understanding!
Appendix
Crochet Symbols and Abbreviations