cherries
fluff and fuzz knitting pattern Amanda Berry
Finished size ..
8cm wide x 8cm high (including leaves and stalks) The finished size will depend on the choice of yarn and needle size.
Wool ...
20g pure wool DK - red for cherries 20g pure wool DK - green for stalks and leaves Length of black wool for decoration This is an approximate amount, but should be sufficient to knit all the pieces and sew your cherry together.
Needle size ..
3 mm straight needles. Two 3 mm double pointed needles (DPNs) for i-cord stalks.
Other materials and equipment ..
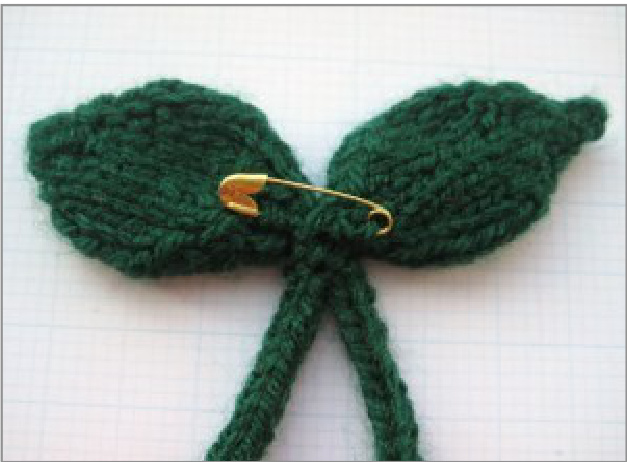
Toy filling/stuffing (approximately 20g). Tapestry needle (to sew the pieces together). Safety pin or brooch pin (optional).
Cherry
fluff and fuzz knitting pattern Design by Amanda Berry Copyright @ 2010, 2011 Amanda Berry All patterns offered by fluff and fuzz (designed by Amanda Berry) are protected by international copyright laws. These patterns are intended for personal use only. Other uses are strictly prohibited.Any unauthorised copying will constitute an infringement of copyright. All rights reserved. Knitting Abbreviations ...
| co Cast on Knit | |
| K | |
| P | Purl |
| KFB | (Increase)-Knittwiceinto thestitch. Knit into the front of thenext stitch on the left hand needle, but do not slip off the needle. Then take the right hand needle and knit into the back of the stitch,then remove the loop from the lefthand needle. |
| SSK | (Decrease)-Slipthenextstitchonthe left needle knitwise, then slip the next stitchon theleft needlepurlwise.Take the left needle and knit through the front of the two slipped stitches on the right needle. [AnalternativetoSSKistodecrease with SKPO (slip, knit, pass over). To do SKPO,slipthenextstitchontheleft needleknitwise,knitthenextstitchon theleftneedle,thenpasstheslipped stitchontherightneedleoverthe |
| K2TOG | knittedstitchontherightneedle.] (Decrease)-Knit two stitches together through the front of the loops. |
| P2TOG | (Decrease)-Purl two stitches together. |
| ...] | Repeat the stitches in square brackets by the number indicated. |
| (-..) | The numberinround brackets indicates the number of stitchesper row. |
Making up ...
Use the same yarn used to knit the cherry or leaf to sew all seams. Tie any knots on the inside (as these will not be seen when the cherry is completed), and bury any loose ends from sewing in the stuffing. Use mattress stitch to sew the seams together unless otherwise specified. Knitting Needle Size Chart ..
| Metric | UK US |
| 2.75 mm 12 | 2 |
| 3.0 mm 11 | |
| 3.25mm 10 | 3 |
| 3.5 mm | 4 |
| 3.75mm 9 | 5 |
| 4.0 mm 8 | 9 |
Tension ...
Tension (or gauge) is not important. However, stitches should be close together so that when the finished cherry is stuffed, the stuffing does not come out through gaps in the stitches. It is advisable to knit a test square before starting toensurethecorrectneedlesizeandtension is used. If the test square shows stitches are loose, try adjusting the tension or using a smaller needle size.
About the pattern ...
\* You do not have to add a pin, you can sew the decoration in place if you prefer. \* You could make your cherries as a hanging decoration by adding a length of ribbon or braided wool. \* If you are making these cherries to give to a baby or child, please ensure you have no loose parts (loose threads, etc) which can be potential choking hazards. Also be cautious about the type of yarn, as fluffy brushed mohair yarns can have small fibres that can be swallowed by children. \* For safety, do not add a pin if this is to be used by a baby or child.
Knitting pattern .
Cherry
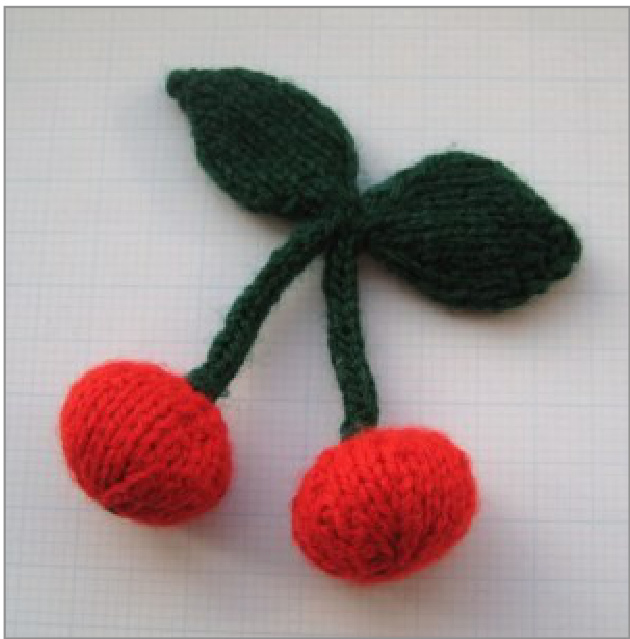
Make 2. Start at the top of the cherry. Knit in red. CO6 1. P (6) 2. [KFB] X 6 (12) 3. P (12) 4. [KFB, K1] X 6 (18) 5. P (18) 6. [KFB, K2] X 6 (24) 7. P (24) 8. K (24) 9. P (24) 10. [K2TOG, K2] X 6 (18) 11. P(18) 12. [K2TOG] X 9 (9) Break the yarn leaving a tail. Thread the yarn through the remaining stitches and pull tight to gather at the base of the cherry. Secure the thread.
Leaf and Stalk
Make 2.
Start at the tip of the leaf. Knit in green. CO3 1. P(3) 2. K1, KFB, K1 (4) 3. P (4) 4. [KFB] X 4 (8) 5. P (8) 6. K1, [KFB] X 2, K2, [KFB] X 2, K1 (12) 7. P (12) 8. K2, [KFB] X 2, K4, [KFB] X 2, K2 (16) 9. P(16) 10. K(16) 11.P (16) 12. K (16) 13. P (16) 14. K2, K2TOG, SSK, K4, K2TOG, SSK, K2 (12) 15. P (12) 16. K1, K2TOG, SSK, K2, K2TOG, SSK, K1 (8) 17. P (8) 18. [K2TOG] X 4 (4) 19. P2TOG, P2 (3) Transfer the 3 stitches to double pointed needles (DPNs) to knit the i-cord stalk. Start with the right side facing you. Knit i-cord on 3 stitches for a length of 4cm. Cast off all stitches.
Making up ...
Using the cast off tail at the base of the cherry, sew the seam towards the top of the cherry (the cast on edge). Add stuffing as you sew.

Gather the cast on stitches at the top of the cherry and secure the thread. If you wish, you can embroider small stitches for decoration on the base of the cherry using blackwool. When making the leaves, note that the leaf seam runs down the centre of the back of the leaf. Sew the leaf seam using mattress stitch from the tip, ending at the beginning of the i-cord stalk. Secure the thread.
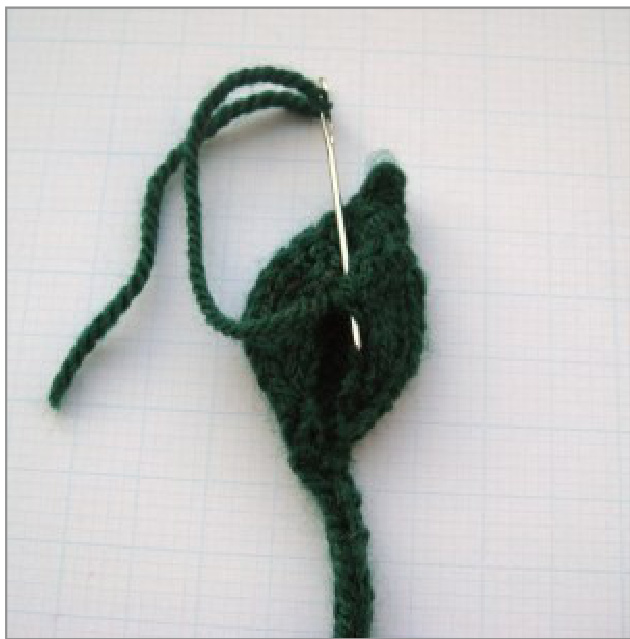
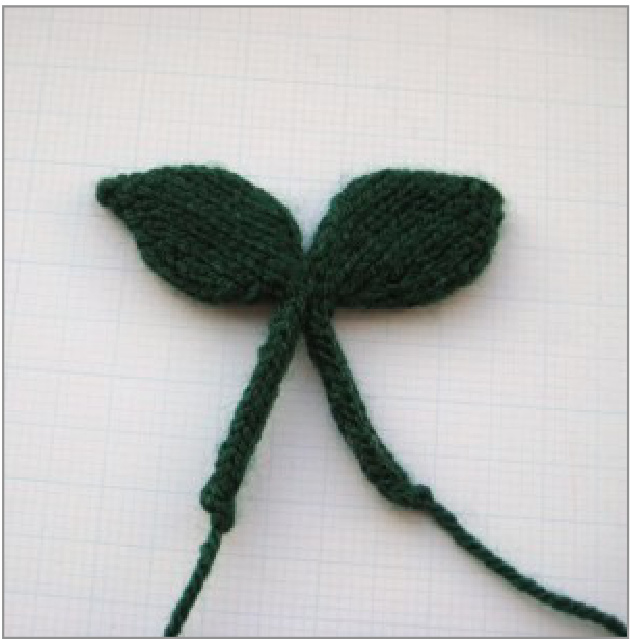
Place the two finished leaves side by side, seams facing downwards. Sew through the top of the stalks to attach the two leaf pieces together.
Sew the i-cord stalk to the top of each cherr)
Add a brooch pin or safety pin on the back of the leaves.
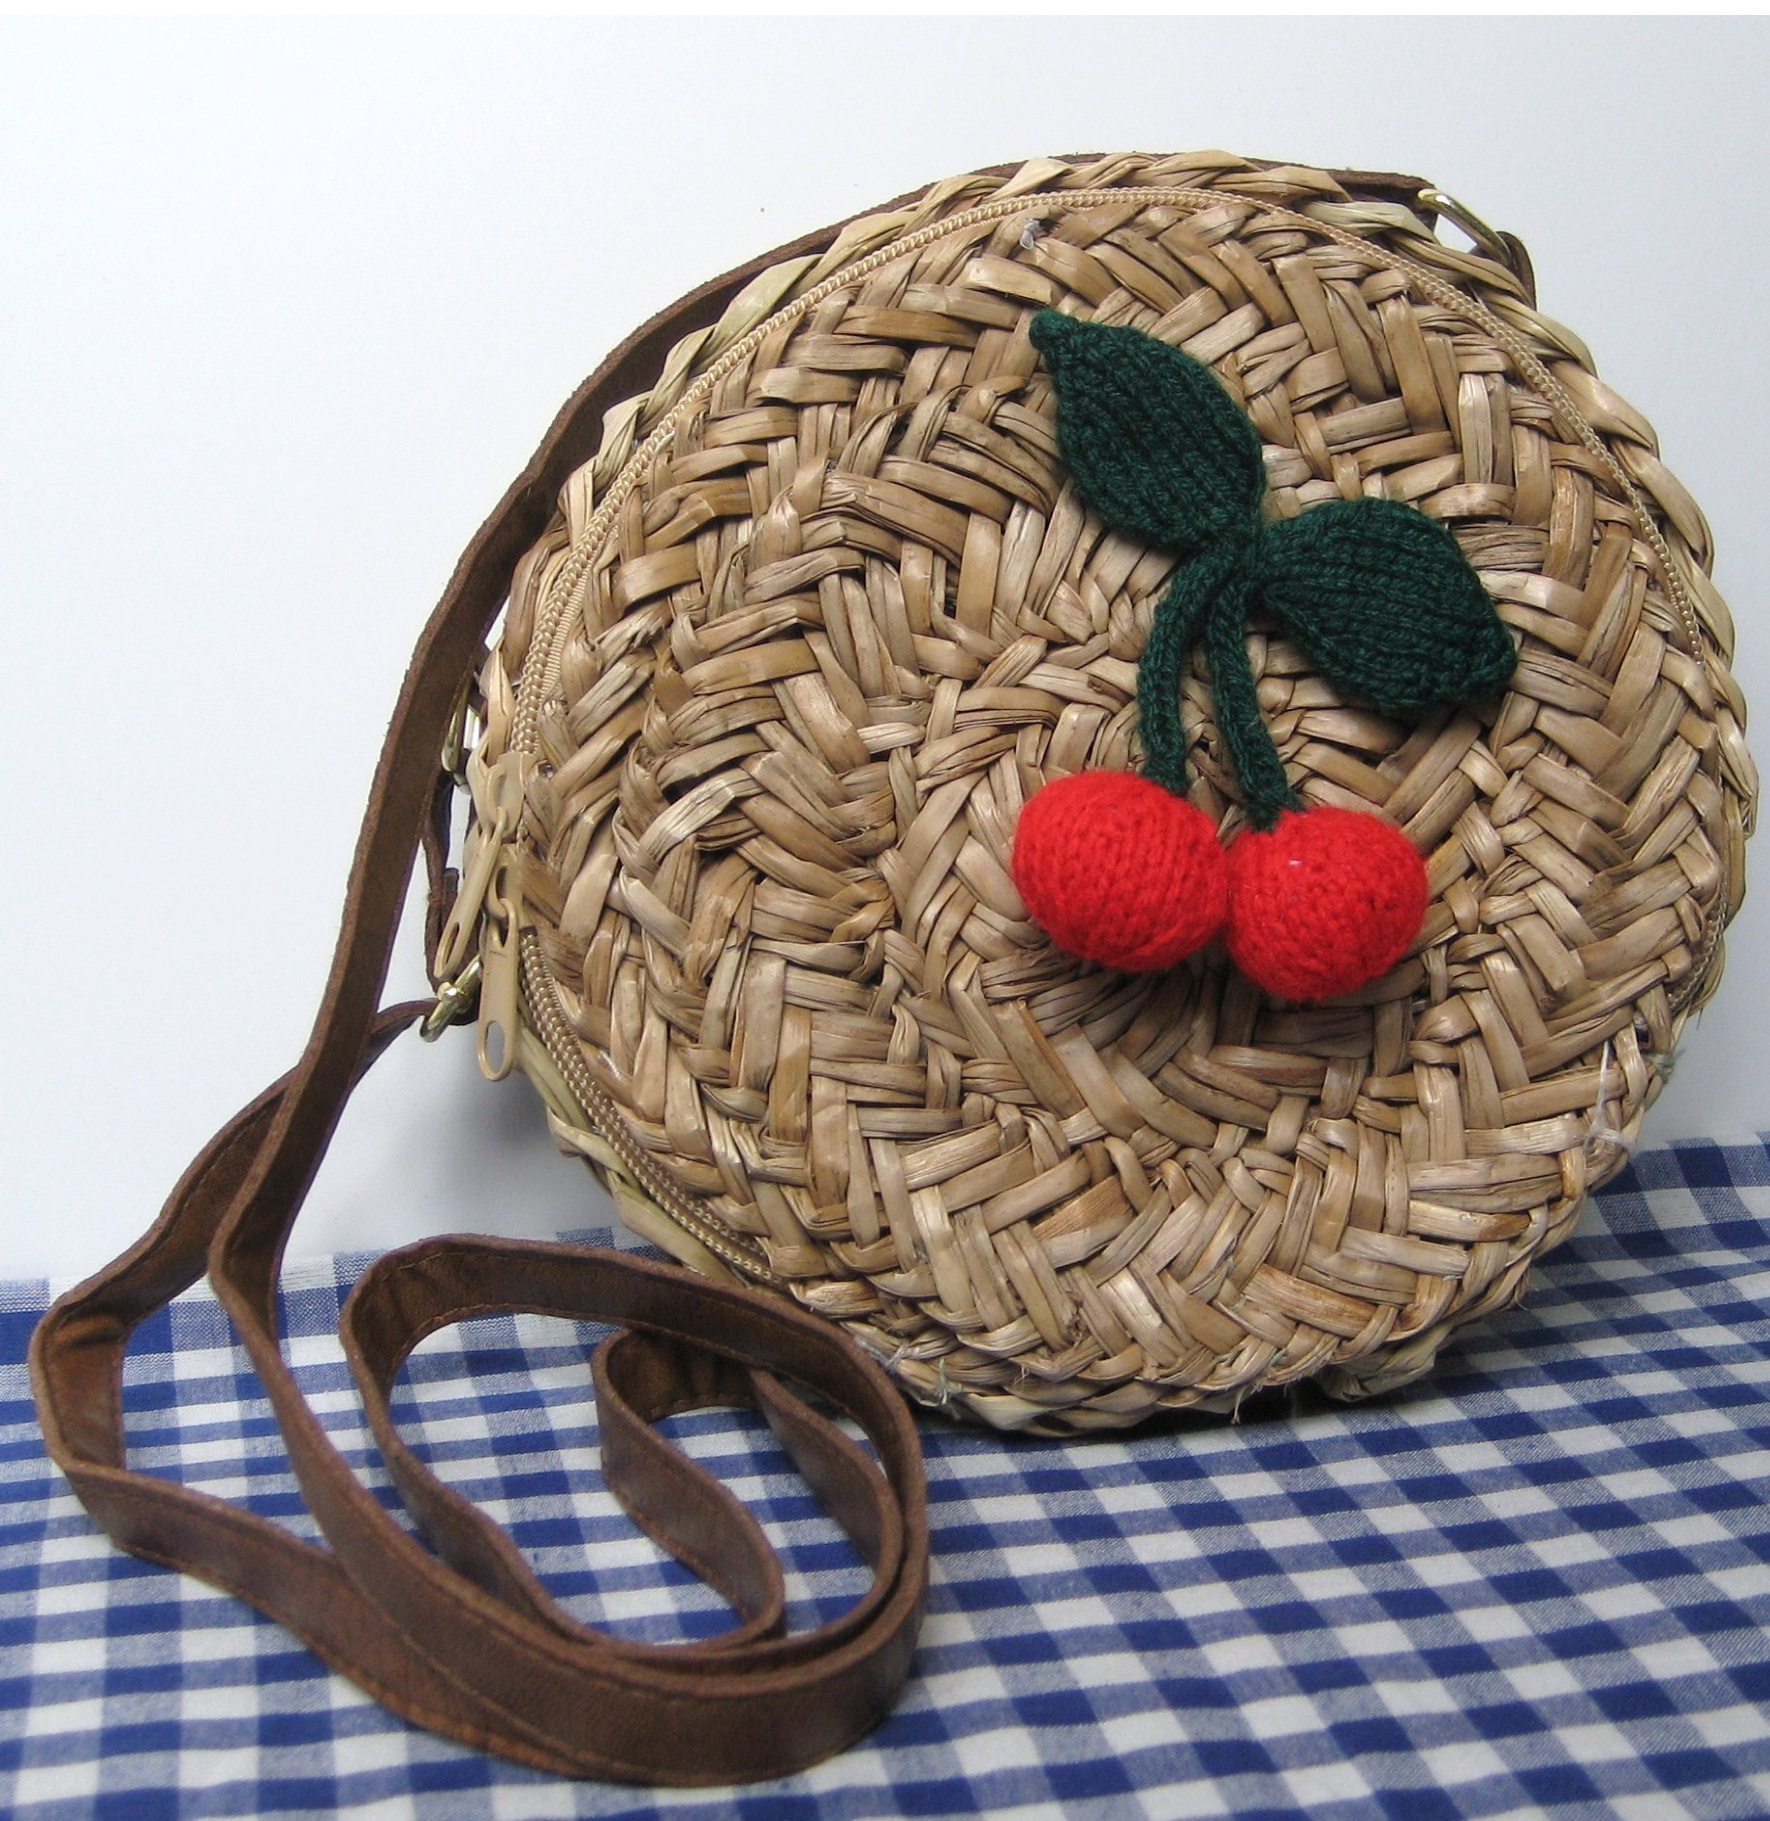
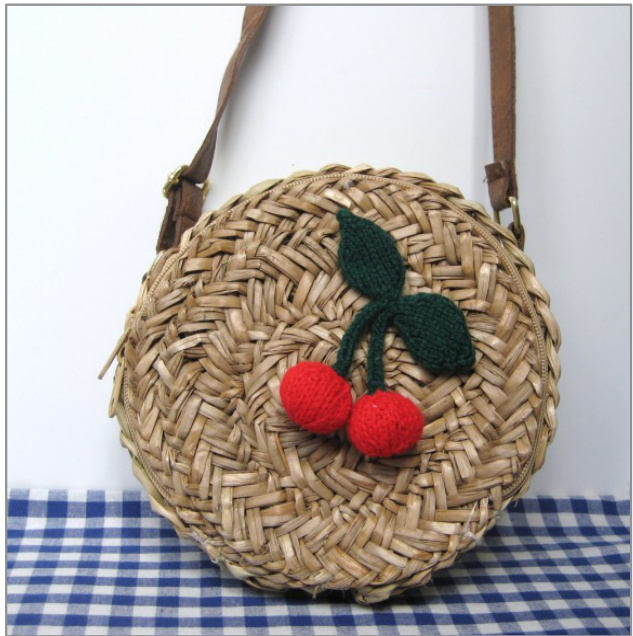
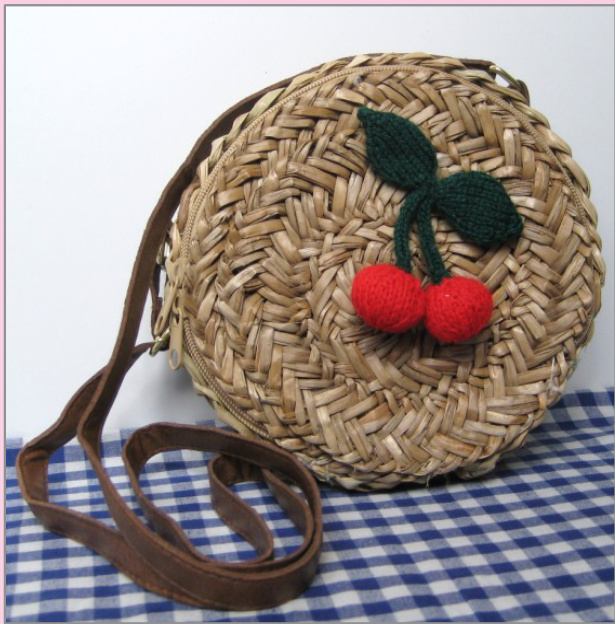
Pin to your bag, jacket, or whatever you like, and you're ready to spread some fluffy fuzzy cherry happiness!
About the author ..
Amanda Berry lives in Berkshire, England. She was taught how to knit by her mother at a young age, and rediscovered her love of knitting over twenty years later. She started designing as fluff and fuzz in 2010. Amanda is passionate about knitting, and enjoys making and designing toys. "I have a short attention span, plus I am a slow knitter, so if you asked me to make a sweater I would give up after a few weeks. I love making toys because they are quicker to complete than a garment, more fun to make than a scarf, and you don't have to worry about whether they will fit you!"
fluffandfuzz.etsy.com fluffandfuzz.folksy.com ravelry.com/stores/fluff-and-fuzz Copyright @ 2010, 2011 Amanda Berry


