Socks for His Nibs
byTerrolGetson $\copyright$

I do apologize for the long-winded pattern, but this is my first published pattern and I want to make sure that everything is crystal clear. If you have any problems or questions please contact me $@$ Terrol The last few years I've pretty much knit socks exclusively. A friend of mine, Wendy Champaign, showed me “Socks Soar on Two Circular Needles" by Cat Bordhi and I've never looked back. In my humble opinion, her next book “New Pathways for Sock Knitters? is the best sock book on the market. Once I found out about Ravelry, my knitting world was turned on its head. I found out about Yarnissima, (Marjan Hammink) who designs socks - not just any socks, but socks to die for, with unusual gussets and patterns so delightful, I was smitten. David Shulz also influenced me as he has made the increases for the gussets every $2^{\mathrm{nd}}$ row instead of every 3rd row, which makes the sock lok more normal offthe foot. Big thanks go out to my two test knitters Wendy Champaign and Sharon Gowland. They've corrected all my snafus and have had some briliant suggestions, most of which I've incorporated. Thank you both, much appreciated.
Requirements:
· 1Addi $80\;\mathrm{cm}$ or longer circular, $2.25\;\mathrm{mm}$ or the size which gives you gauge. · This pattern is writen expressly for magic loop, you may use whatever needles you wish, but you will need some experience converting from one to the other. $100\;\mathrm{g}$ of your favorite sock yarn. $\bigcirc$ I used Wollmeise Sockenwolle 80/20 Fluffy. I started with $159\ \mathrm{g}$ ending up with $45\ \mathrm{g}$ 0 Tausendschon Handgefarbte Sockenwolle, 100 g, 420 meters. Schurwolle / Bambus/Seide, used $42{\mathrm{~g~}}$ for each sock.
Stitchmarkers:
I use leftover yarn from another project.
Size:
· To fit a 10 inch circumference. It is easily adjustable to a smaller or larger circumference. Length is also adjustable. Martin’s are $10\%$ inches.
Gauge:
8.5 stitches to the inch 11 rows to the inch
Pattern Notes:
Where am I - Left or Right Gusset:
· I often get confused with my right and left gusset. Just pretend you are wearing your sock and look down at your feet and you'll figure out where you are very quickly. Judy Becker's Magic Cast On Magic Loop a video on YouTube by theknitwitch which demonstrates the magic loop technique.
Increase one purl ways:
Lift the bar between the needles with the left needle tip, inserting it frm front to back. Purl the stitch through the back.
Inc one knit ways:
$\mathbf{K}\mathbf{\:f}/\mathbf{b}=\underline{{\mathbf{K}}}$ one front and back Knit one, but do not remove stitch from the left needle, now knit into the back of the stitch. Slide the new stitch onto the right needle. 2 stitches fromone. $\mathbf{P}=\mathrm{Purl}$ $\mathbf{B}=\mathbf{K}\mathbf{\Omega}1$ through the back loop $\mathbf{TBL=}$ through the back loop P1 $\mathbf{TBL}=\mathbf{P}\mathbf{url}$ through the back loop
Left Twist:
Insert the right needle behind the left needle into the back of the $2^{\mathrm{nd}}$ stitch on the left needle and knit it, do not drop the stitch off the needle, now knit the $1^{\mathrm{st}}$ stitch and drop both off the left needle.
Right Twist:
Insert needle into the $2^{\mathrm{nd}}$ stitch on needle, stretch the stitch a bit and knit it without removing stitch from needle, you may have to move the stitch you have just worked with your thumb to access the next stitch. Now knit the 1st stitch and drop both off the left needle. Knit 2 stitches together but do not drop off the left needle, knit the $1^{\mathrm{{st}}}$ stitch again dropping both stitches off left needle.
W& T:
On the public side, bring the yarn to the front, slip the next stitch to the right needle, move yarn back, slip the stitch back to the left needle, turn work. On the wrong side (purl side) bring the yarn to the back, slip the next stitch to the right needle, move yarn back to the front, slip the stitch back to the left needle, turn work.
Wrapping (W&T) and Concealing Wraps (CW):
Cat Bordhi has come up with a method for “wrap and turn" that is quite ingenious. Below, you will find videos for part one and two. On the last row of concealing wraps, Cat tells you to use up the last wrapped stitch with the last unwrapped stitch. Do not do this. You need this stitch. O http://www.youtube.com/watch?v $\because$ yVikAvPuE4 O http://www.youtube.com/watch?v $\because$ kFrVqx-iN7k&feature=related
Even:
Work the stitches as they appear.
Adjusting to larger or smaller circumference...
Let's say you normally do a sock with 64 stitches. I would add two more stitches and work with 66 stitches as you need an odd number of stitches between the two sets of B, P and B. Your increases for the gusset will be half of 64 which is 32, so you would make 16 increases. Follow the basic pattern but put in your own numbers. For the cast on start with 8-12 stitches or whatever you are comfortable With. Read pattern through from start to end to familiarize yourself with what is coming next.
TOE:
Using the Judy Becker Cast On or your favorite method Cast On 26 stitches, 13 to each needle. Start of rnd is the instep. Knit one round plain. 1) Increase Round: $^{*}\mathrm{K}\ \mathrm{f/b}$ , knit to 2 stitches before the end of the needle, K f/b, $\mathrm{K}1^{*}$ . Repeat from \* to \* for the sole. 2) Rest Round: K across instep and sole needle, working stitches as they appear. Repeat rounds 1 and 2 until you have 37 stitches on each needle, for a total of 74. Knit one round plain.
FOOT:
·Round 1)Instep needle. $^{*}\mathrm{B}$ P, B, knit to last 3 stitches, B, P, $\mathbf{B}^{\ast}$ . Repeat from \* to \* for sole needle. Continue knitting round one until the start of the gusset.
How to calculate when to start with the gusset:
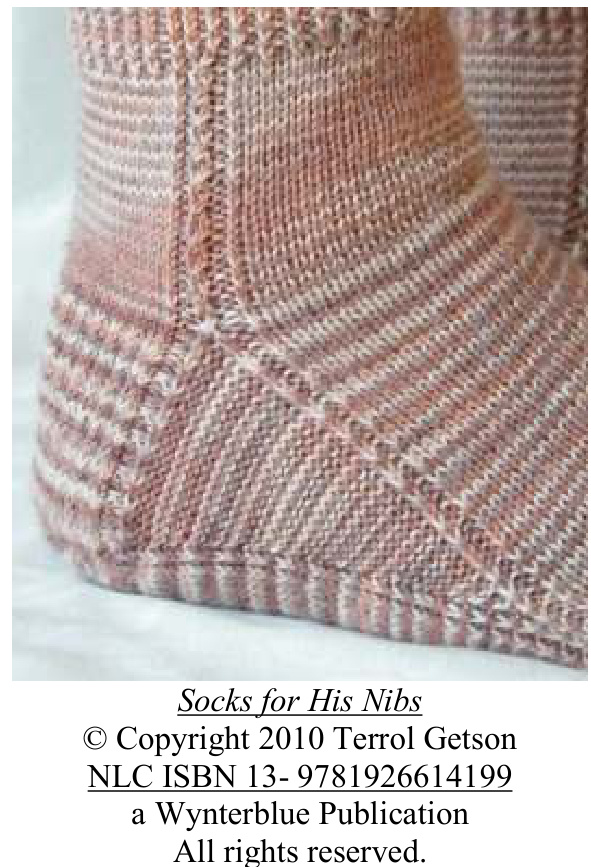
How long do you want the foot to be? I designed this sock for Martin and his foot is $10\%$ inches long. I subtracted $^1\!/\!_{4}$ inch for a snug fit. TOTAL LENGTH WHEN FINISHED: $10\;\%$ inches You may wonder why I've not calculated using the $37^{\mathrm{th}}$ stitch - well, I've ignored it. I didn't want any half stitches. It's totally up to you. $^1\!/\!_{2}$ of foot stitches $=36$ increases for gusset $=18$ $36+18$ (gusset stitches) $=54$ 54 / 11 ( row gauge) $=4.90$ 10.25 - 4.90 $=5.35$ inches. Continue Round 1 until the foot is 5.35 inches. There is a detailed picture of the gusset on the last page.
Set up row for the gusset:
K 31, B, P, B (end of the instep needle) Start of the sole needle: B, P, B , move these three stitches just worked to the end of the instep. K31. Work the last 6 stitches even. This is the new end of round, place coiless pin in knitting to mark the start of round. Moving the stitches makes it possible to do the increases for the gusset.
Increases for the gusset:
$2^{\mathrm{nd}}$ set up round for gusset. Instep needle. \*Knit 31, B, P, B,increase 1 purl ways, B, P, B\*. Repeat from \* to \* for the sole needle. Work one round even.
Round 1)
(instep) Knit 31, B, P, B, increase 1 purl ways, purl to end of right gusset stitches, B, P, B. ·(sole) K31, B, P ,B, purl to end ofthe left gusset stitches, increase 1 purl ways, B, P, B.
Round 2) Work even.
Repeat rounds 1 and 2 until you have 18 gusset (purl stitches). You should have: OK 31, B, P, B, 18 purl stitches, B, P, B on each needle.
Set up round for starting to turn the heel:
·K31, push the rest of the stitches on the left onto the sole needle. All of the stitches that you need to complete the heel turn and the heel flap are on the working needle. Now work B, P, B, P18, place marker here for start of round. · You will be working the heel turn-over the next 37 stitches. To make it easier to keep count of the wrapped stitches at the end of the $1^{\mathrm{{st}}}$ rnd of the heel, turn slip stitches 36 and 37 to the right needle, place a marker and move stitches 36 and 37 back to the left needle and turn, continue onto row 2 of heel turn. Stitch 36 is the stitch you just wrapped and stitch 37 is the orphan which is not worked.
Heel Turn:
The $\overline{{\boldsymbol{I}^{s t}\;\mathfrak{I}}}$ rows need concentration, but once these are done its smooth sailing. Row 1) B, P, B, (Sl 1, K1) to last 4 stitches before marker, Sl 1, B, W & T. Row 2) P1 TBL, purl till 3 stitches before marker, P1TBL, W & T. Row 3) B, (Sl 1, K1) to 3 stitches before marker, W & T. Row 4) Purl to last 3 stitches before marker, W & T. Row 5) (Sl 1, K1) to last 4 stitches before marker, W & T. Row 6) Purl to last 4 stitches before marker, W & T. Row 7) (K1, Sl 1) to last 5 stitches before marker, W & T. Row 8) Purl to last 5 stitches before marker, W & T. Row 9) (Sl 1, K1) to last 6 stitches before marker, W & T. Row 10) Purl to last 6 stitches before marker, W & T. Row 11) (K1 Sl 1) to last 7 stitches before marker, W & T. Row 12) Purl to last 7 stitches before marker, W & T. Row 13) (S1 1, K1) to last 8 stitches before marker, W & T. Row 14) Purl to last 8 stitches before marker, W & T. Row 15) (K1 Sl 1) to last 9 stitches before marker, W & T. Row 16) Purl to last 9 stitches before marker, W & T. Row 17) (Sl 1, K1) to last 10 stitches before marker, W & T. Row 18) Purl to last 10 stitches before marker, W & T. Row 19) (K1, S1 1) to last 11 stitches before marker, W & T. Row 20) Purl to last 11 stitches before marker, W & T. Row 21) (S1 1, K1) to last 12 stitches before marker, W & T. Row 22) Purl to last 12 stitches before marker, W & T. ·You are now ready to start eating up the gusset stitches. This can be a bit awkward for the first few rows but it gets better. 31 plain knit stitches are on the instep needle at this time. Please feel free to conceal the wrapped stitches with whatever method you are most comfortable with.
This might be a good time to watch the video with Cat, links on page 3.
Row 1) K1, S1 1 to the $1^{\mathrm{st}}$ wrapped stitch, conceal the wrap: (pick up the wrap using the tip of the right needle and pick up the wrap and slip it over the stitch on the left needle so it is on the left of the stitch) and knitting the stitch and wrap together. Continue concealing the wrapped stitches until only one wrapped stitch remains. Conceal this wrap by purling the stitch and the wrap together TBL, last stitch on needle, K1 TBL. Turn. Do not wrap any stitches. 0 You are purling this last wrap to maintain the integrity of the pattern. (B,P &B) O On row 2 you may need to tilt your knitting forward to be able to see the wrap. · Row 2) Sl 1, K1, P1 TBL, purl across to the $1^{\mathrm{st}}$ wrapped stitch by (with the tip of the right needle pick up the wrap and slip it over the stitch on the needle so it is on the right side of the stitch, purl them together, continue concealing the wraps till 3 stitches remain, (CW PTBL, CW K, PTBL), turn. Row 3) Sl, P1, B, (S1 1, K1) to last 4 stitches, Sl 1, B, P, ssk, turn. Row 4) Sl 1, K1, PB, purl across to last 3 stitches, PB, K1, P2tog, turn. $\bigcirc$ Repeat rows 3 and 4 until you have eaten up all 18 gusset stitches. $\bigcirc$ Set up row to start working in the round. O S1 1, P and B, push these three stitches to the end of non working needle. O Place coiless pin in knitting to denote starting needle. New beginning of rnd is back of leg.
LEG:
Round 1, Part 1) Joining back into the round.
K31, B, P, LT (Insert the right needle behind the left needle into the back of the $2^{\mathrm{nd}}$ stitch on the left needle and knit i, do not drop the stitch off the needle, now knit the $1^{\mathrm{st}}$ stitch and drop both off the left needle), P, B. This needle is the back of the leg.
Part 2 of Round 1)
· K31, B, P, RT (Insert needle into the $2^{\mathrm{nd}}$ stitch on needle, from the front, stretch the stitch a bit and knit it without removing stitch from needle, you may have to move the stitch you have just worked with your thumb to access the next stitch. Now knit the 1st stitch and drop both off the left needle) or K2 together, but do not remove stitch from left needle, knit the $1^{\mathrm{st}}$ stitch again dropping both stitches off the left needle), P and B. Now work 2 rounds even. · Continue as set doing the twist on the center two $\mathrm{B}\,\mathrm{^s}$ every $3^{\mathrm{rd}}$ row. ● I did this for about 2 inches and then switched to ribbing.
Ribbing:
\*(P, B) X 15, P, B, P, B, B, P $\mathbf{B}^{\ast}$ repeat from \* for the other needle. · Continue twisting the two center B stitches every $3^{\mathrm{rd}}$ row. Repeat for $2~\%$ to 3 inches or however long you want your sock to be.
Cast off by using the following method or use your favorite method:
Work 2 stitches in pattern, \*replace the 2 stitches on the left needle and K 2 together, work 1 stitch in pattern,\* repeat between \*. 0I cheat and ignore the step “replace the 2 stitches on the left needle” and just slide the left needle tip to tip through the 2 stitches on the needle and knit together through the back loop. The left needle should be in front of the right needle to execute the K2 together.
This next tip comes from Cat Bordhi:
·At the end you will be left with one stitch on the right needle. Remove the needle from the knitting and be careful not to lose that last stitch. Cut the working yarn, leaving a tail about 6 inches long. Thread the working yarn onto a darning needle and take the needle through the first bound off stitch (both legs) and then down through the stitch where the tail came from. Now tug on the tail until the join looks smooth. Sew in ends and make another one $\circledcirc$
If you find any mistakes, need to ask a question or for feedback: Email: Terrol


