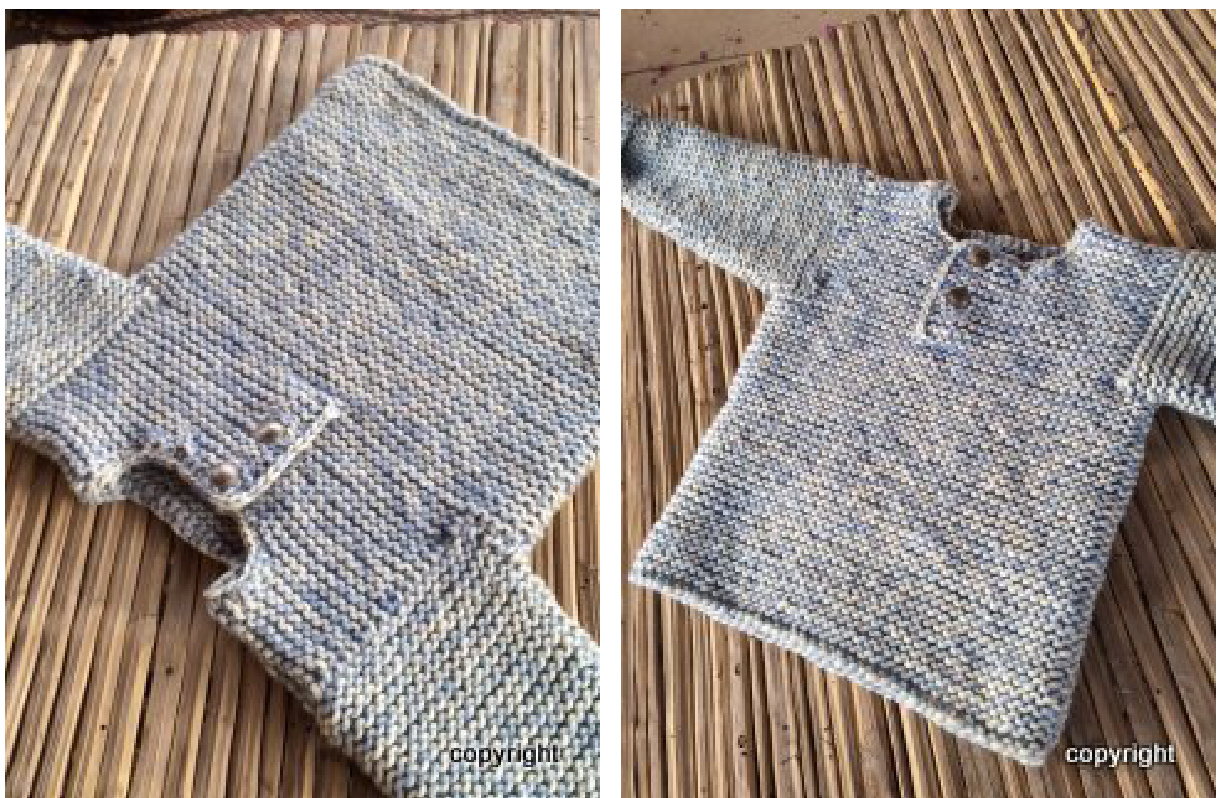
Minstemann
sizes (2) 4 (6) and 8 years A thick and warm sweater for those cold winter days Worked back and forth in Garter stitch
Minstemann
SIZES: about (2) 4 (6) and 8 years YARN: Super bulky 100 % wool, 100 grams = 65 yds Rasta super bulky or Gruesa (thin and thick) from Malagrigo Lopi Super bulky from Alafoss, Tuscany (discontinued), Cascade Yarn or other wool yarn in similar weight YARNAMOUNT: about (750) 850 (900) (950) 1000 grams any color NEEDLES: US10 (6 mm) and 3.75 mm crochet needle for neck edge GAUGE: 10 x 11 rows = 4 x4"(10 x 10 cm) in pattern MEASUREMENTS: Sleeve length, about (10) 12 1/4 (14 1/8) 15 3/4", can be adjusted Chest width, about (211/4) 24 3/8 (27 1/2) 30 3/4" Full length, about (15) 16 1/8 (17 3/8) 19 1/4", can be adjusted BUTTONS: 2
ABBREVIATIONSANDEXPLANATIONS:
st (-s) = stitch (- es) k =knit RS = right side dec = decrease inc = increase WS = wrong side tog = together k2tog = knit 2 stitches together (dec) ssk = slip, slip, knit these 2 sts tog(dec) skp = slip1, k1, pass slipped st over rep\*\* = repeat from \* to\* Garter st ridge, 2 rows = k 1 row RS, and k 1 row WS
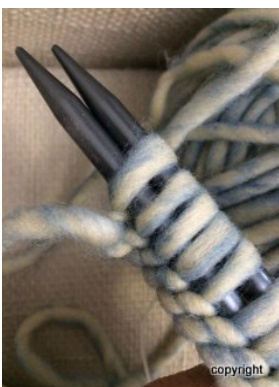
CO with double needles
BACK
Preventing a tight CO row, I suggest doing the CO with double needles. CO (31) 35 (39) 43 sts and work (24) 27 (30) 33 Garter ridges back and forth, counted from the Rs. Slip the first st on every row, creating small loops on each side of the project. Later, after all parts are finished, the side seams will be sewed together through these loops. Next row, RS, \*BO the 4 first sts\*, knit to the end, turn and rep\*\*. Work (14) 15 (16)17 more ridges. Shoulders, ridge 1 (RS): K (10) 11 (12) 13 sts, BO 9 sts, k (10) 11 (12) 13 sts. Turn and work to the BO sts, turn.
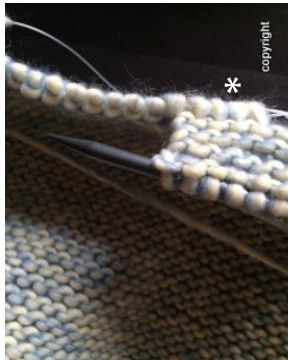
Ridge 2 (RS): skp, (9) 10 (11)12 sts, turn and knit to the BO sts, turn. Ridge 3 (RS): skp (8) 9 (10) 11 sts, turn and knit to the BO sts, turn. K 1 row (RS). Place the (8) 9 (10) 11 sts on a st holder, work the second shoulder the same way, making sure to dec by the neck, on the Ws. BO4sts\* for sleeve opening
FRONT
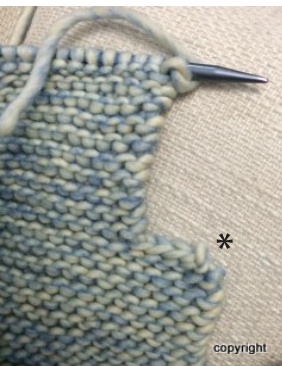
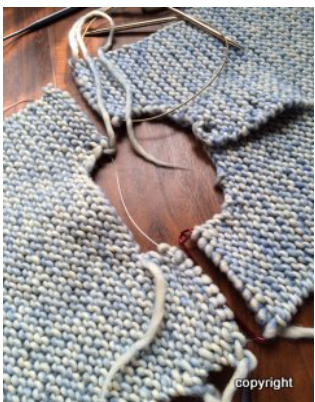
Worked as the back until after the 4 BO sts on each side. After the last BO for sleeve openings, work (12) 13 (14) 15 sts (WS), then pick up 5 sts from in front of, and under the next 5 sts. Turn and knit across (17) 18 (19) 20 sts. Continue on the left side, placing the right side sts on a st holder.
Pickup 5 sts\* from in front of, and under, the next 5 sts
Minstemann
FRONT (continues)
K (8) 9 (10) 11 ridges across the left front. BO 6 sts at the neck side (RS) and work to the end of the row. Turn and k back. Continue dec by for the neck opening, BO 2 sts, work to the end of the row, turn and k back. Dec again by the neck, 1 st, to a total of 11 sts. Work 5 more ridges, the last row from the Rs. Place the sts on a st holder and work the right front.
RIGHT FRONT WITH BUTTON HOLE
Work across the right side sts (placed on holder earlier), one time from the WS, then work (3) 4 (4) 4 ridges. Then ( WS) make a button hole like this: k 2, BO 2 sts, k to the end of the row. Turn and work back, CO 2 sts at the BO sts, k 2. Work (3) 3 (4) 5 ridges. From the WS, make another button hole as before. K 1 more Garter ridge and CO 6 sts on the next row by the neck (WS). Continue the dec, mirror imaging the left front, with 2, 1 st by the neck opening. Leave the sts on the needle.
SHOULDERS
The sts are left on the needles, so that they can be sewed together using Kitchener st on Garter st. If you find it hard to do, go to YouTube for some tutorials, or BO all shoulder sts and sew them together from the back side.
SLEEVES
Pick up sts from the sleeve opening on the body (RS), 1 st from every Garter ridge, about (34) 36 (38) 40 sts. Work (5) 6 (7) 8 ridges. Dec on the next and on every following (3rd) 3rd (4th) 5th ridge row, until (19) 21 (23) 25 sts left, or to desired length. Work the second sleeve.
ASSEMBLING
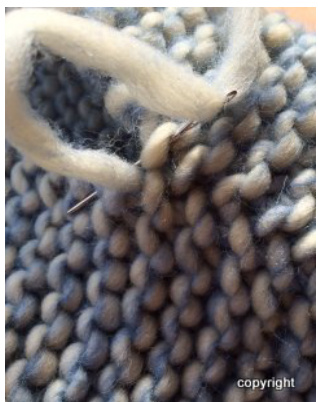
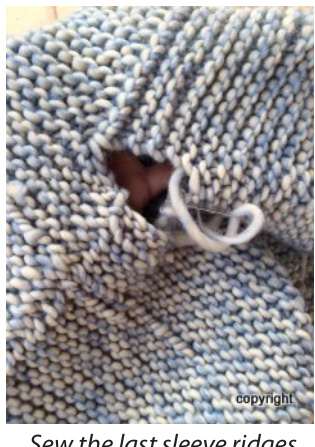
Sewtheshoulderstoqether Sew the side seams together through the loops formed at each ridge. When sewing the sleeves, start from the bottom edge and work until 3 ridges left. Sew the last ridges to the 4 BO sts on each side of the body. Place and attach 2 buttons to the front of the sweater. Sew the side seams through the ridge loops
NECK EDGE
to the 4 BO sts With a 3,75 mm crochet needle, work around the neck edge (RS) 1 time, using a SC st. Start at the button side and finish on the button hole side. Sew all loose ends to the back. Good luck!
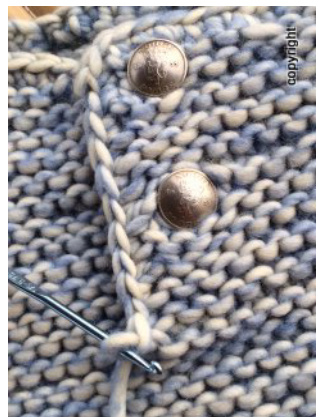
Crochet 1 time around the neck edge with SC


