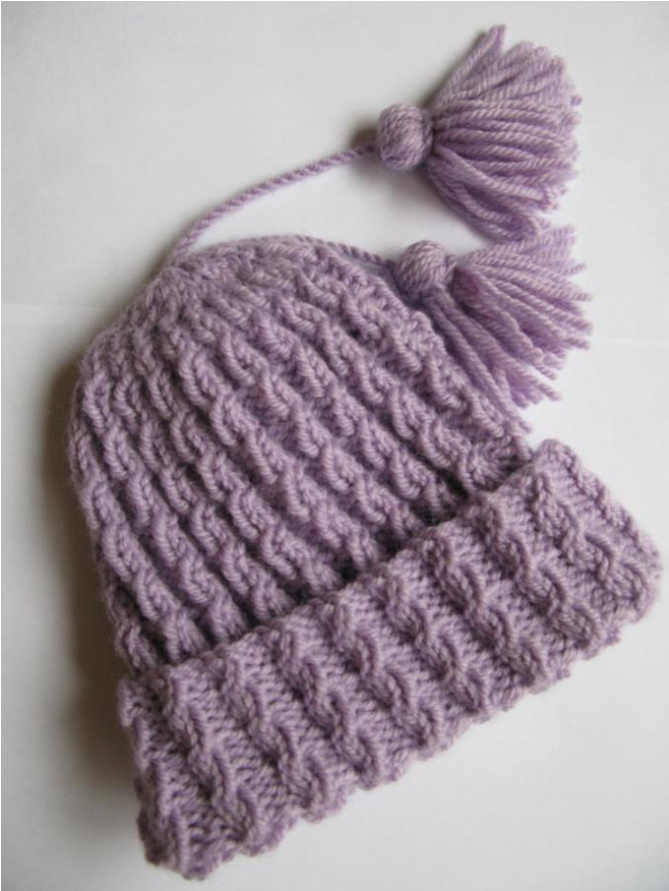
Mock Cable Hat
by Jane Comyns

I originally made this Mock Cable Hatto go with my popular Kids Mock Cable Scarf. A lot of people had asked me if I could design an accompanying hat so that they could knit a set for the "special little someone" in their lives. When I finished the first sample, my teenage daughter loved it so much that she begged me to make an adult version as well. Now the Mock Cable Hat is not just for kids, adults can enjoy it too! @ 2010 Jane E. Comyns. All Rights Reserved. Page 1 of 4
Mock Cable Hat
Finished Sizes
Toddler: 18"(Child: 21") Adult: 22"
Pattern
CO 80 (96) 112sts Join work so that it makes a circle and place a marker to mark the end of each round. Work pattern as follows: 1. \*K2,P2\* repeat from \*to\* until end of rnd. 2. As 1st rnd. 3. \*MoC, P2\* repeat from \*to\* until end of rnd. 4. As 1st rnd. Repeat 3 more times ending with a MoC rnd. Purl one rnd (fold edge.) Turn work inside out so that the ribbed side is now the right side. @ 2010 Jane E. Comyns. All Rights Reserved. Page 2 of 4 Yarn: Plymouth Encore (Worsted) - 1 skein (110g/3.5oz) 200yds, Lilac 233 Needles: US7 (4.5mm) 16" circular & US7 (4.5mm) DPNs or correct size to achieve gauge Pattern: 4 row pattern Gauge/Tension: 5 stitches = 1" Abbreviations: CO = cast on BO = Bind Off Rnds = rounds P2tog = purl 2sts together SSK = sl1st, sl1st, k2tog MoC (Mock Cable) - Place right hand needle after the two knit stitches on the left needle as if to knit. Knit the second of the two stitches, leaving both stitches on the left needle. Knit the first stitch, and remove both stitches to the right needle. Mock cable made. DPNs = double-pointed needles Bring yarn to front of work, sl1st from right needle to left needle. Move yarn to back, sl1st back from left to right needle. Continue with pattern from rnd 1. Repeat pattern until work measures 6"(6.5") 7" from fold edge ending with a MoC rnd.
Shape Crown
1. \*K2,P2tog\*, repeat from \* to \* until end of rnd. 2. \*K2, P1\*, repeat from \* to \* as before. 3. \*K1, SSK\*, repeat from \*to\*. Change to DPNs. 4. MoC 5. K2tog 6. Knit 7. K2tog 8. K2tog Secure and weave in ends with a tapestry needle.
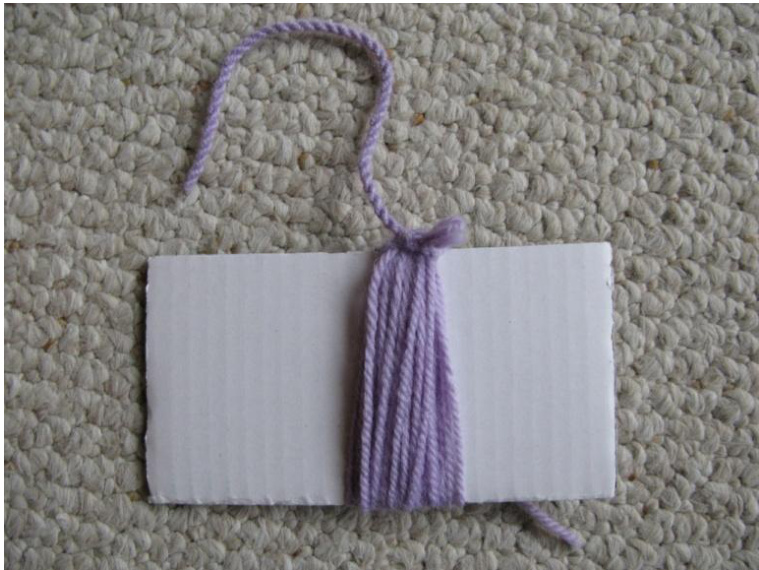
To Make Tassel
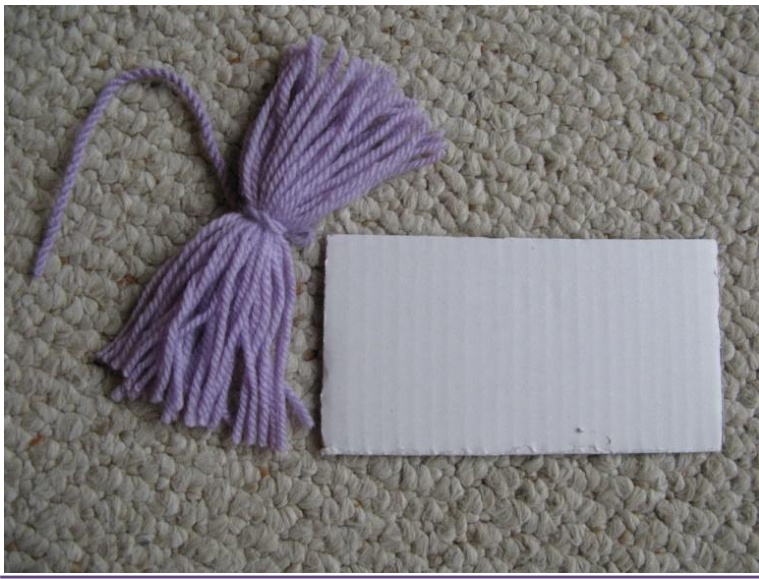
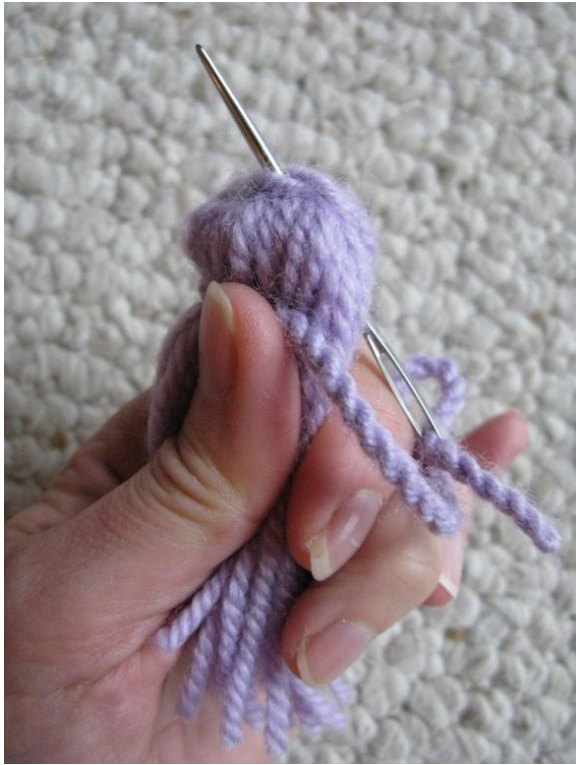
Cut a length of yarn approximately 52" long. Place a pencil in the loop and hold firmly. With the open ends together, twist until the yarn becomes tight and starts to twist back on itself. Fold the length in half and allow this twist to happen. You now have a piece of cord. Cut a piece of cardboard measuring the approximate length of the desired tassel. Wind yarn around it about 25 times. Thread cord through one end and tie to secure tassel. This will become the top. Now cut through yarn at opposite end releasing it from the cardboard. Thread the end of the cord on to a tapestry needle and then wind the cord around the top of your tassel about a thumb width down. @ 2010 Jane E. Comyns. All Rights Reserved. Page 3 of 4
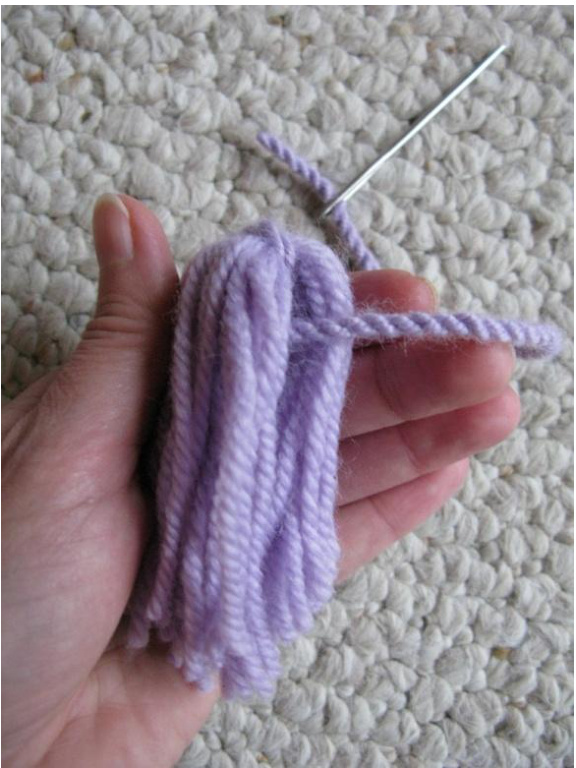
Secure by passing the needle up through the top of the tassel to finish. Make two of these and attach to the top of the hat, varying the length of each one for a touch of style.
Information:
lems or think you may have found an error, please e-mail me at wtknits@gmail.com The entire contents of this pattern and the knitted design to which it refers are subject to copyright. Without the express permission of Jane E. Comyns you may not distribute or sell electronic or paper copies of this pattern in any way. Nor may you sell any items produced using the directions in this pattern. @ 2010 Jane E. Comyns. All Rights Reserved. Page 4 of 4


