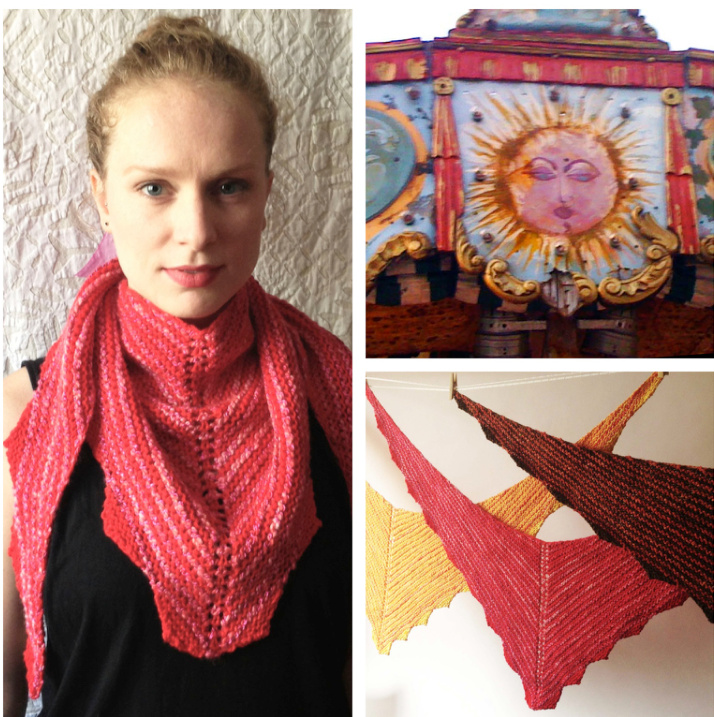
Carousel Scarf, Handspun Version
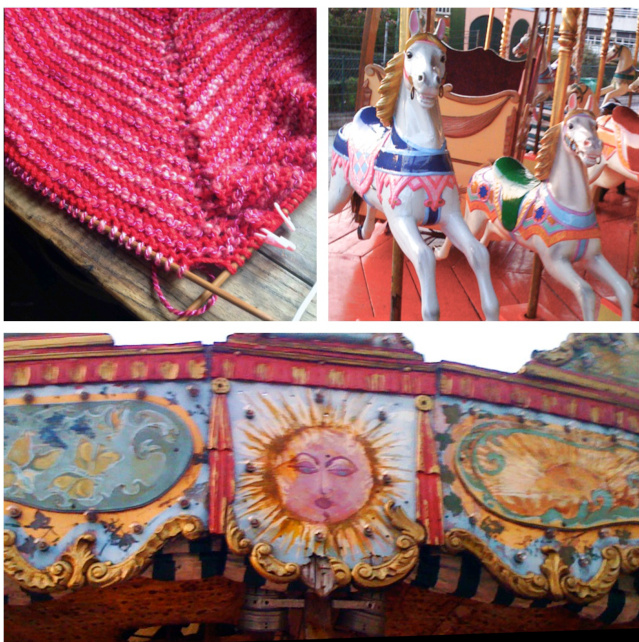
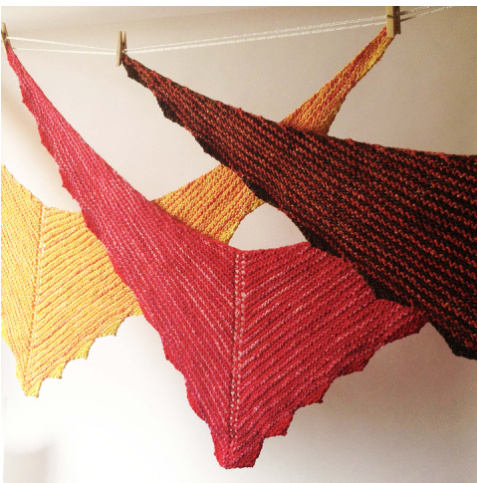
by Cate Carter-Evans Inspired by the fluted edge of an old Parisian carousel, this v-shaped scarf with a modern edging detail is remarkably easy to wear. As simple as it is, this is the scarf pattern I find myself returning to time and time again. Its v-shape keeps it in place with a minimum of fuss, and it's just the right size to be cozy without being overly bulky. Worked in alternating garter-stitch stripes with a central column of yarn-overs. Once you're past the first few rows, this scarf is easy to knit without the pattern - perfect for social knitting or travel.
About this Pattern
Skill Level: Beginner / Intermediate Skills Needed: Basic knitting skils, plus increases (yo, kfb) and decreases (sl, psso, k2tog).
Finished Size:
Wingspan: 60 inches / 151 cm (approx 50 in. / 128 cm before blocking) Depth at center: 15 inches / 38 cm.
Yarn:
MC: Infinite Twist Helix (held double), 450 y CC: Infinite Twist Halo Shine, Halo Heather, or Orbit Heather - 150 y
Needles:
U.s. size 7/ 4.5mm circular needle, at least 80 cm long recommended, or any size yielding correct gauge.
Gauge:
14 stitches / 32 rows over 4" in garter stitch. Notions: 11 stitch markers, yarn needle.
Abbreviations
CC - Contrast Color K - Knit Kfb - Knit front and back K2tog - Knit two together K3tog - Knit three together MC - Main color Pm - Place marker Psso - Pass slipped stitch over. Rs - Right side SI- slip Sm - Slip marker St(s) - Stitch(es) Rem - remains Ws - Wrong side Wyif: with yarn in front Yo - Yarn over Ytb - yarn to back. Move yarn being careful to avoid making
Scarf Body
Using the Long Tail Cast On Method, cast on 7 stitches with CC (Halo Shine, or other hand-spun yarn). Row 1 (Rs): Continuing with CC, kfb, k2, yo, pm, kl (this stitch is the center of the pattern), pm, yo, k2, kfb. 4 sts increased. 11 sts. Row 2 (ws): Change to MC. Kfb, k to 1st marker, sm, kl, sm, k until 1 st rem, kfb. 2 sts increased. Row 3 (Rs): Continuing with MC, kfb, k to Ist marker, yo, sm, kl, sm, yo, k until 1 st rem, kfb. 4 sts increased. Row 4 (ws): Change to CC, work as row 2. 2 sts increased. Row 5 (Rs): Continuing with CC, work as row 3. 4 sts increased. Work rows 2 - 5 18 more times until you have 239 stitches (119 stitches on either side of the center stitch), ending with a row 5 (CC). Final Body row: Using MC, work as row 2. 241 sts. Do not break MC.
Working the Border
Place a stitch marker (pm) every 12 stitches 9 times. Pattern Note: If you discover that you have too few stitches, divide the missing stitches evenly across the work and add kfbs to row 1 of the border pattern as needed. If you have too many stitches, reduce them evenly by working the border pattern segments with 13 sts (as border triangle + center stitch below) as needed. Row 1: with mC, kl2 (to marker), turn. Row 2: s1wyif, ytb, k1, psso, k8, k2tog. 10 sts. Row 3: s1wyif, ytb, k1, psso, k6, k2tog. 8 sts. Row 4: slwyif, ytb, k1, psso, k4, k2tog. 6 sts. Row 5: s1wyif, ytb, kl, psso, k4, k2tog. 4 sts. Row 6: s1wyif, ytb, kl, psso, k2tog. 2 sts. Row 7: k2tog. Break yarn and weave in end. Re-join mC and work from row 1. Work 7 more times to complete 8 border triangles.
Border Segment + Center Stitch
There should now be 12 stitches before the center stitch (remove markers before and after center stitch) Row 1: K13 (including the center stitch), turn. Row 2: : slwyif, ytb, kl, psso, k9, k2tog. 11 sts. Row 3: s1wyif, ytb, k1, psso, k6, k2tog. 9 sts. Row 4: slwyif, ytb, kl, psso, k4, k2tog. 7 sts. Row 5: slwyif, ytb, kl, psso, k4, k2tog. 5 sts. Row 6: s1wyif, ytb, kl, psso, k2tog. 3 sts. Row 7: k3tog. Break yarn and weave in end. Place markers every 12 stitches 9 times along the remaining side, and work each group of sts from row 1. Weave in remaining ends. Block, being careful to stretch out the top edge of the shawl to your desired length, pin out the points of the border pattern, and enjoy!


