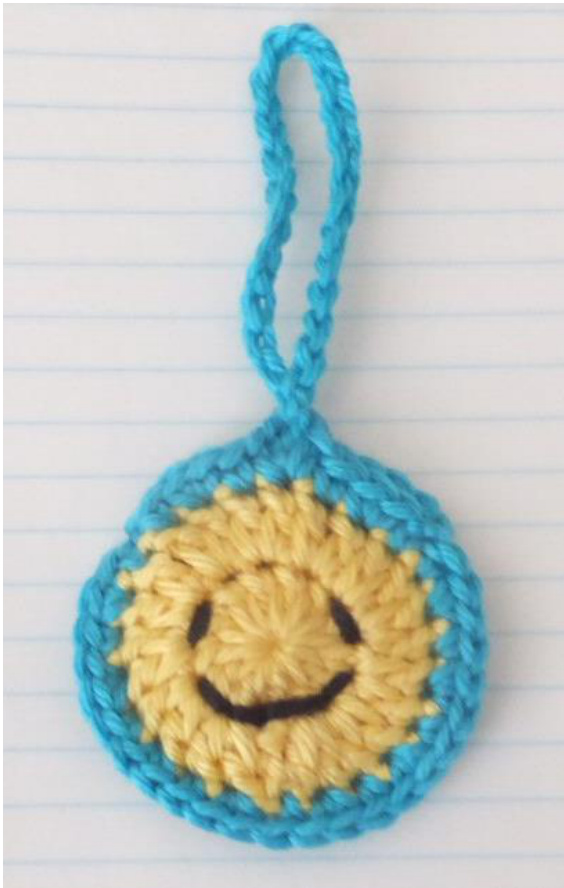
A Secret-Pouch Travel Tag
Travel Time!
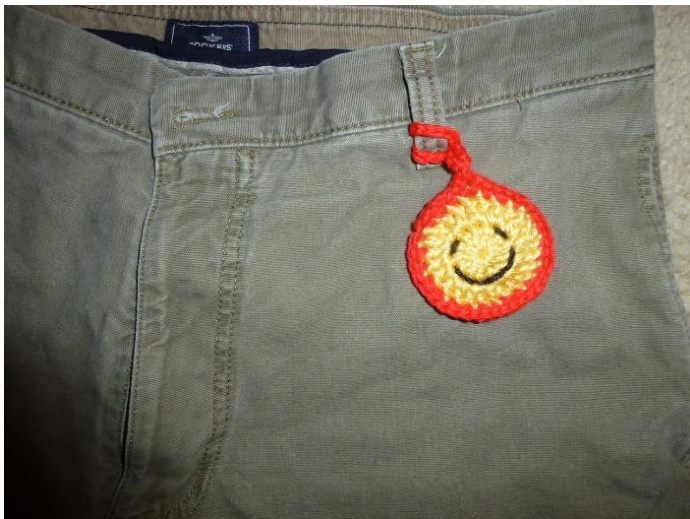
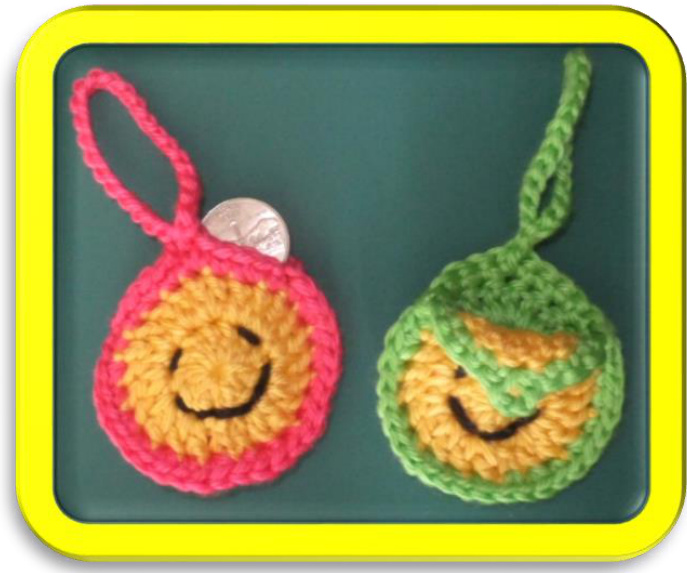
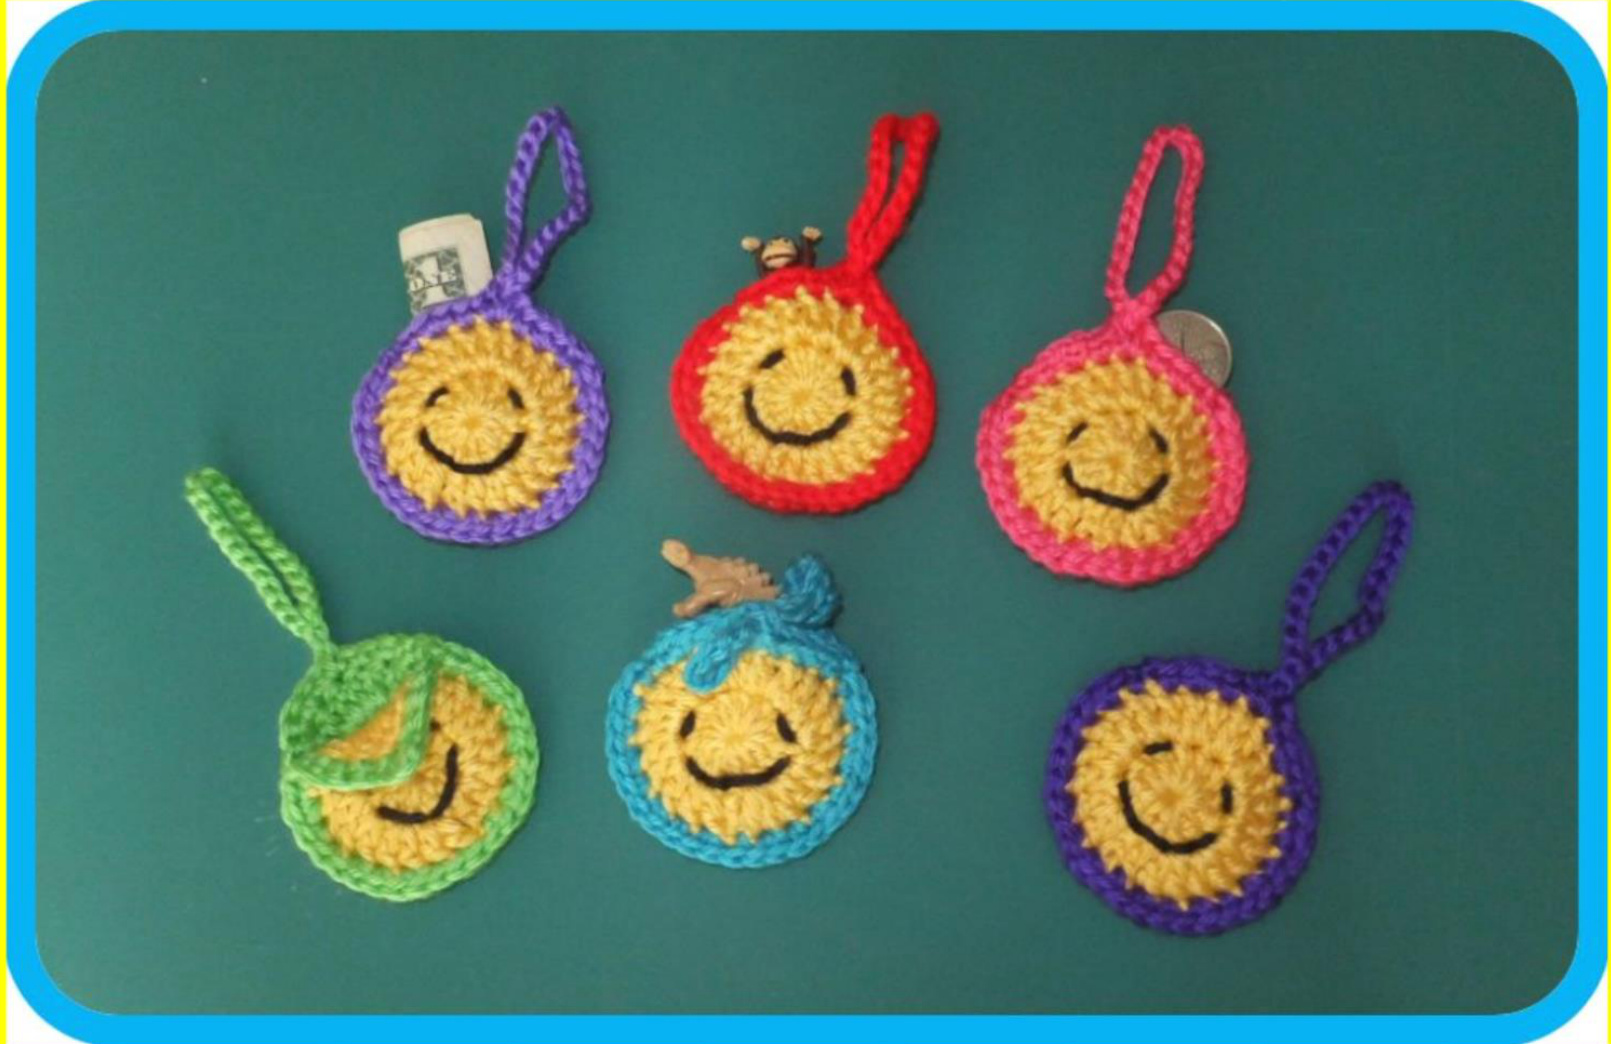
Your Bag will stand out on the luggage carousel. This Secret-Pouch ID Tag can be used as a suitcase or backpack buddy for easy identification Or use it as a small reticule pouch on your belt loop or purse handle. You can hide a secret message in it or a special memento. Maybe store a tiny toy, a little treat, a pretty rock or shell or just some loose change. It could also be used as a tooth-fairy pouch on a bed post. It might make a cute tag on a gift package, or an ornament for a tree. You can adjust up or down a hook size, if you want a larger or smaller pouch. And you can make the handle-loop longer or shorter to suit your need. Hope you enjoy it. Note: I used Caron Simply Soft yarn. Sugar n Cream Cotton might also be good. To mark a stitch, use a piece of yarn or thread, safety pin or a stitch marker. When possible work over the yarn ends to eliminate weaving them in later.
Materials:
Caron Simply Soft or Sugar n Cream Cotton (WW)

Gauge is not critical. First 2 rounds = about 2" (5cm) Finished Size: Diameter: about 2.5" (6.4cm) Total with hanger about 5" (12.7cm)
Abbreviations:
Beg = Beginning CC = Contrasting Color Ch(s) = Chain(s) Dc = Double Crochet Dc-Inc = 2 double crochets into one stitch FO = Fasten Off MR = Magic Ring Rnd(s) = Round(s) Sc = Single Crochet Sc-lnc = 2 single crochets into one stitch Sk = Skip Ss = Slip Stitch St(s) = Stitch(es)
US Terminology
Regarding copyright:
This is a free pattern for your personal use. You are welcome to sell any items that you make. But please, do not sell the pattern or reproduce the text without permission.
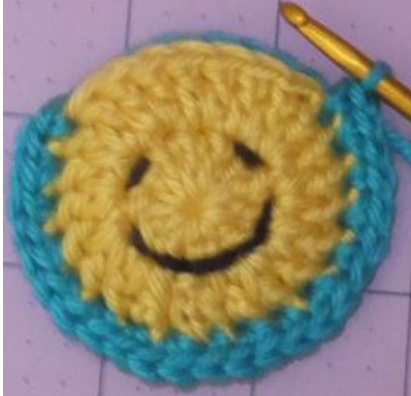
Smiley Face Front:
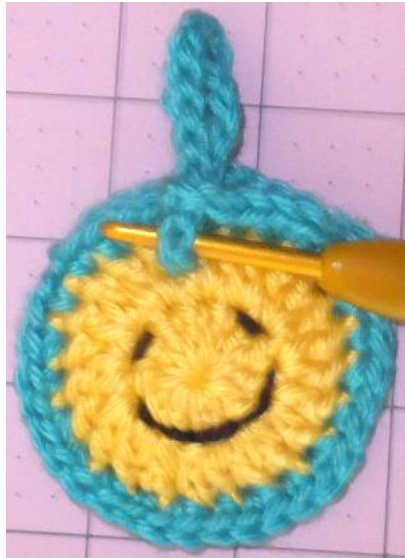
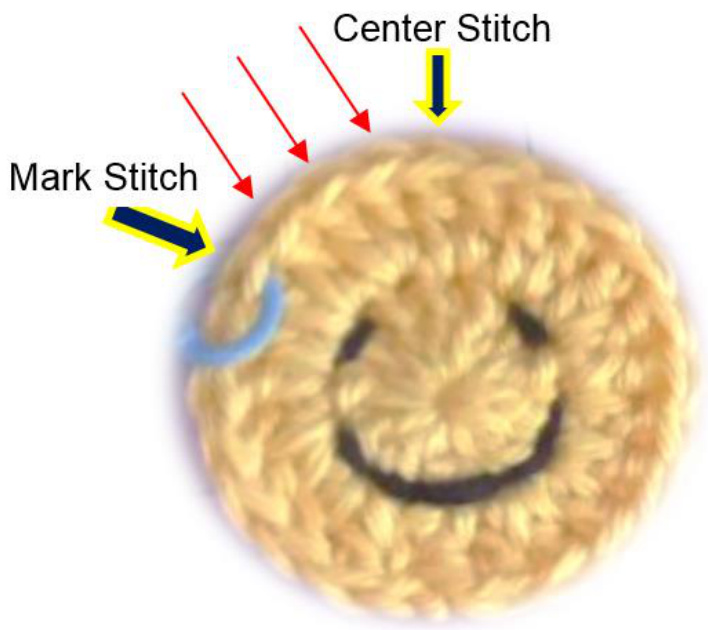
Rnd 1: With Yellow: Start with a MR, Ch 3 (counts as the first dc: now and throughout), 11 Dc in the ring. Join with a ss to the first dc. (12 dc) Pull beg yarn end to close the circle. Rnd 2: Ch 3, Dc in same joined st. (Dc-lnc) 11 times. Join. FO and weave in the end. (24 dc) Locate center top st (see photo) and count 4 sts to the left of it. Mark that st for placement of edging later.
Facial Features:
Thread yarn needle with black. Stitch the eyes and mouth between Rnds 1 and 2. See photo for placement.
Back:
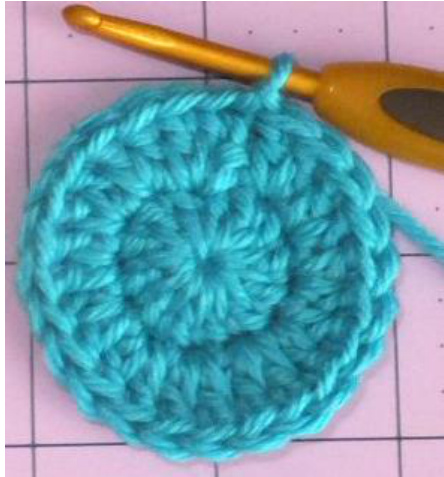
Rnd 1: With CC: Start with a MR, Ch 3, 11 Dc in the ring. Join with a ss to the first dc. (12 dc) Pull beg yarn end to close the circle. Rnd 2: Ch 3, Dc in same joined st. (Dc-Inc) 11 times. Join. (24 dc) DO NOT FO.
Edging:
Rnd 3: TURN to WS and place Face piece in front. Insert hook into the marked st and then through the last st on the Back piece. Working through both pieces, Make one Sc in that first st.
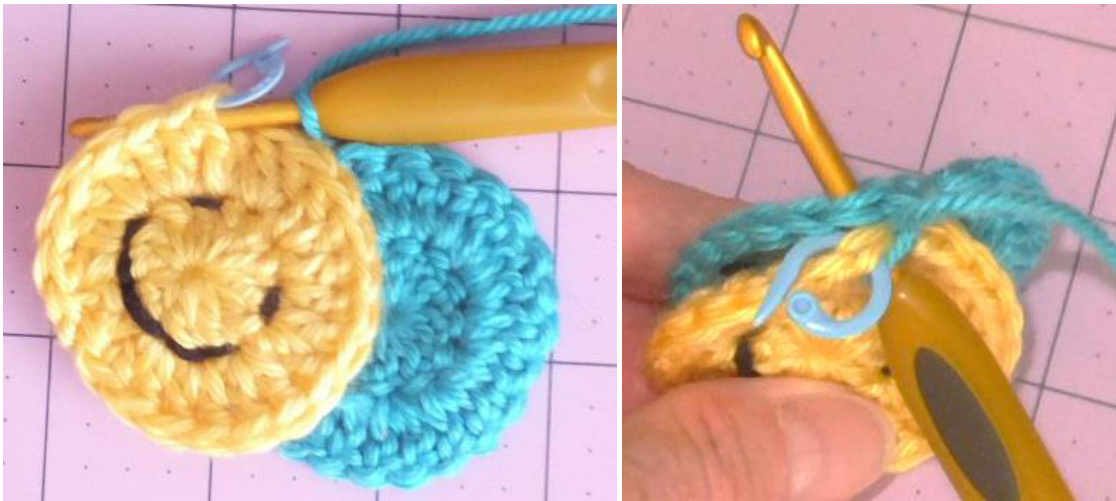
Continue working through both pieces around the edge: (Sc-Inc, Sc) 8 times. Now, there should be 7 free sts left.
Work only on the front Face piece stitches, at this point. Sc, Sc-Inc, Sc, (Sc, Ch 3, Sc all in the center stitch), Sc, Sc-Inc, Sc. Ss to the first sc of the round. Turn. Do not ch-1. Now, Work only on the seven free Back piece stitches. Sc, Sc-Inc, Sc, (Sc, Ch 25, Sc all in the center stitch), Sc, Sc-Inc, Sc. Ss through the next st of the edging to join. FO and weave in.
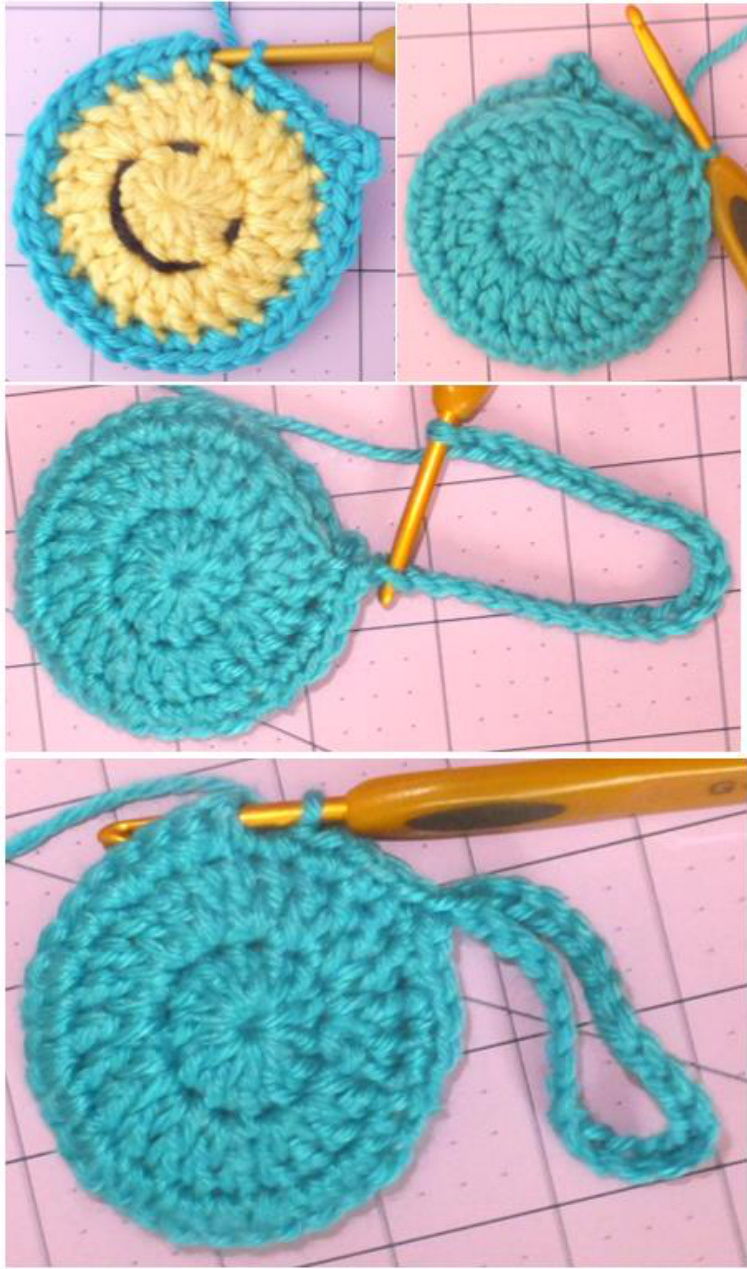
Note: The hanger is 25 chains long, but it can be made longer by adding as many chains as you want. Pull the hanger through the ch-3 loop on the front. The Hanger can be looped through a belt loop or hung like and ornament.