CURIYSHIRLEYCCRDi
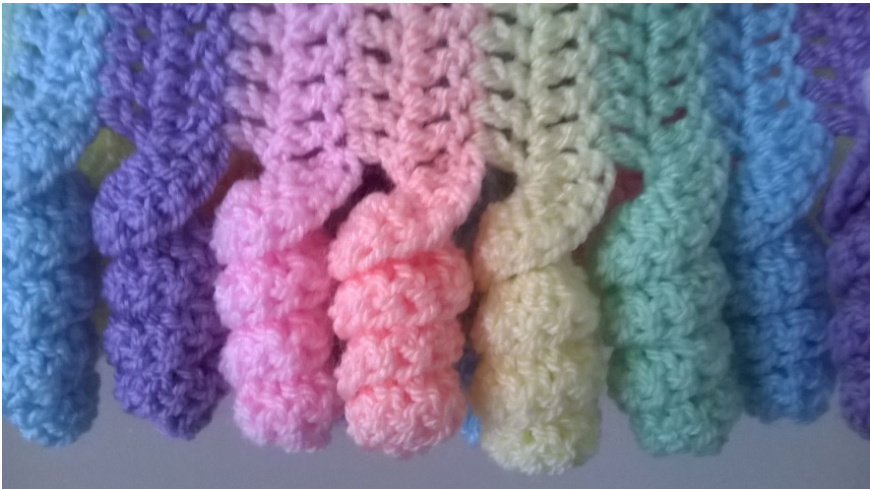
My first written pattern that I've been brave enough to publish - any feedback for improvement wil be appreciated! The name of the cardi is because of the beautiful ringlets that Shirley Temple sported back in the 30's.
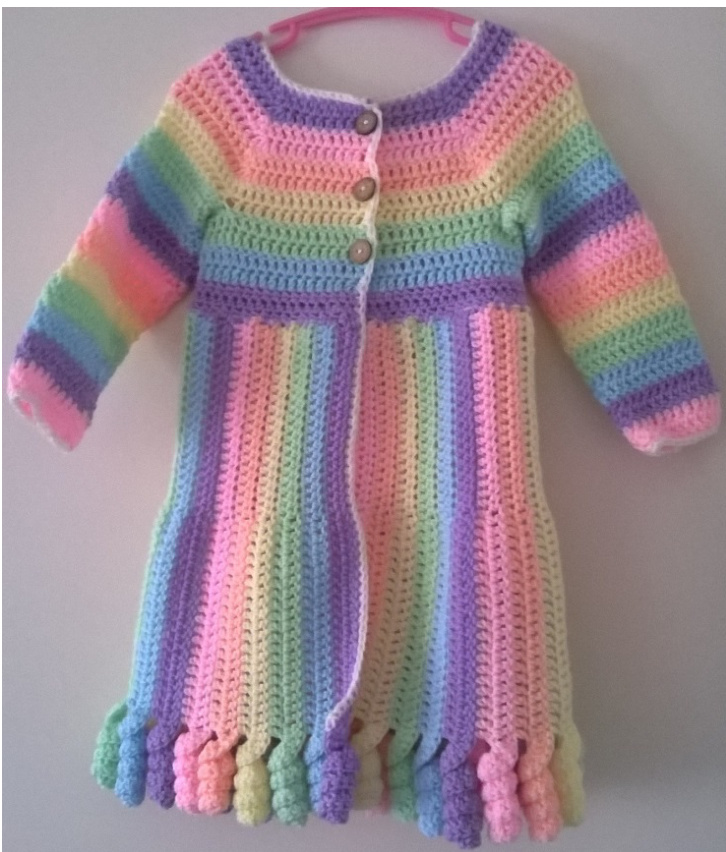
I've written this pattern in response to a friend who found this jacket but couldn't find the pattern anywhere. Having done a few vertical-style cardis in the past, I had a go at writing a pattern for her, and this is the end result! In the interest of passing on the love, my knowledge and inspiration has come from a combination of Moogly's Eloise Baby Sweater and Crochet Kim's Carousel Baby Dress - thanks for writing such awesome patterns, ladies! I hope this cardi does some justice to what you've both taught me! The curls at the bottom had inspiration taken from numerous amigurumi octopuses, of which Esshaych's Mini Ami Octopus is my favourite.
And so! On to the pattern! I've made my sample to fit a size 3-4, but will work on more sizes and update the pattern to reflect this. Written using US crochet terms (US hdc = UK htr, US dc = UK tr) US - H, 5.00mm hook +50 g each of Stylecraft Special DK yarn oColour A: Candyfloss o Colour B: Apricot o Colour C: Lemon Colour D: Spring Green O Colour E: Sherbet O Colour F: Wisteria o Colour G: Cream (only a small amount of yarn needed) 3buttons Gauge: 14 sts x 8 rows = 10cm (4") in dc Definitions and Tutorials - thanks to Moogly for the video tutorials. FDC-FoundationDoubleCrochet FHDC - Foundation Half Double Crochet \* Joiner stitch - a joiner between FDC and dc: yo, insert hook into the v-stitch at bottom of the previous FDC, insert hook into dc from previous row (where you'd normally join a dc after a bunch of chains), yo, pull through 2 loops, yo, puli through 2 loops, yo, pull through 2 loops. Please note! I crochet left-handed, so some of my photos might look backwards' - I hope this doesn't throwanyone!
InSTRUCTiONS
Start with the skirt, worked sideways. Row 1: With colour A, FHDC 20, FDC 20, ch 16. Row 2: Starting in 2nd ch from hook, 3dc in each chain (45 dc total). Continue with one dc in each FDC (20dc), then one hdc in each FHDC (20 hdc). You will end up with a curl at the end of your work - if it doesn't sit nicely, just twist it around a bit until it sits like a lovely curly ringlet. Change colour in last stitch. 3: With colour B, ch2, hdc in 1st st and next 19 sts, dc in next 20 sts. ch 16 Row 4: Starting in 2nd ch from hook, 3dc in each chain (45 dc total). Continue with one dc in each dc from previous row (20 dc), then one hdc in each hdc from previous row (20 hdc). Change colour in last stitch. Rows 5 - 72: Repeat rows 3 and 4, changing colour at the start of every second row. I cycled through ABCDEF six full times, finishing on colour F (so that it matched with colour A at the begining). Yoke - turn the skirt 90° so that you will be working across the rainbow end of the hdc stitches - ie, the end without the curls. The wrong side will be facing you. Row 1: continuing with colour F: ch2, hdc 72 across evenly (2 stitches in each colour). Turn. Row 2: Ch2, hdc in 1st st, and each st across (72 sts). Turn. Row 3: Repeat row 2. Change colour in last stitch. Turn. Row 4: With colour E: ch3, dc in 1st st, and each st across (72 sts) Turn. Row 5: ch3, dc in 1st st, and each st across (72 sts). Change colour in last stitch. Row 6-7: Repeat rows 4-5, but with colour D
Armpit row
Row 8: With colour C, ch3, dc in 1st st, and next 14 sts. FDC 24 (l worked the first FDC into the same stitch from row 7 as my last regular dc in row 8. Sk 6, joiner stitch (see special stitches), then dc in next 29 sts. FDC 24, sk6, joiner stitch, then dc in last 14 sts. Turn. (60 dc and 48 FDC) dc in 1st st, and each st across (108 sts). Change colour in last stitch. Turn Row 10: With colour B, ch3, dc in 1st st. and next 12 sts, dc3tog, dc in next 22 sts, dc3tog, dc in next 26 sts, dc3tog, dc in next 22 sts, dc3tog, dc in last 13 sts. Turn. Row 11: ch3, dc in 1 st, and next 11 sts, dc3tog, dc in next 20 sts, dc3tog, dc in next 24 sts, dc3tog, dc in next 20 sts, dc3tog, dc in last 12 sts. Change colour in last stitch. Turn. Row 12: With colour A, ch3, dc in 1st st, and next 10 sts, dc3tog, dc in next 18 sts, dc3tog, dc in next 22 sts, dc3tog, dc in next 18 sts, dc3tog, dc in last 11 sts. Turn. Row 13: ch3, dc in 1st st, and next 9 sts, dc3tog, dc in next 16 sts, dc3tog, dc in next 20 sts, dc3tog, dc in next 16 sts, dc3tog, dc in last 10 sts. Change colour in last stitch. Turn. Row 14: With colour F, ch3, dc in 1st st, and next 8 sts, dc3tog, dc in next 14 sts, dc3tog, dc in next 18 sts, dc3tog, dc in next 14 sts, dc3tog, dc in last 9 sts. Turn. Row 15: ch3, dc in 1st st, and next 7 sts, dc3tog, dc in next 12 sts, dc3tog, dc in next 16 sts, dc3tog, dc in next 12 sts, dc3tog, dc in last 8 sts. Fasten off.
Sleeves
In the centre of an armhole and with right side of garment facing, join with a slip stitch. Row 1: With colour D, ch1, dc in same st, and next 32 sts. Join with a slst to top of 1st dc. Turn. (33 sts) Row 2: Working from the inside of the sleeve, ch1, dc in same st, and next 31 sts. dc2tog, join with a slst to top of 1st dc. Change colour in slst. Turn. (32 sts) Rows 3 - 16: Repeat rows 1-2, decreasing one stitch on every second row, and changing colour at the end of each even-numbered row (cycling through EFABCDE). Row 16 will end with 25 stitches. : With colour F, ch1, dc around. Join with a slst to top of 1st dc. Turn (25 st: Row 18-20: repeat row 17, changing to colour A at the end of row 18, and colour G at the end of row20. Row 21: With colour G: ch1, sc around. Join with a slst to top of 1st sc. Fasten off. (25 sts)
Edging
With right side facing, begin at bottom of front edge, immediately above curls. With colour G, join with a slst, then sc up front edge, around neckline, and down the other front edge, stopping at the top of the curl.
Buttons
Add three buttons to the horizontal stripes on the yoke - I attached them to colours FBD from the top (every second colour). The spaces between dc stitches act as button holes, rather than specifically made holes. .. and then find a little girl to wear your cardigan! Thanks for trying my pattern out - if you have any feedback on it, or changes that I need to make, please do contact me on beejam16@gmail.com


