HAPPIY THOUGHTS
present
luluMiGuRuMi
Written for unfilodi.com
Materials:
Yarn $\rightarrow\mathrm{~I~}$ usually use cotton or acrylics because they don't stretch. Polyfill stuffing Crochet needles $\rightarrow$ a size or a size and half smaller than the ones suggested by the yarn label, this way you won't see the polyfill trough the sc. Sewing needle Safety eyes or yarn/embroider for sewing them
Gauge:
The final size of the doll will depend on the yarn you choose.
Abbreviations and etc.
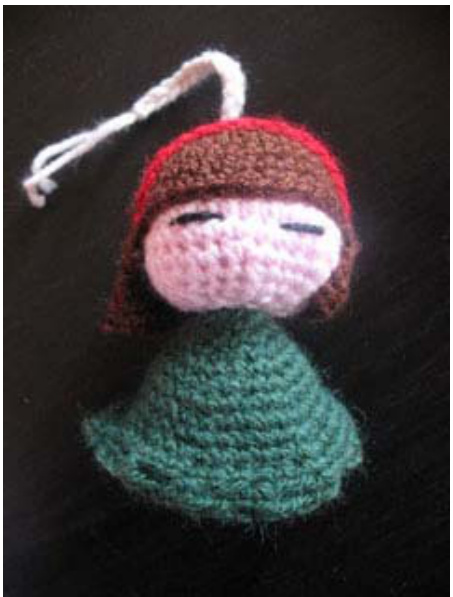
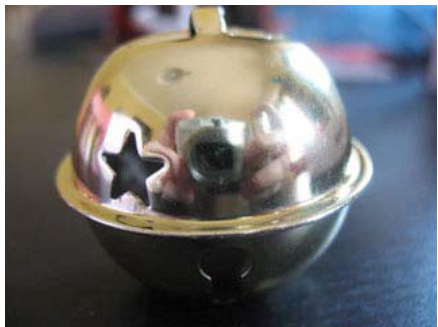
$=$ a way to start a rlnig witnout tne noie tne middle. Sc - single chain 2 sc in each/next sc $=$ crochet 2 sc in 1 single chain → increase 1 single chain 2 sc together $=$ crochet 2 single chain together $\rightarrow$ decrease 1 single chain rnd - round You can work in spiral, so you just have to put a marker where your round begins or you can slip the first sc of the last round, chain 1 and start with the first sc of the new round. I usually choose to crochet the balls in spiral as it's easier: you just keep on crocheting sc ;-) You may choose to put a little bell into the body of the doll, like I did for the doll I did in green. You may decide to use them like Christmas ornament
I suggest you to read the pattern at once, then start crocheting!
Head
Start with a Magic Ring\* of 6 sc Increasing: $1^{\circ}$ rd) (2 sc in each sc)\* - 12 sc $2^{\circ}$ rd)( $\mathrm{~\leftmoon~}^{\prime}\mathrm{~1~sc~}+\mathrm{~2~}$ sc in next sc)\* - 18 sc $3^{\circ}$ rd) $\left(2\ s c+2\right.$ sc in next sc)\* - 24 sc $4^{\circ}$ rd) $\left(3\mathrm{~sc~}+2\right.$ sc in next sc)\* - 30 sc $5^{\circ}$ rd)( $4\mathrm{~sc}+2$ sc in next sc)\* - 36 sc $6^{\circ}$ rd) sc 36 $7^{\circ}$ rd) sc 36 $8^{\circ}$ rd) sc 36 Decreasing: $9^{\circ}$ rd) $^{(4\mathrm{~sc}+2}$ sc together)\* - 30 sc $10~\mathrm{rd})$ $\left(3\mathrm{~sc~}+2\right)$ 11 rd) $\left(2\,\sec+2\right)$ sc together) $^\ast\mathrm{~-~}18$ sC 12 rd) ( $\begin{array}{r}{1\,\sec+\,2}\end{array}$ sc together)\* - 12 sc At this point you have to put the polyfill in the little head before starting the next rounc $13~\mathrm{rd})$ (2 sc together)\* - 6 sc Close.
Hair
1) Short hair
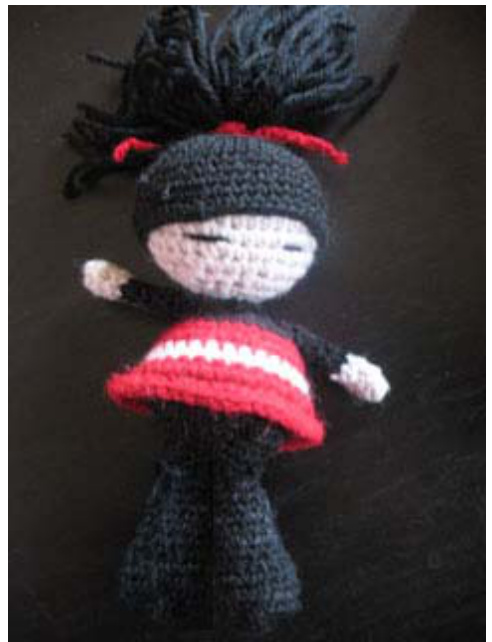
start a Magic Ring" o1 o sc Increasing: $1^{\circ}$ rd) (2 sc in each sc) $^\star-12$ SC $2^{\circ}$ rd)( $\mathrm{1~sc}+2$ sc in next sc)\* - 18 sc $3^{\circ}$ rd) $\left(2\ s c+2\right.$ sc in next sc)\* - 24 sc $4^{\circ}$ rd) $\left\langle3\sec+2\right.$ sc in next sc)\* - 30 sc $5^{\circ}$ rd) ( ${4\csc+2}$ sc in next sc)\* - 36 sc $6^{\circ}$ rd) sc 36 $7^{\circ}$ rd) sc 36 $8^{\circ}$ rd) sc 36 $9^{\circ}\;\mathrm{rd}-16^{\circ}$ rd) You don't have to crochet rounds but front and back. You have 36 sc, but you will crochet only 24 of them: this way you will have a “shorter frontal part" and you'll keep on crocheting in order to have the “long hair" part that you will have to put on the head with a sense. Increasing: $1^{\circ}$ rd) (2 sc in each sc) $^\star-12$ SC $2^{\circ}$ rd)( $\mathrm{1~sc}+2$ sc in next sc)\* - 18 sc $3^{\circ}$ rd) $(2\mathrm{~sc}+2\$ sc in next sc)\* - 24 sc $4^{\circ}$ rd) $\left\langle3\sec+2\right.$ sc in next sc)\* - 30 sc $5^{\circ}$ rd) ( ${\mathrm{4~sc}}+2$ sc in next sc)\* - 36 sc $6^{\circ}$ rd) sc 36 $7^{\circ}$ rd) sc 36 $8^{\circ}$ rd) sc 36 $9^{\circ}$ rd - until you like) sc 36 "Until you like” means that you have to choose the right number of rounds for the yarn you have chosen, you have to crochet some sort of half sphere in order to cover the front and the back of the “head". To do the ponytail: Cut 30 pieces of yarn, about 4". Make a knot in the center with another piece of yarn that you will pass through the half sphere you've just crocheted in order to join the 2 parts.
Body
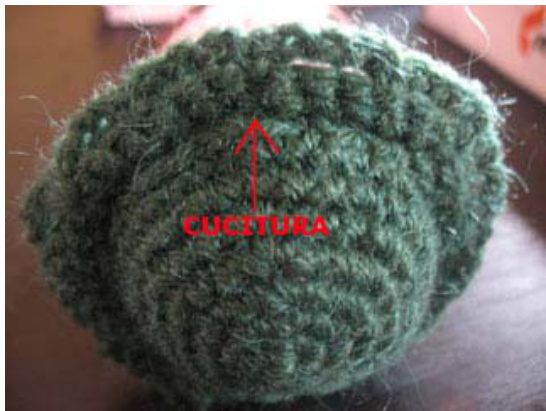
Start a Magic Ring\* of 6 sc Increasing: $1^{\circ}$ rd) (2 sc in each sc)\* - 12 sc $2^{\circ}$ rd)( $\mathrm{~1~sc~}+\mathrm{~2~}$ sc in next sc)\* - 18 sc $3^{\circ}$ rd) $(2\mathrm{~sc}+2\$ sc in next sc)\* - 24 sc $4^{\circ}$ rd) $(3\mathrm{~sc}+2\$ sc in next sc)\* - 30 sc $5^{\circ}$ rd) $(4\mathrm{~sc}+2\$ sc in next sc)\* - 36 sc $6^{\circ}$ rd) sc 36 $7^{\circ}$ rd) sc 36 $8^{\circ}$ rd) sc 36 $9^{\circ}$ rd) sc 36 $10^{\circ}$ rd - until you like) sc $36\rightarrow$ until you have the right lenght of the dress, as you prefer Last rd rd) (1 $\mathrm{.~sc+chair}$ 1 $4+\mathrm{sl}\:3)$ \* Second part of the body - some sort of semisphere With the yarn you chose for the body: Start a Magic Ring\* of 6 sc Increasing: $1^{\circ}$ rd) (2 sc in each sc) $^\star-12$ SC $2^{\circ}$ rd)( $\mathrm{1~sc}+2$ sc in next sc)\* - 18 sc $3^{\circ}$ rd) $\left(2\ s c+2\right.$ sc in next sc)\* - 24 sc $4^{\circ}$ rd) $(3\mathrm{~sc}+2\$ sc in next sc)\* - 30 sc $5^{\circ}$ rd) $^{(4\mathrm{~sc}+2}$ sc in next sc)\* - 36 sc $6^{\circ}$ rd) sc 36 $7^{\circ}$ rd) sc 36 Now you can put the polyfill or the little bell like I did in my prototype and start sewing the semisphere to the body. In the image you see the join between body and the semisphere. Cucitura is the Italian word for sewing.
Legs
With the yarn you chose for the body: Start a Magic Ring\* of 6 sc $1^{\circ}$ rd) (2 sc in each sc) $^\star-12$ SC $2^{\circ}$ rd)( $1\mathrm{~sc}+2$ sc in next sc)\* - 18 sc $3^{\circ}$ rd) sc 18 $4^{\circ}$ rd) sc 18 $5^{\circ}$ rd) ( $1\mathrm{~sc}+2$ sC together)\* - 12 sc $6^{\circ}$ rd - until you like) sc 12, until ypou have the lenght you like
Arms
With yarn in a skin color Start a Magic $\mathrm{Ring^{*}}$ of 6 sc $1^{\circ}\mathrm{~-~}2^{\circ}\mathrm{~-~}3^{\circ}\mathrm{-~}4^{\circ}\mathrm{~rd~}$ ) sc 6 - with the skin coloured yarn Change color to which you prefer $5^{\circ}$ rd - until you like) sc 6
Sewing
Eyes: embroyder the eyes with 2 orizontal little lines of black yarn You can easily cut 2 small pieces of black yarn, insert in the head, make a knot and then let the knot being hidden in the head. Hair: Press lightly the head in order to put it into the “hair sphere": these pieces are the same size, so pressure will do the work of keeping them connected ;-) Short hair version: be careful to put the hair in the exact position. The shorter frontal part must be quite on the eyes Ponytail version: remeber to join the ponytail to the semisphere first, and then to join the head and hair. Also in this case, pressure will keep them in the right position. Hair Embellishment: chain 15 and close leaving 2 tail, in the beginning and in the end . Put it onto the head, where you like, pass the tail through the head with a needle and make a knot in the back part of the head as you can see in the image. Polyfill: I suggest you to put quite a big quantity of polyfill in order to make each part really firm: this way you can squeeze them but they won't change their shape.
You've finished, enjoy it!
2010 $\copyright$ Rossella Spagnoli - Happy Thoughts - Unfilodi.com The pattern and photographs are subject to copyright. The pattern is available for personal and non-commercial use only. Please don't distribute or sell electronic or paper copies of the patterns and don't sell items crocheted using the directions of the pattern. If you are in doubt about an intended usage, please contact me on Ravelry.


