The WC1 Block Messenger
Designed and Knit by Emily Bourdeau (user Seismothesaurus on Ravelry), July 2010 The WC1 Block Messenger is a shoulderbag designed and crafted with its namesake London postcode happening in the background. In the suggested yarn, it's fairly lightweight and light-duty, but large enough to contain all your day-in-the-city necessities (loose tobacco & rolling papers, umbrella & sunglasses, keys & wallet, and the English translation of Antonio Gramsci's SelectionsfromthePrisonNotebooks).
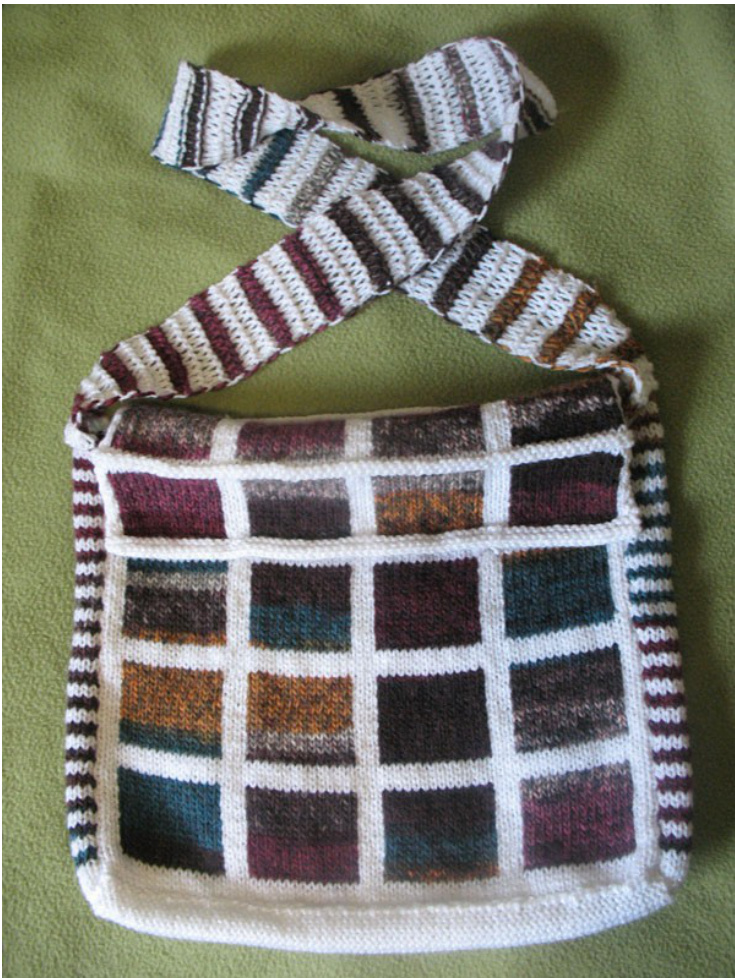
Skill Level: pretty easy. Intarsia is the most dificult aspect due to all the tangly ends to keep track of. To achieve a differentiated look as pictured, the coloured blocks are worked from both ends of two balls rather than carrying the yarn across the white sections. Basic seaming is also required.
Materials:
5mm/US #8 straight needle pair Ella Rae Jaspé Wool in #09 - 3 balls (possible with 2, depending on strap length) ·Less than 240m/264yds white worsted (any material with comparable elasticity) Tapestry needle Optional: your favourite bag closures (magnets would work well) and wires or rods to sew into the seams for more crisp edges Dimensions: 30cm/12in wide x 27cm/10.5in tall x 6cm/2.25in deep
Front Panel:
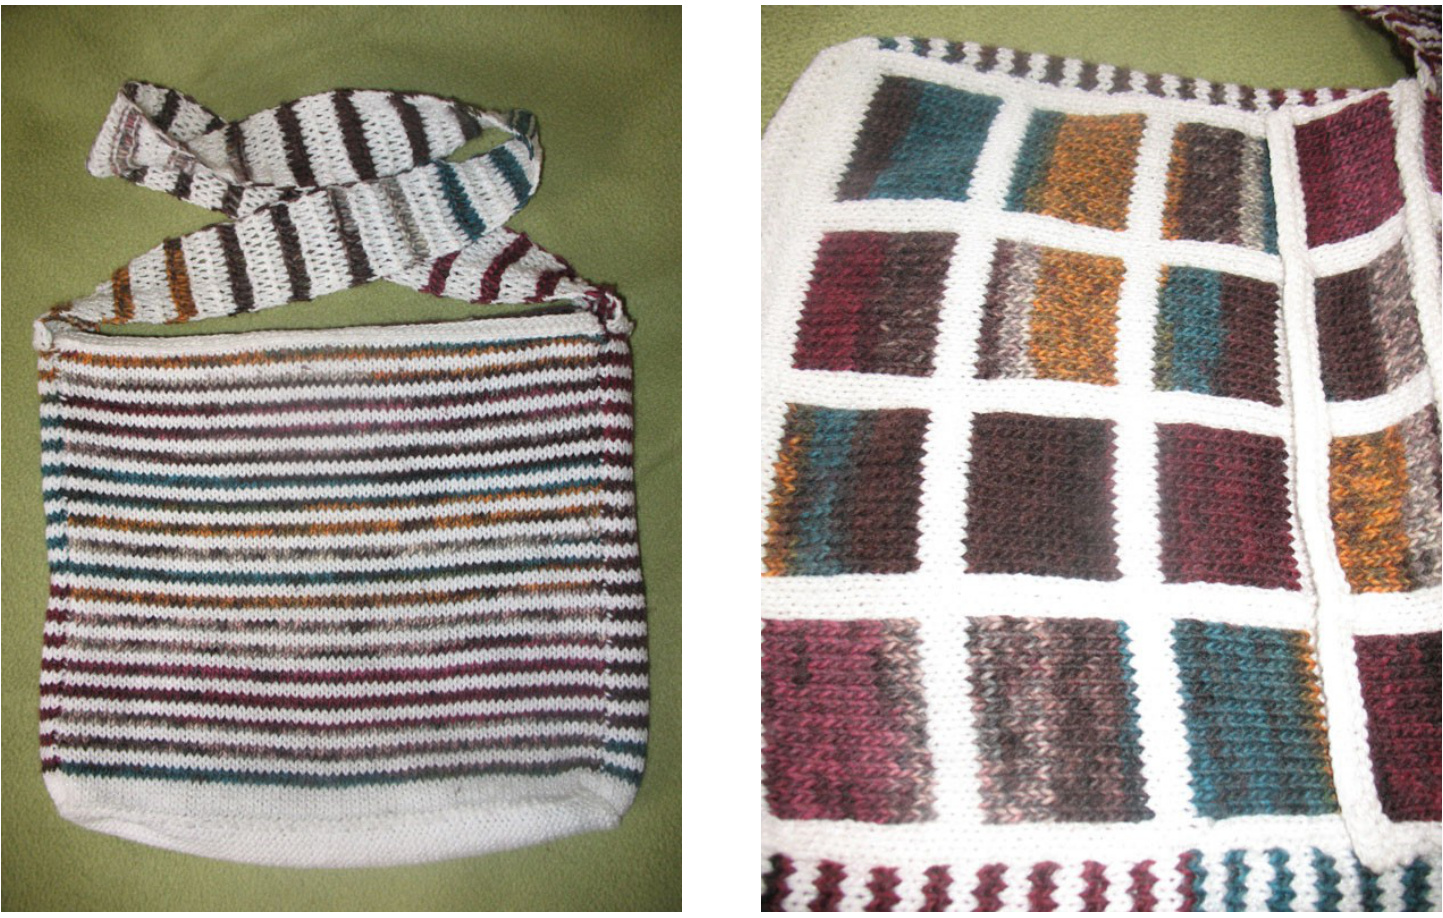
-CO 69 sts with MC (white) and wk 4 rows in stockinette stitch -1. k4, \*switch to CC, k13, switch to MC, k3\* x4, k1 (wk this row in st st for 14 rows total) -2. Switch to MC, wk 4 rows st st -wk sections 1 and 2 4x total (76 rows) and BO
Top Panel:
-CO 67 sts with MC and wk 4 rows st st -k3, \*switch to CC, k13, switch to MC, k3\* x4 (wk this row in st st for 14 rows total) -wk 2 rows st st in MC, reverse the stockinette for 2 rows (p on RS, k on Ws), wk 2 more rows in st st as before (k on RS, p on WS) (Working the purls on the outside gives a clean, approximately 90-degree angle to the flap and helps maintain the bag's overall boxy shape.) -k3, \*switch to CC, k13, switch to MC, k3\* x4 (for 14 rows, same as previous blocks) -k 4 rows in MC (garter stitch border) and BO
Back Panel:
-CO 69 in MC and wk 4 rows in st st -Alternate working 2 rows in CC and 2 rows in MC for 76 rows and BO
Sides and Strap:
-CO 12 in MC and wk 4 rows in st st -Alternate working 2 rows in CC and 2 rows in MC for 76 rows -1. With CC, \*yo, k1\* to end -2. K across, dropping the yo sts -3. With MC, repeat these 2 rows for 4 rows -Repeat steps 1-3 until the strap is the desired length, making sure to end with the MC (This stitch is fairly stretchy, but conserves the CC better than continuing a 2x2 st st if only two balls of CC are available, as was my case. The strap can easily be modified to fit individual taste.) -In st st, alternate working 2 rows in CC and 2 rows in MC for 70 rows -wk 4 rows in MC and BO
Bottom Panel:
-CO 12 in MC -wk MC in st st for 30cm/12in and BO
Connecting and Finishing:
-From the WS, assemble the back panel and side panels, being careful to line up the stripes and avoid twisting the strap (unless that's a desired effect, of course) -From the WS, attach the front panel (BO side up) and bottom panel (purls facing outward) -From the RS, line up the CO side of the flap with the top edge of the back panel and sew across just below the first row, leaving a ridge to complement the garter edging and structure -Weave in a zillion ends (or don't on the inside—no one ever has to know)
Closure:
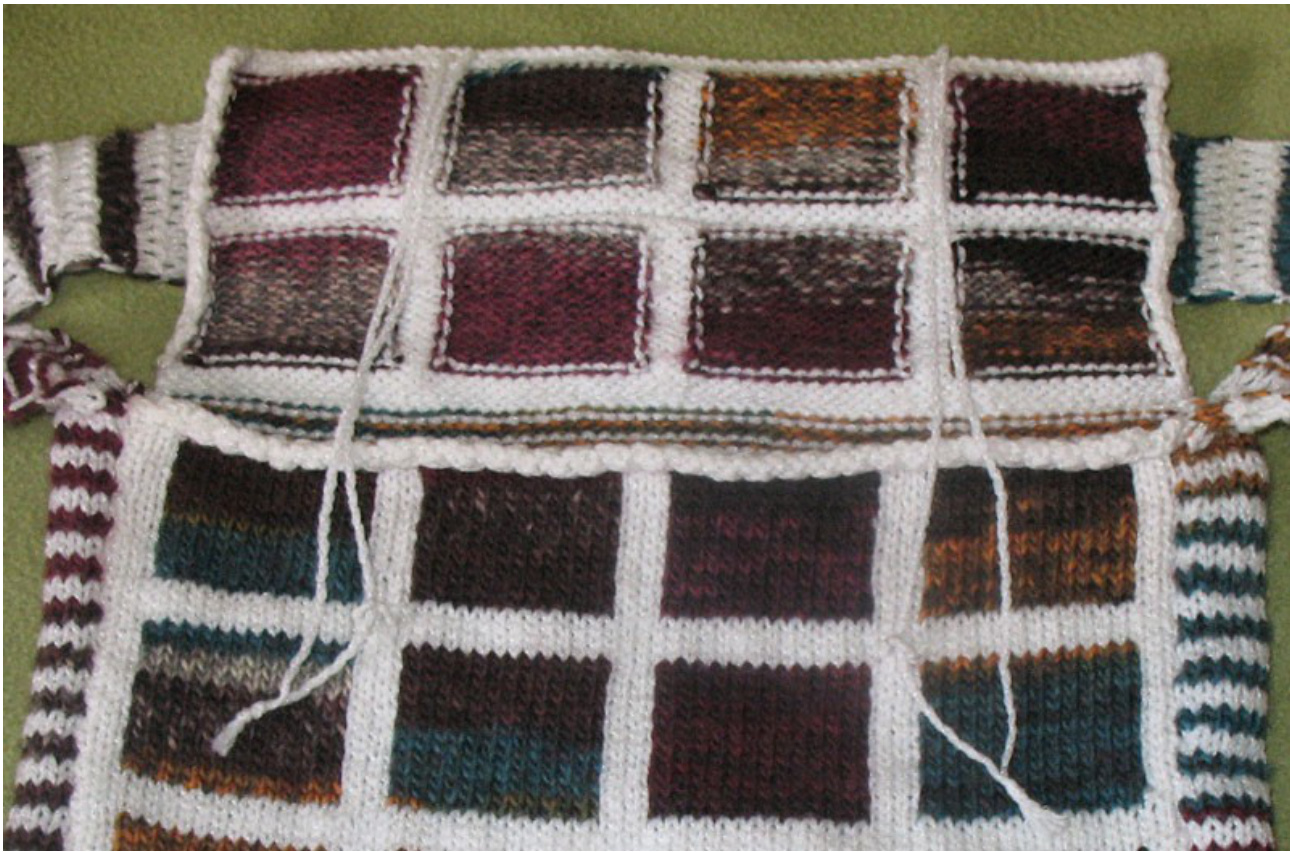
-With a small length of MC (about 10cm/4in), make six knots close together near the midpoint, but not overlapping (x2) -On the front panel, locate where the top edge of the second-down CC block intersects with the second and fourth vertical MC sections (see the photo detail below—this whole section sounds much more complicated than it actually is) -With 2 sts between, pull each end of the knotted strand through to the back and tie the ends together securely. This should leave a small horizontal arch sticking out of the piece. -Cut a strand of MC about 30cm/12in long (2x) -Locate the centre of the second and fourth MC sections of the flap right at the edge of the garter border (they correspond with the columns just worked with) -Thread both ends of one strand through from front to back, 2 sts apart; make sure the hanging ends are the same length and tie a simple knot where they come through to the back -Bring one of these strands through the knot archway and tie them both together at the bottom -Repeat the last two steps for the other strand and enjoy awesome drawbridge action. The garter border should just line up with the MC st st section on the front panel, leaving the block pattern fairly uninterrupted. Tie the drawstrings like shoelaces to keep the wind from knocking the flap open.
Showing the drawbridge-style closures below. These cords are long enough to move off to the sides when the flap is all the way back, leaving the opening unobstructed.
aimer: This pattern is offered for personal or gift uses only. It is not to be produced for sale


