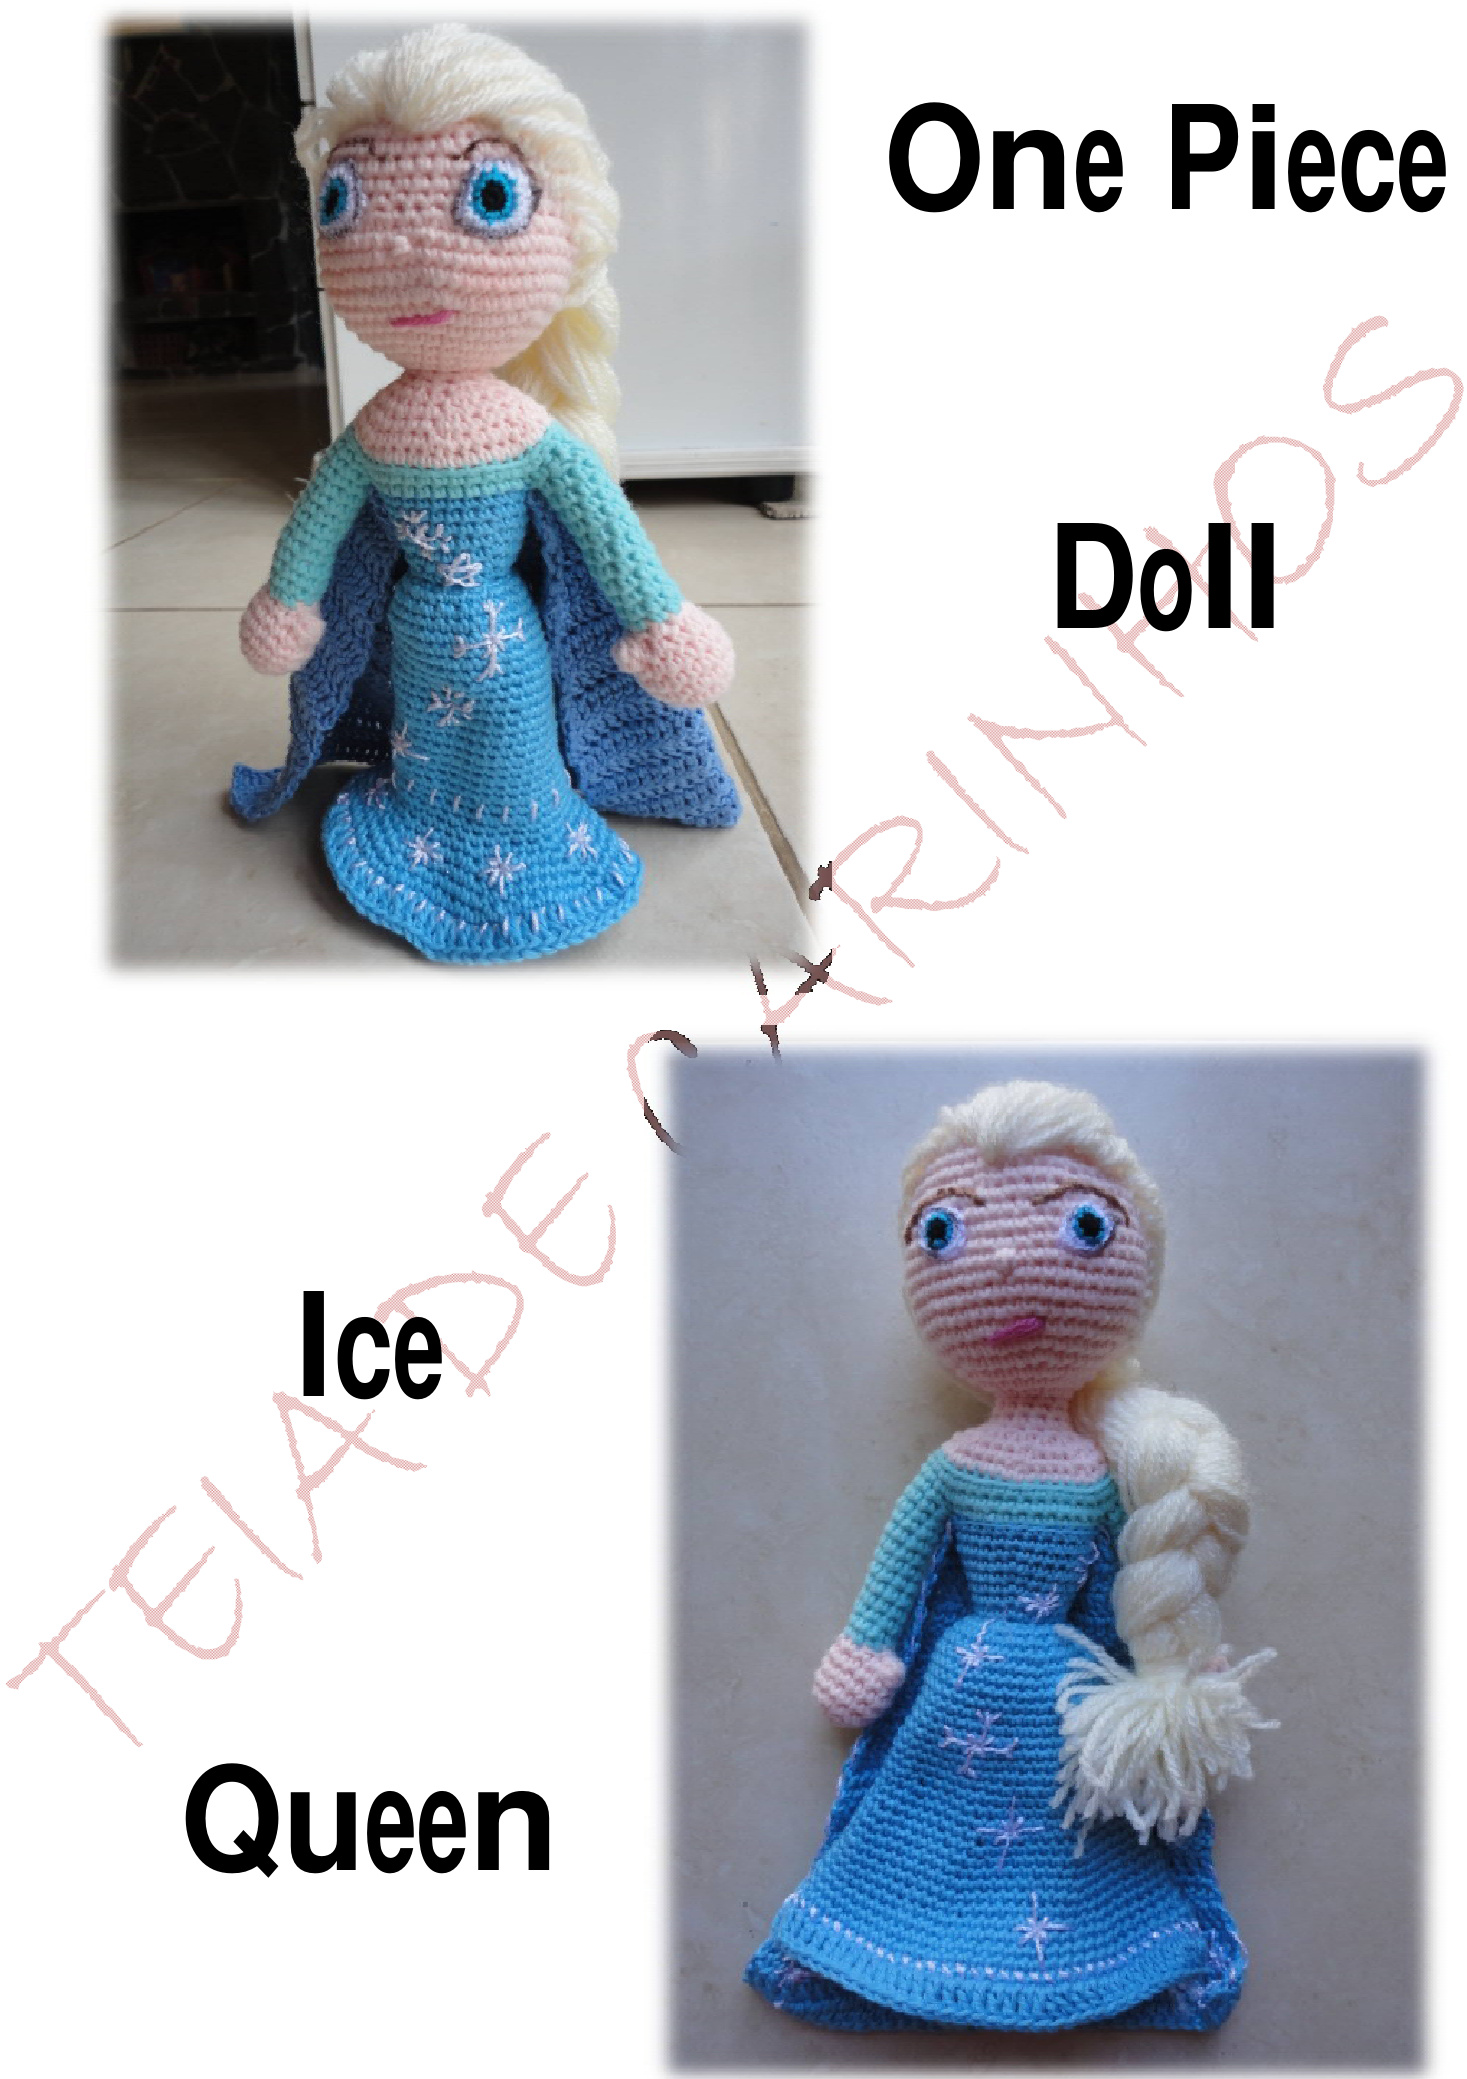
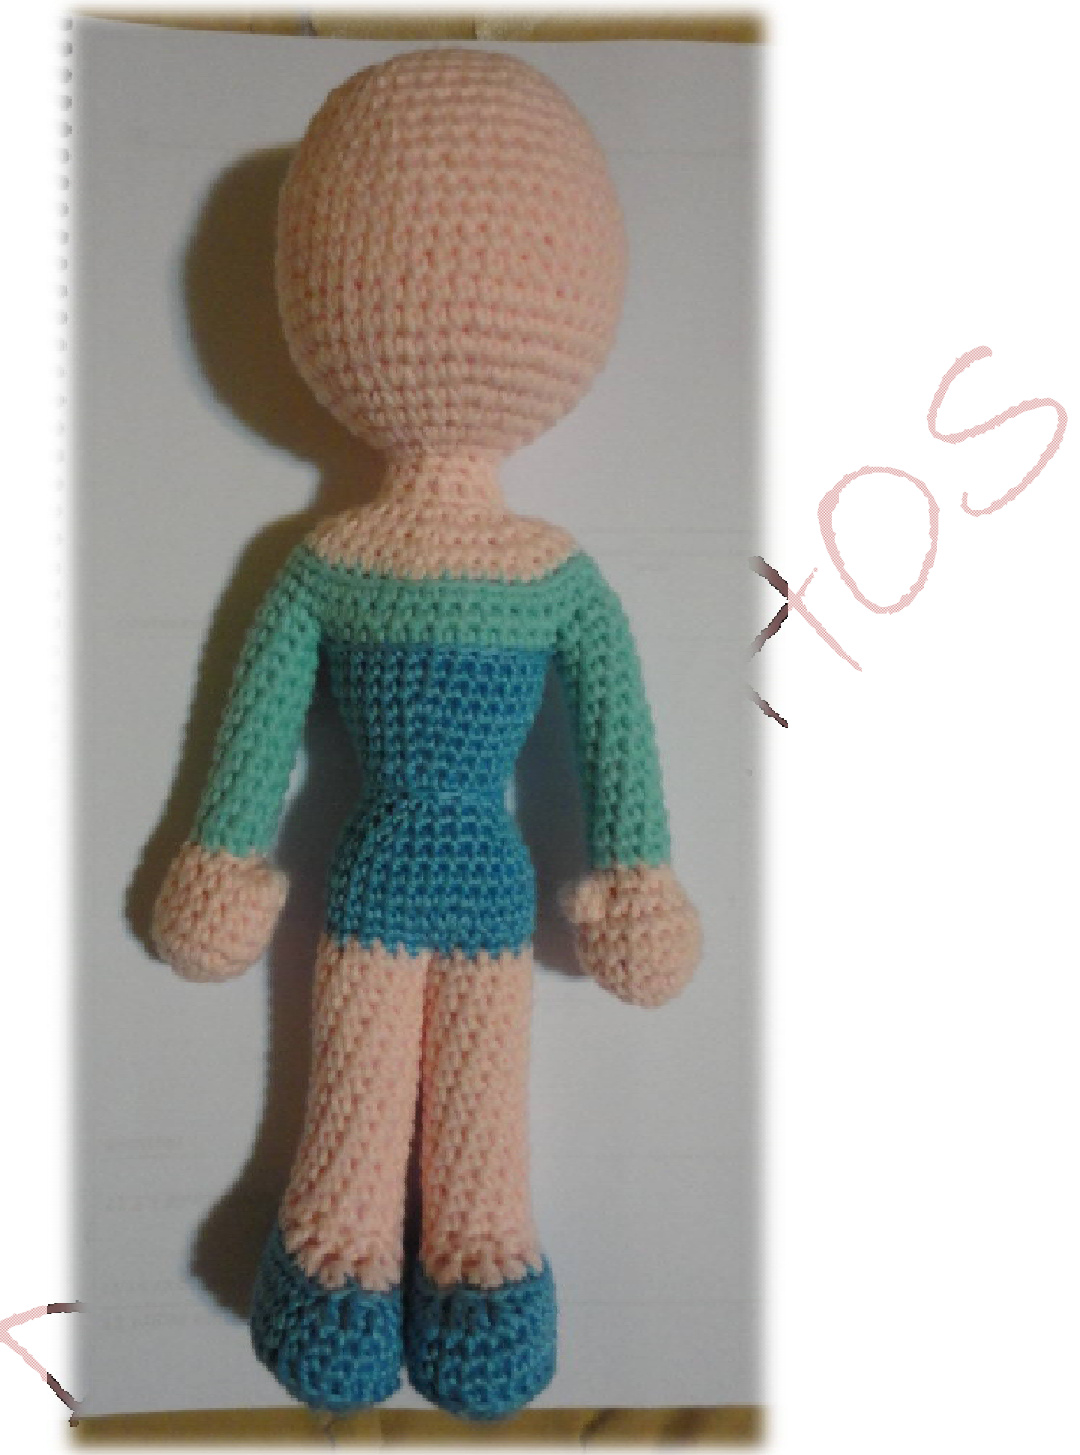
This doll is about 20cm tall.
Material:
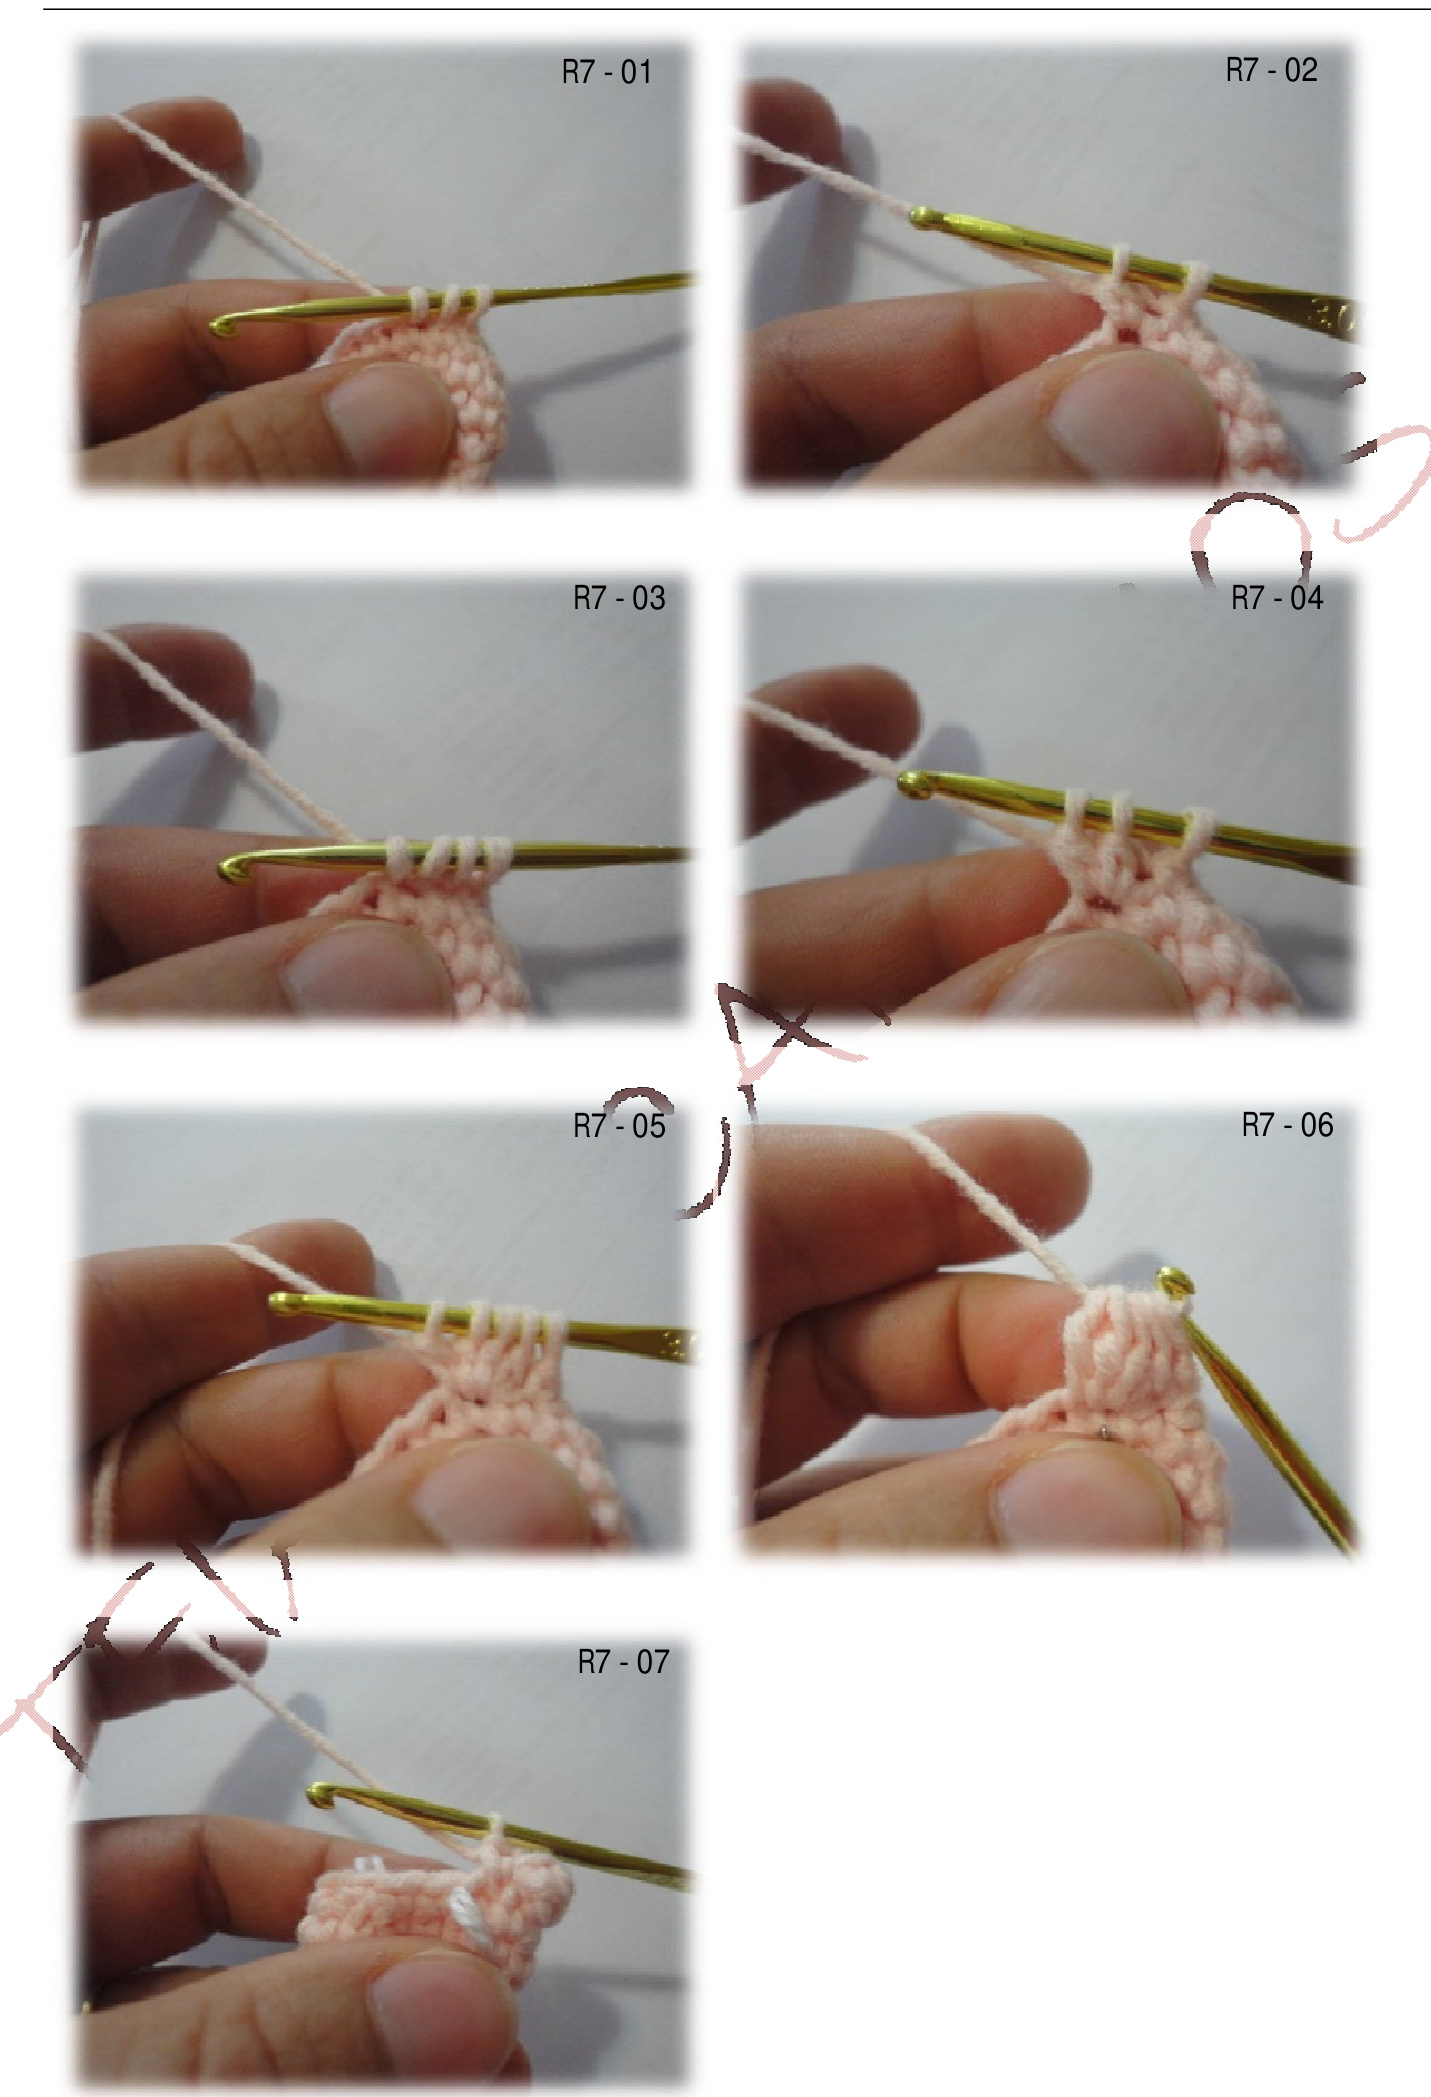
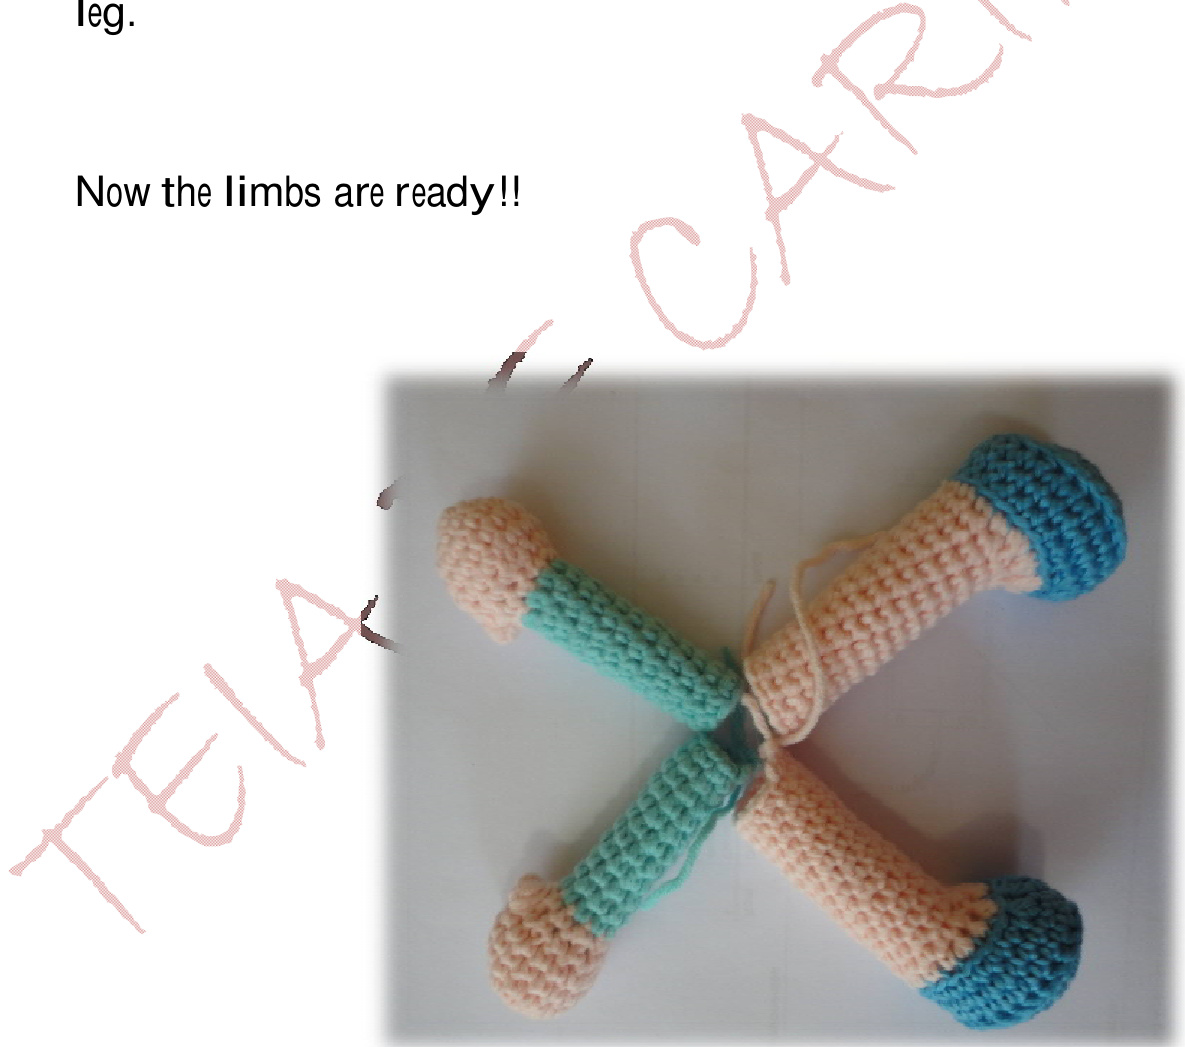
Just a little warning! The separation body parts is merely didactic, to know where you are. That said, here we go! This doll has a sequence of execution a little different; I first made the hands and arms, then legs and feet, body, shoulders, neck and head. This makes it easier to join the arms to the body, it is not necessary to cut the thread.
HANDS AND ARMS (3mm hook)
SKIN COLOR-BALLOON

Go filling the hand and the arm gently but firmly as you go, cut the thread, tie off and just let on hold. Do the same to the other arm and let them two on hold.
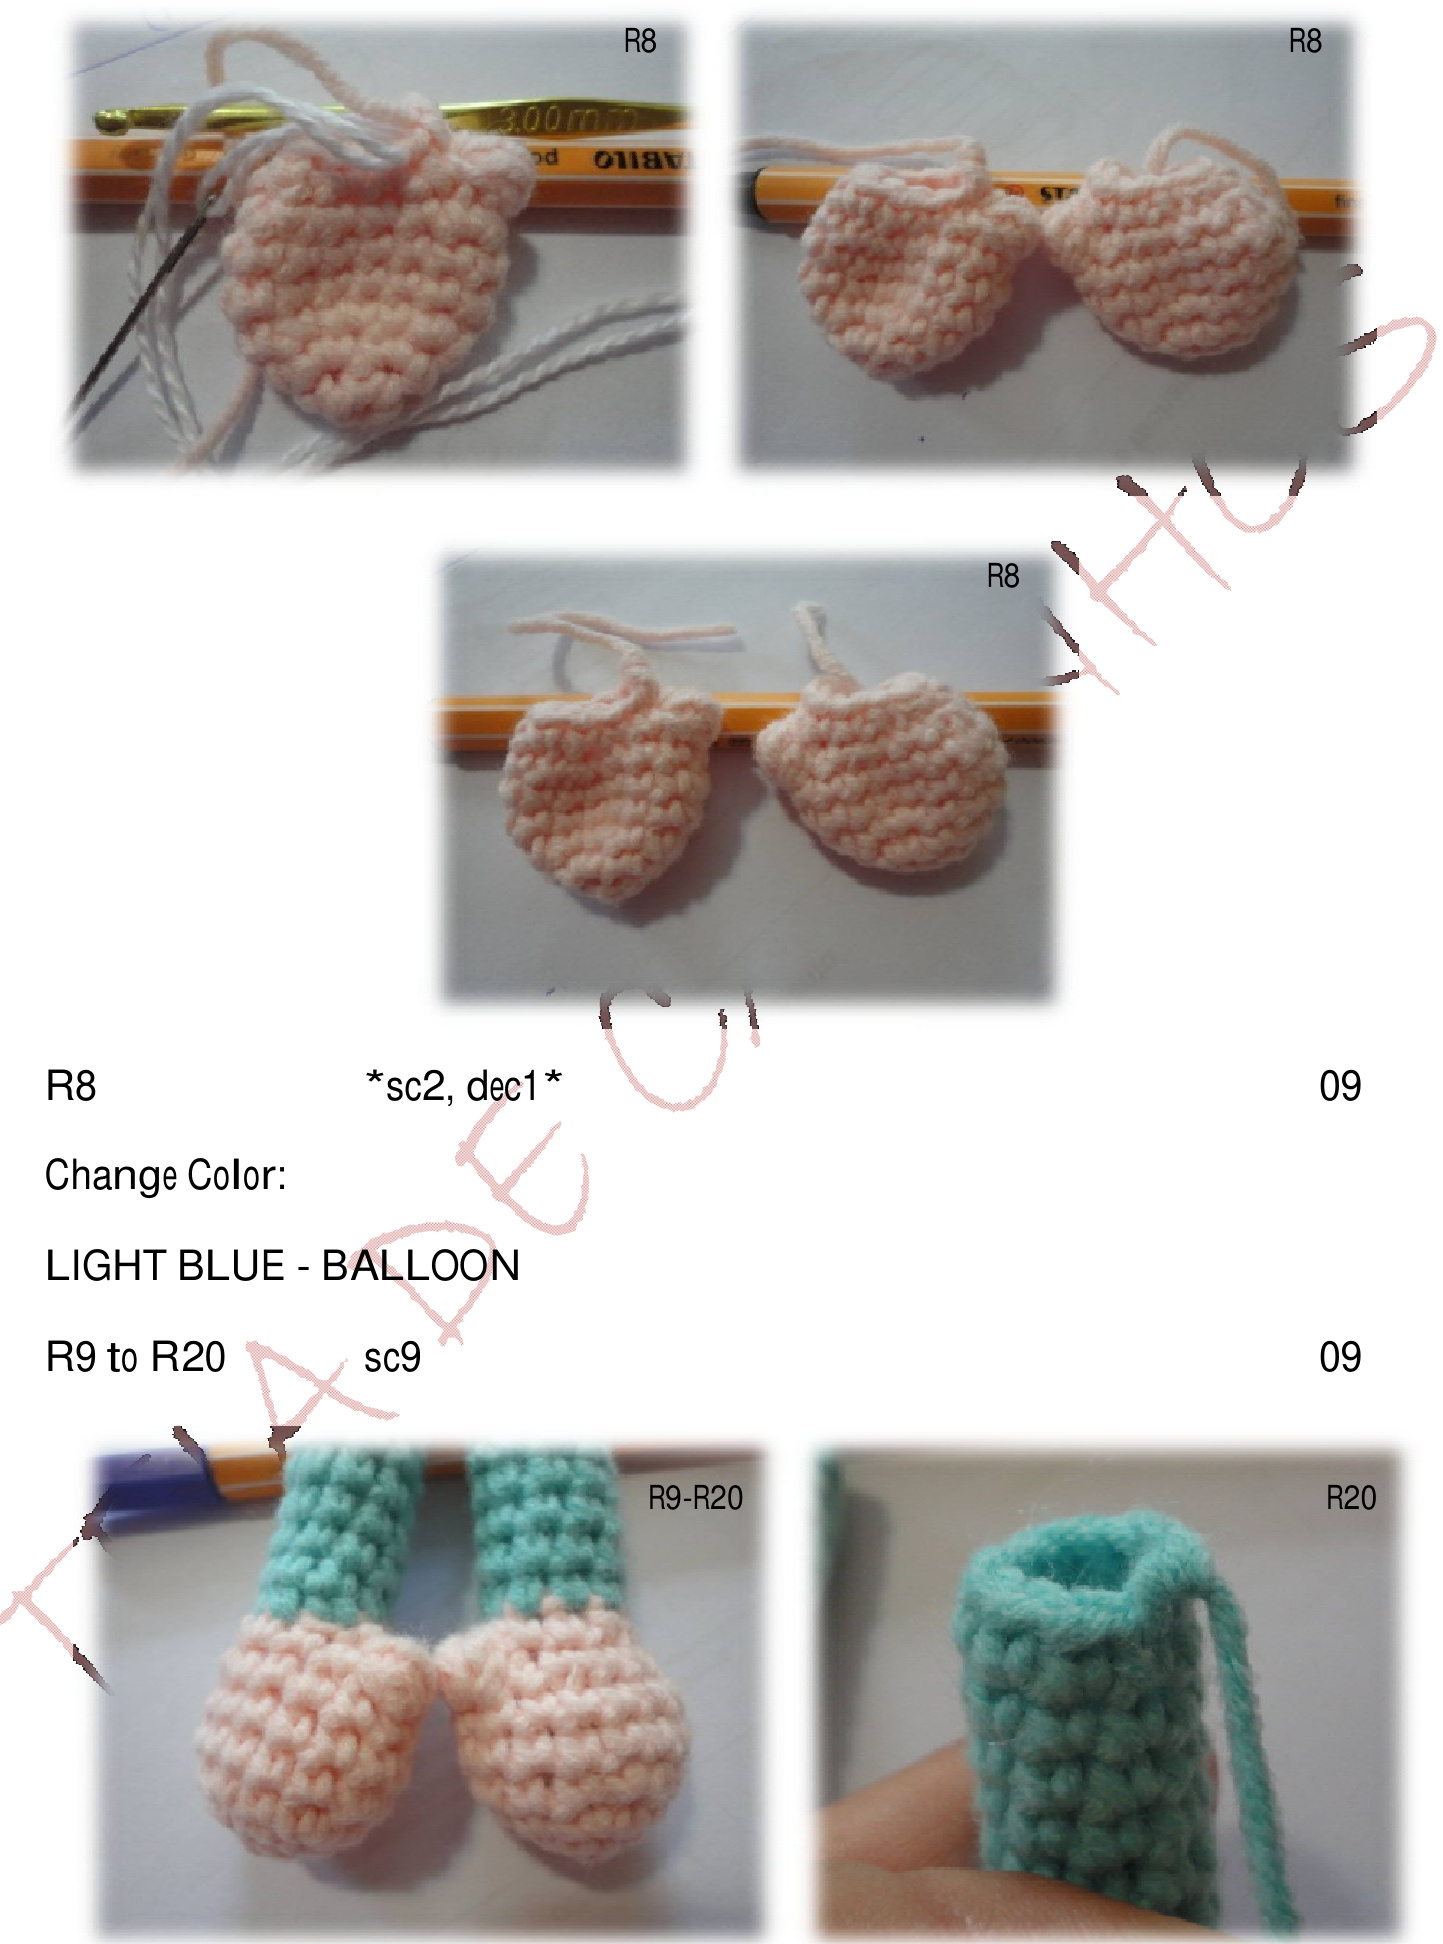
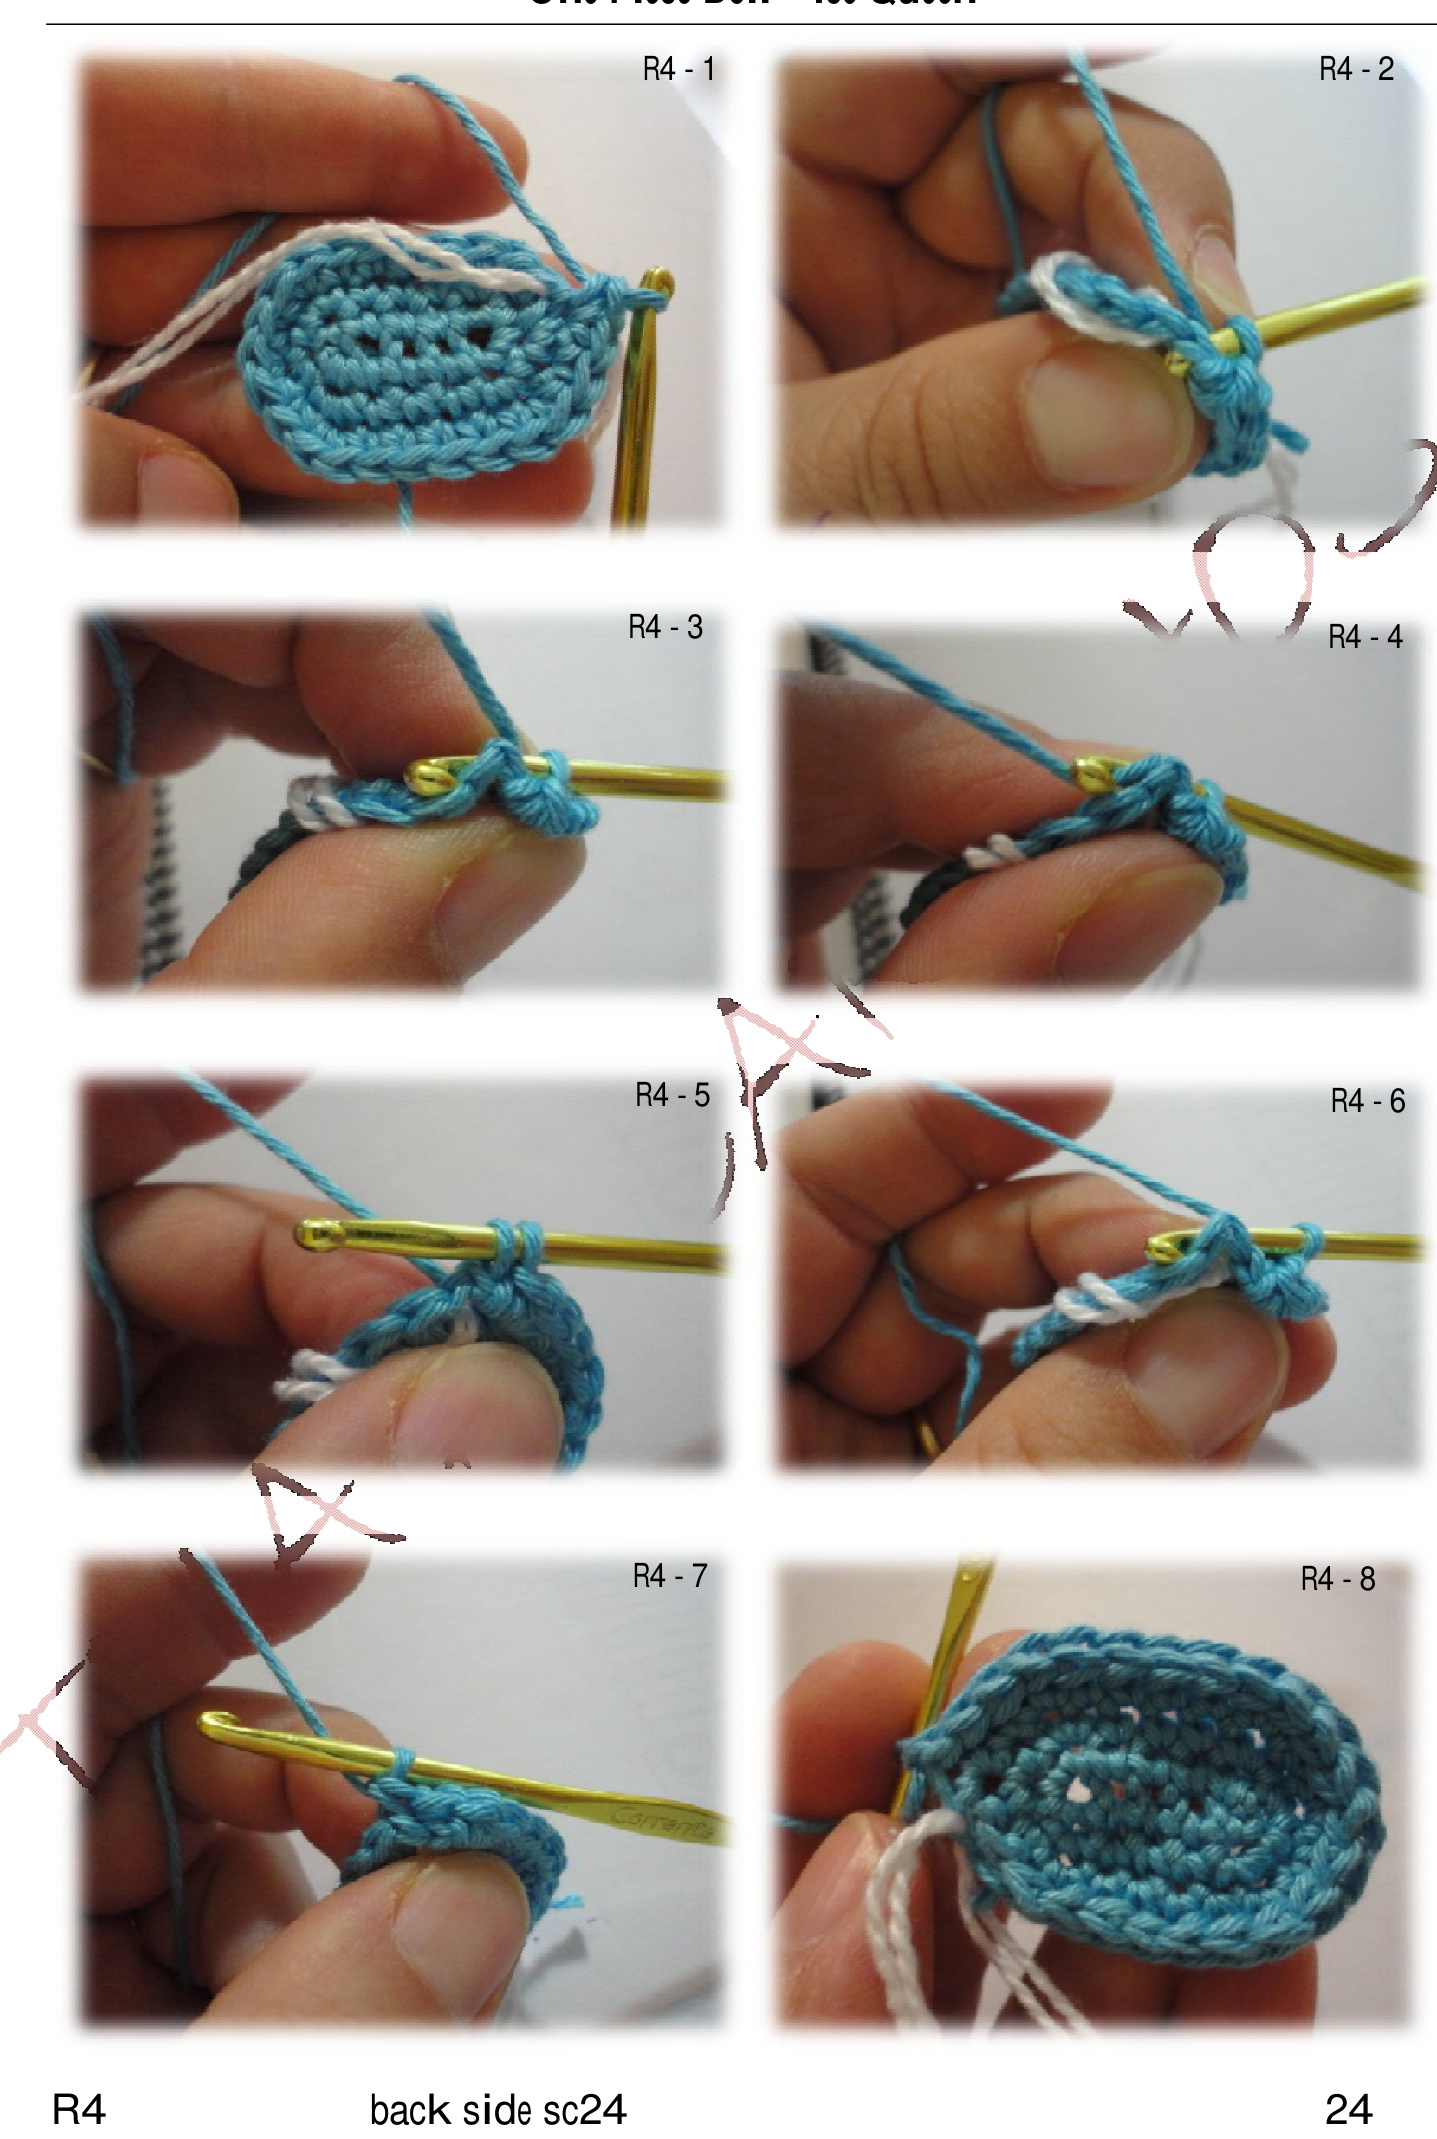
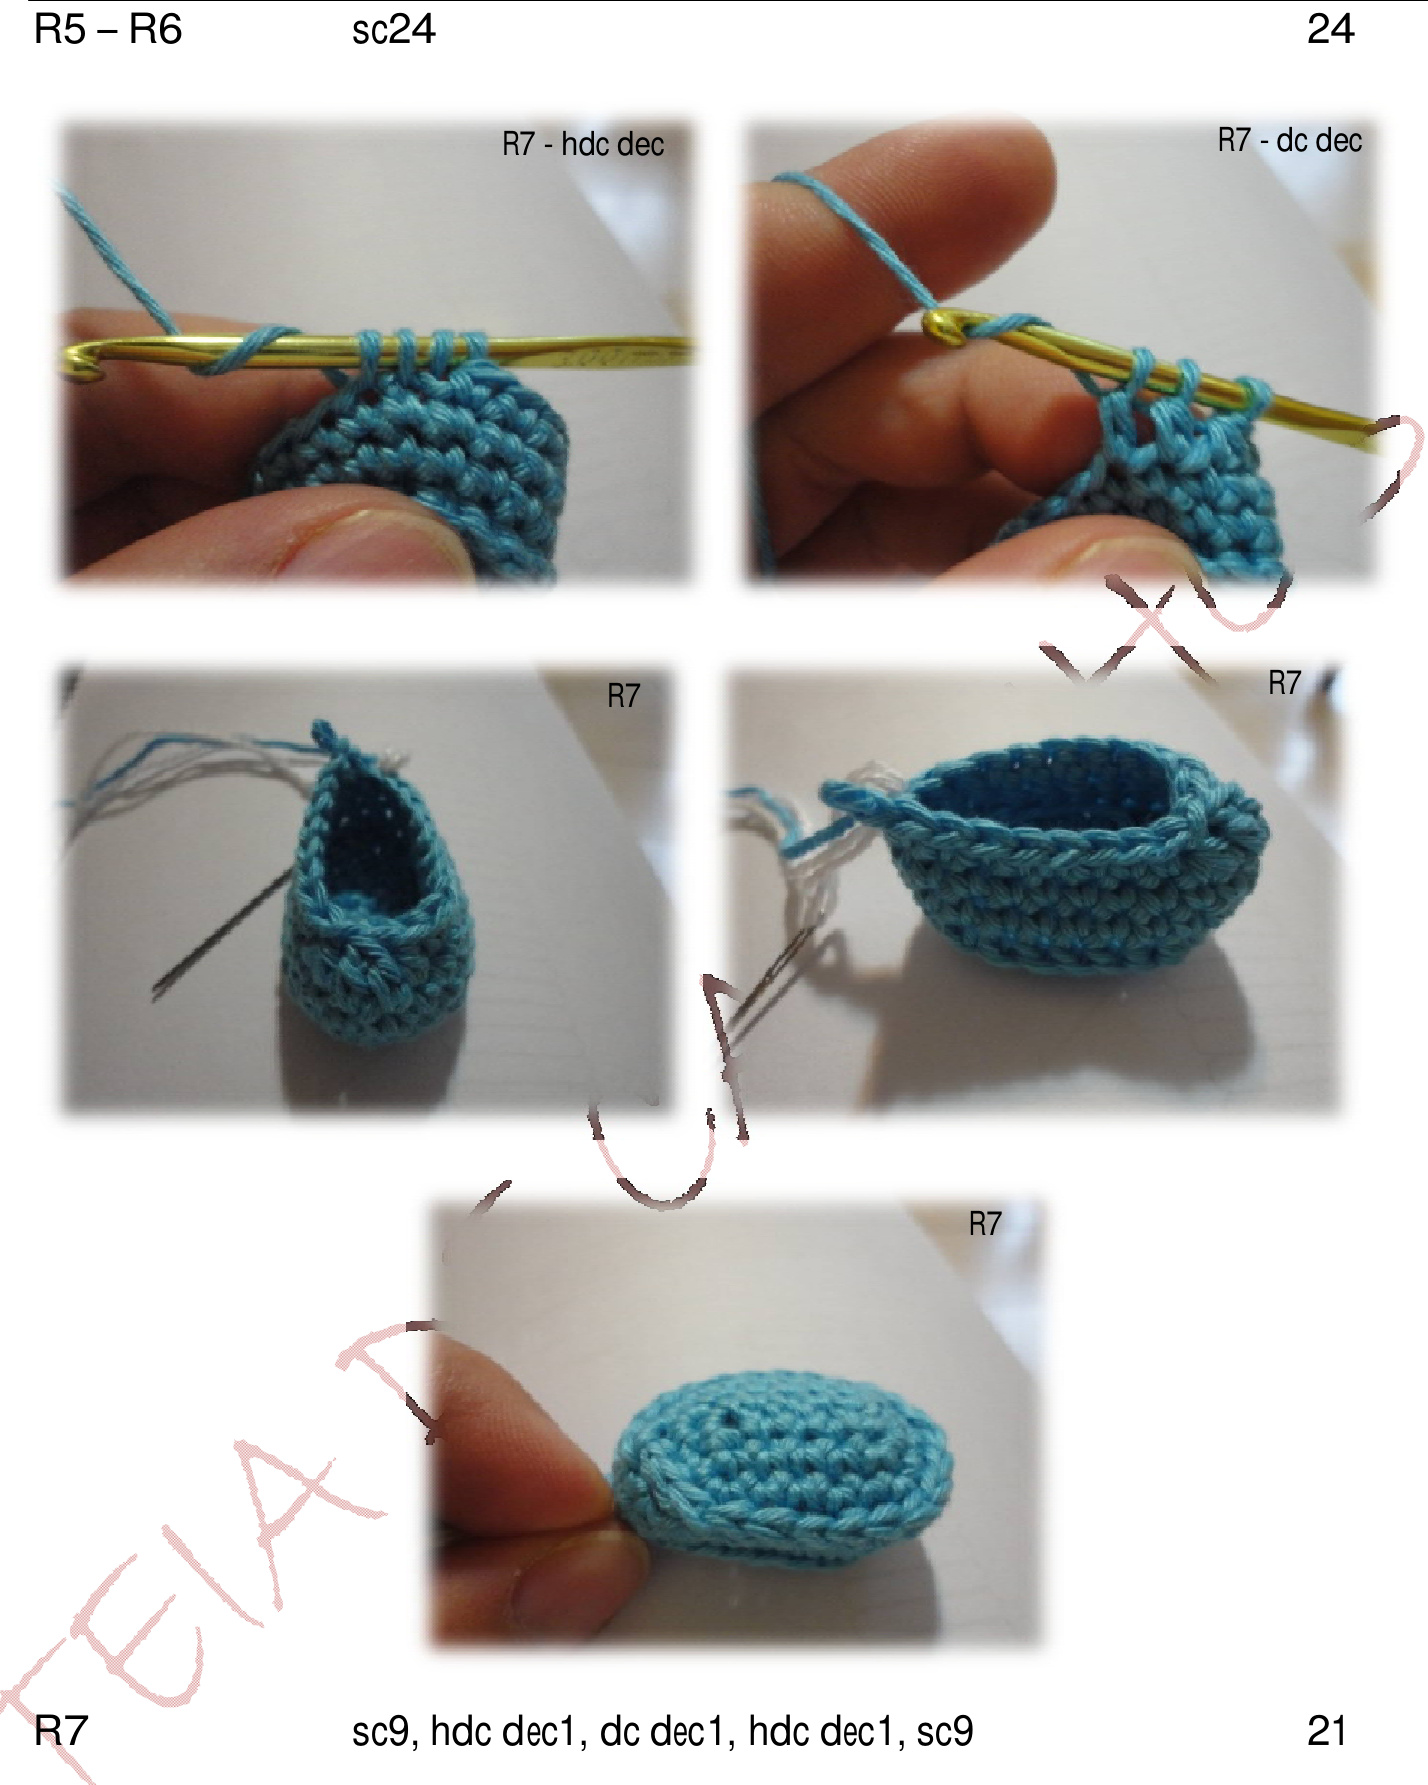
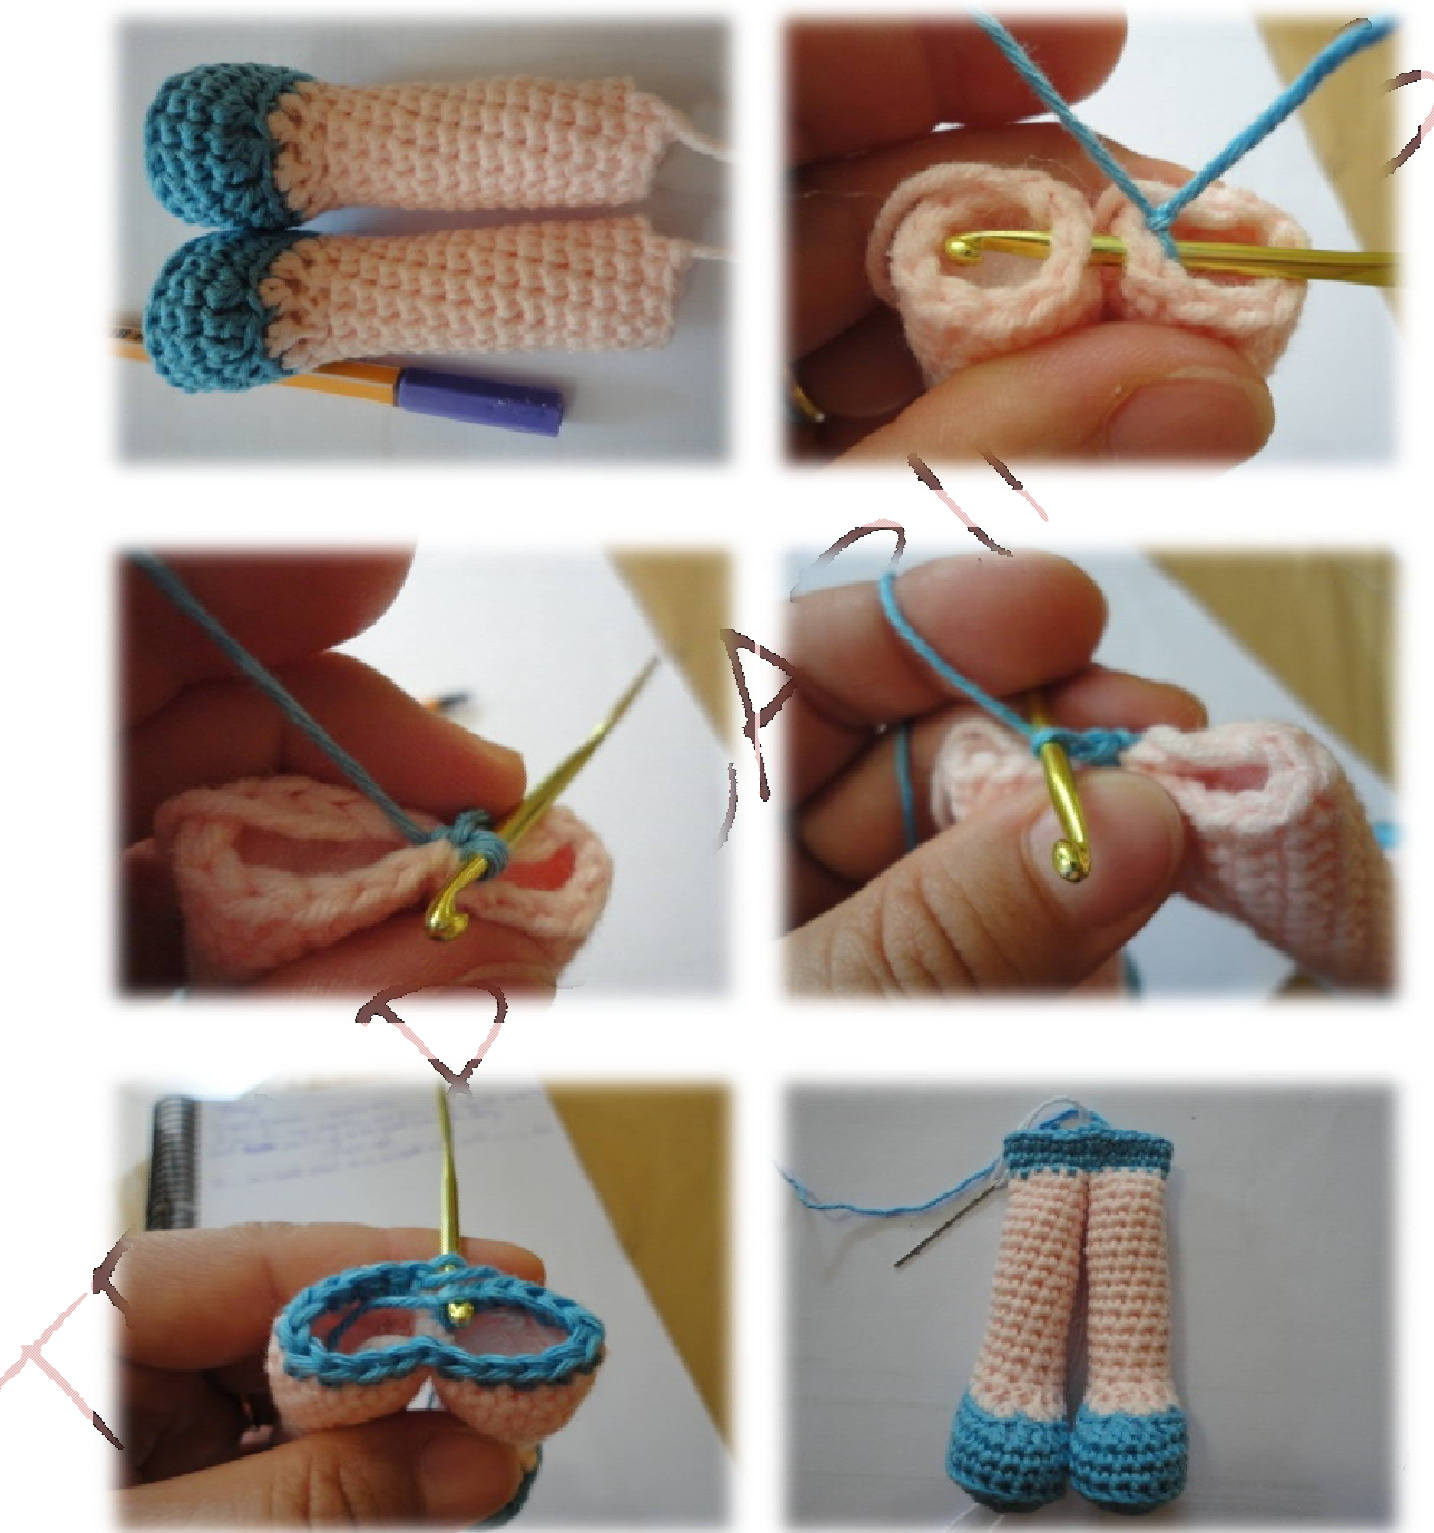
FEET AND LEGS (3mm hook)
Make one at a time to join them later. BLUE-BELLA
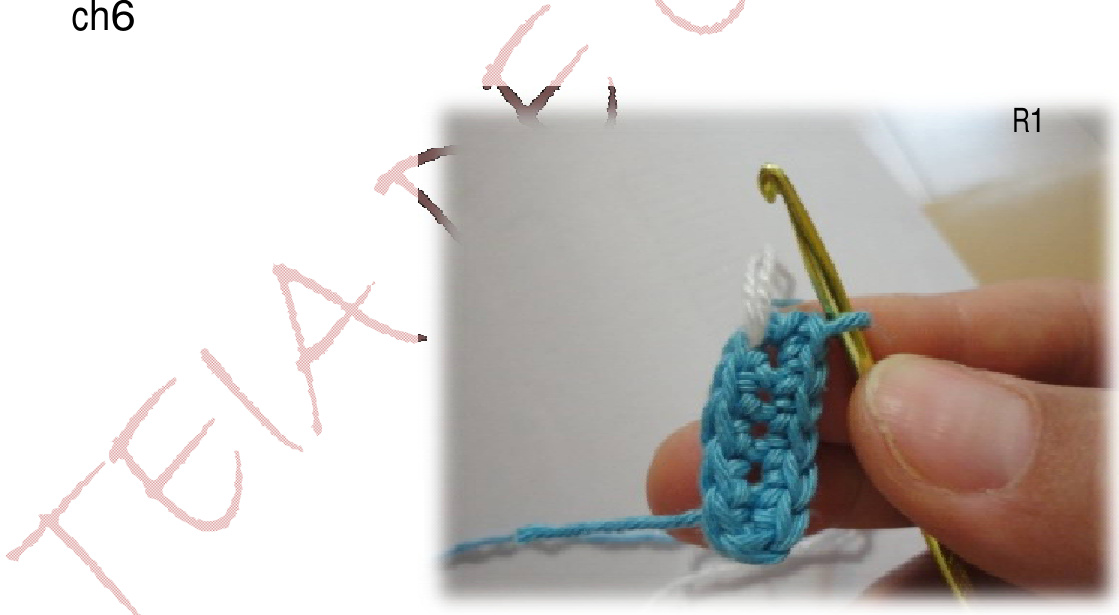
R1 sc4, sc3 in the last st, s3, sc2 in the last st 12 R2 inc1, sc3, inc3, sc3, inc2 18 R3 sc1, inc1, sc3, (sc1, inc1)x3, sc3, (sc1, inc1)x2 24
Change Color:
SKIN COLOR-BALLOON
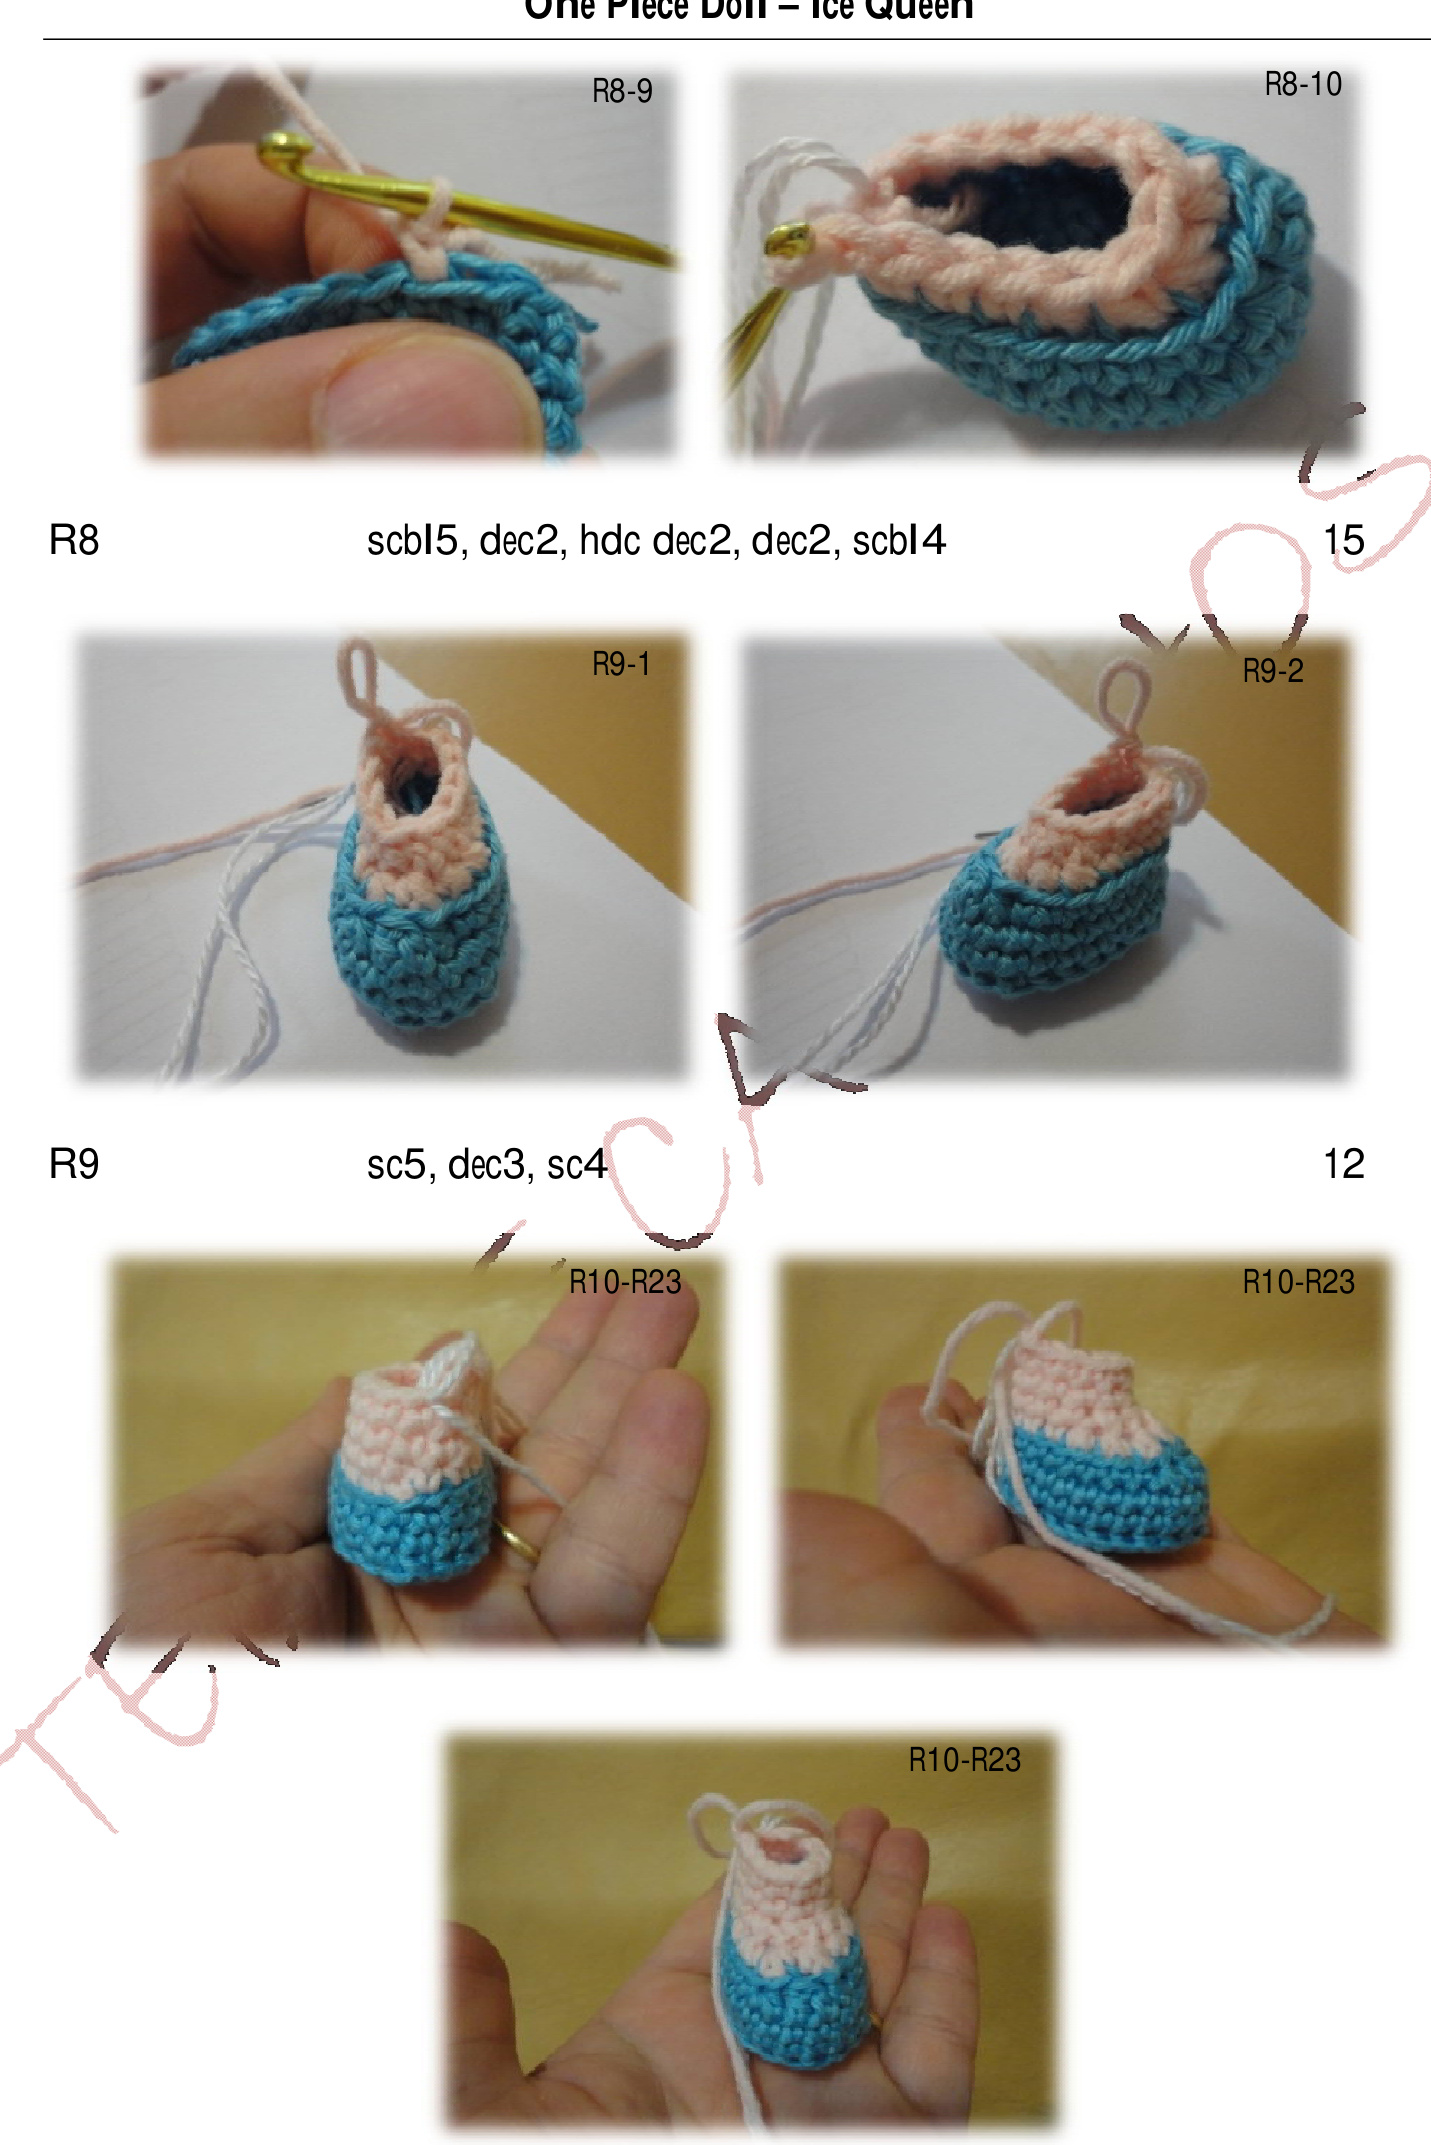
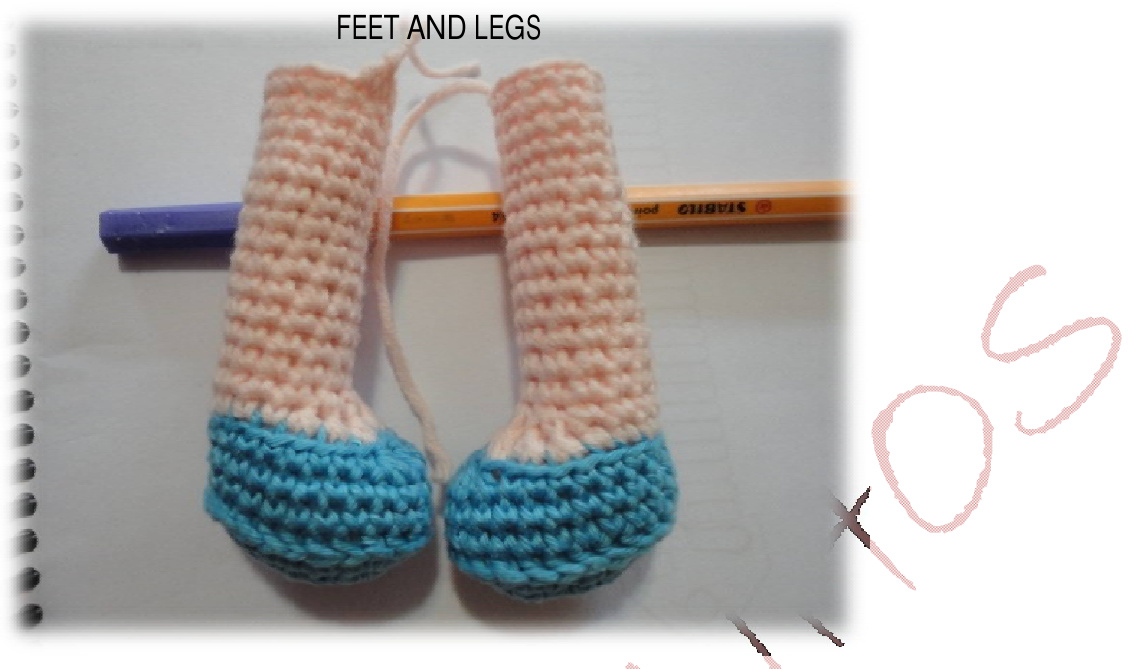
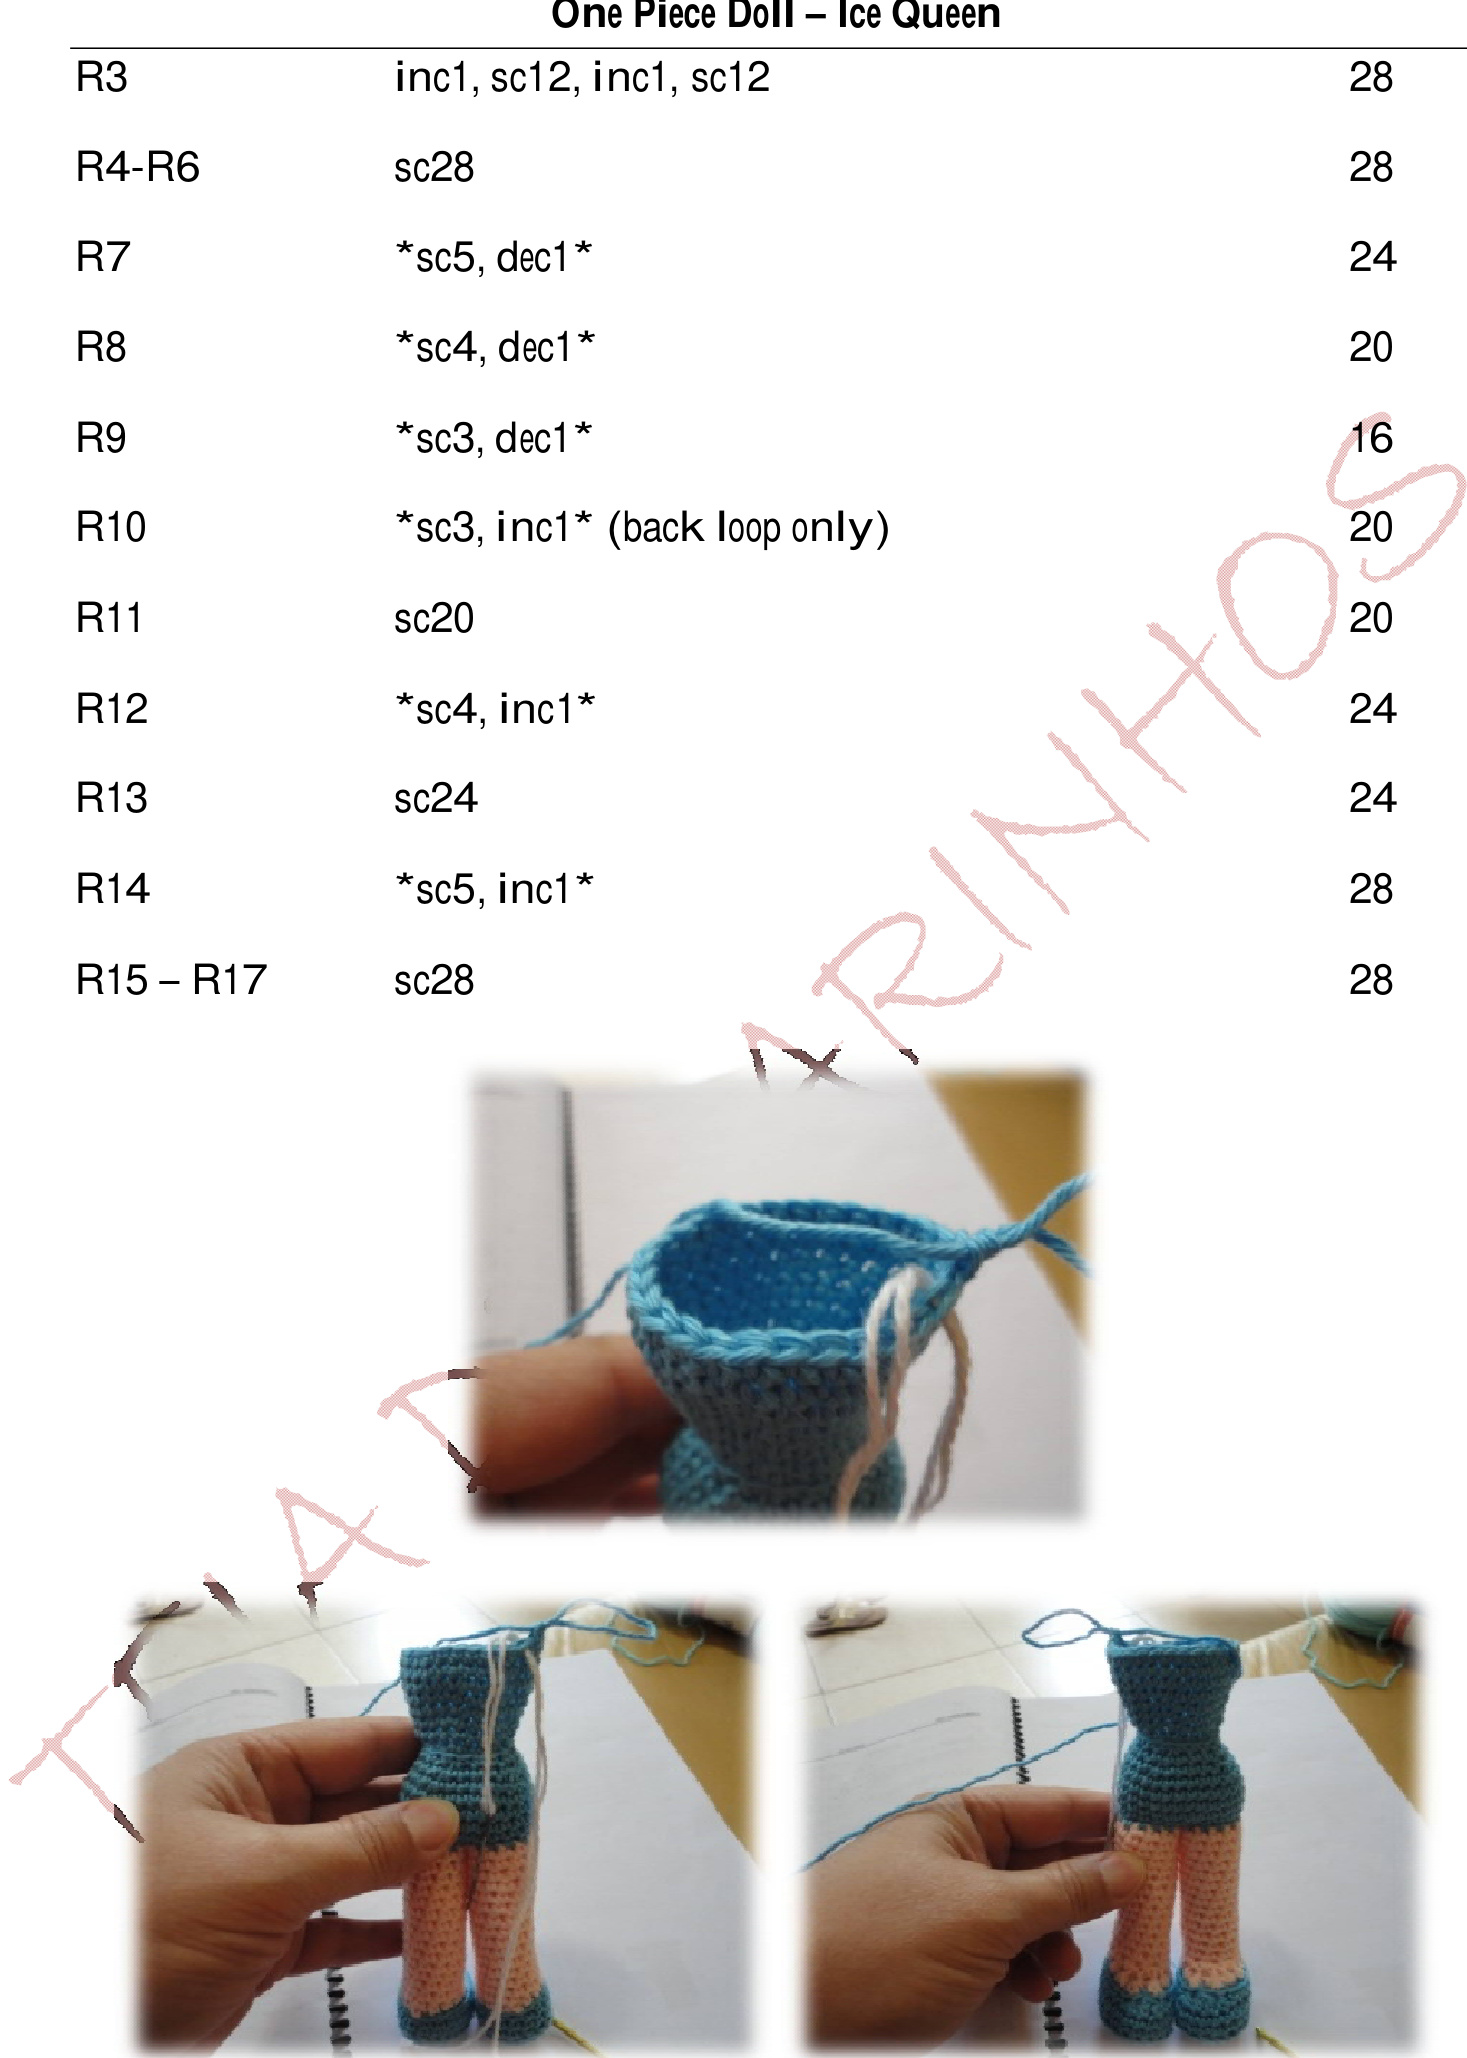
Fill and shape the foot and leg as you go. Cut the thread, tie off and make other
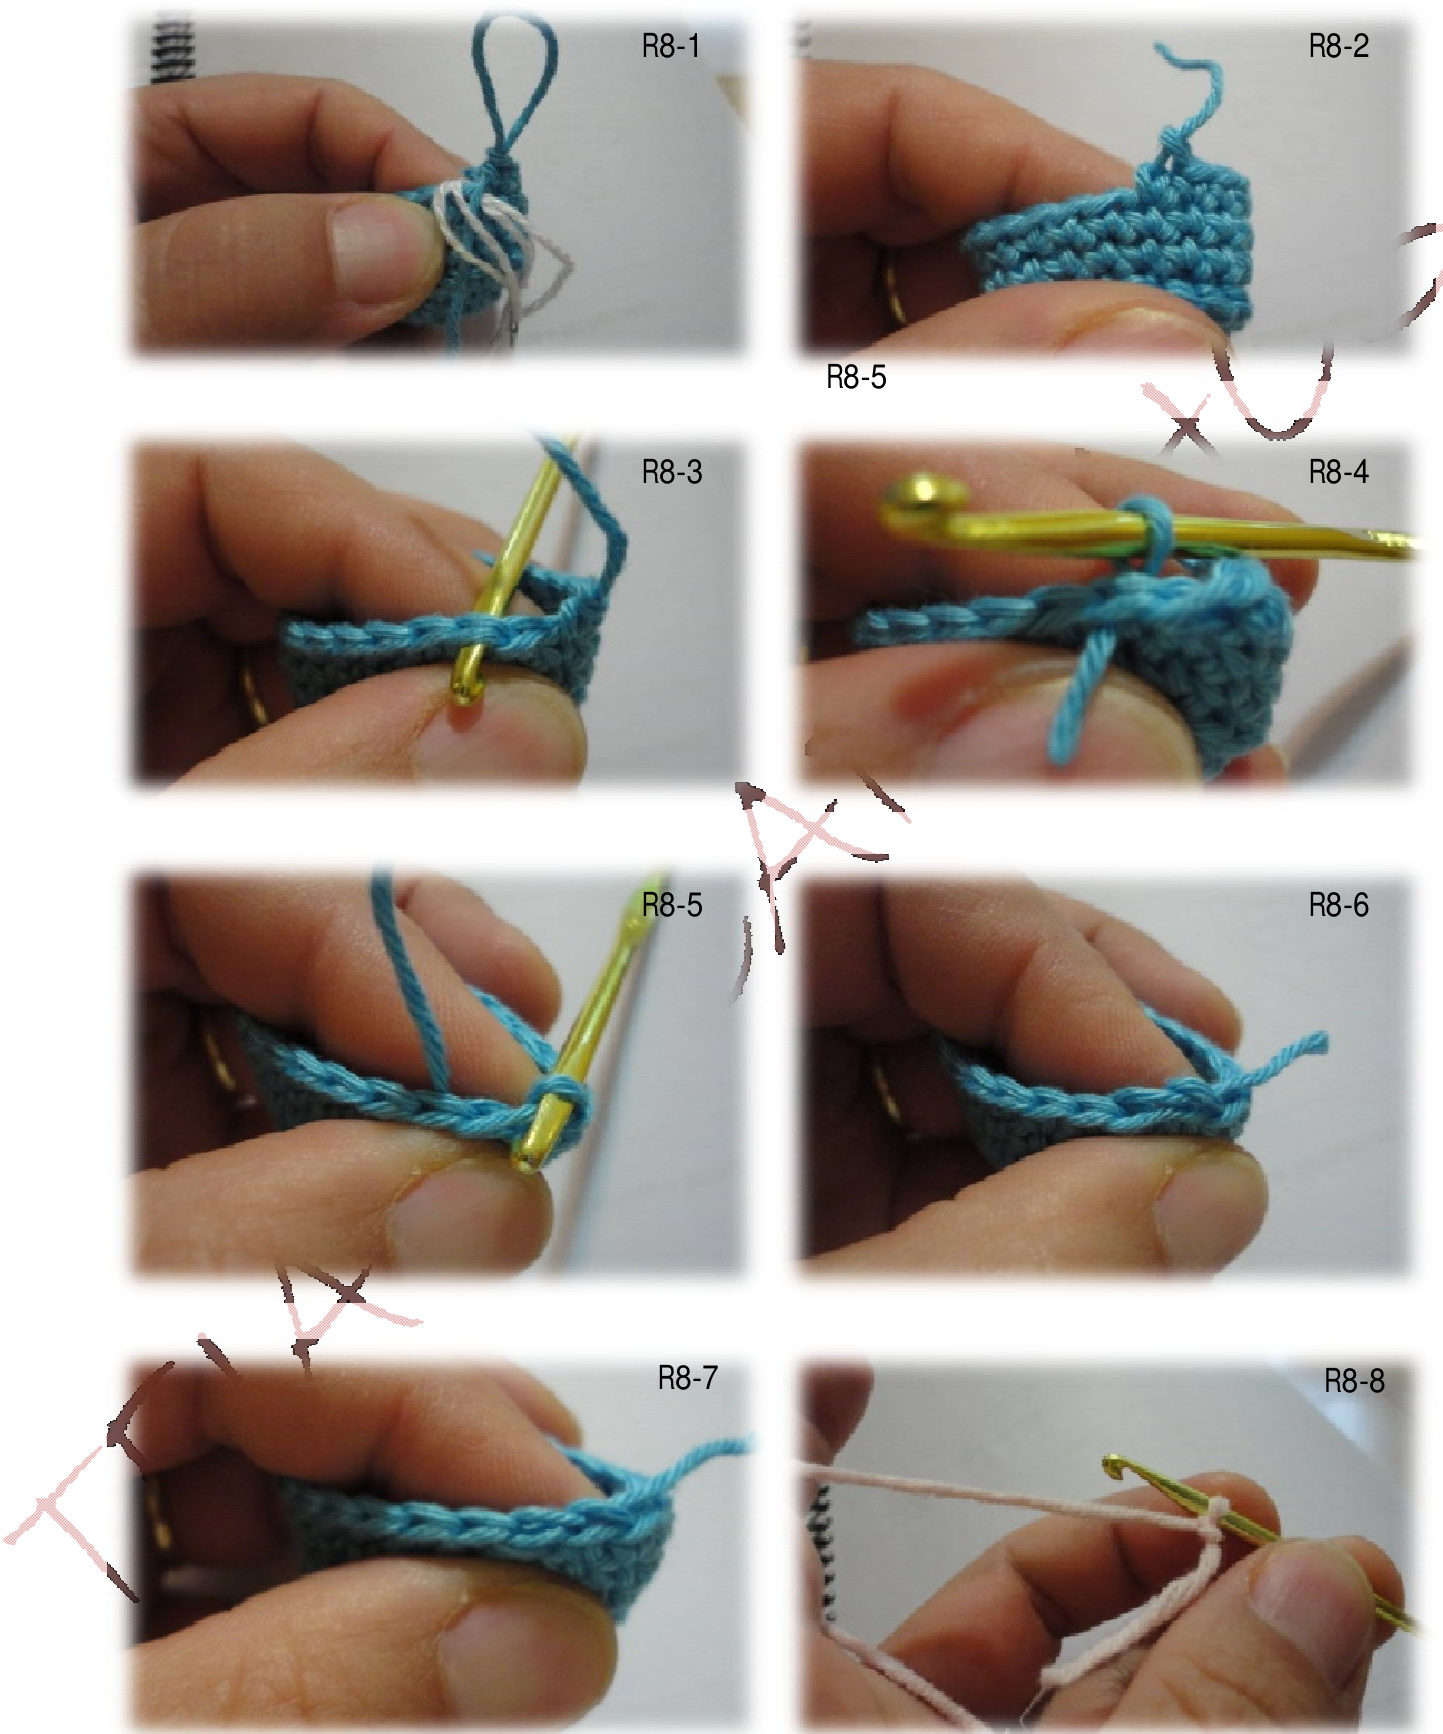
BODY(3mm hook)
BLUE- BELLA At this time we join the doll legs. Make sure the toes are directed forward. Place both legs side by side and begin by the back side as follows:
R1
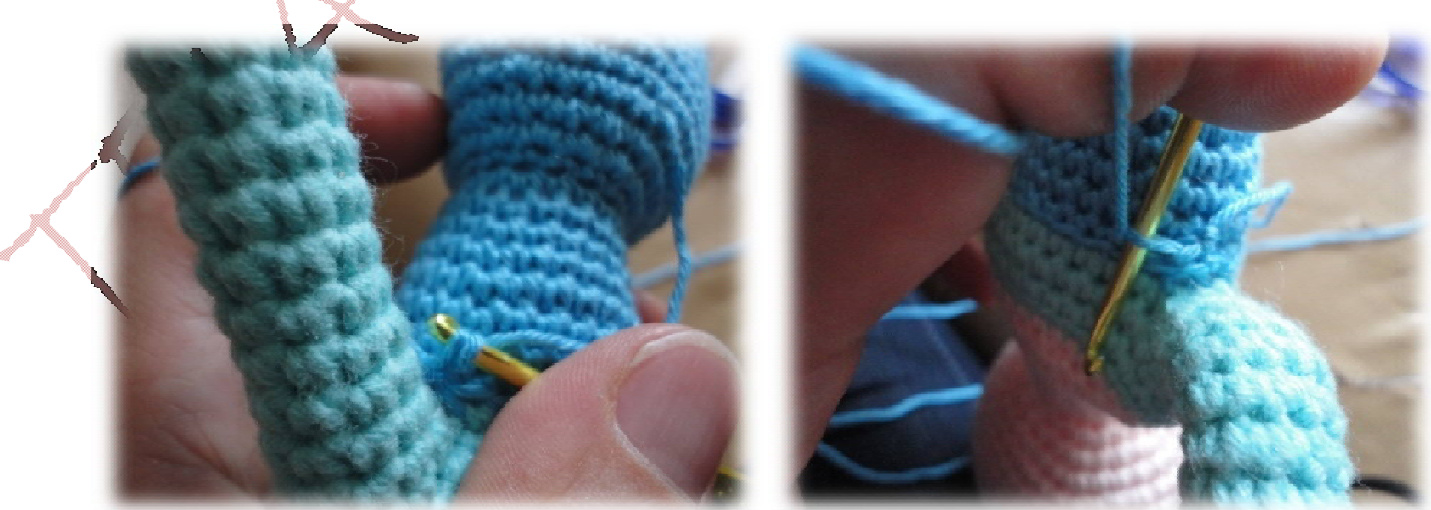
At this time we join arms. Fold the body and put marker on 2 stitches each side.
Fill well the body to begin to give support to the rest of the doll, as you do the shoulders it will be more difficult to shape the body and the union of legs. Fold the arm and put a marker to the thumb side in 2 stitches (l used a thread of a different color) taking care that the thumbs stays inside of the body.

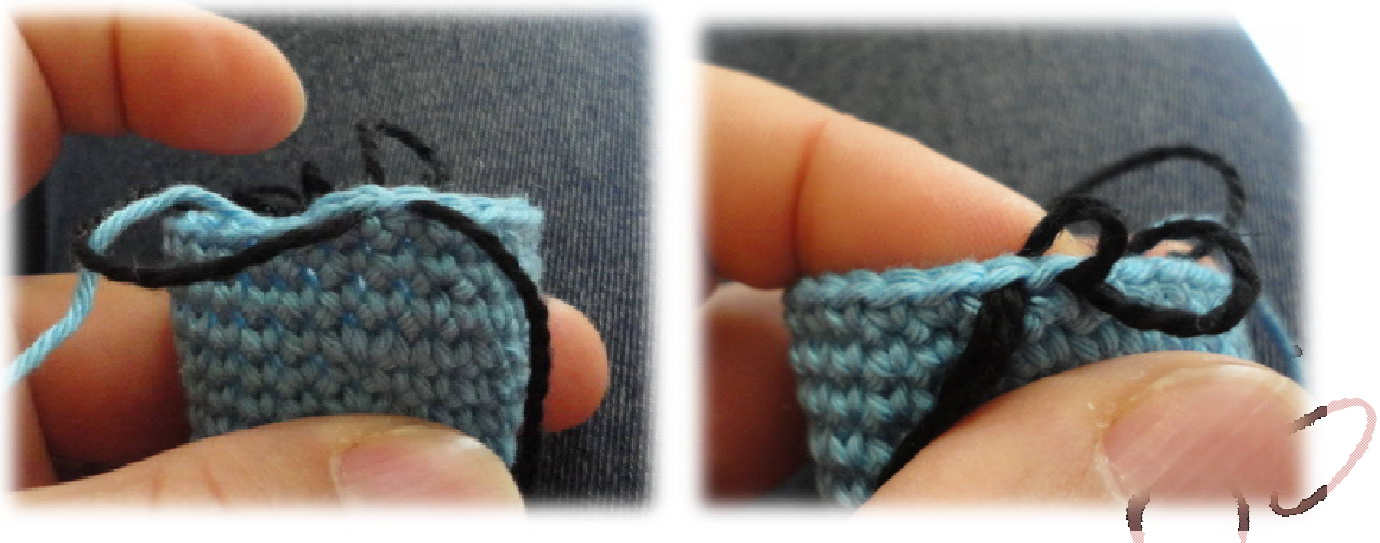
Change Color: LIGHT BLUE - BALLOON The stitches made on body are back loop only but the stitches on the arms are regular sc. Start from back to front. R18 scbl12 (back), sc1 (both body and arm), sc7 (arm), sc1 (both body and arm), scbl12 (front), sc1 (both body and arm), sc7 (arm), sc1 (both body and arm)

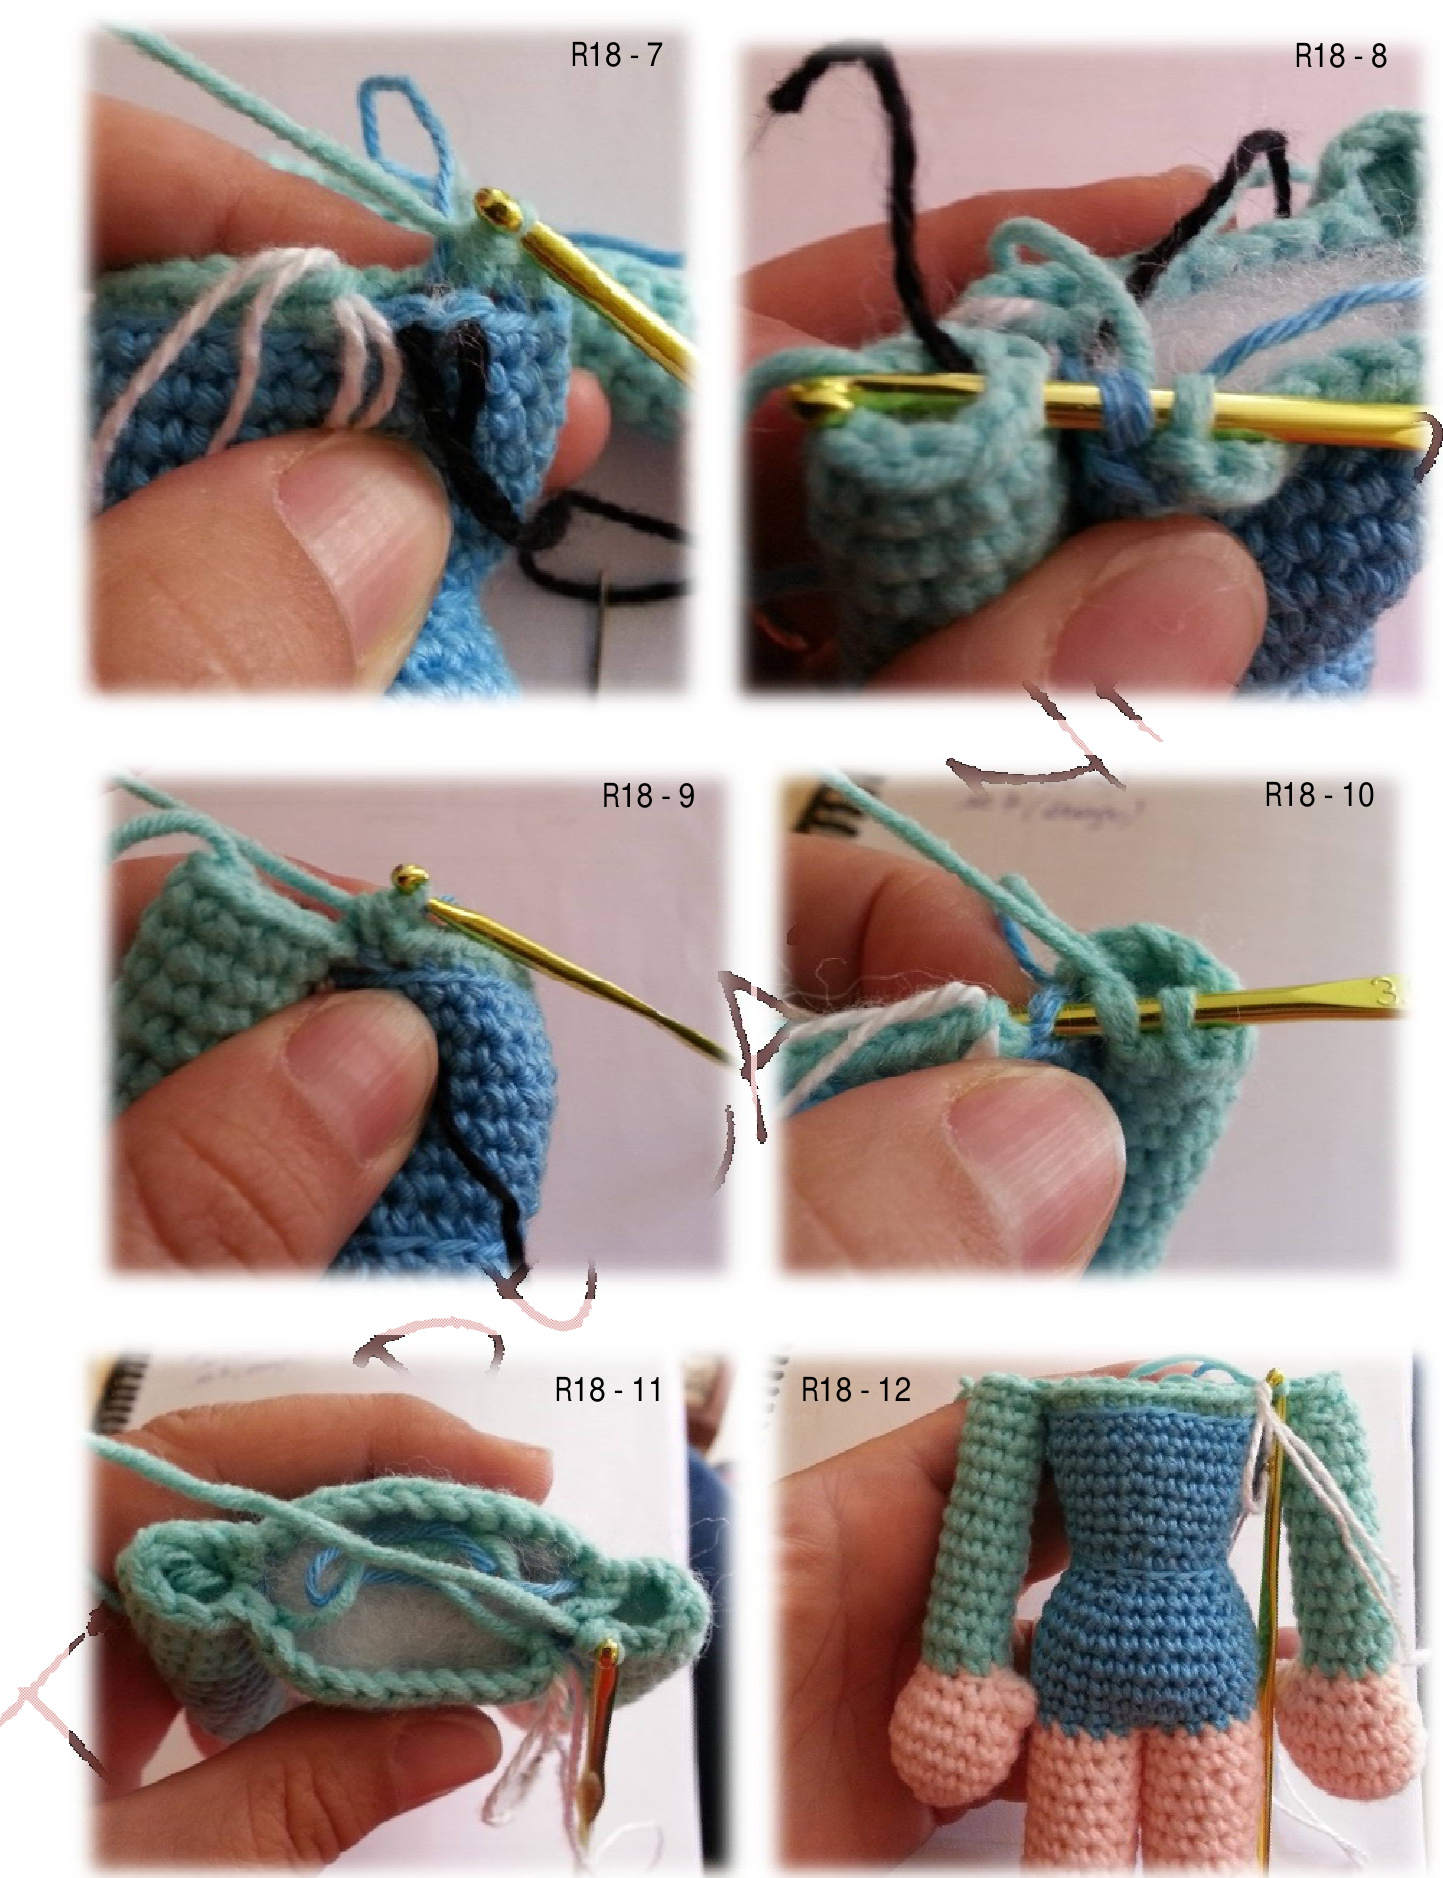
R19-R20 SC42
SHOULDERS (3mm hook)
As you make the shoulders, it must be very careful and well filled to ensure the strength of the arms and the neck. Change Color:
NECK (3mm hook)
R25 and R26 SC14 14 R27 \*sc5,dec1\* 12
HEAD(3mm hook)
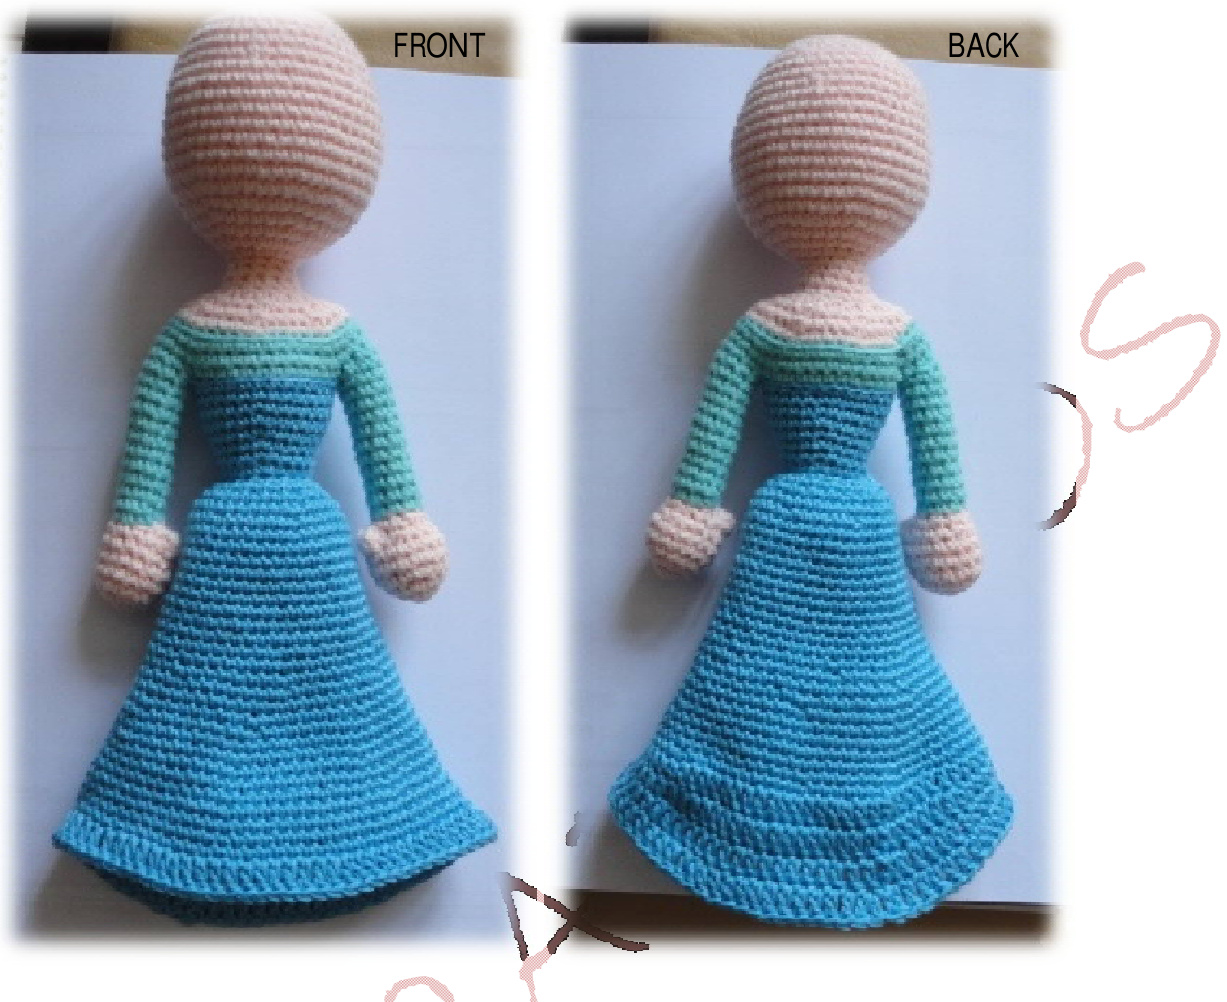
Now your doll is ready! The basis of it, at least. She must look like this.
Now lets start the clothes, hair and face.
SKIRT(3mm hook)
BLUE-BELLA Remember, when the body was made, the 1oth row was in single crochet back loops. Now, the first row of the skirt is made in the front loop that was left.
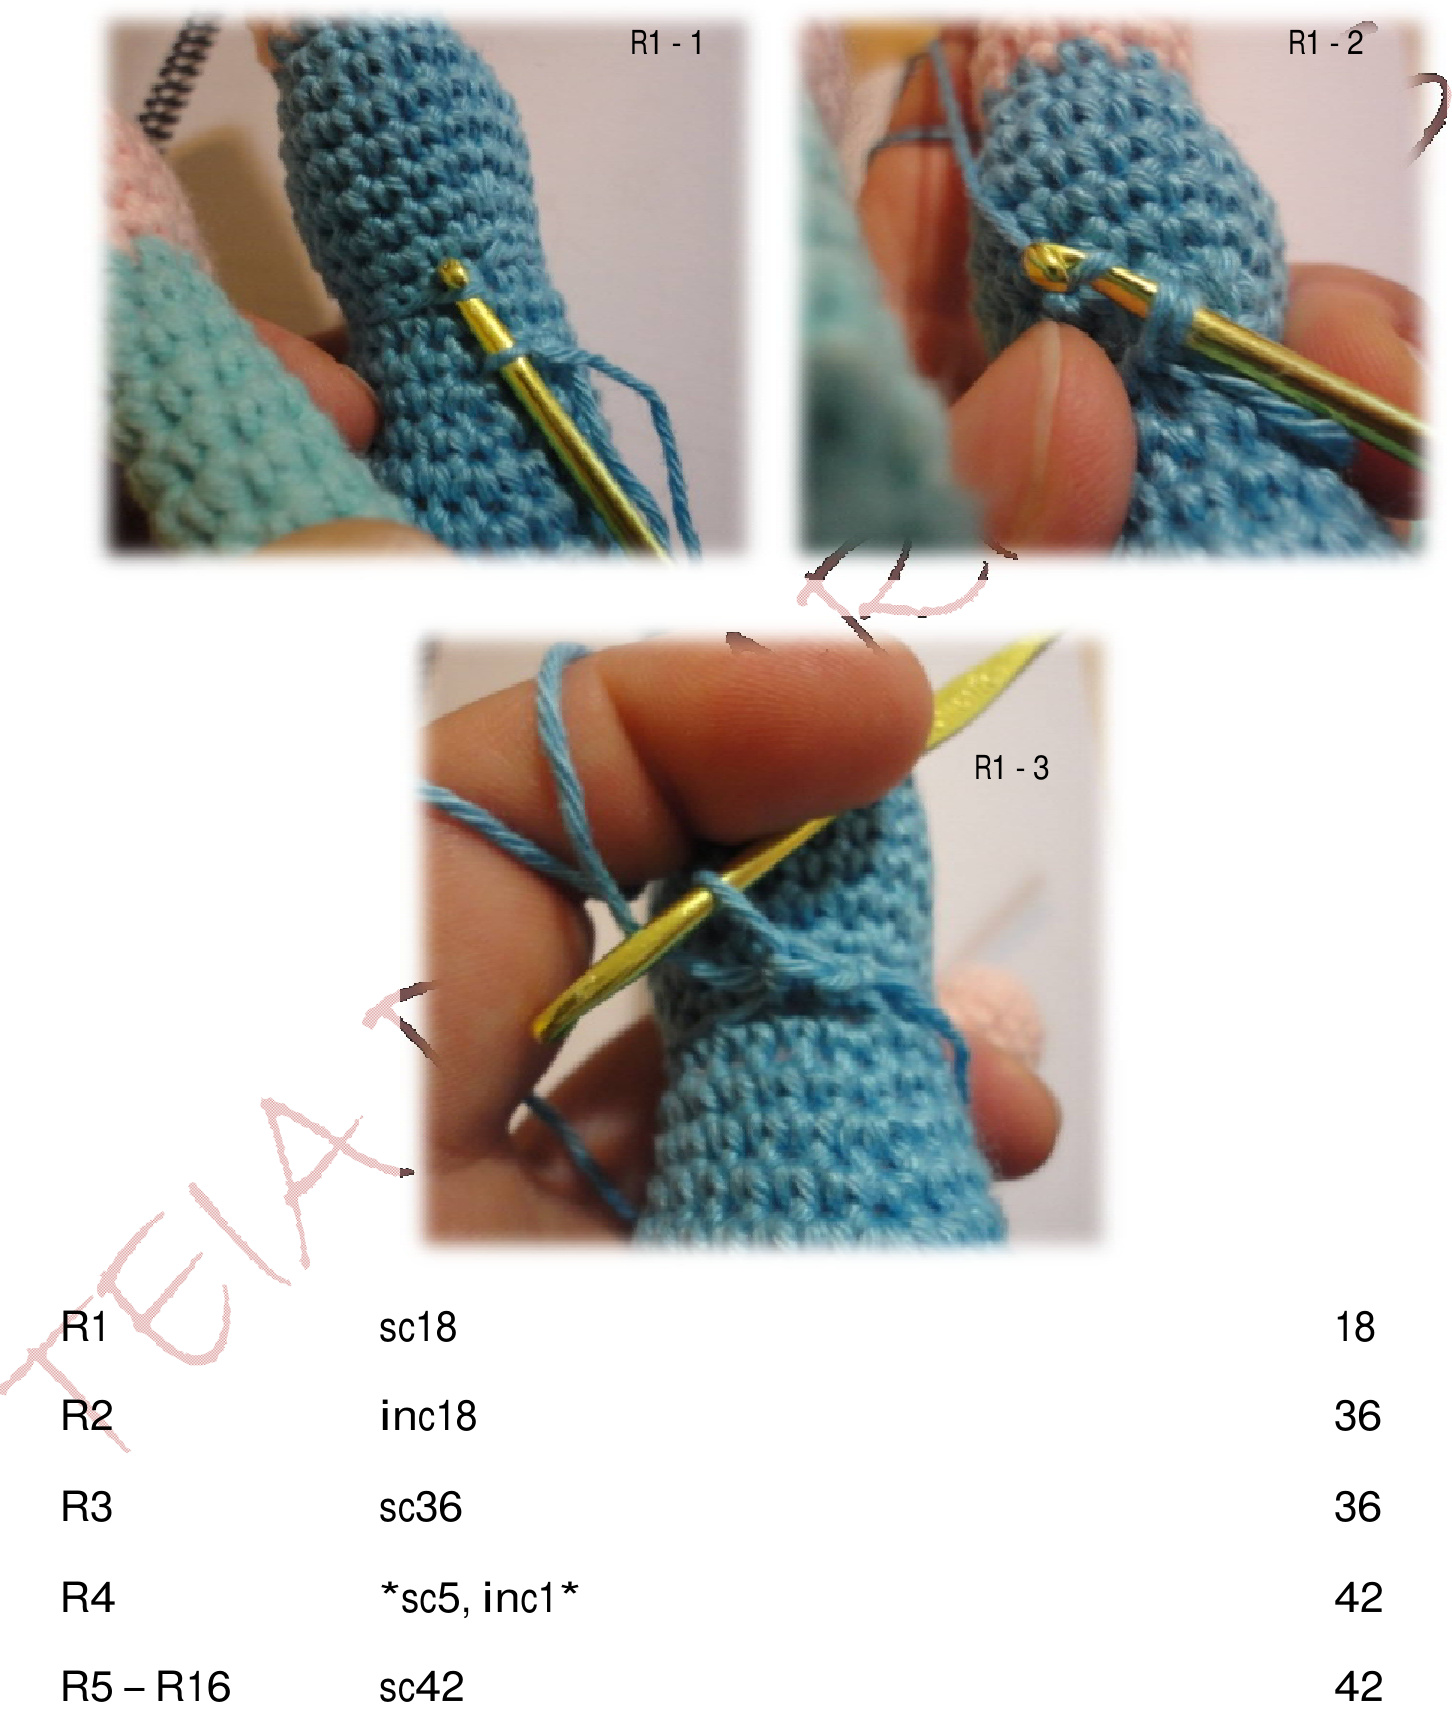
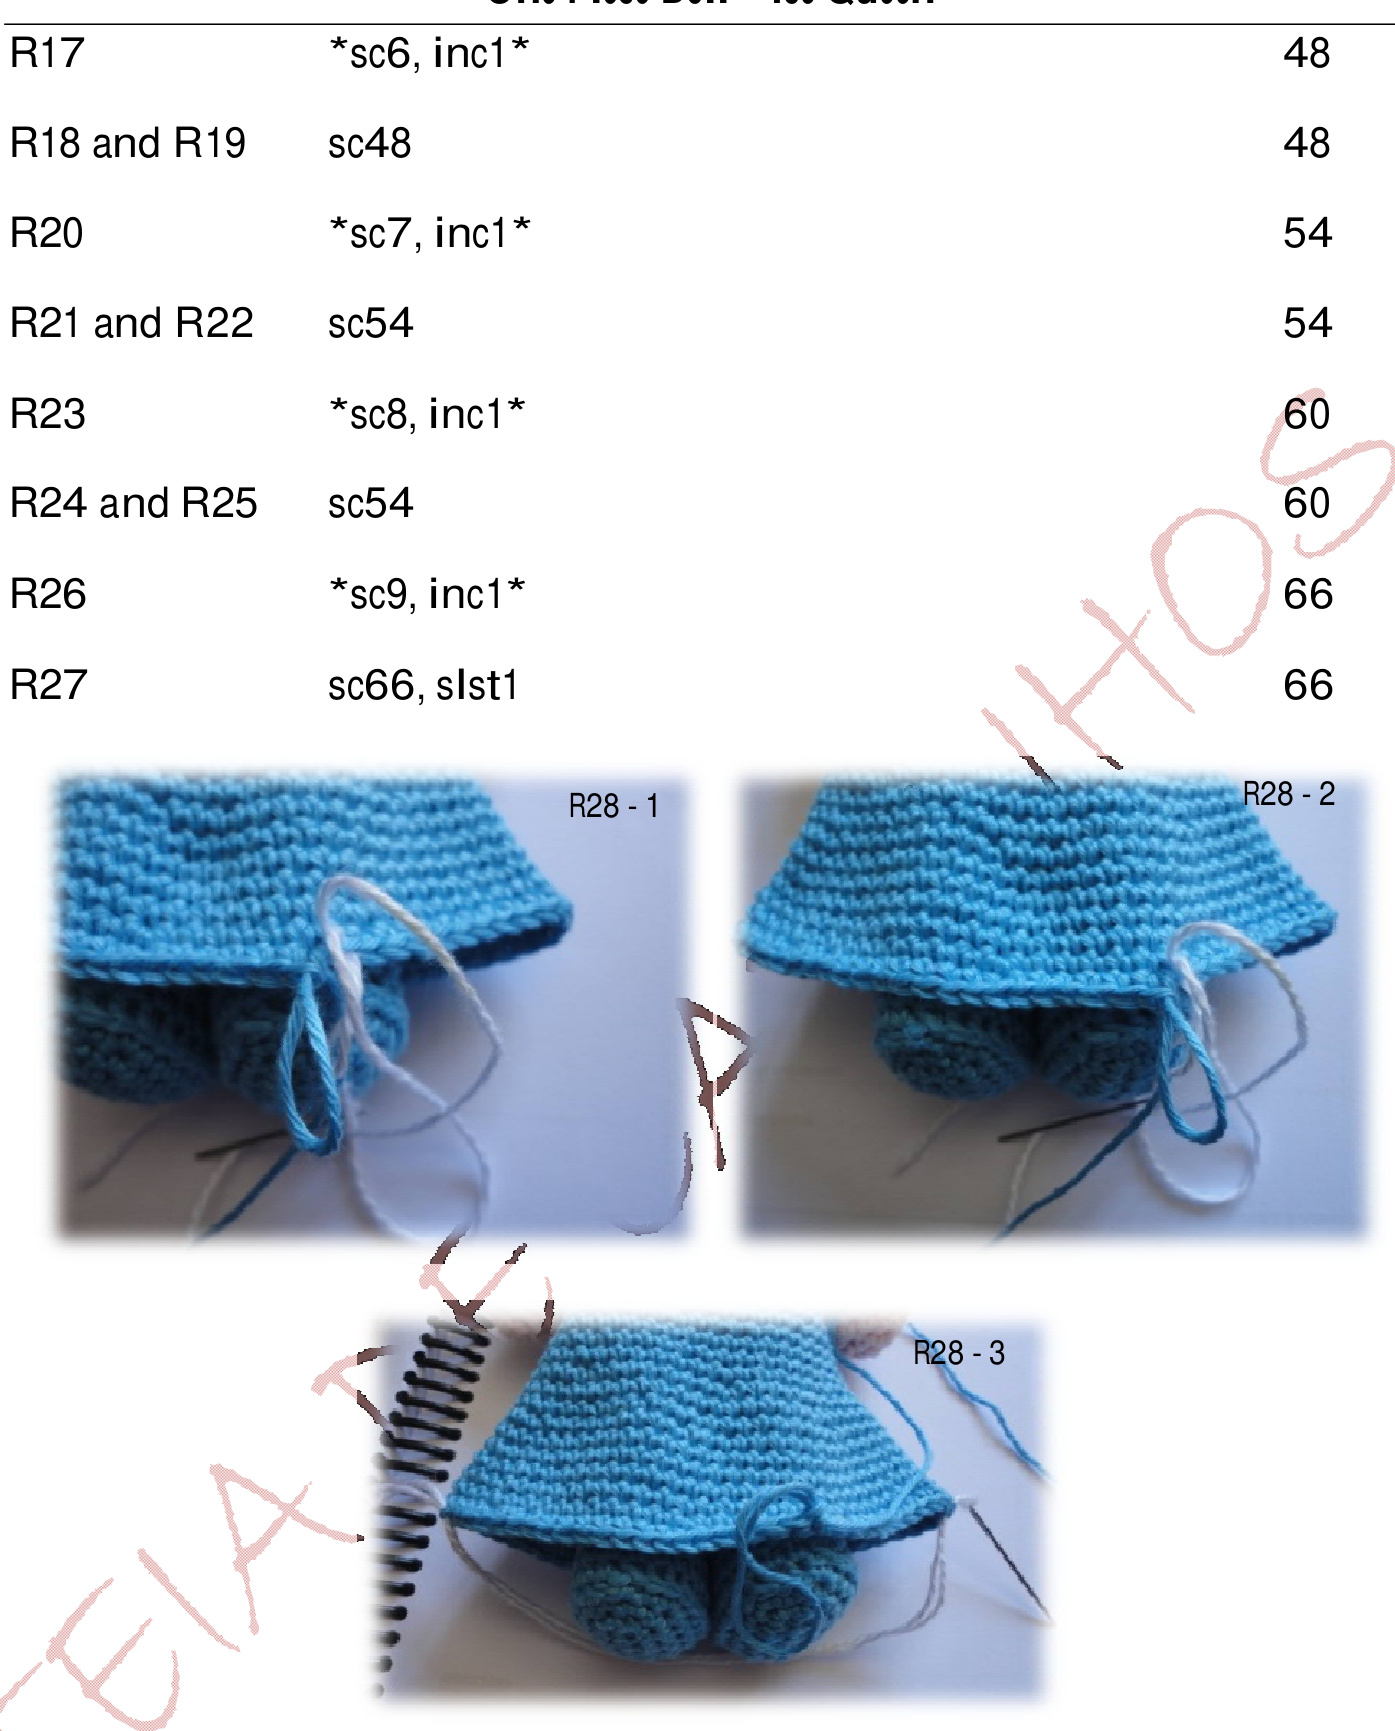
At this point, put a marker each side to separate the front and the back side of the skirt. When starting the R28, it will be as follow: R28-R30 dc6, hdc5, sc33 (front side), hdc5, dc17 66 R31 \*dc10, inc dc1\* 72 Tie off. The doll must look like this, so far.
CLOAK (3mm hook)
BLUE - BELLA The cloak is made with the front loops of R28 from body, starting with 2st under the first arm, 12st from back side and 2st under the second arm. When finish the row, you turn the work and start a new row.
One Piece Doll - Ice Queen
R2 (ch2, dc1) in the same st, dc14, inc dc1 18 R3 (ch2, dc1) in the same st, dc16, inc dc1 20 R4 (ch2, dc1) in the same st, dc18, inc dc1 22 R5 (ch2, dc1) in the same st, dc20, inc dc1 24 R6 and R7 dc24 24 R8 (ch2, dc1) in the same st, dc22, inc dc1 26 R9 (ch2, dc1) in the same st, dc24, inc dc1 28 R10 (ch2, dc1) in the same st, dc26, inc dc1 30 R11 - R14 dc30 30 R15 (ch2, dc1) in the same st, dc28, inc dc1 32 R16 (ch2, dc1) in the same st, dc30, inc dc1 34 R17 (ch2, dc1) in the same st, dc32, inc dc1 36 R18 (ch2, dc1) in the same st, dc34, inc dc1 38 R19 (ch2, dc1) in the same st, dc36, inc dc1 40
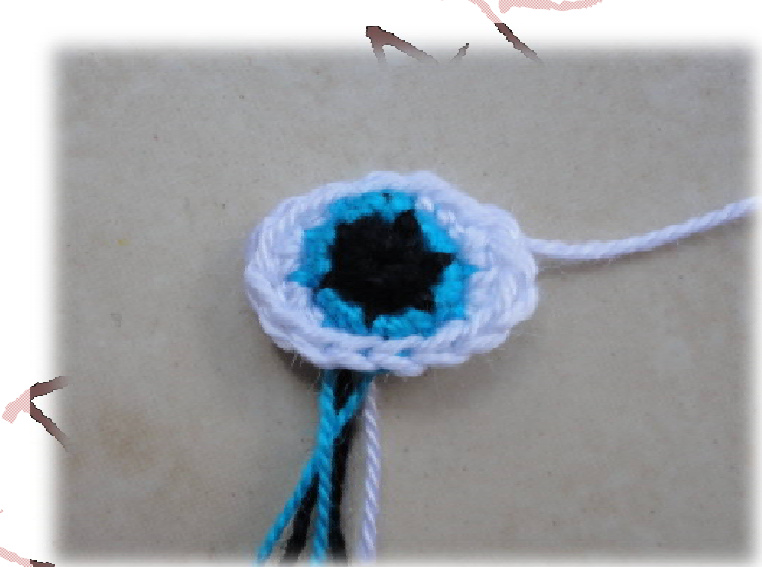
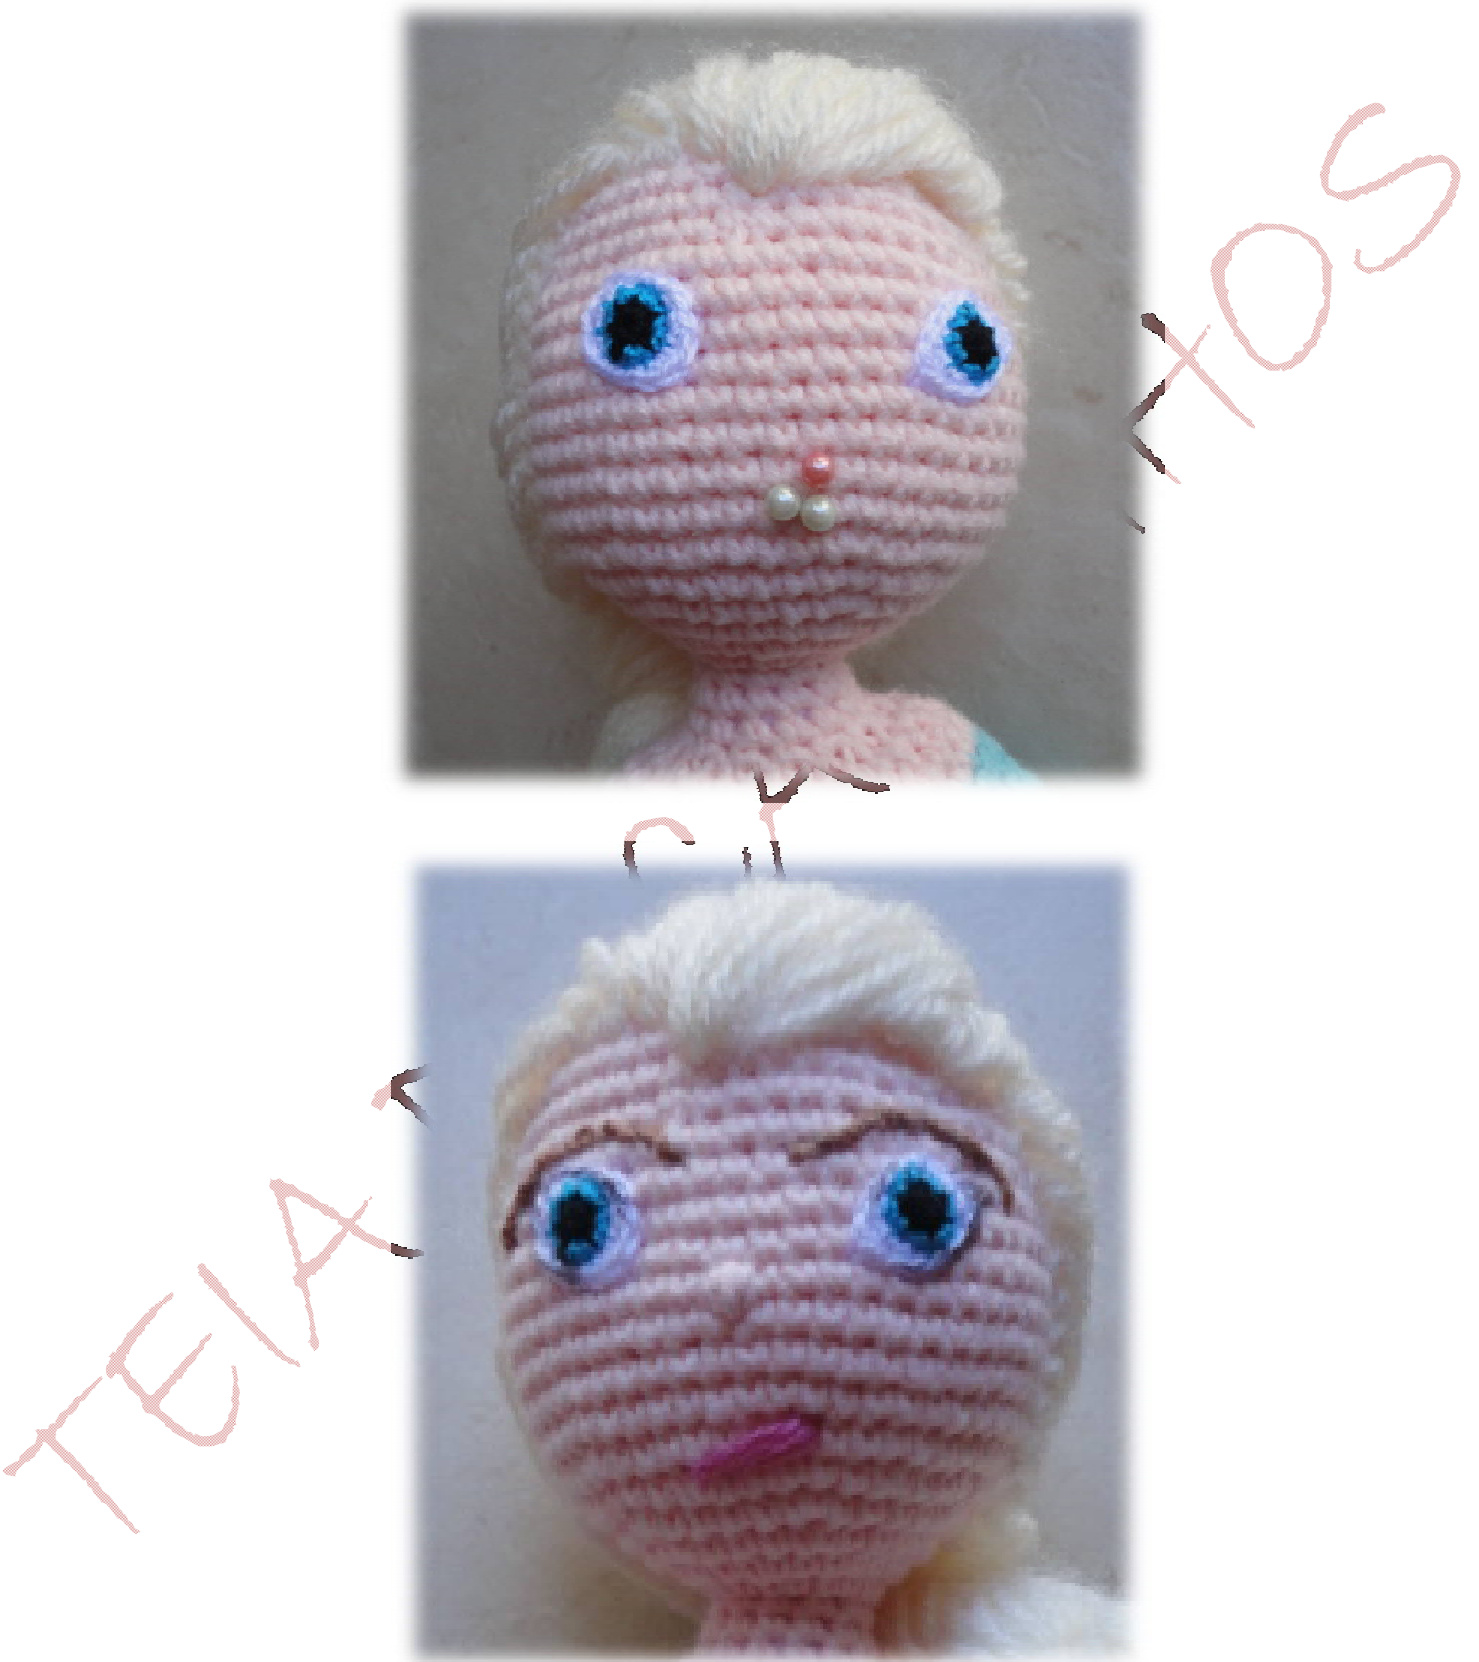
EYES (1.25mm hook)
BLACK-Clea1000 R1 MR, sc6 06 Change color: LIGHT BLUE - Clea1000 R2 inc6 Change color: WHITE-Clea1000 R3 sc1, slst2, sc1, (sc1, hdc1) in the same st, (hdc1, sc1) in the same st, sc1, slst2, sc1, (sc1, hdc1) in the same st, (hdc1, sc1) in the same st Tie off, leave a long tail to sew in the face. Make two of them.
HAIR
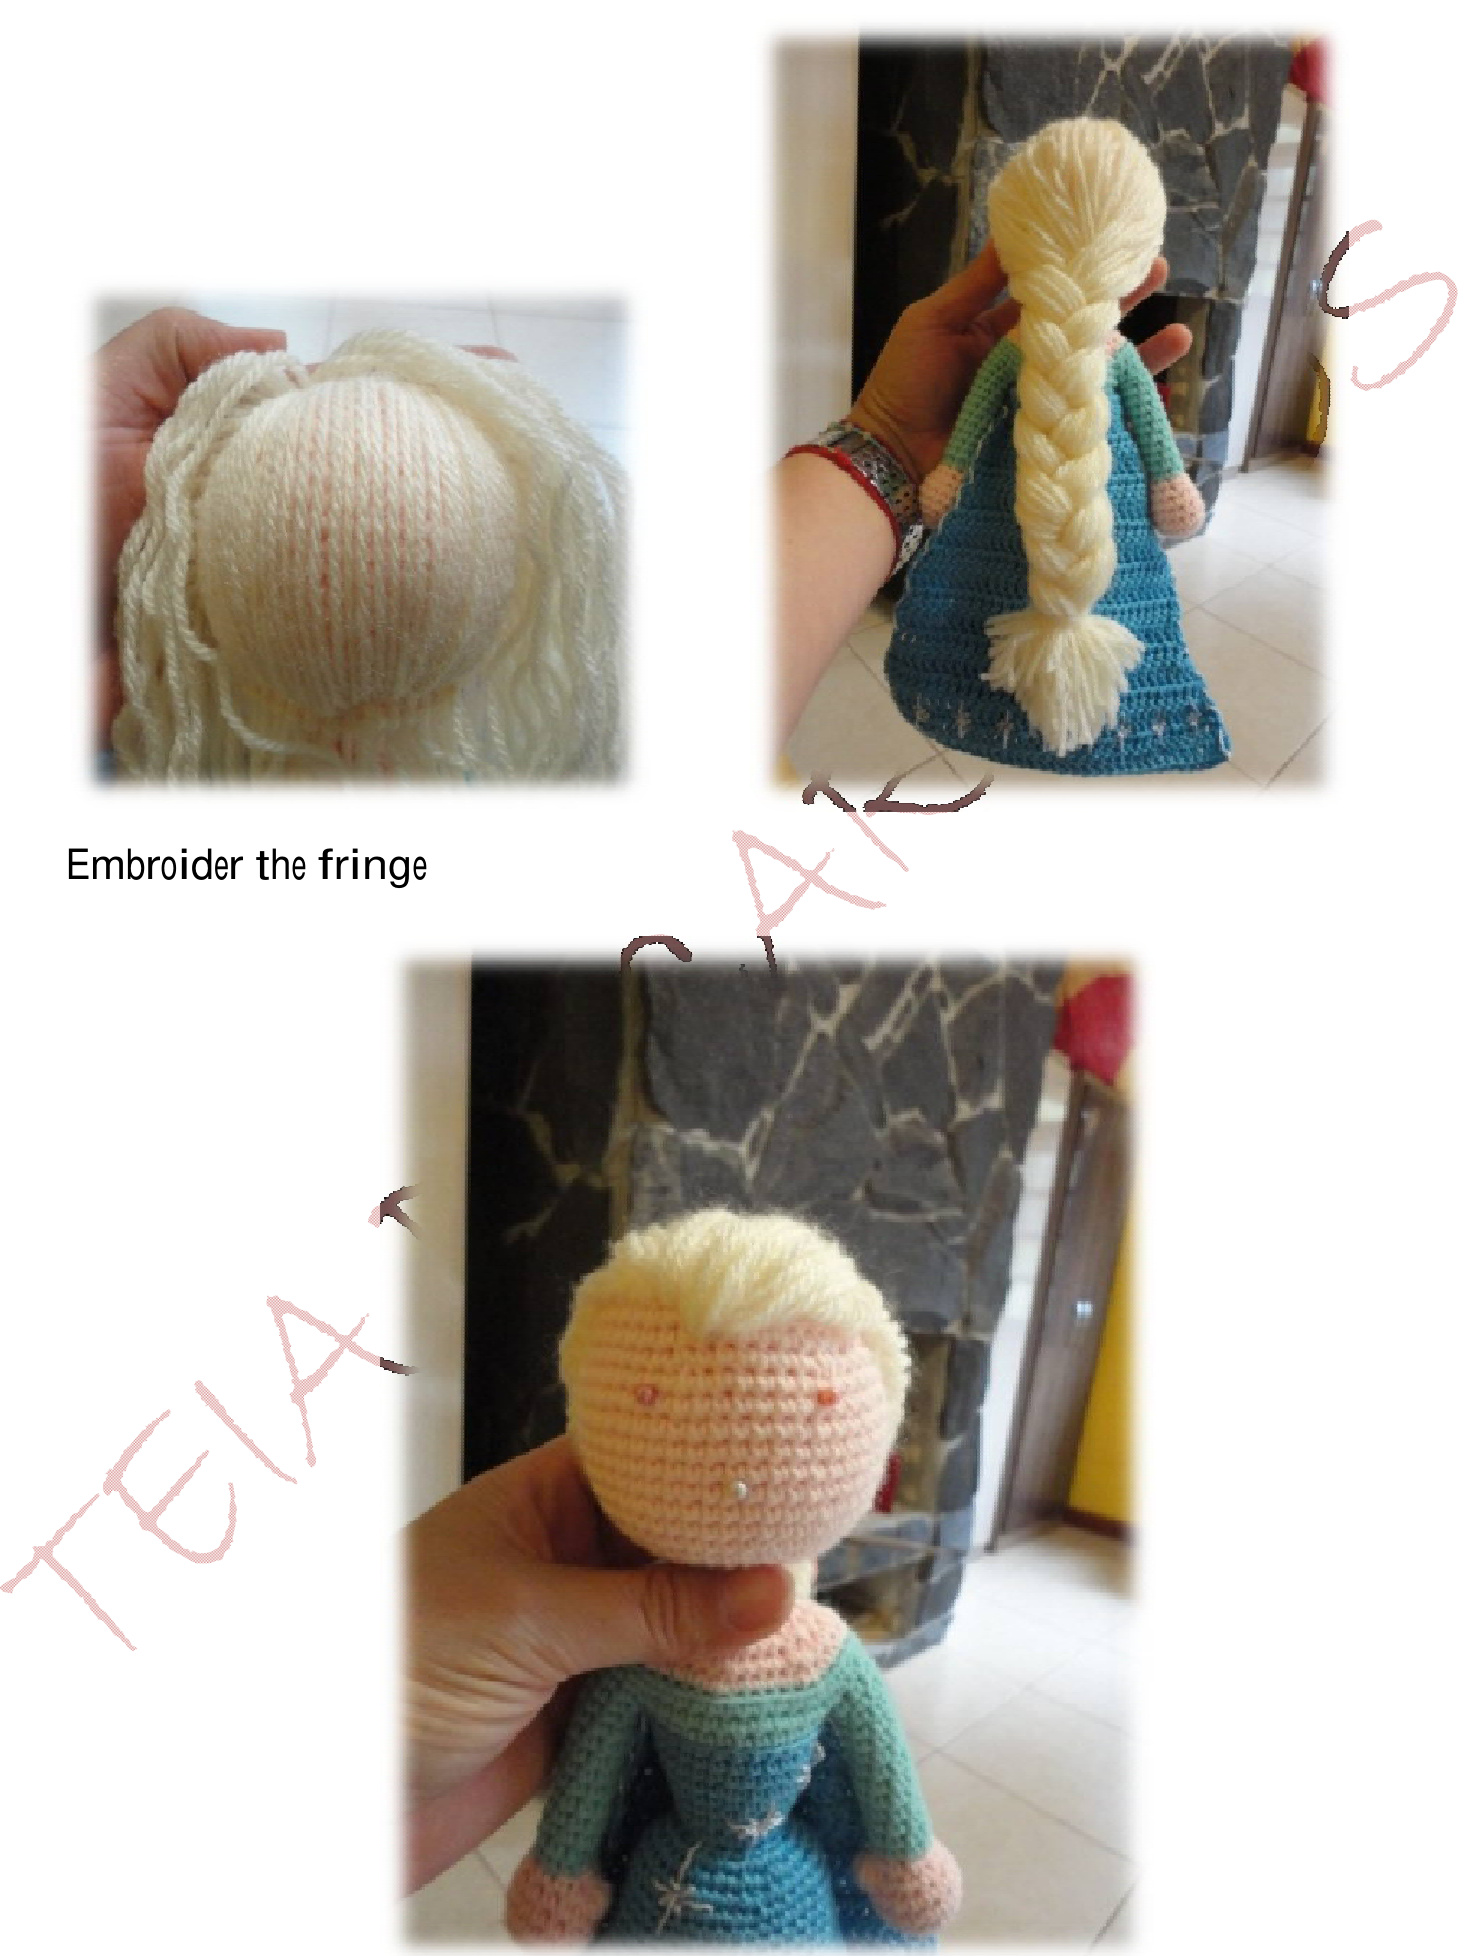
ICECOLORYARN-FAMILIA Cut yarn with 85cm length, I needed 60. But start cutting 20. You will need more for sure. The hair was made one by one, as follow: 1 - Fold in half and, usind the 2mm crochet hook attach the yarn to the head on R44. Start in the center and go to the sides. Now follow the pictures to understand how it was made.
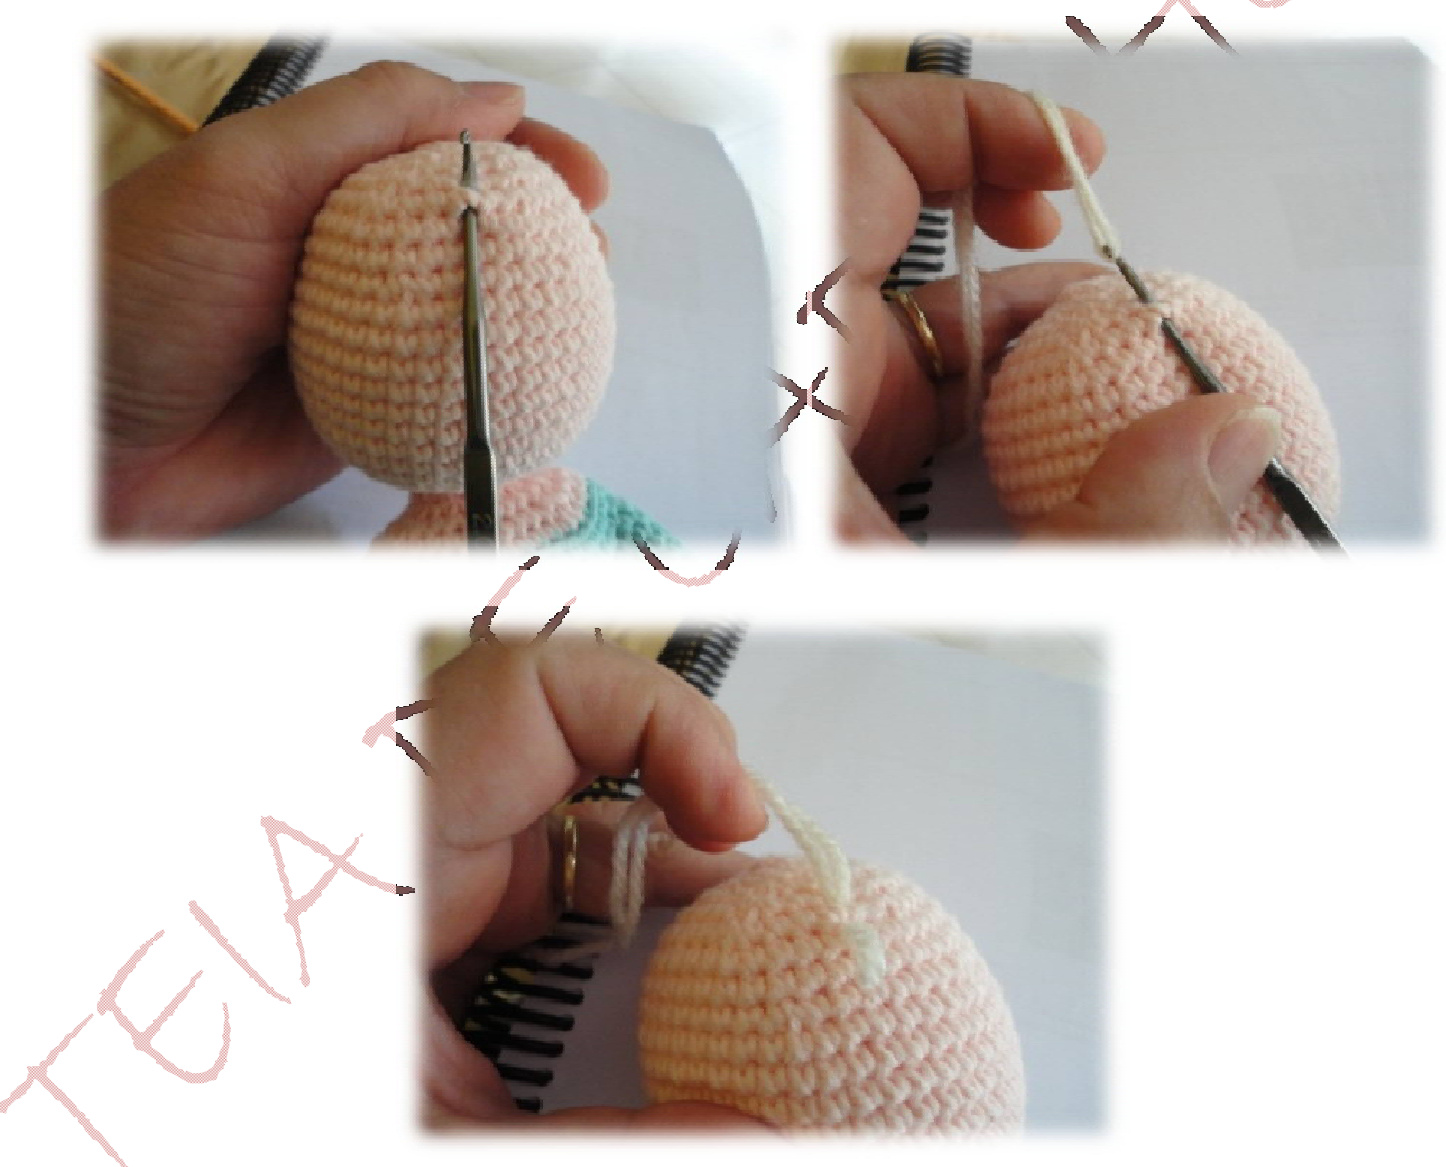
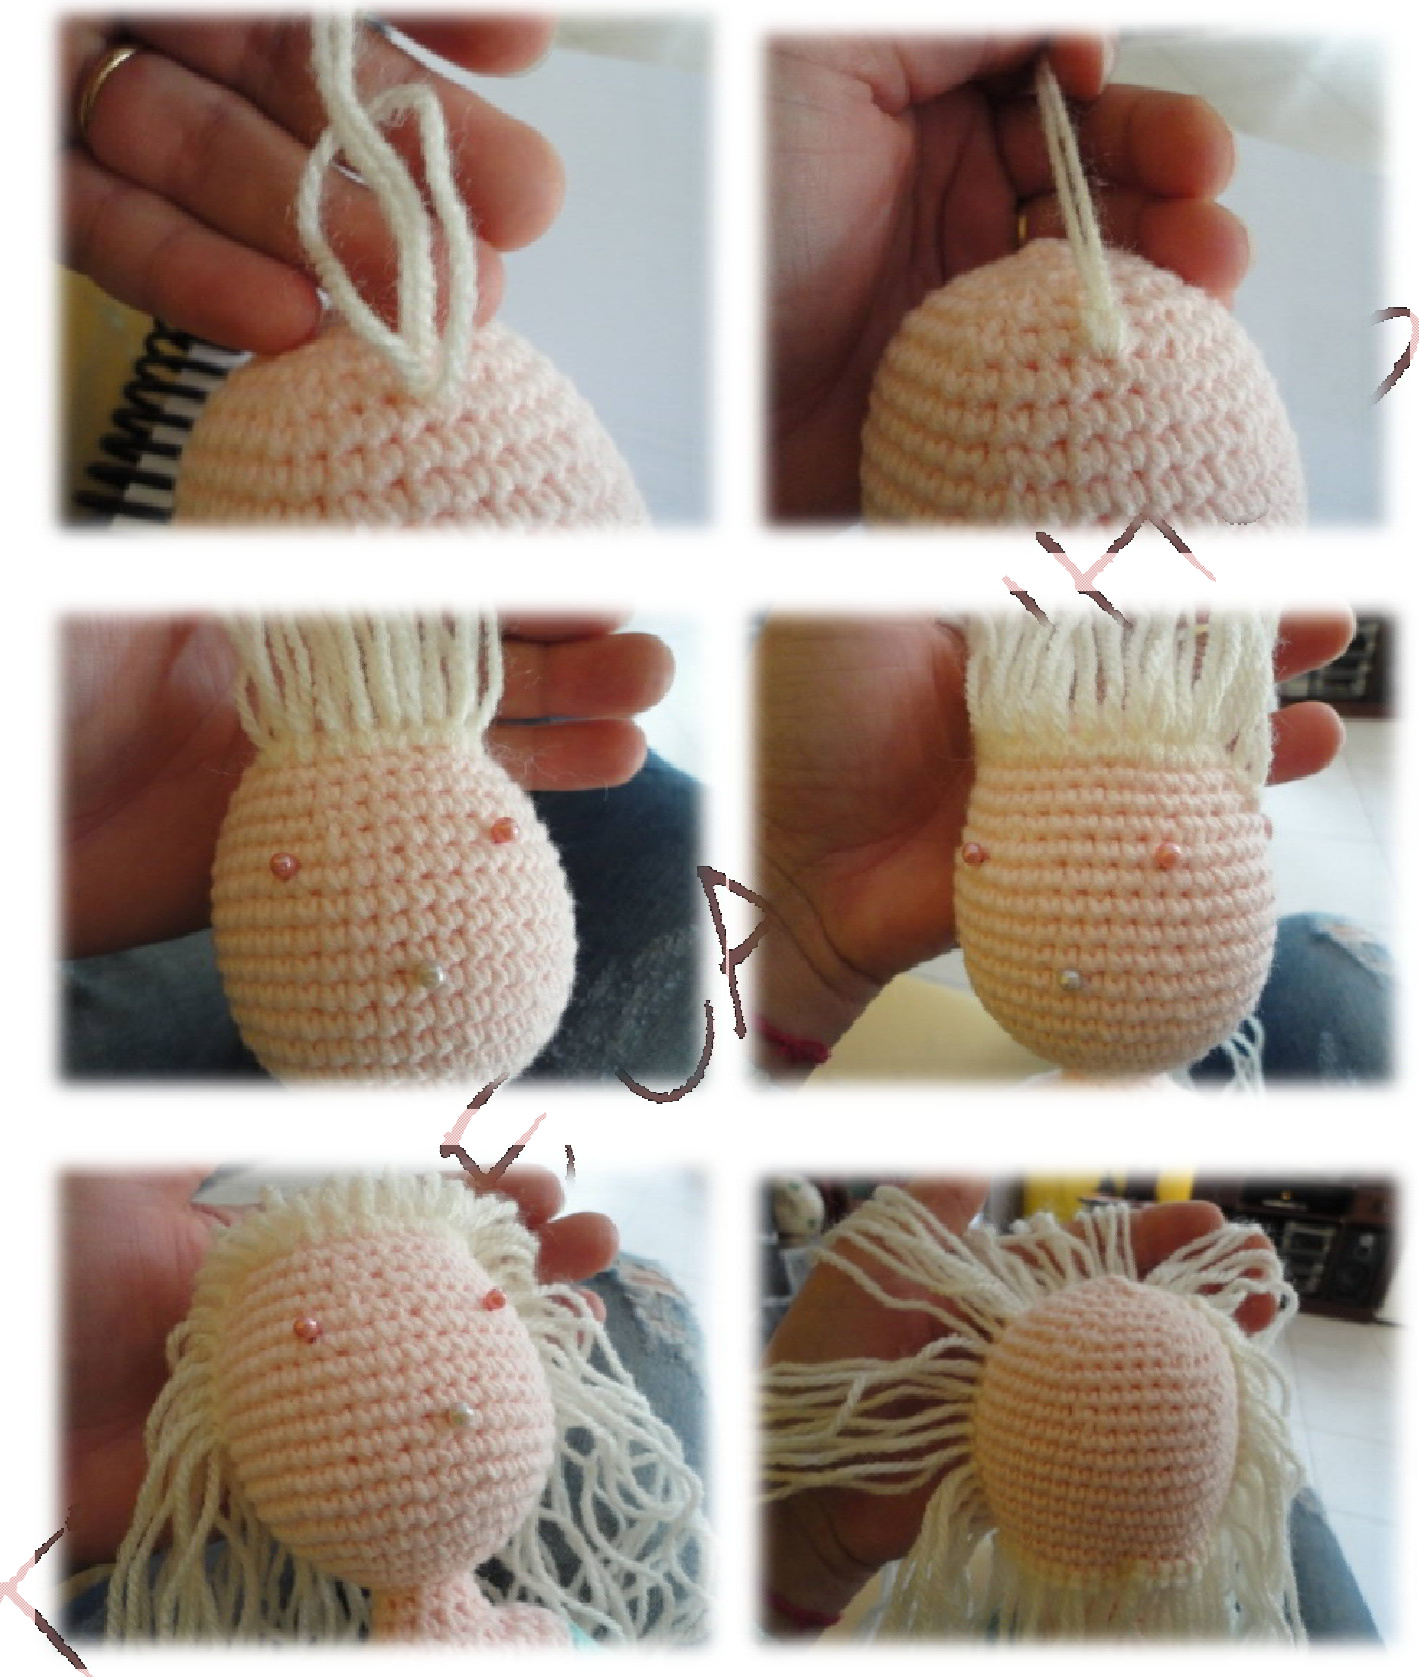
When all around the head is ready, with a sewing neddle, you can fill the middle of the head so it will not show the skin color when making the braid.
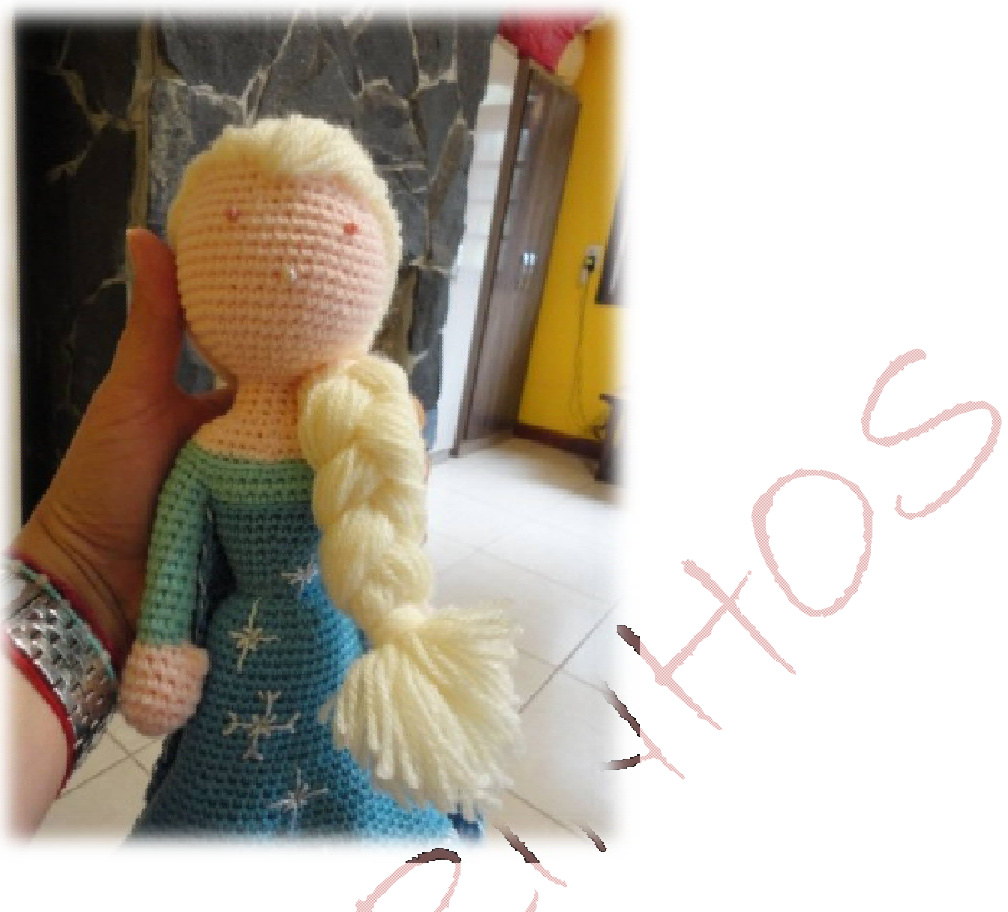
And the hair is ready. As can be seen, the dress is completely embroidered. Use your imagination and make stars and snow flakes as you wish.
FACE
At this moment I finally fixed the eyes and embroidered the nose, lips, eyelashes andeyebrows.
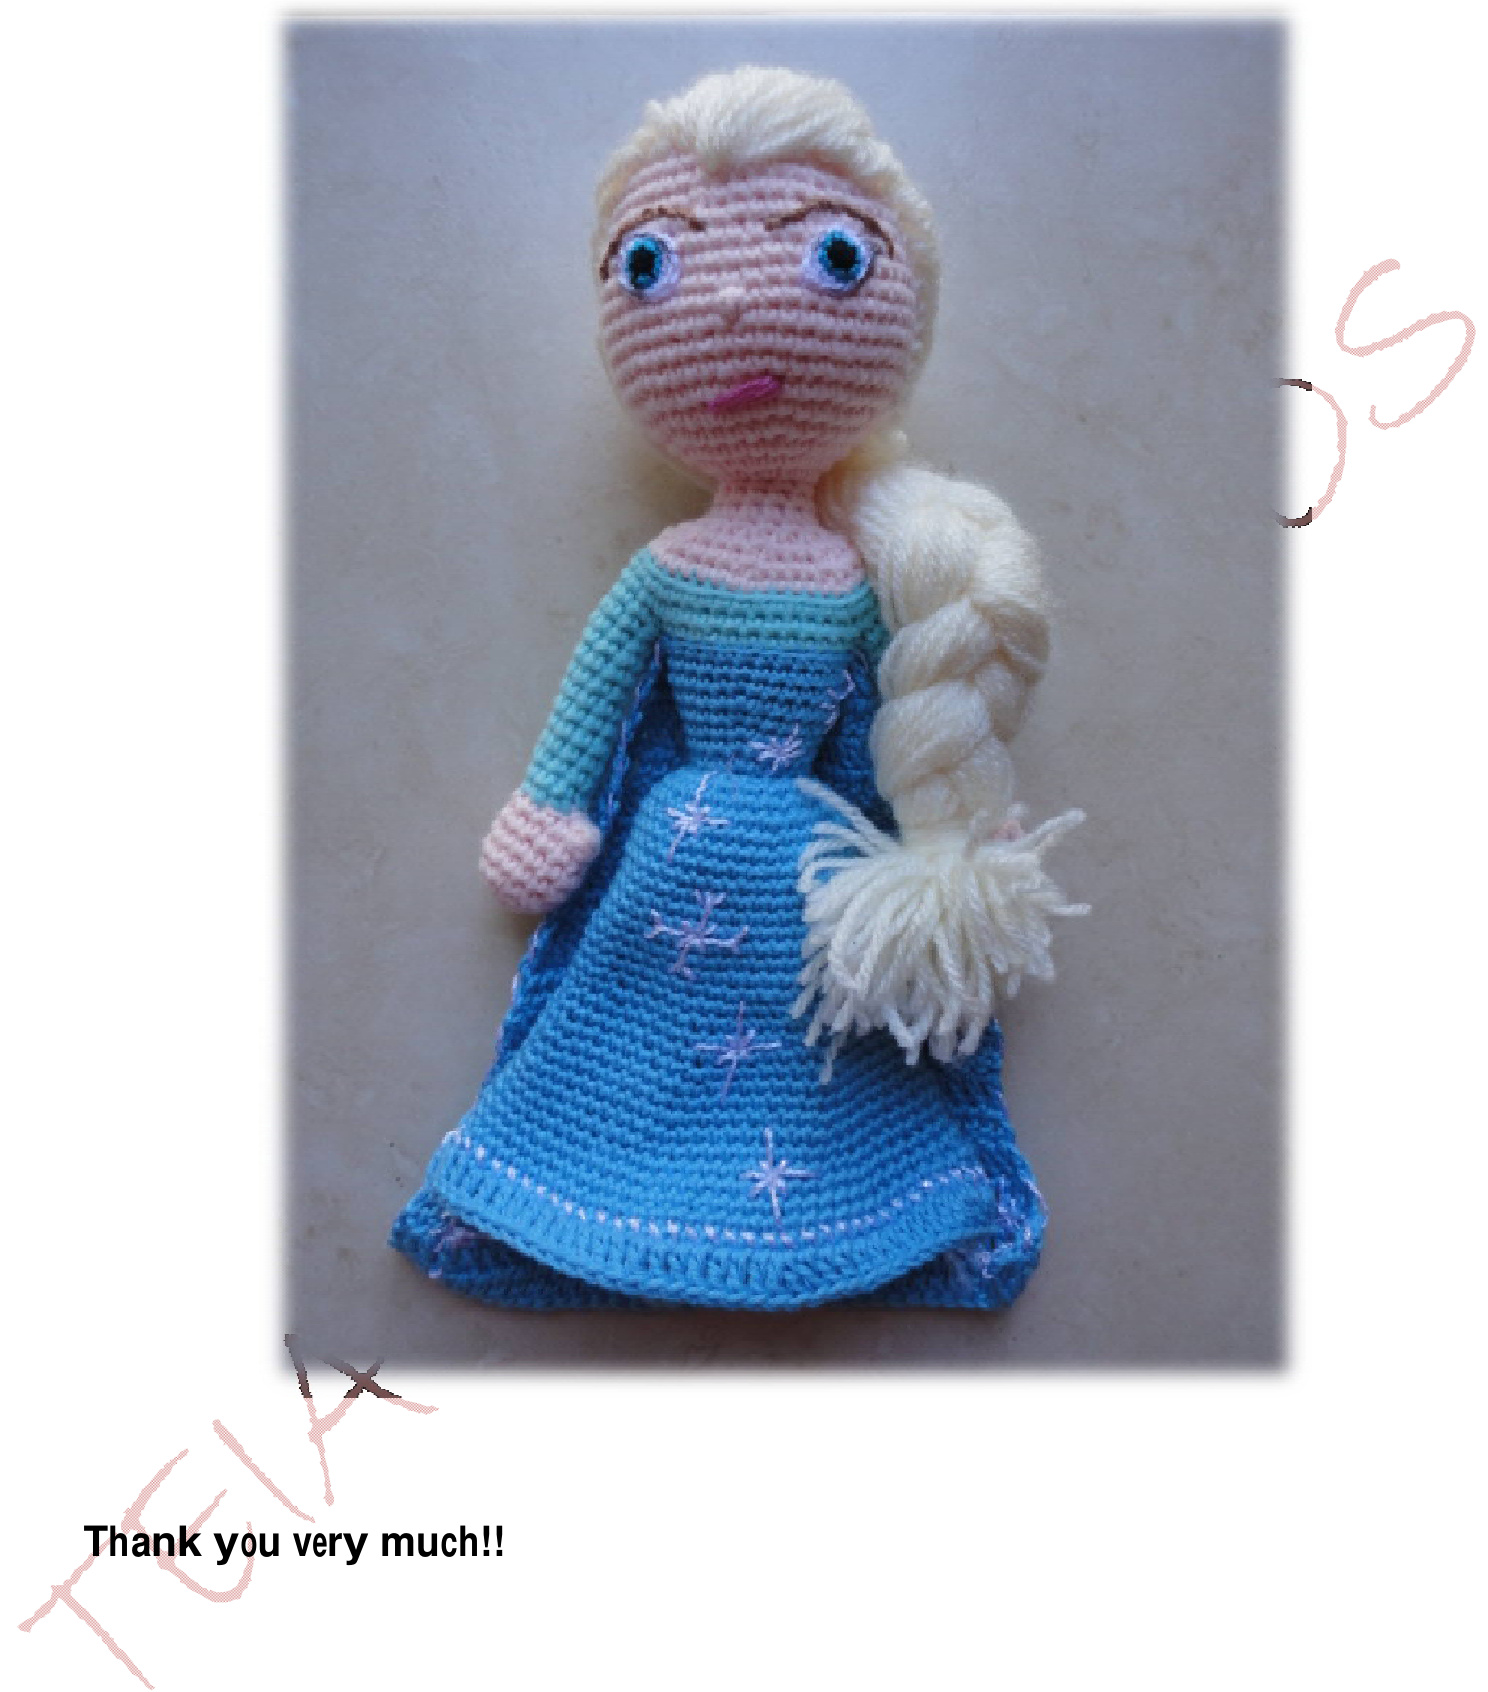
Here is the Ice Queen doll! She is done! Have fun!!
January 23rd, 2016


