DUDLEY "The Dashing ‘Doodle" (Labradoodle that is!)
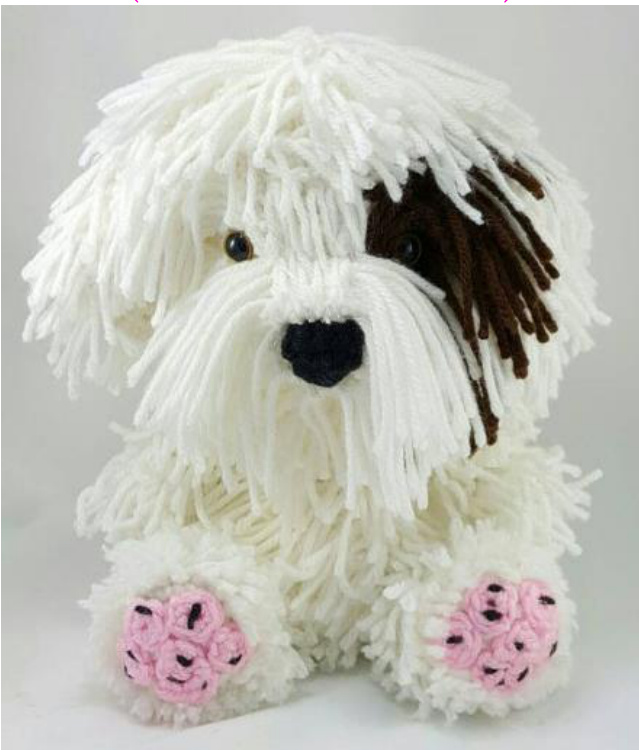
Measurements: Approximately 9.o" tall sitting, 11" tall standing, and 7" wide Materials: Worsted Weight Yarn DK Yarn 2 - 12mm Safety Eyes 4.5mm Hook Polyester Fiberfill or other Toy Filling Yarn Needle Stitch Marker Clear Thread (Or colors matching your yarn) Sewing Needle
Design Notes:
I used Caron ilb for this pattern. I find this worsted weight yarn to be thicker than other worsted weight yarns. If using any other brand, I suggest using a 4.omm crochet hook or smaller. You can use any yarn weight and appropriate hook to create this pattern. This will affect the size of your finished piece. Amigurumi does need to be crocheted tightly so the stuffing does not show through. If using a different yarn weight, make sure to use a smaller hook than the yarn recommends. In addition, safety eyes can be considered a choking hazard. If you intend on giving this dollto a child under 3 years old, it is highly suggested you use yarn eyes in place of the plastic safety eyes. Pattern Copyright @2o15 Megan Alameda. All Rights Reserved. Pattern may not be altered, copied, redistributed, or sold as your own pattern. You may sellthe finished product on a small scale as long as credit for pattern is given to Happy Hook Designs and link to my sites are provided (www.happyhookdesigns.com and/or www.facebook.com/happyhookdesign). Permission to sell does NOT include mass production. Large scale production is prohibited. Page1of7
Abbreviations:
Ch: Chain SC: Single Crochet SISt: Slip Stitch Inc: Two Single Crochets in one stitch Dec: 1 Single Crochet over two stitches Rnd: Round St: Stitch () : Repeat instructions between the asterisks as many times as indicated in the pattern [] : Total number of stitches at the end of the round. This pattern is made in continuous rounds. Place a stitch marker in the first stitch of each round as you progress through the pattern. The photos in this pattern are from two separate creations and the color yarn in all photos is not an accurate example of the dog you may be making. The photos are to provide a visual instruction of the process only. You will need to crochet all pieces before attaching to the body.
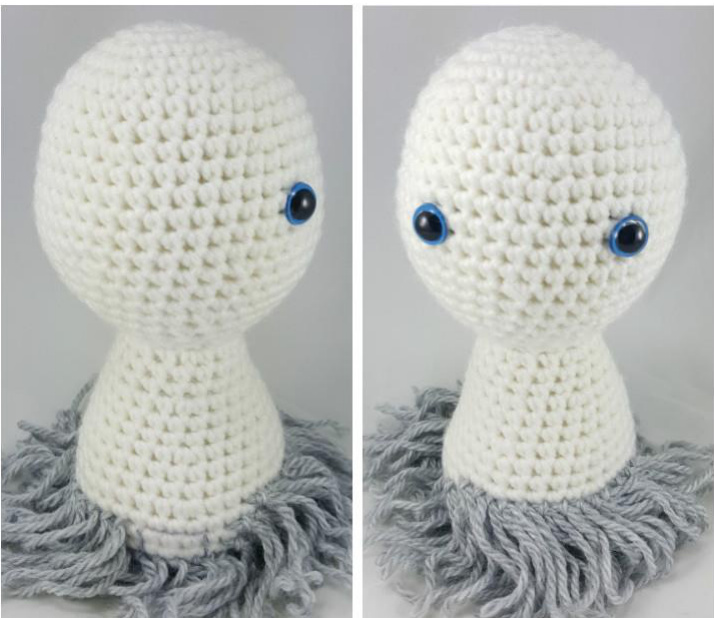
HEAD & BODY
With Worsted Weight Yarn Ch 2 Rnd 1: 6 SC in 2nd ch from hook [6] Rnd 2: Inc 6 times [12] Rnd 3: (Inc, SC in next st) Repeat 6 times [18] Rnd 4: (Inc, SC in the next 2 st) Repeat 6 times [24] Rnd 5: (Inc, SC in next 3 st) Repeat 6 times [30] Rnd 6: (Inc, SC in next 4 st) Repeat 6 times [36] Rnd 7-8: SC in all 36 st [36] Rnd 9: (Inc, SC in next 5 st) Repeat 6 times [42] Rnd 10-14: SC in all 42 st [42] Rnd 15 (Dec, SC in next 5 st) Repeat 6 times [36] Rnd 16-17: SC in all 36 st [36] Rnd 18: (Dec, SC in next 4 st) Repeat 6 times [30] Rnd 19: (Dec, SC in next 3 st) Repeat 6 times [24] Attach eyes between rounds 12 & 13 approximately 9 stitches apart. Rnd 2o: (Dec, SC in the next 2 st) Repeat 6 times [18] Rnd 21: (Dec, SC in next st) Repeat 6 times [12] Rnd 22: SC in all 12 st [12] Rnd 23: (Inc, SC in next st) Repeat 6 times [18] Rnd 24-25: SC in all 18 st [18] Rnd 26: (Inc, SC in the next 2 st) Repeat 6 times [24] Rnd 27-28: SC in all 24 st [24] Stuff head firmly but do not stretch stitches. Rnd 29: (Inc, SC in next 3 st) Repeat 6 times [30] Rnd 30-31: SC in all 30 st [30] Rnd 32: (Inc, SC in next 4 st) Repeat 6 times [36] Rnd 33-35: SC in all 36 st [36] Rnd 36: (Dec, SC in next 4 st) Repeat 6 times [30] Rnd 37: SC in all 30 st [30] Rnd 38: (Dec, SC in next 3 st) Repeat 6 times [24] Rnd 39: (Dec, SC in the next 2 st) Repeat 6 times [18] Rnd 4o: (Dec, SC in next st) Repeat 6 times [12] Finish stuffing neck and body. Stuff neck firmly. Rnd 41: Dec 6 times [6] SISt in first st of previous round. Fasten off.
EARS (Make 2)
With Worsted Weight Yarn Ch 2 Rnd 1: 6 SC in 2nd ch from hook [6] Rnd 2: Inc 6 times [12] Rnd 3: (Inc, SC in next st) Repeat 6 times [18] Rnd 4-6: SC in all 18 st [18] Rnd 7: Dec, SC in remaining 16 st [17] Rnd 8: Dec, SC in remaining 15 st [16] Rnd 9: Dec, SC in remaining 14 st [15] Rnd 1o: Dec, SC in remaining 13 st [14] Rnd 11: Dec, SC in remaining 12 st [13] Rnd 12: Dec, SC in remaining 11 st [12] Rnd 13-25: SC in all 12 st [12] SISt in first st of previous round. Fasten off. Flatten ears.
MUZZLE
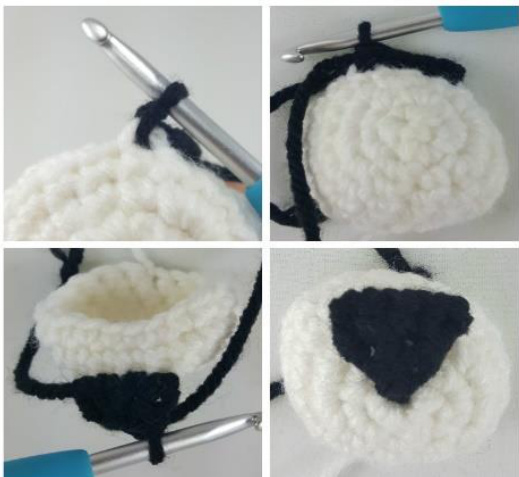
With Worsted Weight Yarn Ch 2 Rnd 1: 5 SC in 2nd ch from hook [5] Rnd 2: Inc 5 times [1o] Rnd 3: SC in next 2 st, 3SC in each of the next 2 st, SC in next 3 st, 3SC in next 2 st, SC in last st [18] Rnd 4: SC in all 18 st [18] Rnd 5: SC in first 8 st, SC BLO in next 4 st, SC in last F 6 st [18] Rnd 6: SC in all 18 st [18] SISt in first st of previous round Fasten off
NOSEINSTRUCTIONS
With Worsted Weight Yarn Attach yarn to first skipped front loop. Working in rows Row 1: SC in same st as where you attached yarn. SC in next 3 st, Turn [4] Row 2: SC in all 4 st [4], turn Row 3: Dec twice [2], turn Row 4: Dec once [1] Fasten off with long tail.
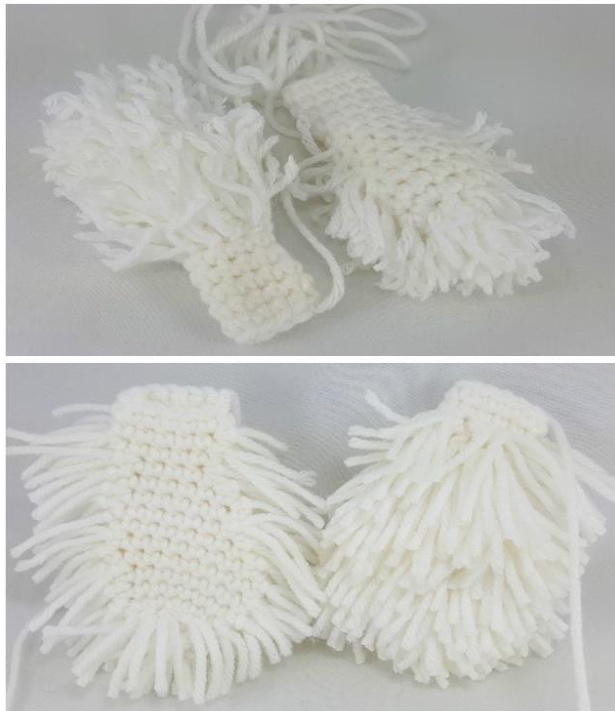
ARMS (Make 2)
With Worsted Weight Yarn Ch 2 Rnd 1: 5 SC in 2nd ch from hook [5] Rnd 2: Inc 5 times [10] Rnd 3: (Inc, SC in next st) Repeat 5 times [15] Rnd 4-5: SC in all 15 st [15] Rnd 6: (Dec, SC in next st) Repeat 5 times [10] Stuff Arm. Do not add any stuffing after this point or very little stuffing. Rnd 7-14: SC in all 10 st SISt in first st of previous round Fasten off.
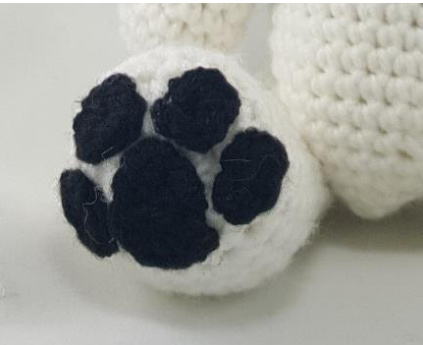
TOES (Make 8)
Ch 2 With Worsted Weight Yarn of DIFFERENT COLOR Rnd 1: 5 SC in 2nd ch from hook SISt in first st of previous round
FOOT PAD (Make 2)
Ch 4 With Worsted Weight Yarn OF DIFFERENT COLOR Row 1: HDC in 2nd ch from hook and across, turn [2] Row 2: 1 HDC in each st, turn [2] Row 3: 2 SC in each HDC [4] Fasten off.
FOOTINSTRUCTIONS
You can either stitch on toes and pads, or you can glue them on. If you are stitching on the pads/toes, I suggest doing this before you place the fur. Beginning in the center of the foot stitch or glue on the pad. Place four toes evenly around the top/side of the pad.
LEGS (Make 2)
Ch 2 With Worsted Weight Yarn Rnd 1: 6 SC in 2nd ch from hook [6] Rnd 2: Inc 6 times [12] Rnd 3: (Inc, SC in next st) Repeat 6 times [18] Rnd 4: (Inc, SC in the next 2 st) Repeat 6 times [24] Rnd 5-6: SC in all 24 st [24] Rnd 7: SC in first 6 st, (SC, Dec) Repeat 4 times, SC in last 6 st [20] Rnd 8: SC in first 4 st, Dec 6 times, SC in last 4 st [14] Rnd 9: SC in all 14 st [14] Rnd 1o: SC in first 4 st, Dec 1 time, SC in next 2 st, Dec 1 time, SC in last 4 st [12] Rnd 11-18: SC in all 12 st [12] Stuff leg firmly but do not stretch stitches. Rnd 19: Dec 6 times [6] SISt in first st of previous round Fasten off.
TAIL
Ch 2 With Worsted Weight Yarn Rnd 1: 4 SC in 2nd ch from hook [4] Rnd 2: (SC, Inc) Repeat 2 times [6] Rnd 3-4: SC in all 6 st [6] Rnd 5: (SC, Inc, SC) Repeat 2 times [8] Rnd 6-8: SC in all 8 st [8] Rnd 9: (SC, SC, Inc, SC) Repeat 2 times [10] Rnd 10-16: SC in all 10 st [10] SISt in first st of previous round Fasten off. Stuff Tail firmly, but do not stretch stitches.
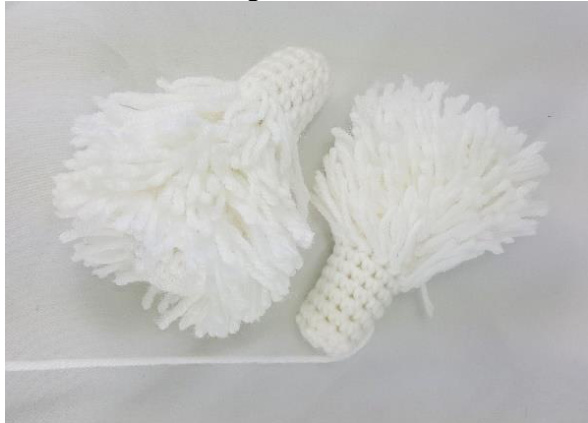
FURINSTRUCTIONS
Taking one strand of DK weight yarn approximately 5-6" long, fold yarn in half. Pull yarn under one stitch and pull ends through the loop of the yarn. Continue this process for each strand of fur. Step #1 - Legs Begin attaching your fur at round 4. Attach yarn around every stitch until approximately round 13. Trim fur to desired length.
Step #2 - Body Part #1
Begin attaching fur at round 5. Attach yarn around every stitch until approximately round 6. Mark a 4 stitches wide x 3 stitches tall square on each side of the body. This is approximately where the legs will be attached. Attach yarn around every stitch not included in your marked square until round 10. Trim fur to desired length.
Step #3 - Tail Begin attaching fur to the tip of the tail. Attach yarn around every stitch leaving the last two rounds without fur. Trim fur to desired length. Step #4 - Attaching Legs & Tail Attach legs to sides of the body in the space marked. Once attached, fill in all stiches without fur both on the top of the leg as well as any stitches not covered by the leg on the body. Stitch tail to the back of the body right above the last row of fur. Once attached, fill in all stitches on the tail. Trim fur to match length of fur previously trimmed.
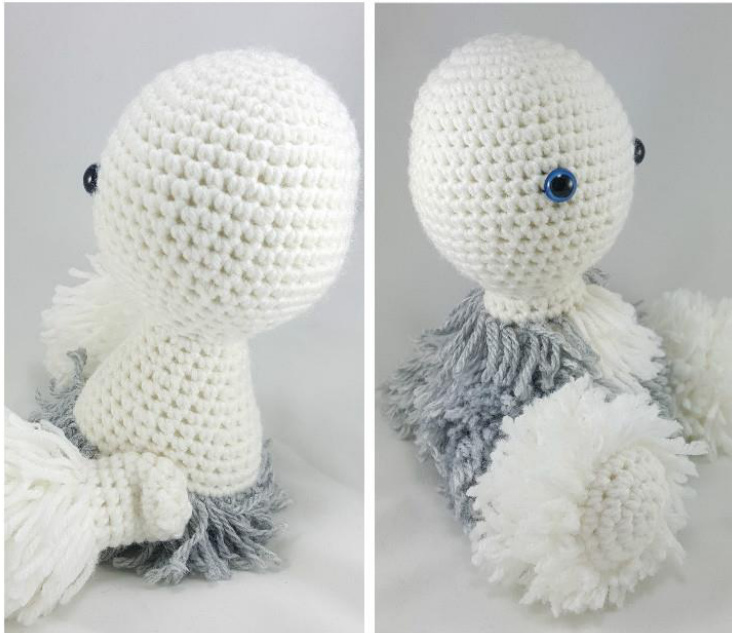
Step #5 -Body Part #2 Continue attaching fur to around every stitch until you reach Round #25 of the body. Trim fur to match length of fur previously trimmed. Step #6-Arms &Ears Beginning attaching fur to the bottom of the arm. Attach yarn around every stitch for three rounds. The rest of the arm will only need fur on the top most part of the arm, leaving the underside of the arm with no fur. Trim fur to desired length. Repeat the same process for the ears.
Step #7 - Arms Attach Arms to Round #23 of body. Weave in ends. Once attached, fill in all stiches without fur both on the top of the arm, underneath the arm and across the front and back of the body. Trim fur to match length of fur previously trimmed. Step #8 -Muzzle & Ears Stuff Muzzle and attach to face with the top aligned at Rnd 13 and the bottom aligned at Rnd 2o. Weave in ends. Insert long tail of nose through center stitch and weave in the tail. Cut any remaining length of yarn after weaving in the end. Attach Ears to Round 5 of the head. Weave in ends. Once attached, fill in all stiches without fur on the ear. Trim fur to match length of fur previously trimmed.
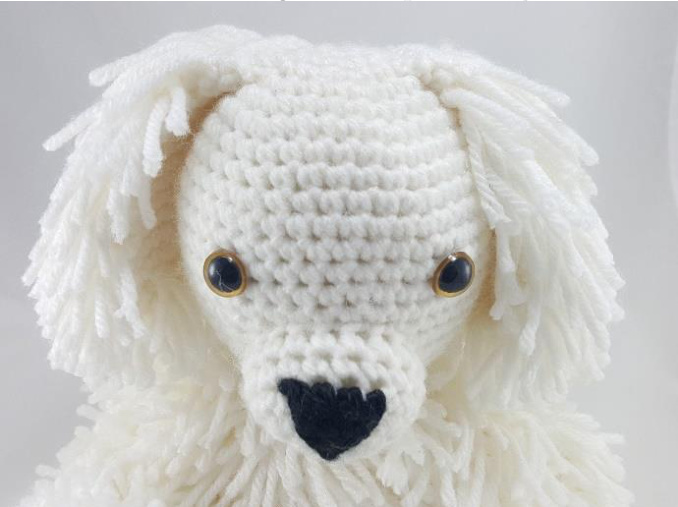
Step #9 - Head Part #1 Begin attaching fur to Round #1 of the head. Attach fur around every stitch on the top of the head to the round where you attached the ear. Lift ears (I put mine in a hairband for easier weaving). Beginning approximately 4-5 stitches to the outer side of the eye, begin attaching fur around every stitch of the head working across the back of the head. Stop attaching fur approximately 4-5 stitches to the opposite eye. You will be leaving the front of the face “un-furred" for the time being. Fill in the complete back and side of the head with fur. Trim fur to desired length. Step #1o -Muzzle Attach fur to each stitch of the muzzle. Make sure to attach fur as close to the nose as possible to prevent emptyspaces.
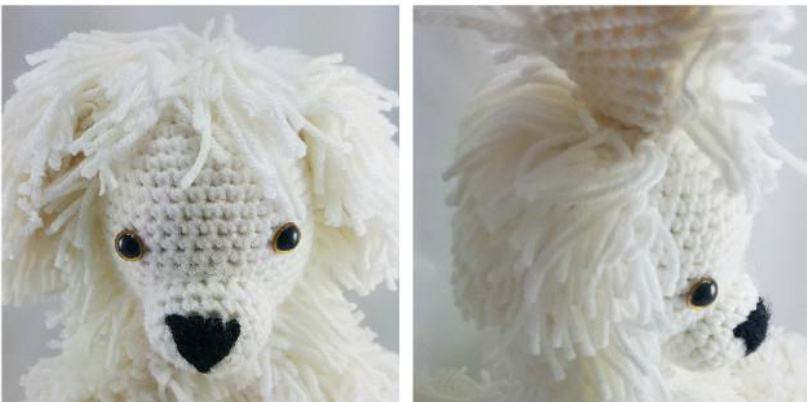
Do not trim fur yet. Muzzle fur will be longer than the rest of the body. Step #10-Head Part #2 Fill in all stiches without fur beginning at the top of the head leaving three rows above the eye with no fur creating the puppies “bang" Trim fur so it just barely reaches the eye without covering it.
Step #11 - Eyes
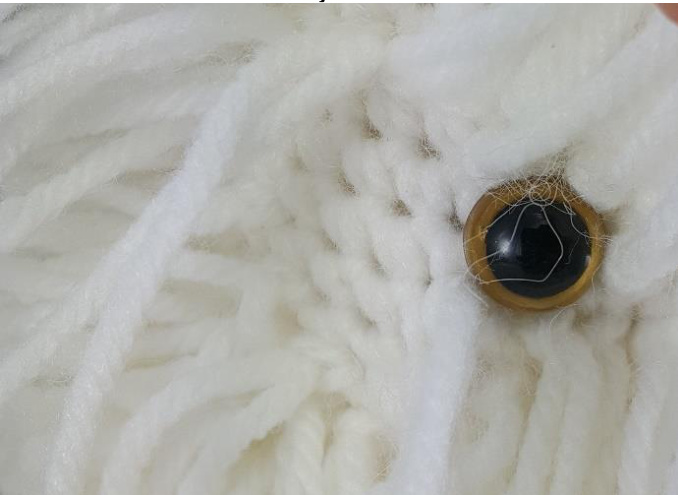
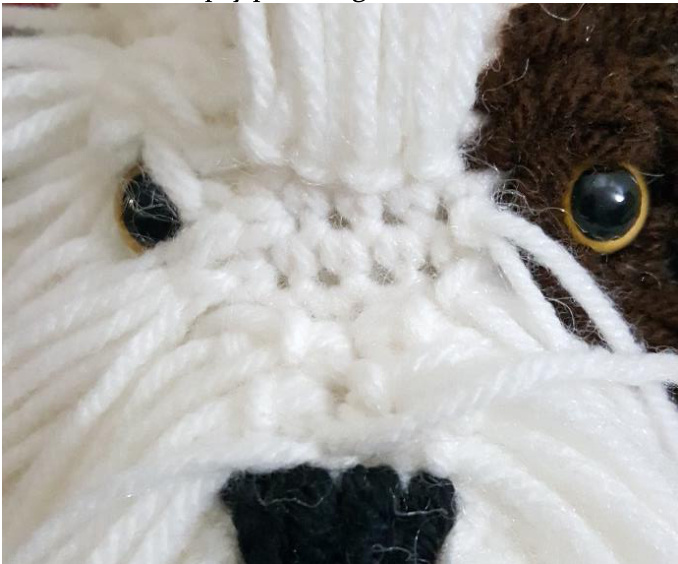
Attach fur to the stitches surrounding the eyes. You will only need to attach fur approximately 2 stiches above/below the eye and 2 stitches toward center portion of the face. Fill in the corners to create a square-ish shape. You will not need to fill in any fur on the outer side of the eye.
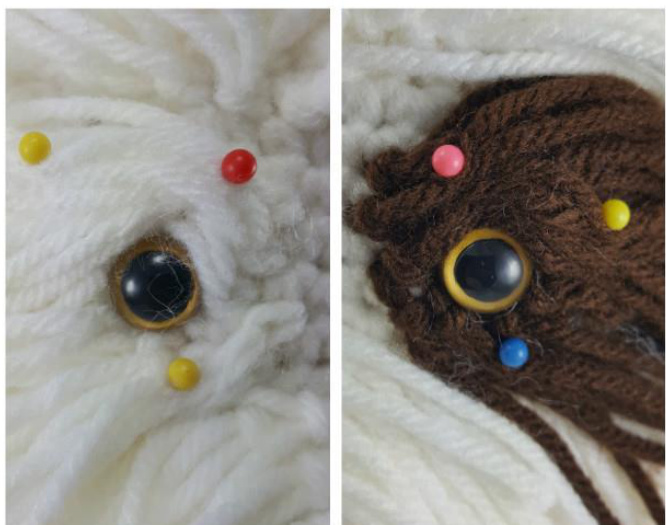
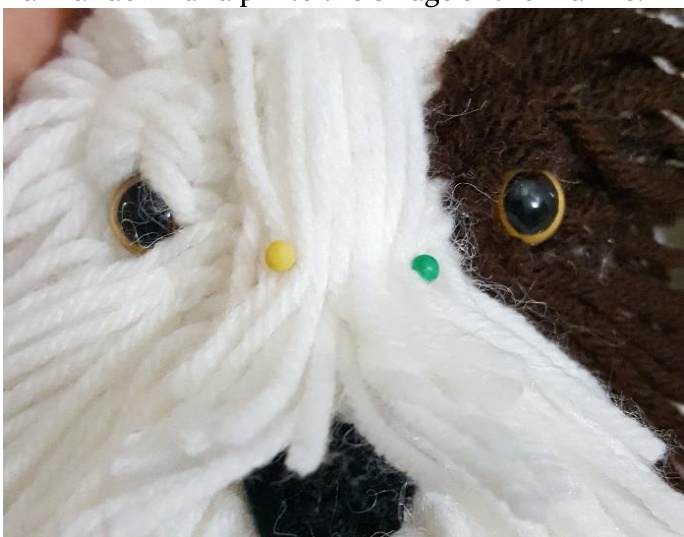
Arrange fur so that the bottom center corner of the fur is pulled up and across the top of the eye. Pin fur in place. Pull remaining fur across the bottom of the eve. Pin fur in place.
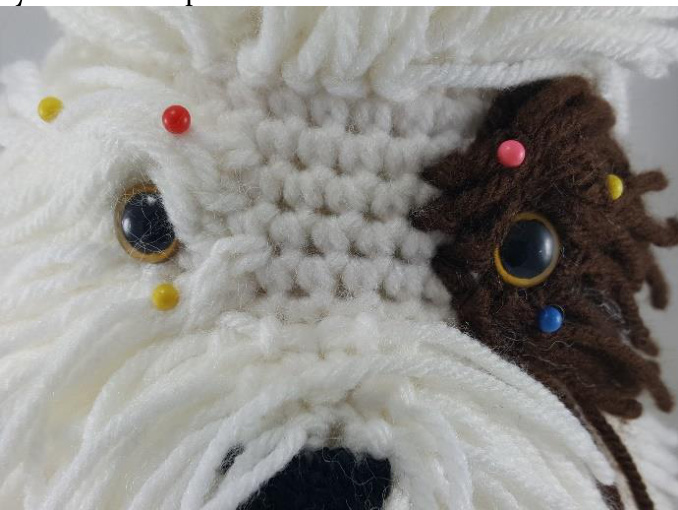
With a sewing needle and thread, stitch fur in place at the location of the pins. Remove Pins.
Fill in all stiches without fur not covered by the fur surrounding the eye. Do not trim fur yet. Front facial fur will be longer than the rest of the body. Step #12 - Head Part #3 You will be filling in the empty space on the front of the face. Beginning below the last row of fur, across the middle most 4 stitches, attach fur around each stitch for 4 stitches. Repeat for two more rows. This will leave an empty patch right above the muzzle.
Pull fur down and pin to the bridge of the muzzle.
With a sewing needle and thread, stitch fur in place at the location of the pins. Remove Pins. Trim fur so it comes up to the edge of the nose without covering it. Trim remaining facial fur and muzzle fur to the desired length. Admire your hard work! I know this one is definitely a labor of love and I thank you for choosing my pattern. If you have any questions, please email me at happyhookdesigns@gmail.com. I hope you enjoyed this pattern and love your new puppy dog! Best wishes, Megan Happy Hook Designs www.happyhookdesigns.com www.facebook.com/happyhookdesign http://www.ravelry.com/designers/happy-hook designs http://www.craftsy.com/user/7560364/pattern-store


