Wristlets with tucks on Passap Duomatic 80
Why and what for? As I feel cold quickly on my hands I was looking for a warming solution, which also fits to my office outfits at work, so I decided to go with wristlets. The length of wristlets ends near the thumb and of course there's no need for a thumb opening. They keep the wrists and parts of the lower arm warm and with all these beautiful yarn colors and qualities they match with blouses and long sleeves, without appearingtoorustic. I played around a little bit and was quite confident with this shape and style. What do you need? I knitted the wristlets on my Passap DM80, a standard gauge machine with 5mm needle distance. The wristlets fit perfectly on my wrists and lower arms. For any changes in width and length please calculate referring to your swatch.
Material
50g Sock yarn in your favorite color or self striping (420m/100g) are enough for one pair ofwristlets
Techniques
cast on, cast off, increasing
Tools
Weights are quite helpful (claw weights), tapestry needle or sewing machine, yellow
Swatch
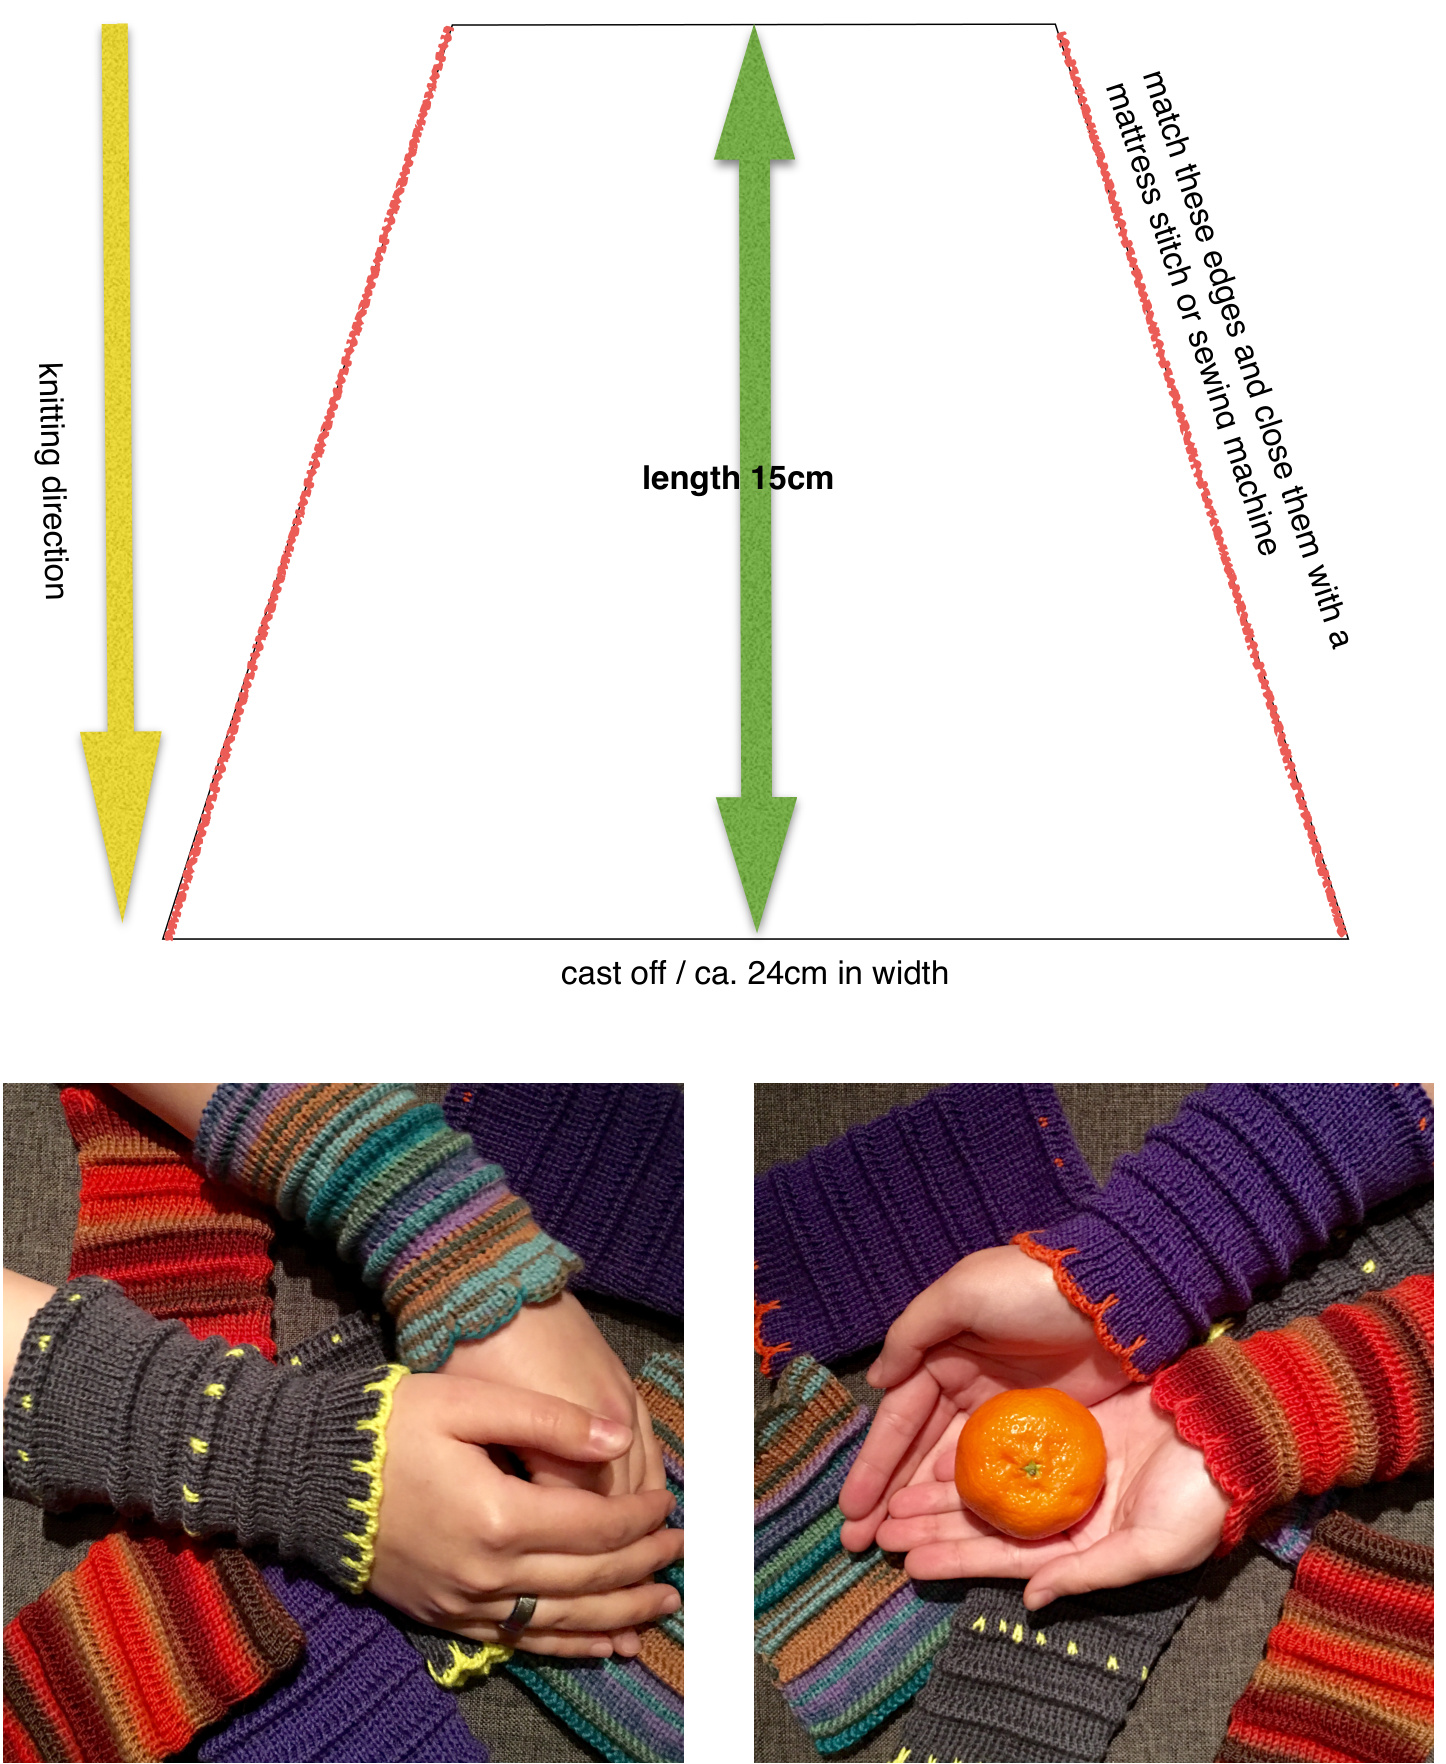
100 stitches (50 on each bed) = 18 cm 91 rows = 15 cm (incl. the tuck rows) 10 rows full needle rib = 2,5cm
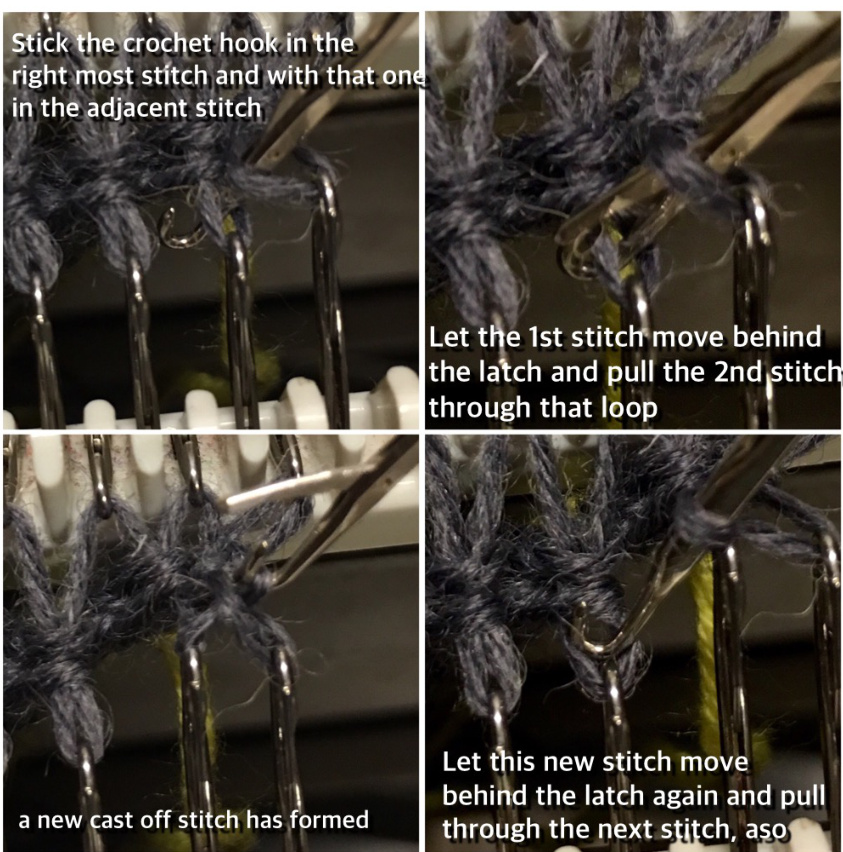
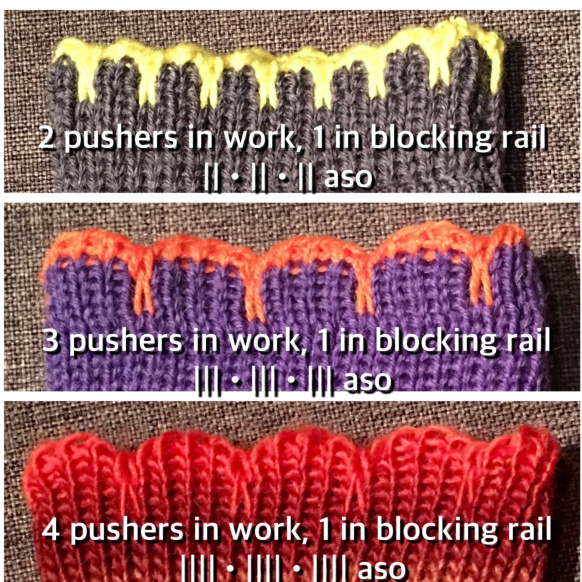
Set up for locks / Preparation - the 2 cast on rows may be knitted in a different color, to intensify the scalloped edge visually -Locks N/N -Tension 4,5 - orange stripers racking handle down - bring 50 needles on each bed into working position (100 needles in total): 1st needle left is on the front bed, last needle on the right is on the back bed Cast on / scalloped edge - start with a different color, if you fancy - knit 1 row to the left (if available, insert your weight comb) - rack the handle to the left (1st needle left is on the back bed now) - knit 1 row to the right (if you use your weight comb, knit a few rows without strippers) change to main yarn now - take the pushers on front and back bed out of blocking rail according to your needles in work and set up like this: 5 pushers in work, 1 back to the blocking rail. Follow this setup for the rest of your needle width (scheme: Illlllll ...and so on) - Lock BX/BX , knit 6 R - Lock N/N, knit 2 R - the scalloped edge is done now rack the handle to the right (so your needle rule is back to correct again) rest of the wristlet - Lock N/N - tension 5 - black strippers - knit 6 R - 1. tuck: Lock N/GX (front lock doesn't knit), knit 6 R Lock N/N, knit 2 R - intermediate part with increases - knit 4 R, whilst increasing 1 stitch each row (adding one needle on the edge) as follows - 1st R: front bed on the right 2nd R: back bed on the left 3rd R: front bed on the left -4th R: back bed on the right - work 2nd tuck and 2nd intermediate part with the increases as done before work 3rd tuck and 3rd intermediate part with the increases as done before work 4th tuck and 4th intermediate part with the increases as done before work5thtuck - knit 8 R N/N with increases in the same order as above (no intermediate part!) - knit 2 R N/N - knit the 6th and last tuck Cast off row - transfer all the stitches from back bed to the front bed - tension on 6 on back bed, front bed stays on tension 5 - knit 1 R to the left -lower your front bed - crochet off beginning with the right most needle, or any favorite flexible cast off techniqueyou like
Finishing - lay the wristlet to half lengthwise, public side facing you - close with mattress stitch (taking care of the tucks, you really need to sew through them, otherwise it looks kind of unfinished ) or - lay the wristlet to half lengthwise, wrong side facing you, and close it with your sewing machine - knit the second wristlet the same way Variations you may easily knit it longer or shorter - you may vary the numbers of tucks and/or the intermediate parts, just don't forget the increases you may also knit the tucks in different colors - you may vary the pushers: the more pushers are in work between those single ones in the blocking rail, the wider the scallops appear Happy knitting :D Kirsten Schreiweis
This pattern is for private use only - it's not allowed to sell or copy it. This pattern and its pictures are under my solely copyright. @die Strickschmiede/Kirsten Schreiweis 2015 Any questions? Contact me strickschmiede@gmx.net my Blog Instagram Strickschmiede FacebookStrickschmiede my YouTube-Channel


