Checkerboard Tea Cosy
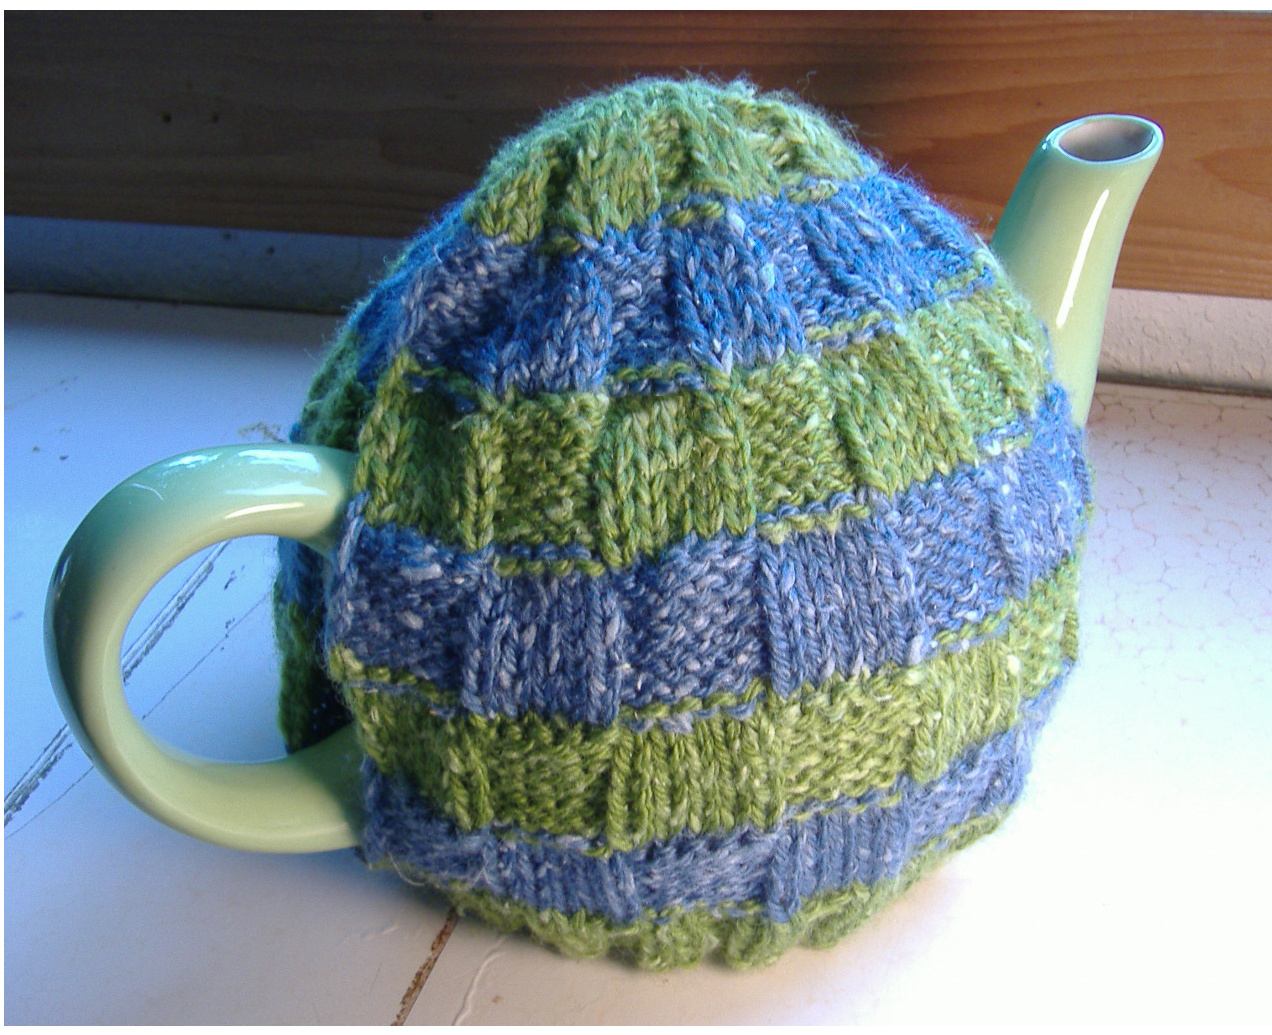
The Checkerboard Tea Cosy keeps your teapot warm, without al the frou-frou. The checkerboard stitch pattern, which alternates along with the yarn color, creates strong vertical and horizontal lines. If it wasn't a tea cosy, I'd call it “\*masculine." The Checkerboard Tea Cosy is knit in two piees, with a slip stitch edging. The pieces are worked from the bottom up, then seamed. The ribbing at the bottom helps to tuck it in around the curve of your tea pot. The decreases at the top are worked in pattern, to preserve the vertical lines. Both schematics and written-out directions are provided for the stitch pattern, overall construction, decrease rows, and seaming.
SIZE
Medium To fit a 6-cup (42-ounce) teapot.
FINISHED MEASUREMENTS
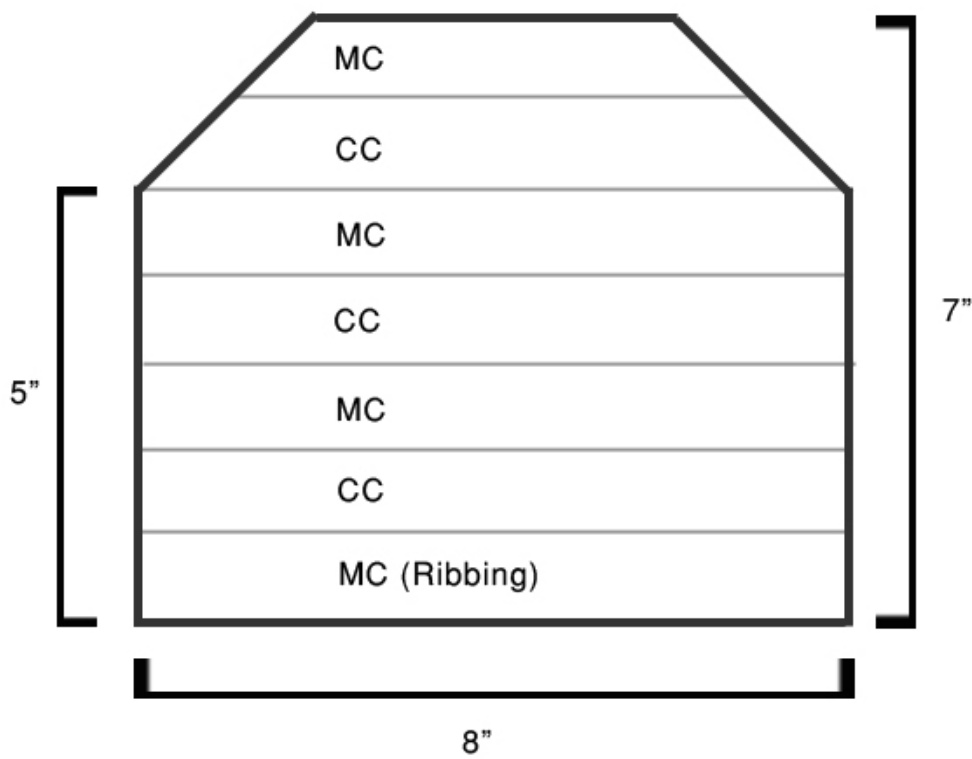
Height: 7 inches Width: 16 inch diameter. Each half is 8 inches wide.
GAUGE
5 stitches / 7 rows to the inch over stockinette, after blocking. Be aware that Moda Dea Silk N Wool Blend grows considerably after blocking. Be sure to block swatch before checking gauge. Don't panic when your pre-blocked tea cosy looks too small to fit your teapot.
MATERIALS/EQUIPMENT
MC: 1 skein Moda Dea Silk N Wool Blend ( $85\%$ wool/ $15\%$ silk; 154 yards/80 grams). Color shown: #4232, "Wasabi" CC: 1 skein Moda Dea Silk N Wool Blend ( $85\%$ wool/ $15\%$ silk; 154 yards/80 grams). Color shown: #4223,"Aquatic" US #7/4.5mm knitting needle (or size needed to obtain gauge). US #5/3.75mm knitting needle 2 safety pin-style stitch markers, or safety pins, or bits of yarn in a contrasting color. Yarn needle
SPECIAL TECHNIQUES/ABBREVIATIONS
K2tog: Knit two stitches together. P2tog: Purl two stitches together. Sl1: slip stitch purlwise with yarn in front. Last updated: 12/28/2008
DIRECTIONS
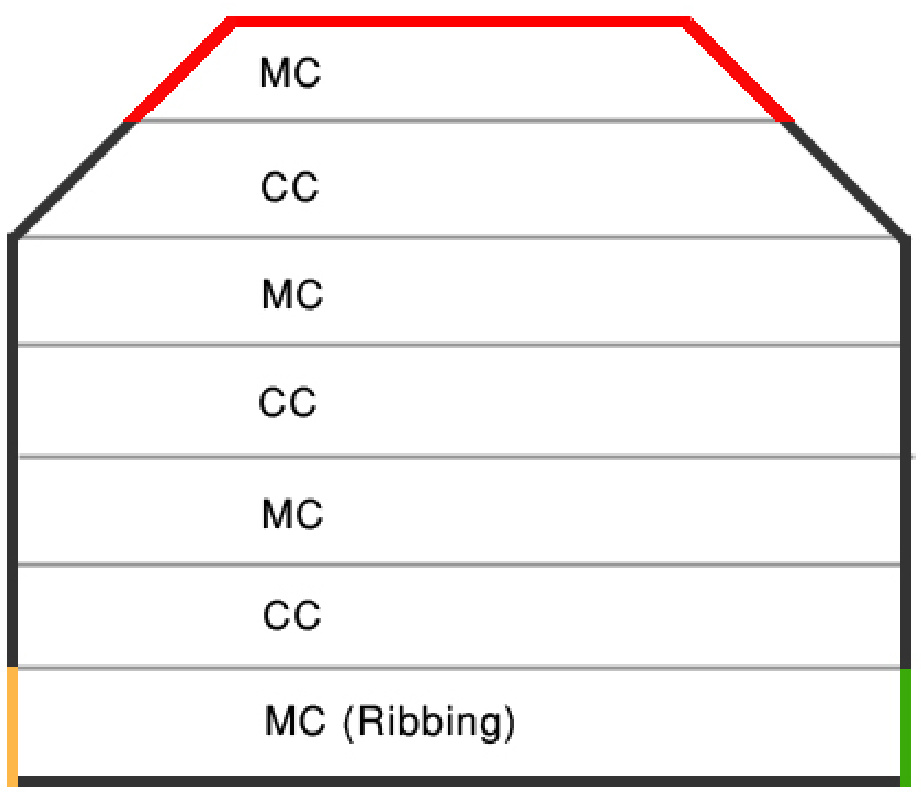
1. Using MC, cast on 42 stitches onto the # $5/3.75\mathrm{mm}$ needles. Work seven rows of k2p2 ribbing: Sl1 (k2, p2)k When knitting the second row, place a stitch marker on the other side to indicate the right side (RS) of the work. 2. Switch to CC and $\#7/4.5\mathrm{mm}$ needles and begin body pattern: CC: sl1 (k5, p5) k 7rows MC: sl1 (p5, k5) k 7rows CC: sl1 (k5, p5) k 7rows MC: sl1 (p5, k5) k 7rows 3. Begin the decrease rows: Switch to CC 1. Sl1 (k2tog, k3, p5) kl (38 stitches) 2. Sl1 (k5, p4) k1 3. S11 (k4, p2tog, p3) k1 (34 stitches) 4. Sl1 (k4, p4) k1 5. S11 (k3tog, k2, p4) k1 (30 stitches) 6. Sl1 (k4, p3) k1 7. Sl1 (k3, p2tog, p2) k1 (26 stitches) Switch to MC 1. Sl1 (p3, k3) k1 2. Sl1 (p2tog, pl, k3)k1 (22 stitches) 3. Sl1 (p3,k2) kl 4. Sl1 (p2, k2tog, k1)kl (18 stitches) 5. Sl1 (p2,k2) kl 6. Sl1 (k2tog) k1 (10 stitches) 7. Purl across Bind off. 4. Work the second piece identical to the first. 5. Put both pieces together, WS facing each other (RS facing out). Seam together the first 7 rows of ribbing on each side. (See Seaming Diagram, green and yellow lines.) 6. Seam the top: seam together the top 7 rows of MC, across the top, and down the top 7 rows of MC on the other side. (See Seaming Diagram, red line.)
SCHEMATICS
Pattern Overview
Stitch Pattern
Knit on right side, purl on wrong side. Purl on right side, knit on wrong side.
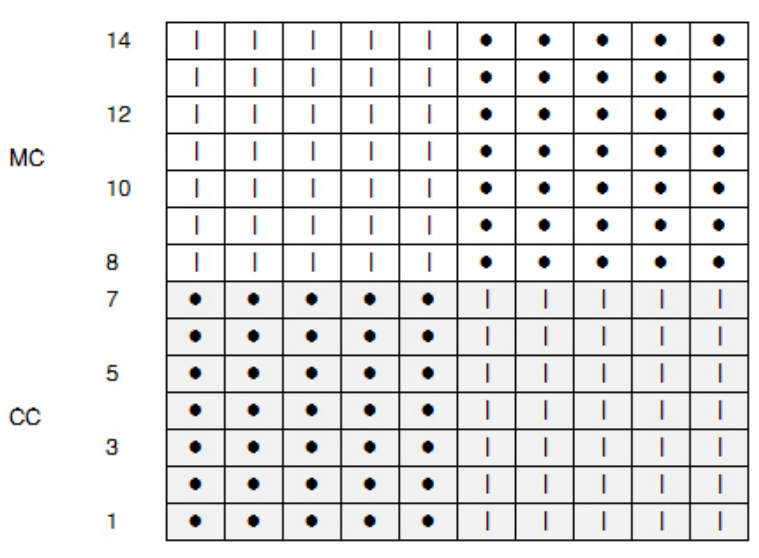
Note:Remember to continue the slip stitch edging, which is not shown on the chart.
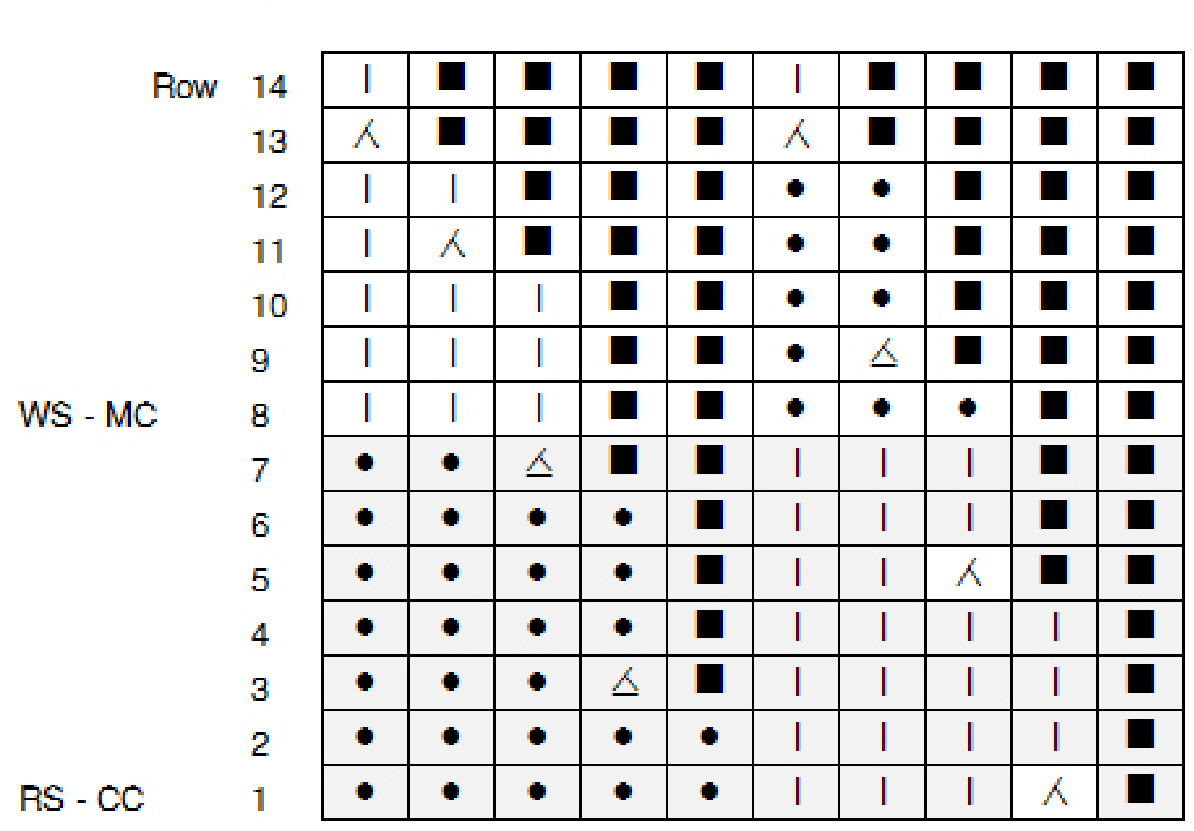
Decreases
Knit on right side, purl on wrong side. Purl on right side, knit on wrong side. 人Knit 2 together △ Purl 2 together kla =ili=ls. Note: Remember to continue the slip stitch edging. which is not shown on the chart.
Seaming Diagram
ABOUT THE AUTHOR
Erika Barcott is a Pacific Northwest knitter and blogger. She lives near Deception Pass in Washington State; her blog lives at http://redshirtknitting.com. Erika urges you to follow your whims, no matter how silly, because you never know which one will make you Internet Famous. Pattern questions or comments? Email Erika: mechagrue@ gmail.com


