Stranded but not Alone
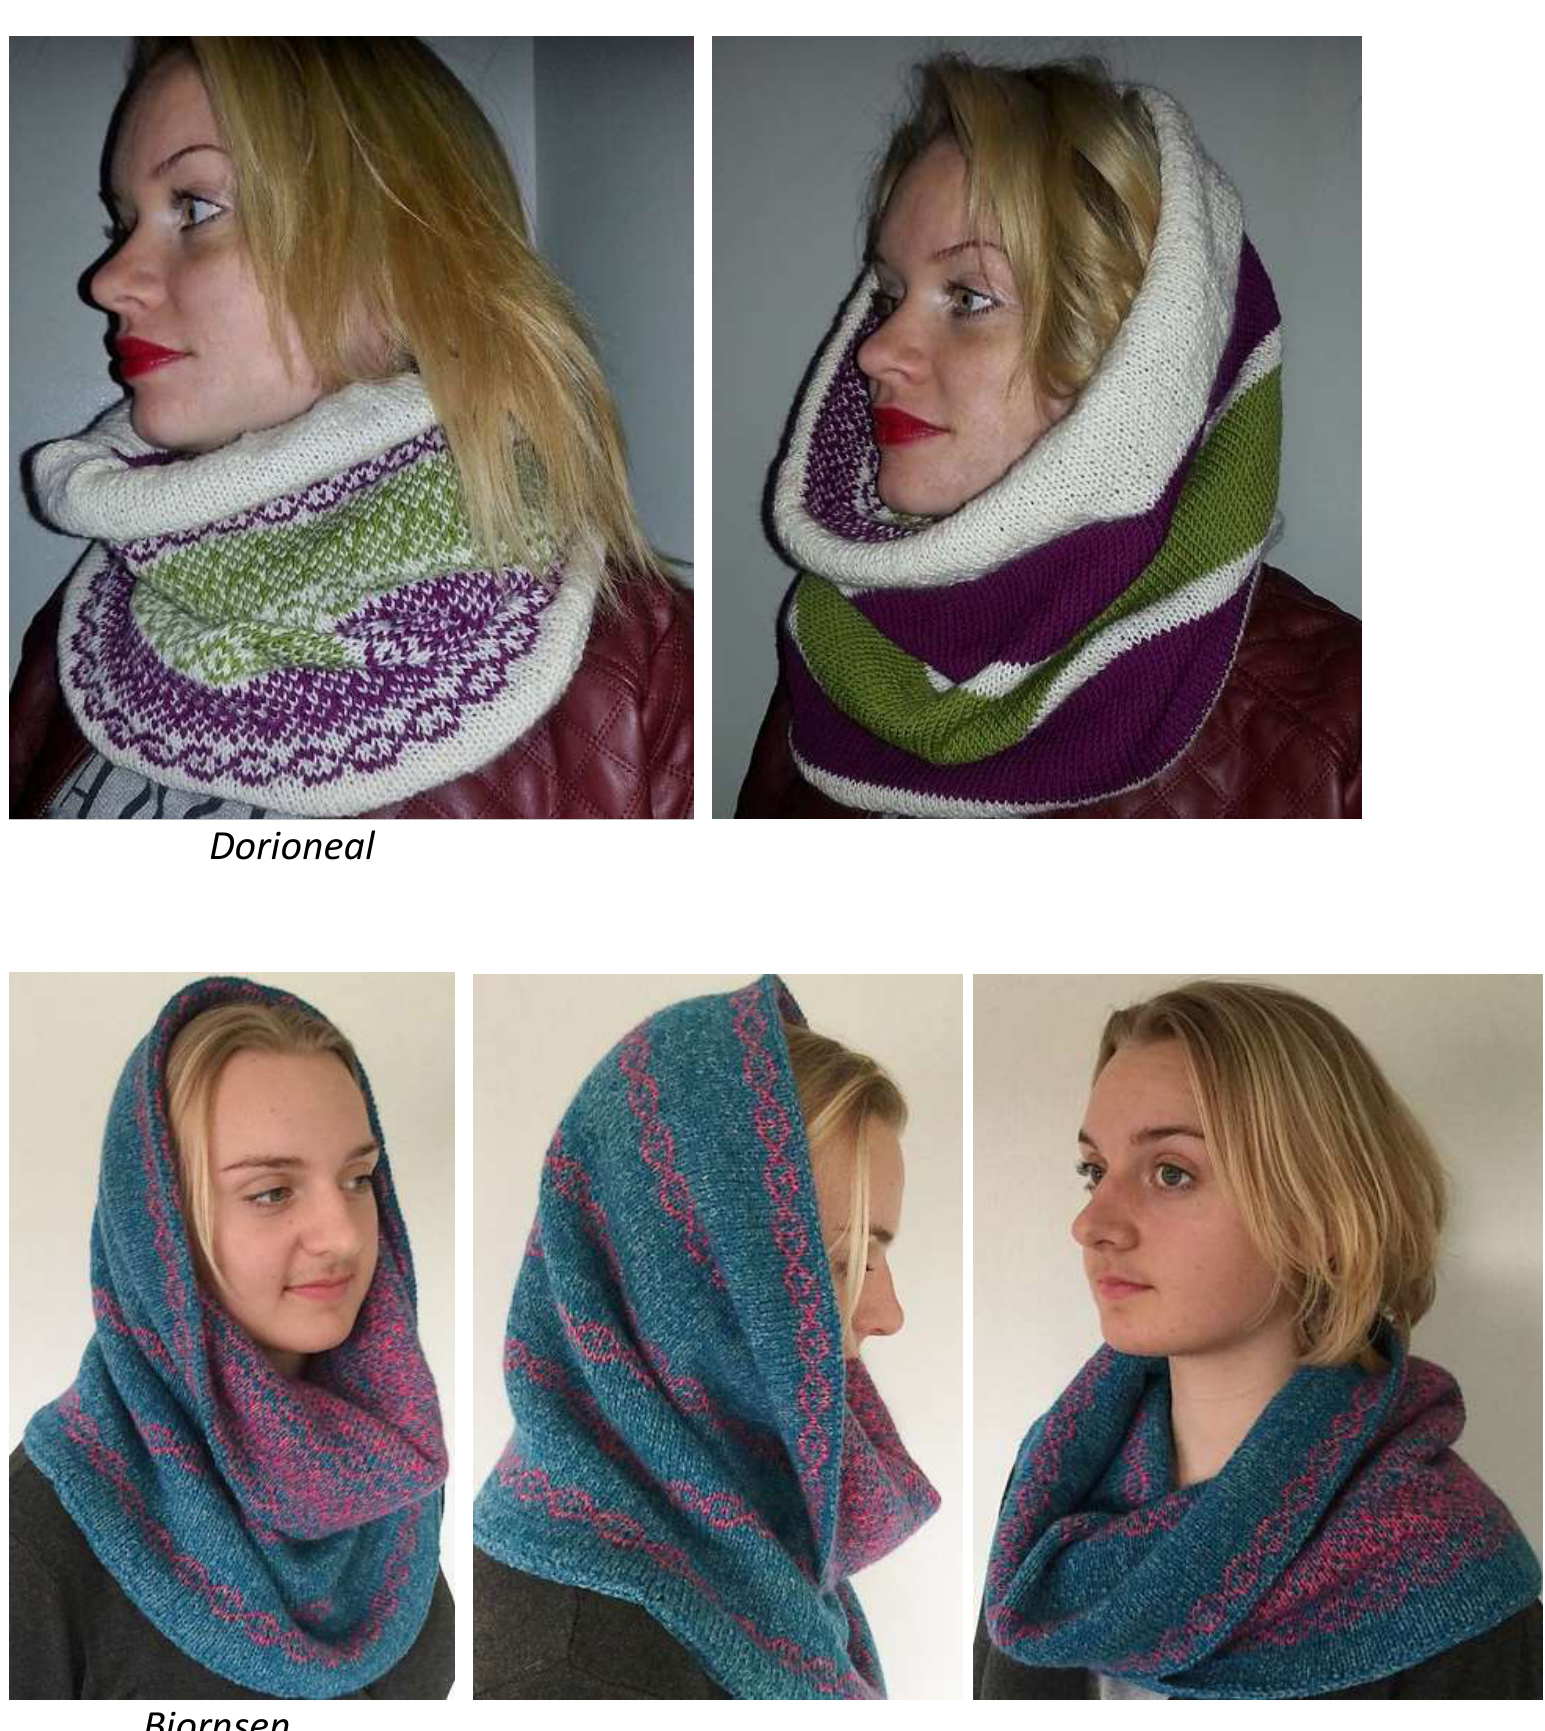
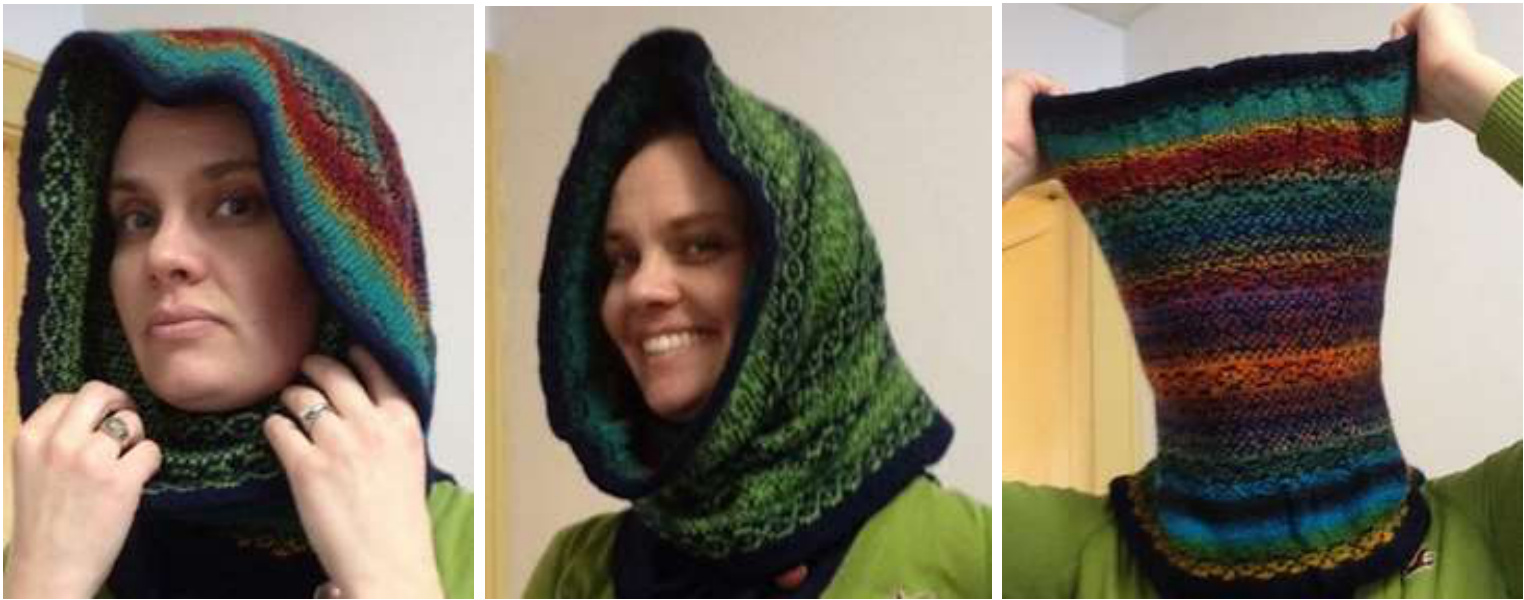
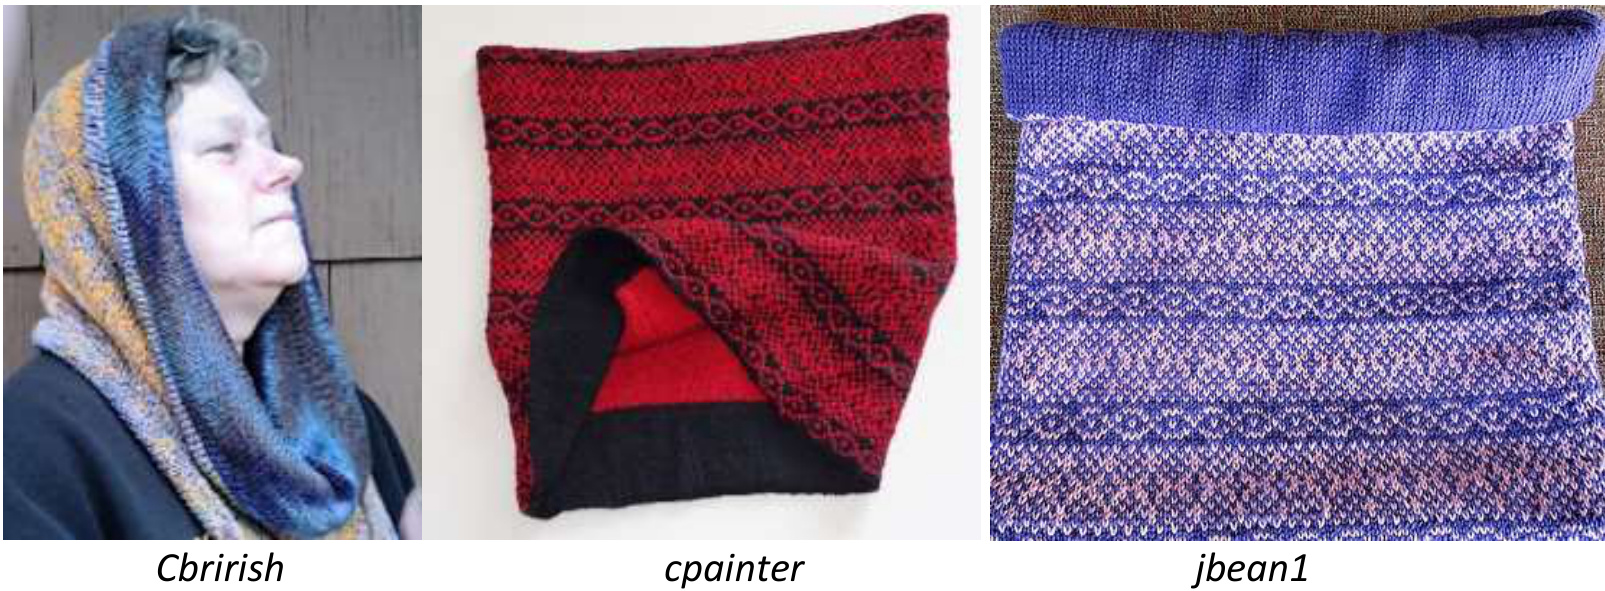
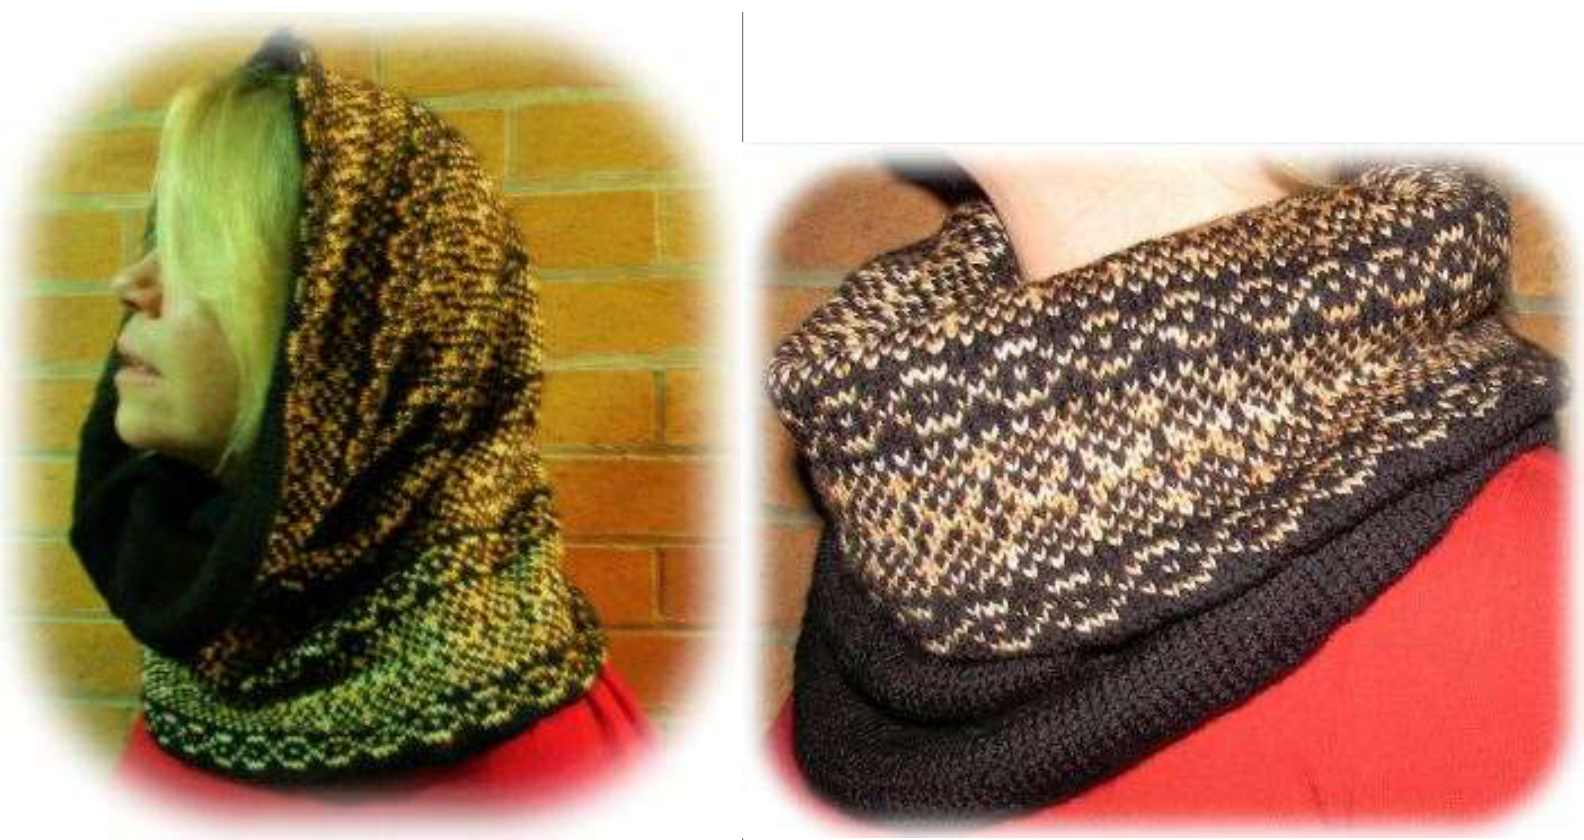
DeborahTomasello CBD MKAL Project for February 2015 Copyright ? 2015 by Deborah Tomasello All rights reserved. This pattern or any portion thereof may not be reproduced or used in any manner whatsoever without the express written permission of the publisher. WARNING: Giving or accepting a free copy of this pattern to another, without permission of the designer, is stealing. January and February of 2015 were brutal winter months for a good portion of the US. It was a great time for knitting and wearing this super cowl. In my Ravelry group, Colorworks by Debi, (CBD), we knitted our mystery cowls. The cowl is super-tall, allowing it to be pulled up and worn as a wind-shielding hood. Or it can be folded down, exposing the contrasting lining. The cowl is also reversible. However it is worn, because it is stranded on one side and lined on the other, it is supper warm without being bulky. It has plenty of luscious drape. I asked the knitters to submit ideas for a pattern name. I received oodles of possibilities. I narrowed it to three, and thiagram set up a poll. The KALers voted, and Stranded But Not Alone, the name submitted by Janchuck, won by a huge margin. Congratulations, Janet! Thank you to thiagram for setting up the poll and to everyone else for submitting great name ideas. Color Dominance is a major issue with this design. I have included helpful information on the topic. Please review it before deciding how to hold your yarns for the colorowrk portion of this pattern. As always, the participants intertpreted the pattern and tweaked it to their own likes and needs. Some added a picot edging, some added color to the lining, and some opted to make shorter cowls. I have included many project pictures to show you some of the ingenious color and design choices the KALers made. I encourage everyone to not feel constrained by my instructions. Flap your own creative wings and make your own, unique stranded super cowl.
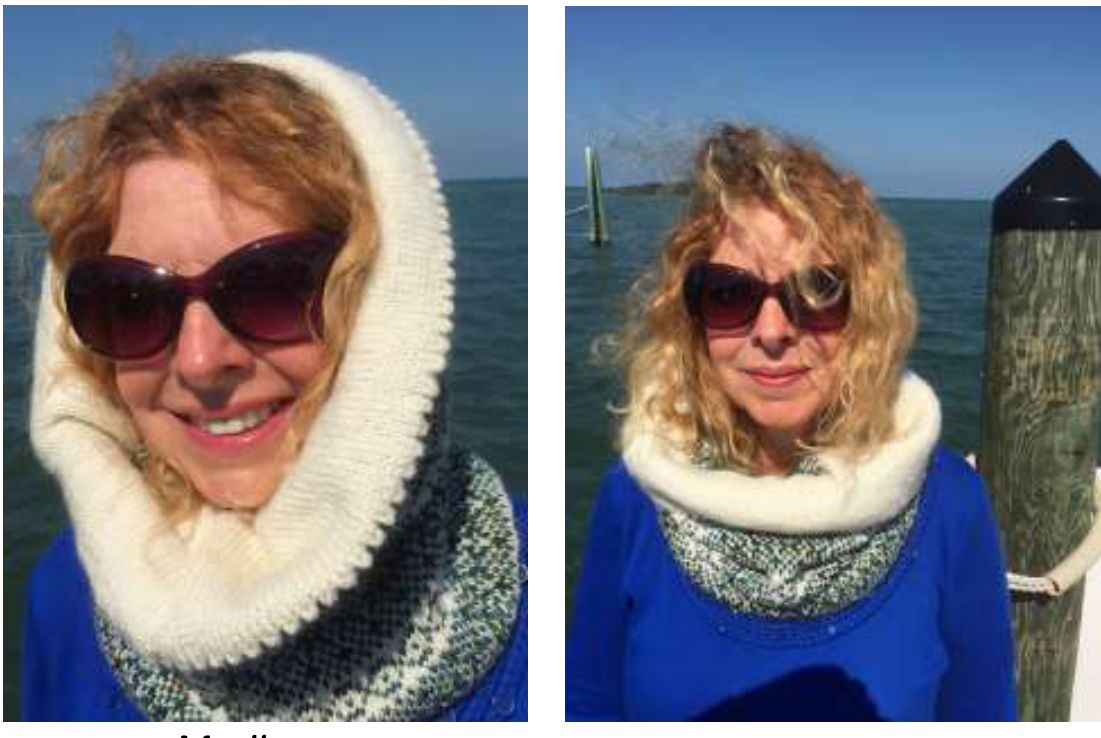
Marji
Odilemat
llenek1p2
Jhchristopher
DeborahTomasello
amyhansen1222
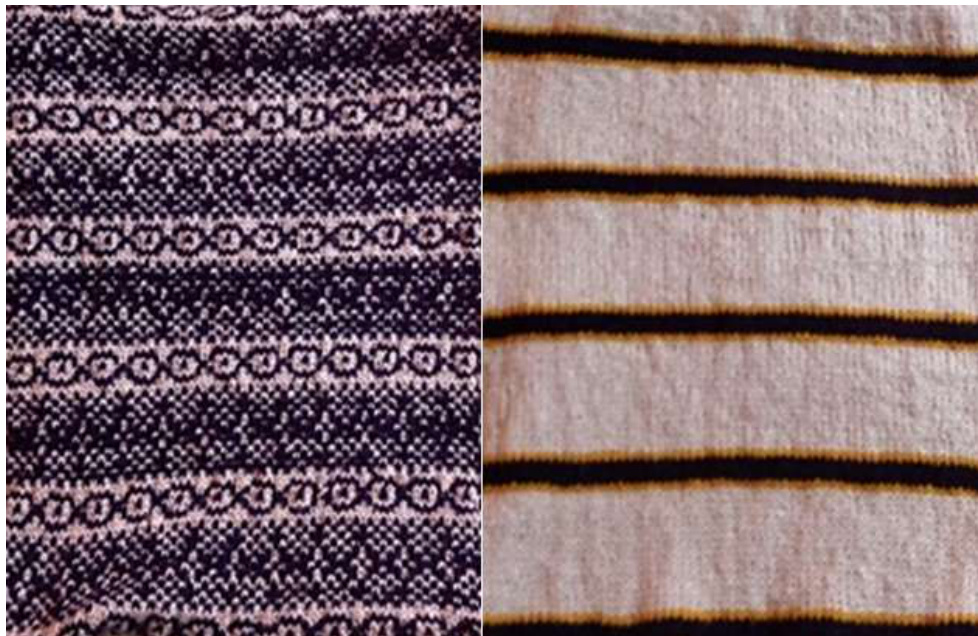
Easy Color-Dominance Explanation

In the above swatch, I knitted the same motif across the piece, and then I repeated it. The only difference I made was the position in which I held my yarns. In the bottom half, I held my yarns so that the blue was dominant, that is to say more obvious than the white, on the front of the work, and the white receded into the background. On the top half, I knitted the same stitches but I held my yarns so that the white dominated and the blue receded. You see a definite difference in the appearance of the motifs when comparing the top and bottom halves of my swatch.
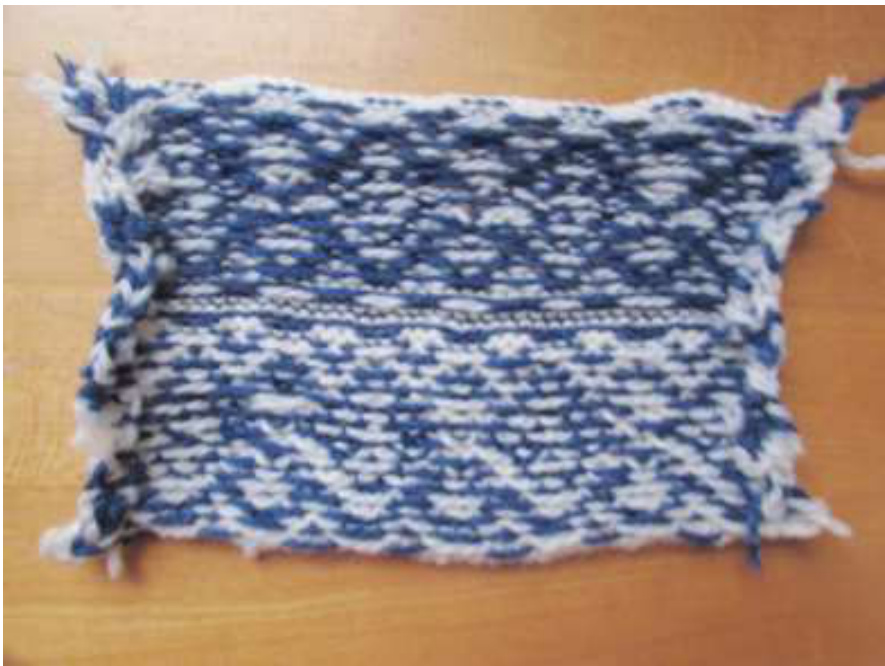
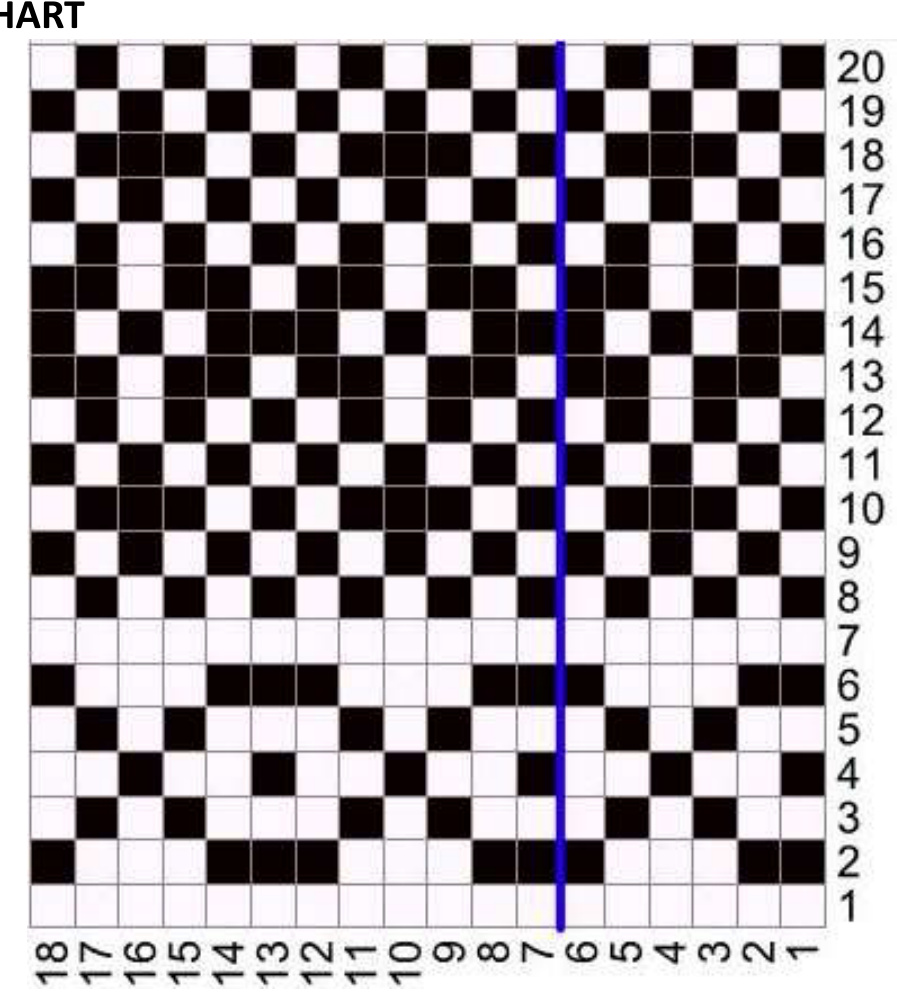
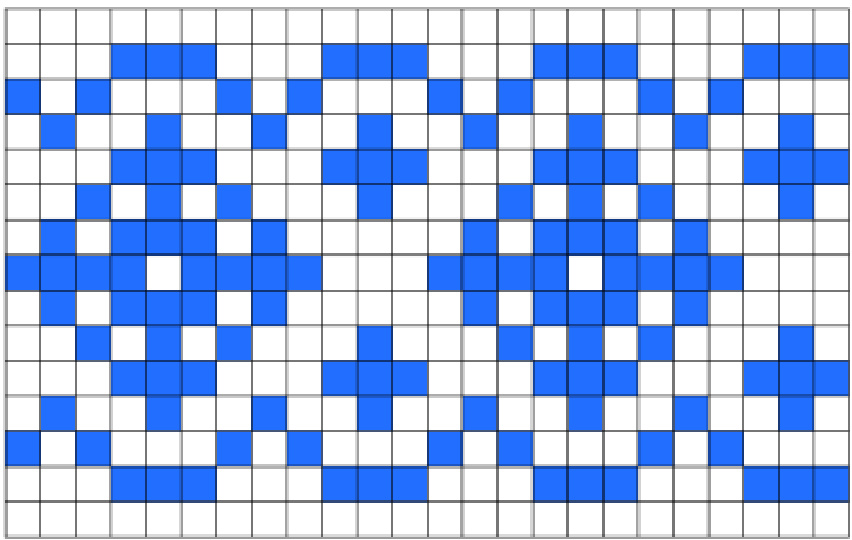
Viewing my swatch from the back, you notice that the color that dominated on the front recedes on the back, and the color that was recessive on the front dominates on the back. A color cannot be dominant both on the front and the back at the same time. So, how do you control for this? How does a color become dominant? I have read many explanations of color dominance, and frankly, they all leave me scratching my head. Terms are used like "over" and "under," which are nonsensical to me. Over where? Under where? Also, each knitter has her own yarn-holding method. We need an explanation that works no matter how we hold our yarns. First, it is important to point out that, whatever way you hold your yarns when stranding, you want to maintain the same position throughout the piece so that you catch your floats the same way, consistently. That said, here's how color dominance happens. (And it happens whether you like it or not!) The color that will dominate---or stand out—on the front of your work is the color that consistently lies closer to your work as you go. In the above example, on the bottom half of the front of the piece, the blue is more prominent than it is on the top portion of the piece. This is because it lay closer to the piece as I was working the bottom half. How do we know this? Look at the back of the swatch. The bottom on the back shows more white relative to the top of the swatch. You see more white because the floating yarn, the white, is floating over, or around, the blue..it lies further from the piece, has farther to travel, than the blue. Because the white lies closer to you on the bottom half when viewing the back, it is more visible to you than is the blue. Because it is more visible—dominant—on the back, it cannot be, at the same time, the dominant color on the front. No matter how you choose to hold your yarns, one in each hand, both in the right hand, or between your toes as I do, the above rules apply. Try a swatch as I did. Try knitting with the yarns in one position and then switching them. Take note of the color that has to travel to float around the color that lies closer to the work. The one that has to travel to float around the close color is not the color that will dominate on the front of your swatch, but it is the color that will be most evident on the back. Try knitting this chart with two, highly-contrasting colors and DPNs so that you are working in-theround. You will cut the swatch open when you complete it:
Stranded but not Alone
Deborah Tomasello
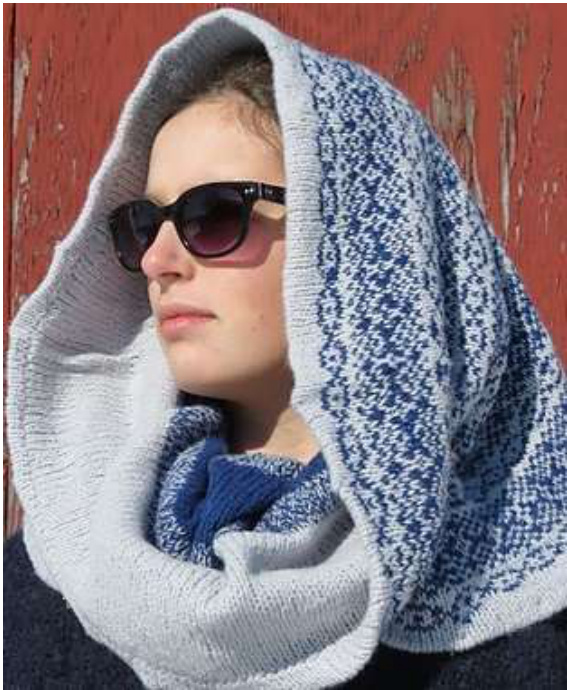
Ileneklp2 This super cowl was the CBD mystery KAL project for February 2015. It is super-tall so it can be pulled up over your head and worn as a hood. It is lined for extra warmth and for a great look. It is also reversible. See the pictures at the end of the pattern to see how knitters worked different edgings (picots) and linings. This is your project. You choose your colors. Use my pattern as a guideline, but don't feel sonstrained by it. Size: Knitter's choice (Cover cowl measures 17" tall x 26"circumference after blocking.) Materials: Approx. 800 yds of Knit Picks Gloss Fingering: 70% Merino Wool, 30% for background. (4 skeins) Approx. 400 yds of Knit Picks Gloss fingering in a contrasting color ( 2 skeins \* Any fingering-weight yarn will do, provided it has a hard twist, no halo, and high contrast between colors. One 16" circular #6 needle stitch marker tapestry needle Abbreviations: k = knit P = purl cO = cast on BO = bind off St-sts = stitch-stitches Gauge: Approx. 8-9 sts/inch, but gauge is unimportant here. INSTRUcTioNs: Using a #6 needle and your background color (the color that requires the larger amount of yarn) provisional c0 192 sts. Join to work in-the-round, placing marker at beginning and taking care not to twist sts. Then, knit, with one color only, about linch. Add your second color-the one that will create the colorwork design--and, after deciding which color you want to dominate (see the info about yarn dominance above), begin following the chart below. The design has a 6-st repeat. You will work the repeat 32 times per round (chart shows 3 repeats but marks off the first with a blue line). NOTE: Keep your work loose and even so there is no pulling or puckering on the front. After working the chart through round 20, work rounds 1-20 again, four more times, for a total of 100 pattern rounds. Then work chart 1 again. NOTE: Here it where you need to make your decision for height. The recommendation above will yield an 16-17" tall (approx.) cowl after blocking. If you want a shorter cowl, do only as many pattern rounds as you want to achieve the height you want, still ending with the first chart for the sake of symmetry. When the cowl is the height you want it to be ( DO NOT COUNT your first solid-color inch), detach your second color and, continuing with the background color, continue knitting the back side (cowl lining).\* You will work the lining to equal the number of inches of the design portion on the front. The first inch you knitted, before starting the chart, is part of the lining, so that inch counts for the back portion. This allows your seam to be an inch up from the bottom of the cowl when you sew your seam. \* Or consider doing some striping or other lining color options. Add a picot edge, if desired, before beginning the lining portion. See project photos above for ideas. A couple of the KAL participants found their lining was much more loose than the patterned front portion, and they suggested, if you are a loose knitter, you might want to consider going down a needle size (to a #5) for the lining portion. Most knitters, including yours truly, found any difference between the front and back evened out with blocking. Graft last round to provisional CO round. Finishing: Soak and block flat (stretching gently to achieve max height and circumference), so that the piece is blocked in half, the design portion as the front half and all the solid background color as the back side. Your seam should be about one inch up from the bottom on the inside of the cowl Make sure edges are straight and crisp. If you knitted all 5 repeats plus the first chart again, you should have a super-tall cowl when blocked that can be folded to show part of the lining, scrunched for extra neck warmth, or pulled up over your head---a snood. It will be fully reversible as well, so you can wear either the printed side or the solid side out.