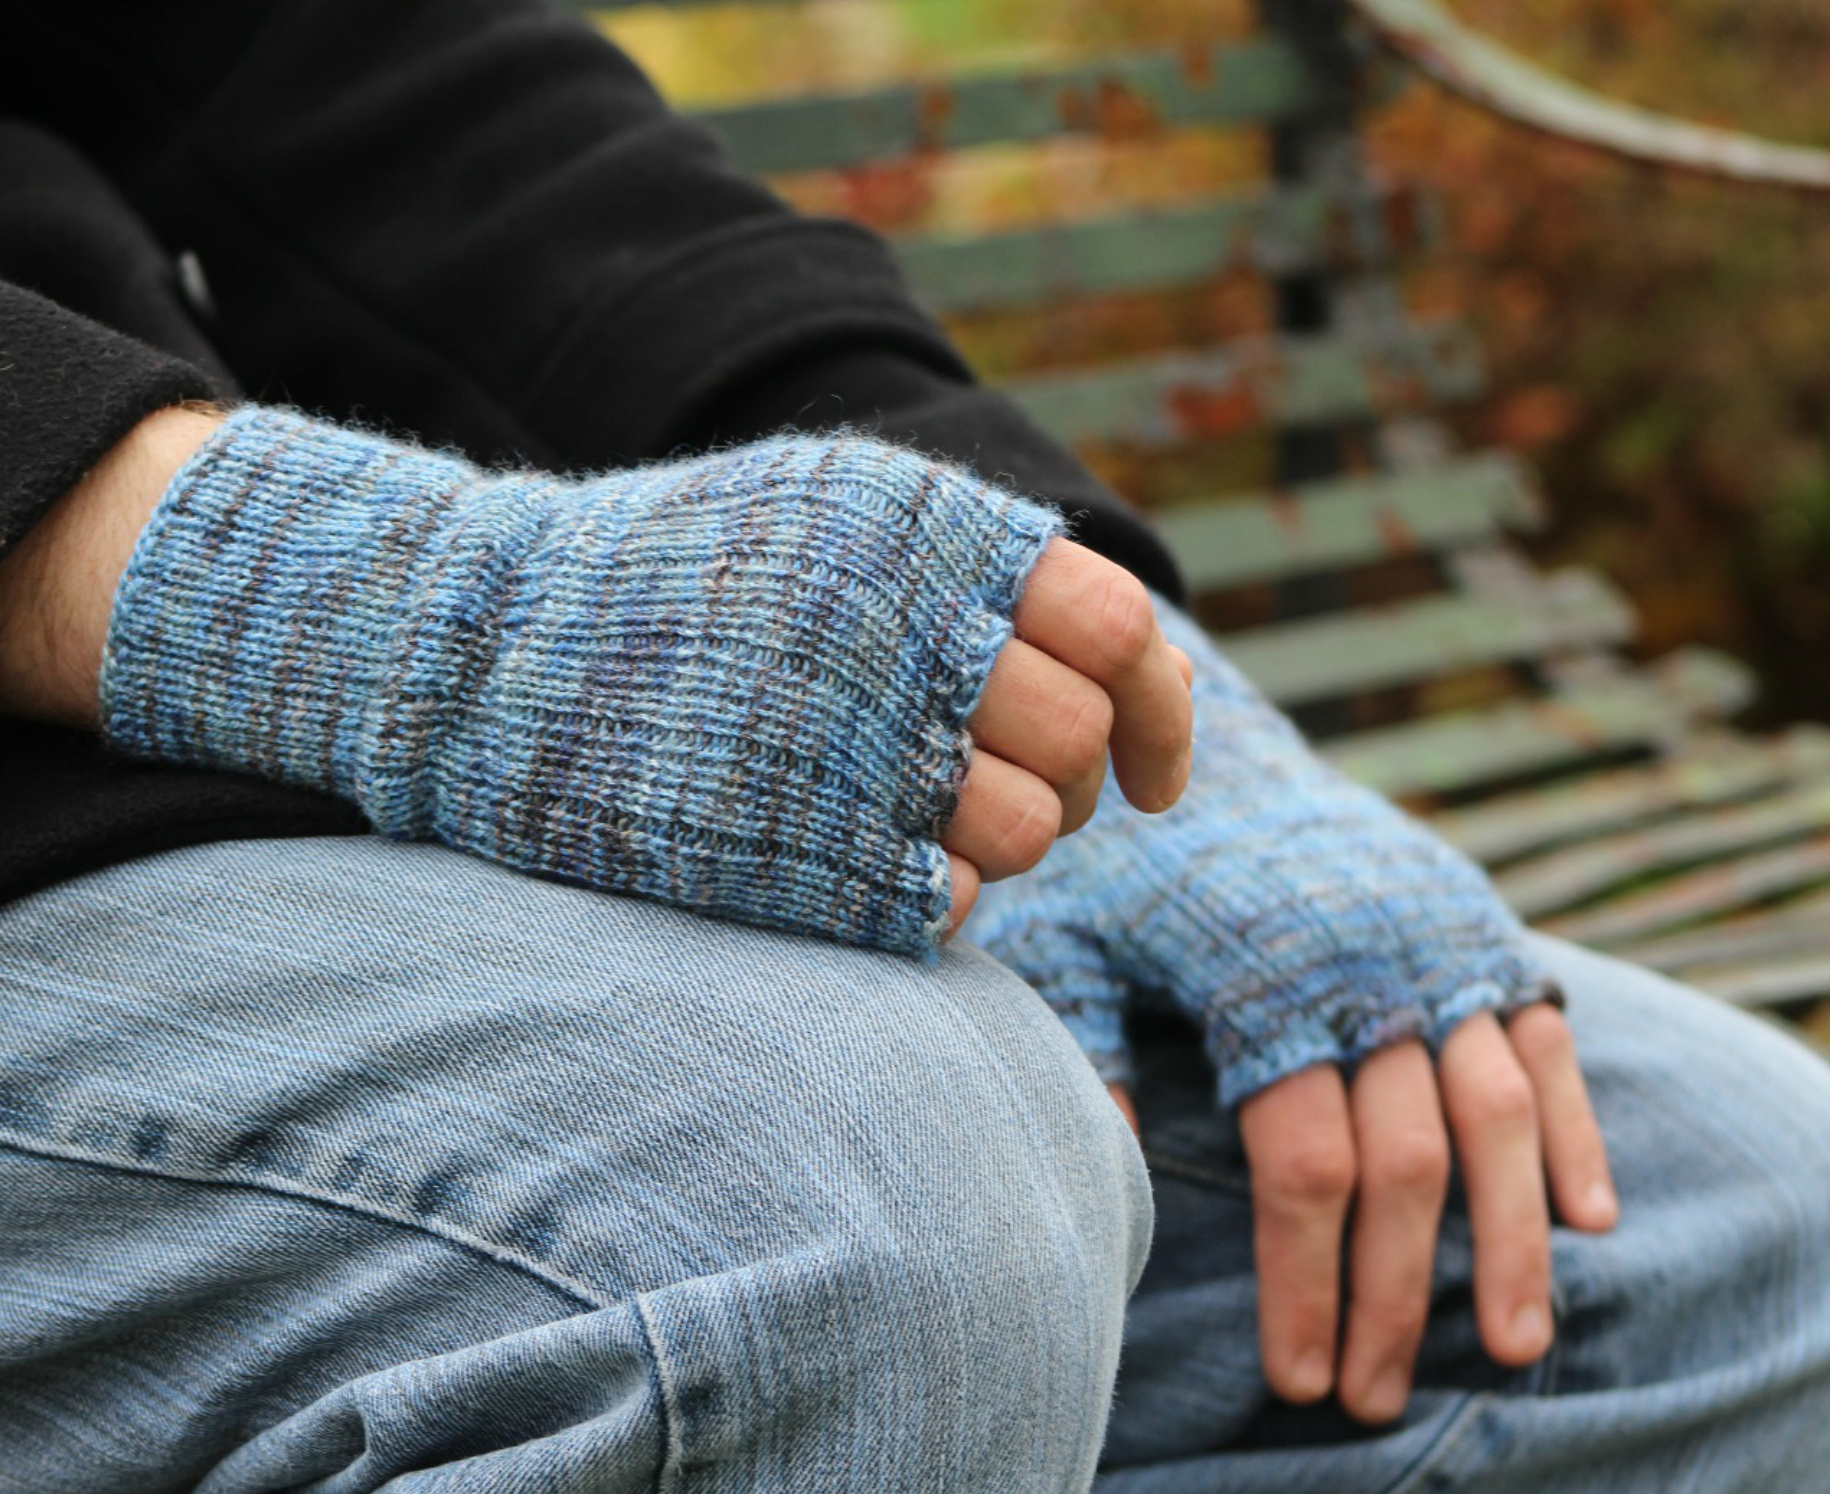
Majority Mitts
by Jodie Gordon Lucas
designed these mitts in honor of my son's 21st birthday. He's rather notorious for both loving and losing fingerless the fingerless mitts I make for him. For his birthday, I came up with the solution to his dilemma. He chose his favorite sock yarn from my stash and I promised to keep knitting these mitts until the yarn ran out. That way he would have a few spares in case one went missing. It looks like my 100 gram skein of sock yarn will make 5 mitts...hopefully that will keep him in fingerless mitts for a few years! The mitts are a simple 1x3 rib, with a patterned gusset. The thumb and finger openings are created with my Phalangee technique which was published in Knitty's Deep Fall 2012 issue. Also, I took the opportunity to finally record a demonstration video of the technique while making these mitts-the link is included in the techniques section.
DIRECTIONS
Using a Twisted German Cast on (or the loose cast on of your choice, CO 40(48, 56) sts. Join to work in the round taking care not to twist the stitches.
Cuff
Round 1: (K3, p1) to end of rnd. Repeat Round 1 until mitt measures 2(2.5, 3) inches.
Thumb Gusset
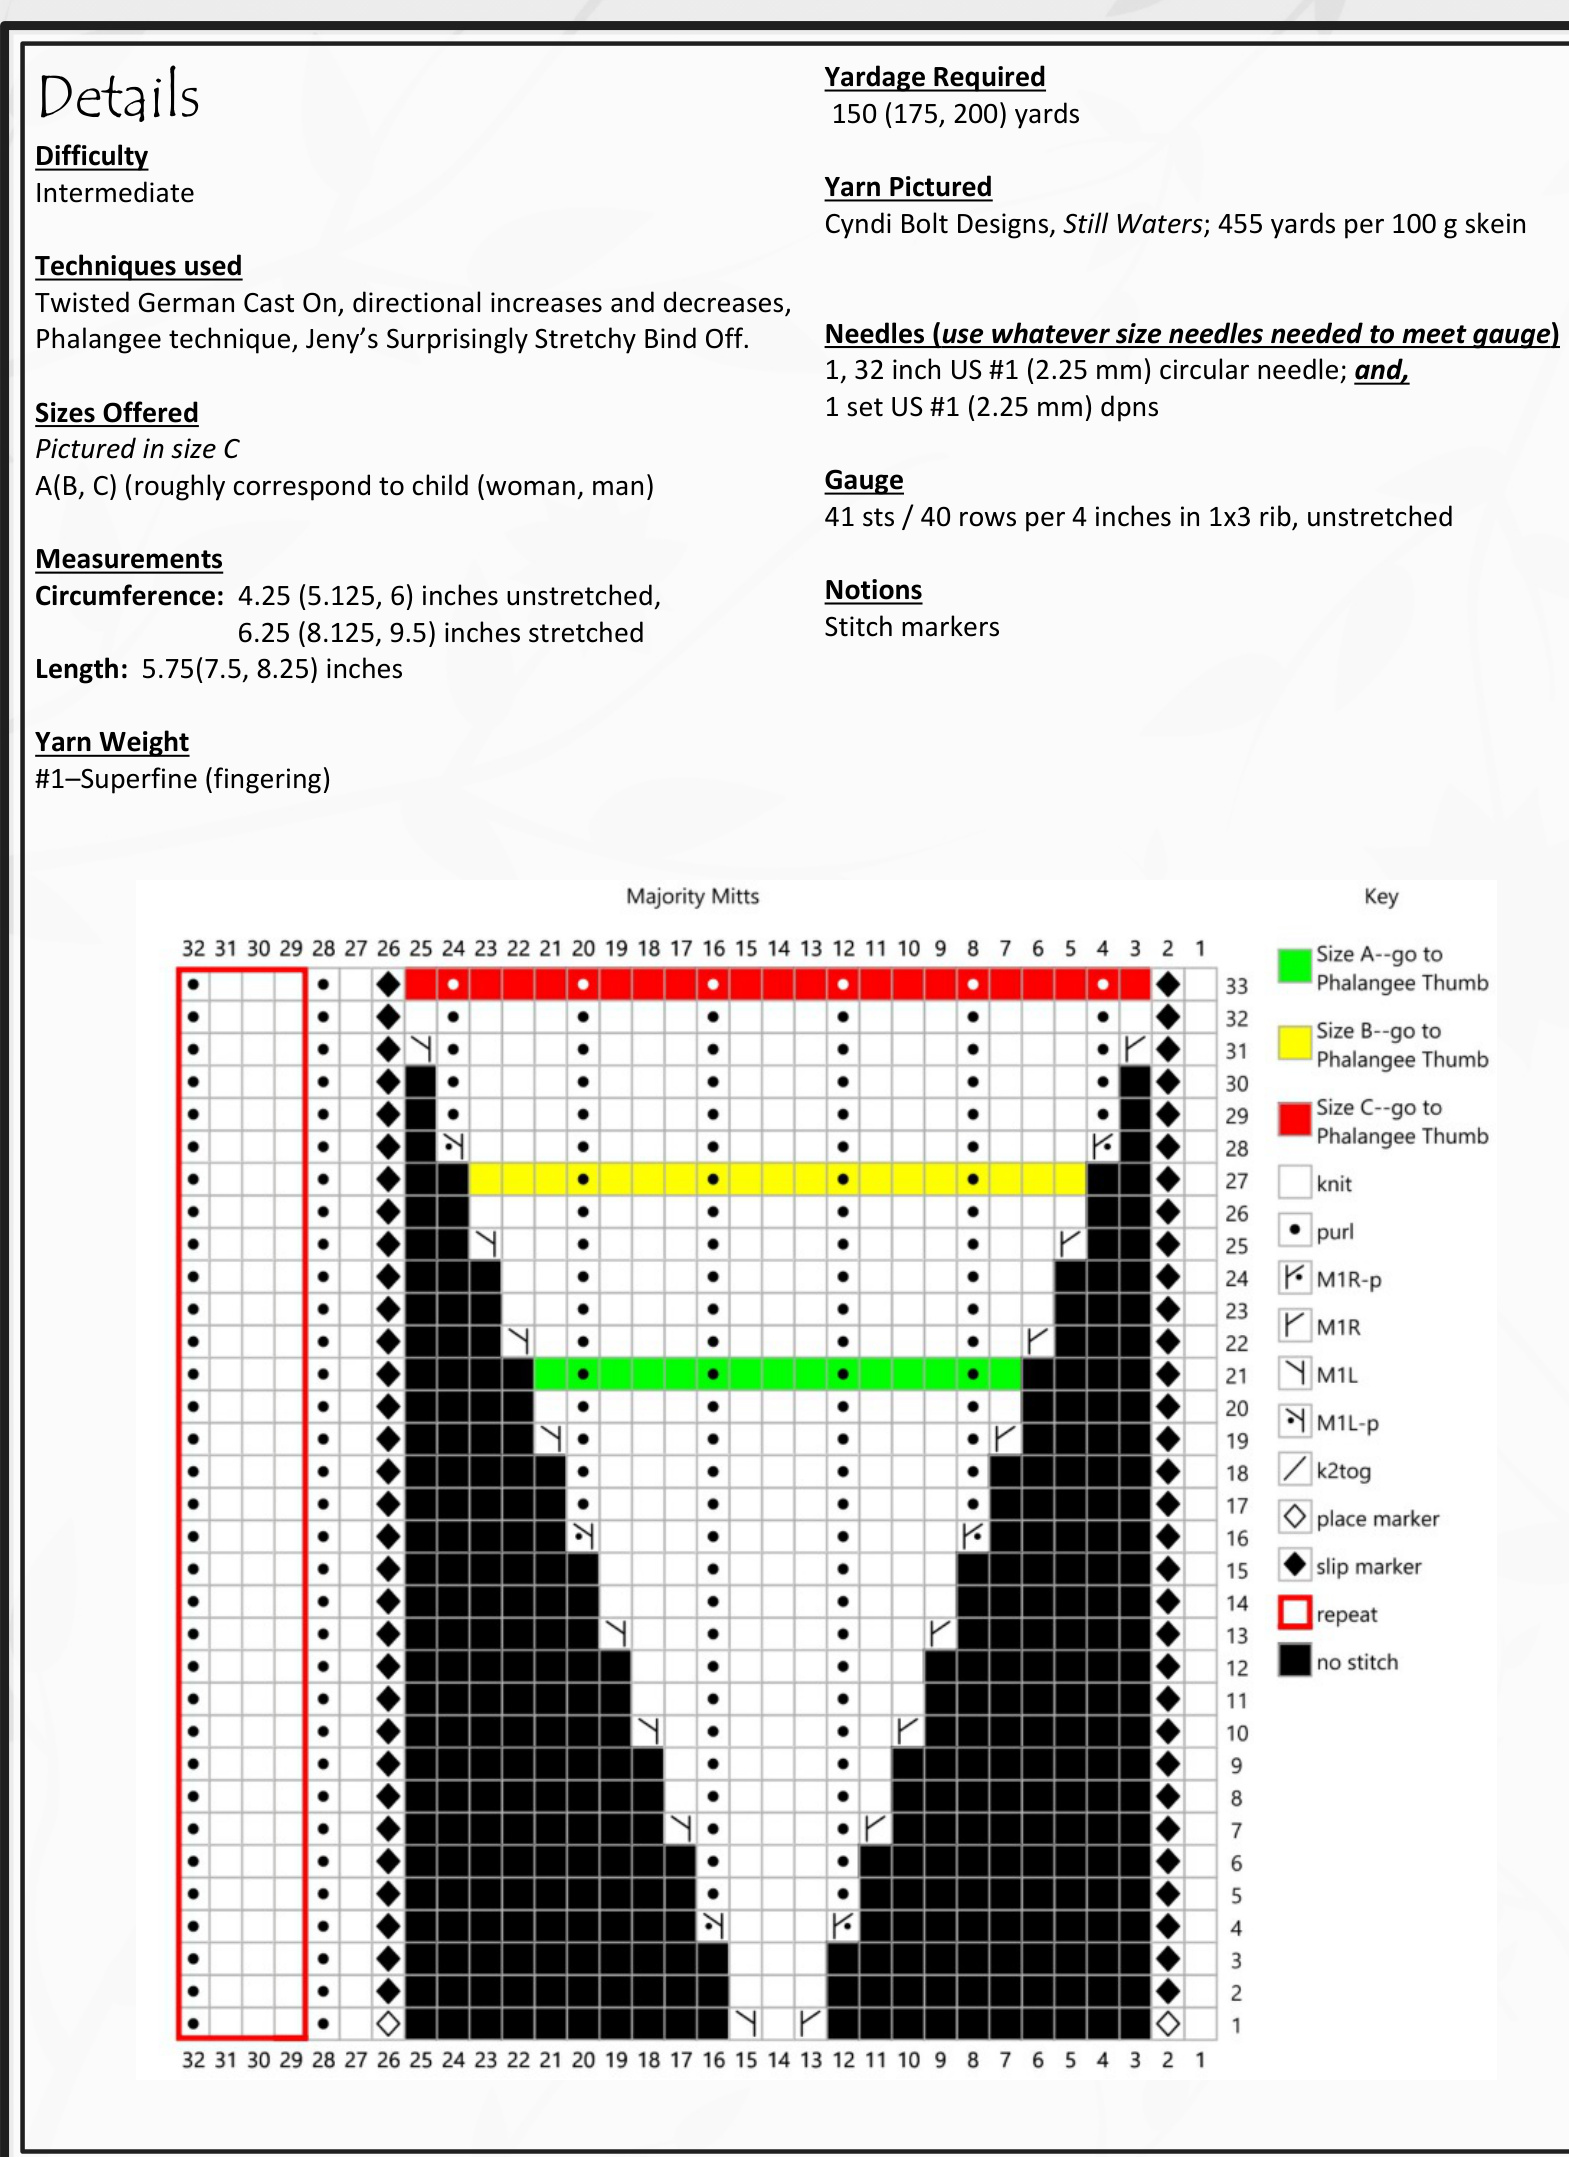
Work the Thumb Gusset using the chart on the previous page or the written directions below. Round 1: K1, pm; M1R, k1, M1L, pm; work in pattern (WiP) to end of round. Rounds 2 and 3: WiP. Round 4: K1, slm; M1R-p, WIP to marker, M1L-p, slm; WiP to end of round, slm. Rounds 5 and 6: WIP. Round 7: K1, slm; M1R, WIP to marker, M1L, slm; WiP to end of round, slm. Rounds 8 and 9: WIP. Rounds 10 through 15: Repeat Rounds 7 through 9 another 2x. Rounds 16 through 21: Repeat Rounds 4 through 9. Size A: proceed to Phalangee thumb, 15 gusset stitches. Rounds 22 through 27: Repeat 7 through 9 x2. Size B: proceed to Phalangee thumb, 19 gusset stitches. Rounds 28 through 33: Repeat Rounds 4 through 9. Size C: proceed to Phalangee thumb, 23 gusset stitches.
Phalangee Thumb
Round 1: K1, M1L, slm; M1R, WIP to marker, M1L, slm; M1R, WIP to end of round. Round 2: WIP. Round 3: K1, k-cs-tog, slm; sl 1, k to 1 st before marker, k-cs-tog, slm; sl 1, WiP to end of round. pund 4: K2, remove marker; work thumb itches with dpns to marker, remove larker. ontinue with thumb on dpn-s. Size A Thumb Round 1: SSK, WIP to final 2 thumb sts, k2tog, M1l, pm. Thumb Rounds 2-5: WIP. Thumb Round 6: Knit. Thumb Round 7: Purl. Thumb Rounds 8-9: Repeat Rounds 6 and 7 once. Bind off with JSSBO. Size B Thumb Round 1: SSK, WIP to final 2 thumb sts, k2tog, M1l, pm. Thumb Round 2: WIP. Thumb Round 3: SSK, WIP to 3 sts before marker, k2tog, k1. Thumb Rounds 4 - 7: Repeat Thumb Rounds 2 and 3 another 2x, 16 sts. Thumb Round 8: Purl. Thumb Round 9: Knit. Thumb Rounds 10- 11: Repeat Rounds 8 and 9 once more. Bind off thumbs sts with JSSBO. Size C Thumb Round 1: SSK, WIP to final 2 thumb sts, k2tog, M1L, pm. Thumb Round 2: WIP. Thumb Round 3: SSK, WIP to 3 sts before marker, k2tog, k1. Thumb Rounds 4-9: Repeat Thumb Rounds 2 and 3 another 3x, 16 sts. Thumb Round 10: Purl. Thumb Round 11: Knit. Thumb Rounds 12 - 13: Repeat Rounds 10 and 11 once more. Bind off thumbs sts with JSSBO. pund 4 continued: Work resumes at the ase of thumb. WIP to end of round. pund 5: K2tog, M1L, SSK, WIP to end of id. ound 6: K2, (p1, k3) to final st, k1.
Palm
WIP for a total of 1.5(1.75, 2) inches from the thumb.
Phalangee Finger Openings
Round 1: WIP 5(6, 7), M1L, pm "A1"; M1R, WIP 5(6, 7), M1L, pm “B1"; M1R, WIP 5(6, 7), M1L, pm “C1"; M1R, WIP 10(12, 14), M1L, pm "C2"; M1R, WIP 5(6, 7), M1L, pm "B2"; M1R, WIP 5(6, 7), M1L, pm “A2"; M1R, WIP 5(6, 7), 52(60, 68) sts. Round 2: WIP. Round 3: (WiP to 1 st before marker, k-cstog, slm; sl 1) x 6, WiP to end of round. The bind off is worked in a figure 8, with JSSBO in established pattern. BO from beg of Rnd to A1; 口 Slip sts from the end of Rnd to A2 onto a dpn to access stitches at A2; 口 BO from A2 to B2; 口 Slip sts from A1 to B1 onto a dpn to access stitches at B1; 口 BO from B1 to C1; 口 Slip sts from B2 to C2 onto a dpn to access stitches at C2; BO from C2 to C1 (turn mitt so opposite side is now facing); 口 BO from C2 to B2 (from dpn); 口 BO from B1 to A1 (from dpn); 口 BO from A2 to end of round.
FINISHING
Weave in ends. The weakest point in the mitt is at the base of the thumb. Reinforce that area when weaving in the yarn tail there.
Abbreviations
Techniques
Twisted German Cast On
https://www.youtube.com/watch?v=BfFadEumBak
M1R and M1L:
BO bind off co Cast On JSSBO Jeny's Surprisingly Stretchy Bind Off k knit k2tog knit 2 stitches together k-cs-tog knit corresponding stitches together. Insert right needle into stitch and then into the corresponding stitch on the other side of the round. Continue as for a k2tog. Caution-this connects two stitches-it is not a decrease. M1R Make one stitch (right leaning): From back of work lift bar between stitches onto the left needle and knit it. M1R-p Make one stitch purlwise (right leaning): From back of work lift bar between stitches onto the left needle and purl it. M1L Make one stitch (left leaning): From front of work lift bar between stitches onto the left needle and knit it through the back loop. M1L-p Make one stitch purlwise(left leaning): From front of work lift bar between stitches onto the left needle and purl it through the back loop. p purl pm place marker rep(s) repeat(s) rnd(s) round(s) RS right side SI slip purlwise with yarn behind work slm slip marker SSK slip slip knit st(s) stitch(es) WIP work in pattern (i.e., knit the knits & purl the purls) Ws wrong side times http://knitpurlhunter.com/blog/?p=236
Phalangee Technique
Original article: http://www.knitty.com/ISSUEdf12/PATTphalangees.php Demonstration Video: https://youtu.be/KexVF1fUPU8
Errata Policy

I've been told perfection is boring. Well,I'm certainly not boring (just ask my friends) and I'm definitely not perfect (just ask my kids)! Because of this I have a standing policy of rewarding people who nicely bring an error to my attention with a free single pattern download from my Ravelry pattern store. Also, I'm always happy to answer questions. Drop me an email. I usually get back to you within 24 hours. Jodie_mom@QueenieKnits.com


