Idris @
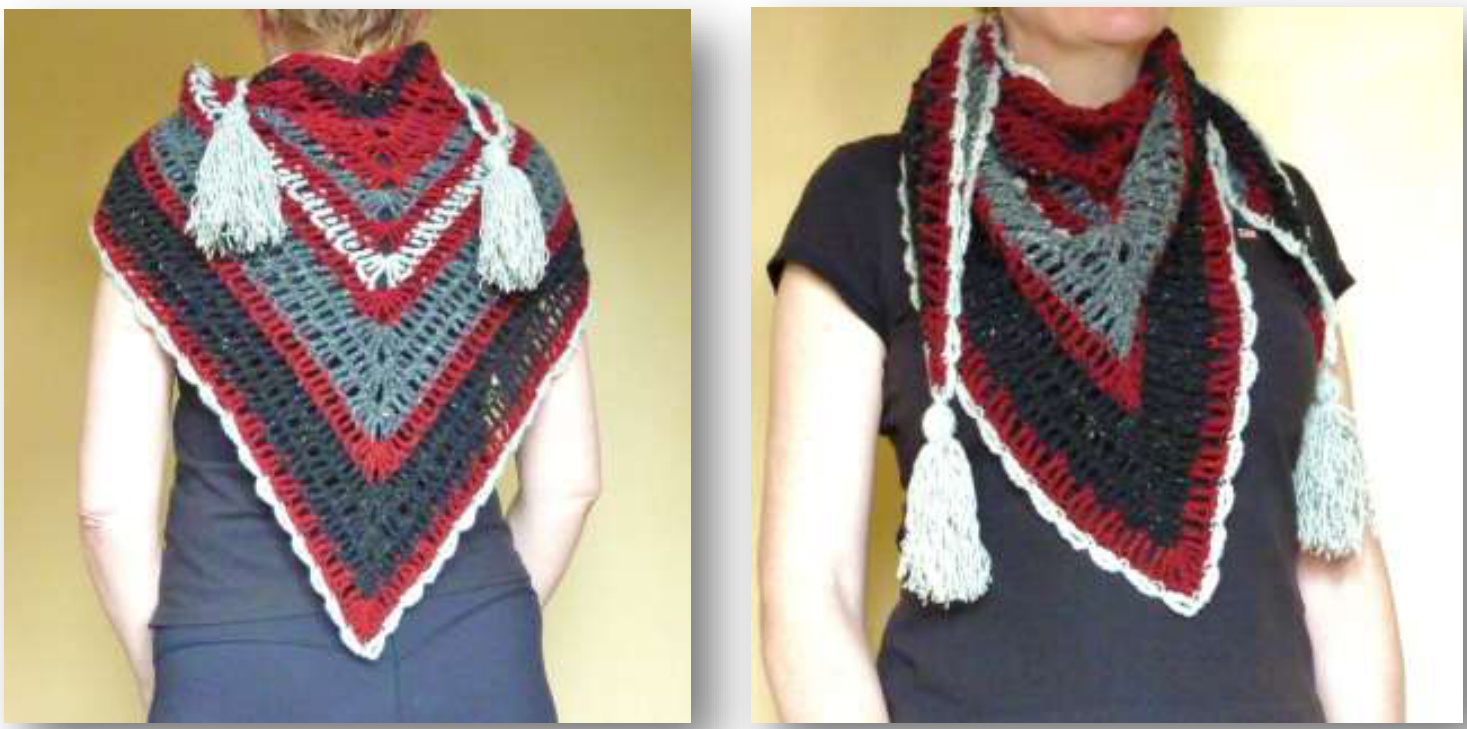
Triangular shoulder shawl / kerchief
Jane Howorth
Note: these instructions are written in English crochet terminology. U.S. terminology can be found in brackets in the key to abbreviations below.
You will need:
4 x 50g balls of DK weight yarn, 8wpi, one each of four colours. I used 100% wool Rowan Tweed DK (118m/129yds) in the following colours: Buckden: Red (col A) Pendle: Black (col B) Malham: Mid grey (col C) Bedale: Pale grey (col D) @Jane Howorth This yarn feels quite harsh when you are working with it, but it softens when washed.
Hook: 5mm (H-8)
Dimensions:
Width (excluding edging): 127cm (50") Depth (excluding edging): 69cm (27")
Abreviations:
Ch chain Dc double crochet (single crochet) Dtr double treble (treble) Fpdtr Front post double treble (front post treble) Bpdtr back post double treble (back post treble) Ss slip stitch (slip stitch) Sp space Miss skip Col. Colour/color Rsright side Ws wrong side
Tension/Gauge:
In pattern, 6cm (2%") equals 7dtr and 3 rows. Stripe pattern: Use your colours in the following sequence: @Jane Howorth Row 8: Col C Row 9: Col A Row 10: Col D Row 11: Col A Row 12-14: Col C Row 15: Col A Row 18: Col B Row 19: Col A
Pattern: (Remember to change colours as needed)
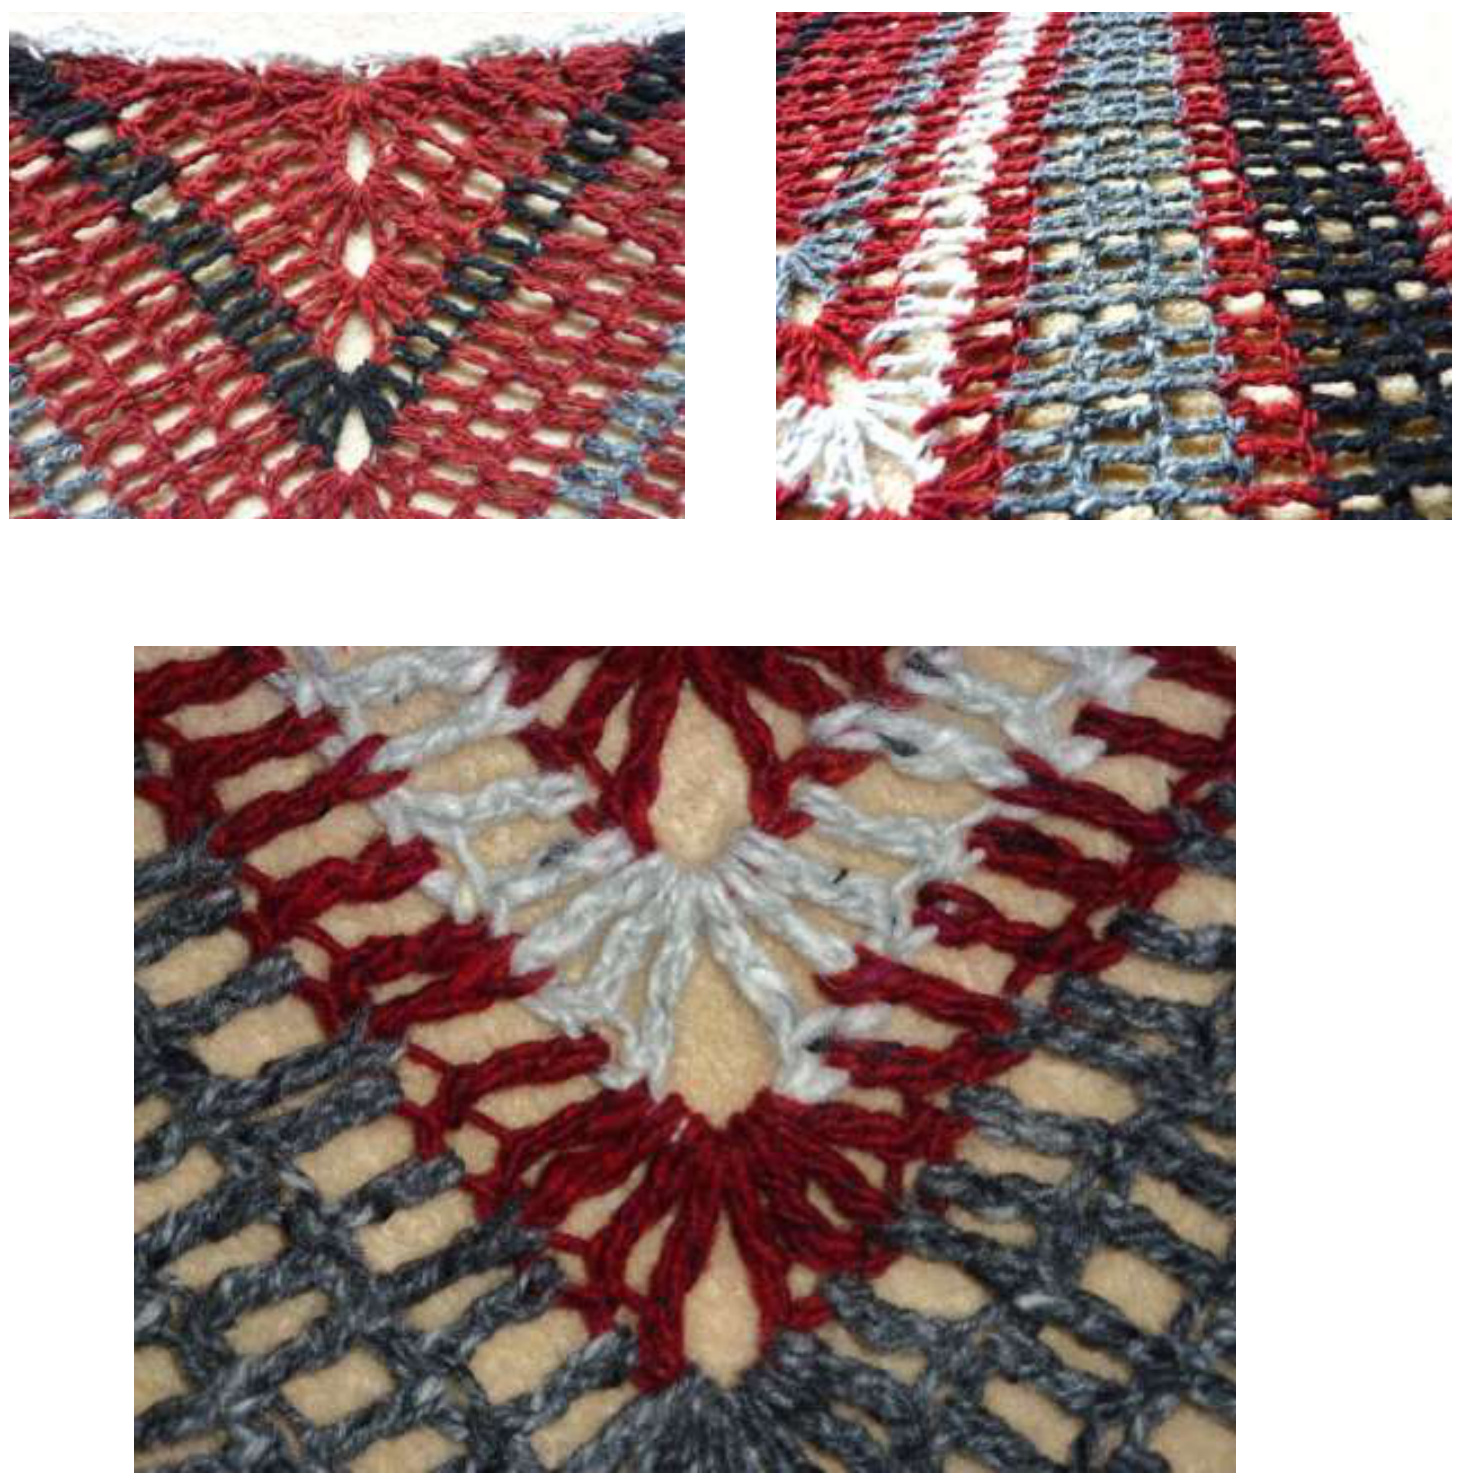
Row 1: (ws) Starting with an adjustable ring, work 5dtr, 2ch, 5dtr. Tighten ring so that stitches worked form a half circle. Turn. Row 2: (rs) 4ch, 2dtr into last dtr of previous row; 1dtr, 1fpdtr, 2dtr. 3dtr, 2ch, 3dtr into 2ch sp of previous row. 2dtr, 1fptdr, 1dtr, 3dtr in top of 4ch of previous row. Turn. Row 3: 4ch, 2dtr into last dtr of previous row; 1bpdtr around 2nd dtr of previous row; 2dtr, 1bpdtr around fpdtr of previous row. Continue the sequence of 2dtr followed by 1 bpdtr, ensuring that the bpdtr is always worked around a fpdtr of the previous row. At the point of the shawl, work 3dtr, 2ch, 3dtr into the 2 ch sp of previous row. Follow the same sequence of 2dtr followed by 1 bpdtr down the other side of the work, finishing with 3dtr in top of 4ch of previous row. Turn. Row 4: 4ch, 2dtr into first dtr; 2dtr, 1fpdtr around bpdtr of previous row; \*2dtr, 1fpdtr\*. Repeat from \*to\* until the 2ch sp. 3dtr, 2ch, 3dtr into the 2ch sp. \*2dtr, 1fpdtr\*. Repeat from \*to\* until end, finishing with 3dtr in top of 4ch of previous row. Turn. Following rows: Observe the pattern that has now been established. Notes of guidance: Always start a row with 4ch and 2 dtr in last dtr of previous row; and finish a row with 3dtr in top of 4ch of previous row. @Jane Howorth As the work grows, introduce new fpdtr or bpdtr stitches as needed, always following the pattern of 2dtr followed by 1fpdtr or 1bpdtr, depending on whether you are working a rs or ws row. At the point of the shawl always work 3dtr, 2ch, 3dtr into the 2ch sp of previous row. Remember to change colours as needed. Work 19 rows in total and finish off.
Shell Edging
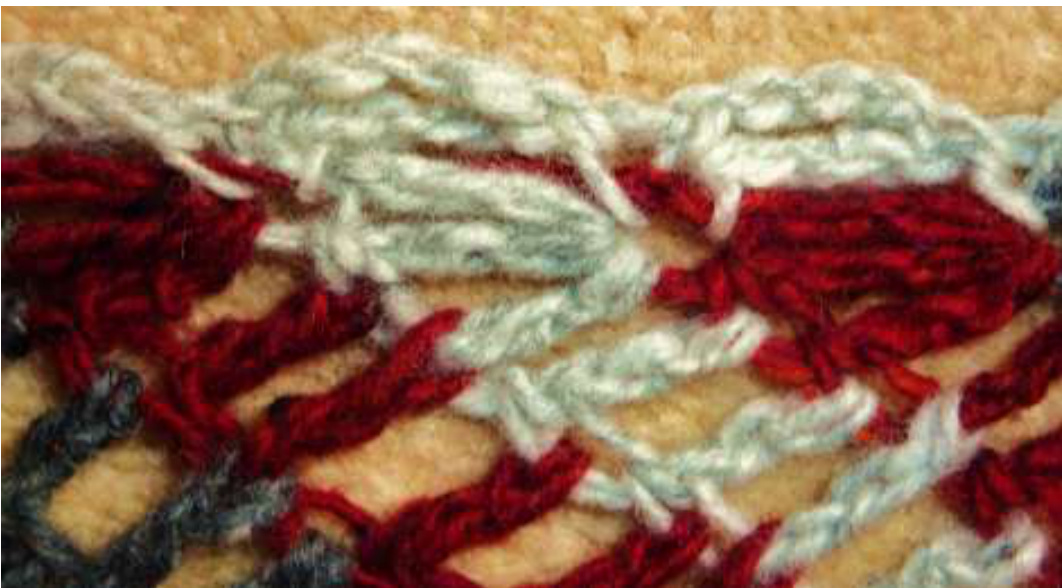
Begin by working down one diagonal edge, towards the apex. With col D and starting in the right-hand top corner of the long edge attach yarn and work 4ch, 1dtr, placing this dtr into the same place where you joined the yarn. Miss 5dtr, 1dc in next dtr. 4ch, 1dtr, placing dtr into the dc you just worked. To do this, push hook between the two vertical ‘legs' of the stitch. Miss 2dtr, 1dc in next dtr. \*4ch, 1dtr in last dc worked, miss 2 dtr 1dc in next dtr\*. Repeat from \* to \* until you reach the apex. In the 2ch sp at the apex you should place 1dc, then turn and work up the second side of the shawl, placing a dc in the left-hand top corner. Turn and work along the long top edge. Here you should continue in shell pattern as set, but place each dc in the join between each row (see photo). Finish with a ss at the base of the first 4ch of the shell edging. Finish off.
Finishing
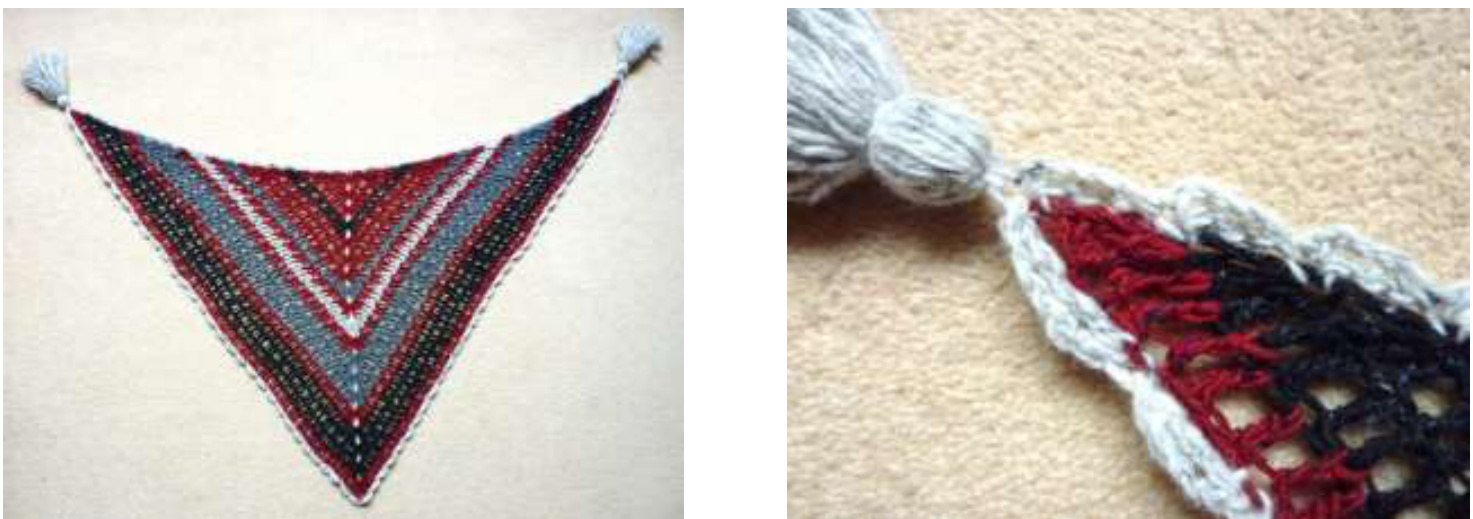
Work in loose ends. Wash and block to dimensions. Make and attach 2 tassels.
To make tassel
Select a book or cut a piece of firm card that has a width equalling the desired length of the finished tassel. If you are using a book you should take its thickness into your calculation for the finished tassel. The tassels I made are 13cm/5"long. Wrap yarn col D around the book or card between 60-70 times, or the number of times you choose to get a tassel of the desired bulk. Thread a piece of the same yarn under all the threads at one side of the card. Work this up to the edge of the card and use it to gather or pull all the threads close to each other. Tie in a loose overhand knot. With scissors, cut all the threads at the other edge of the card. Tighten up the overhand knot and make into a permanent knot. Approximately 2.5cm/1" below this knot, tightly tie another piece of yarn around the tassel to form the head. Smooth out the tassel and trim the ends to your satisfaction. Firmly and securely attach one tassel at each of the corners at the long side of the shawl.
I hope you will be pleased with your shawl. If you have any queries or comments, or spot any errors, please PM me and I will be happy to help Please use this pattern to make items for yourself and to give as gifts, but please; not to sell.