Fast Forward
I wanted a triangular scarf in garter stitch, which is narrower at the center and definitely longer from side to side than the usual top-down triangular scarf. (I was inspired by Baktus, but wanted it TopDown).
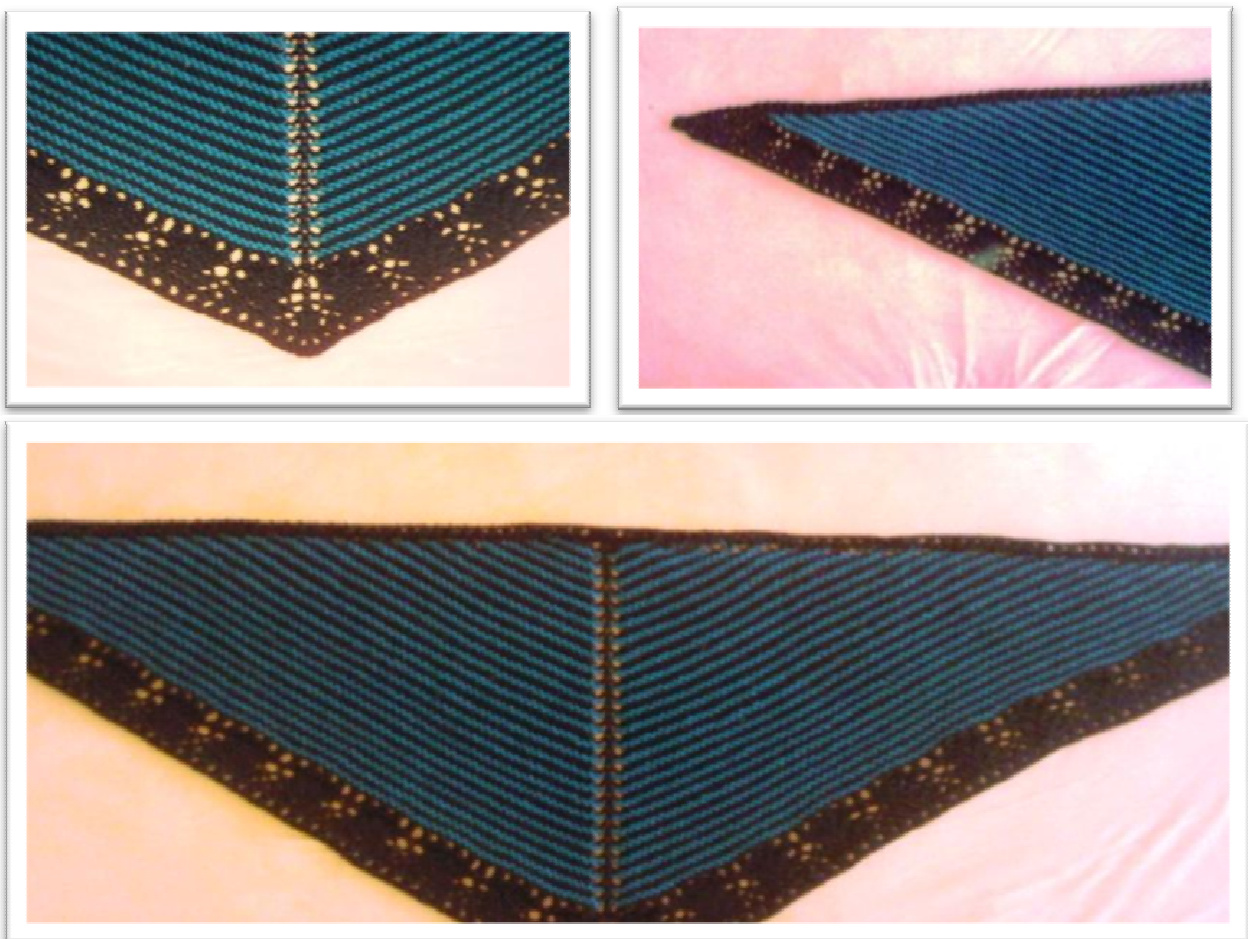
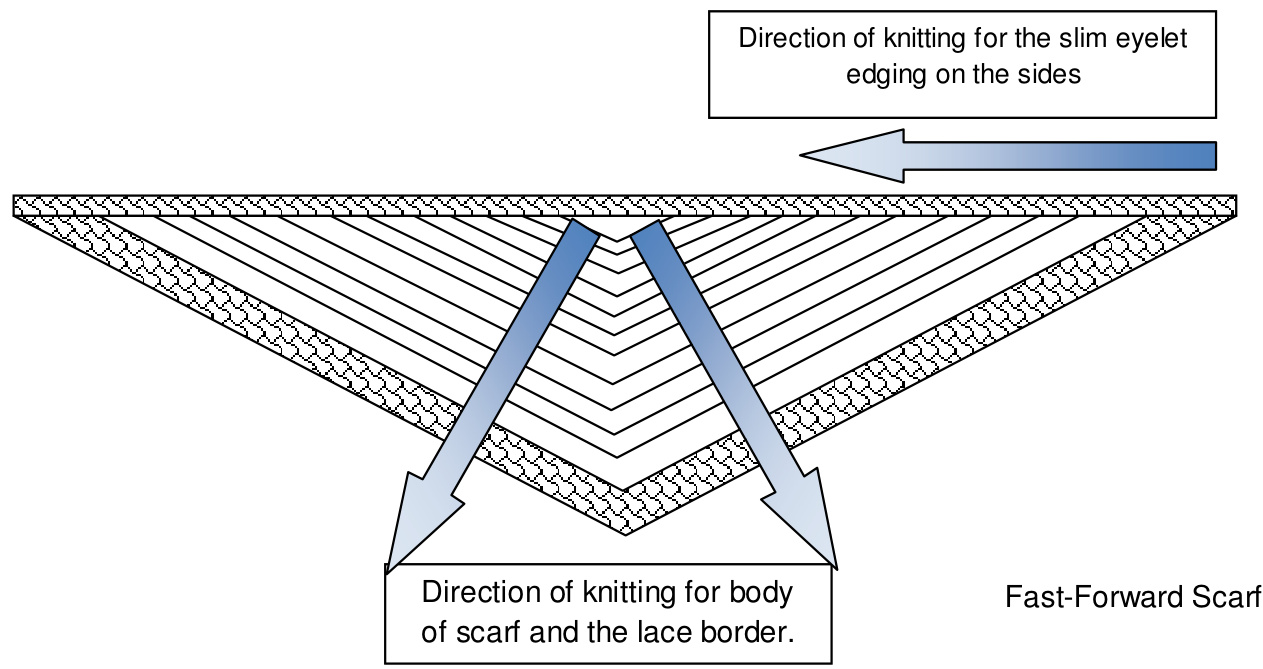
I realized the shape I wanted with increases in alternating places. There are 4 increases every other Row (=in every stripe). In the black stripes, there is one increase (YO) on either end and 2 increases (YO) next to the center stitch. In the teal stripes, there are two increases on either end (YO + M1), but no increases in the center. In the teal rows the center stitch is slipped together with YOs, like a mosaic stitch. I thought that would look nice together with the lace border (and it actually does @). (Maybe the scheme of increases on the next page might help to understand, even though it is somehow uncommon). The main lace border has the same alternating places of increases. At the sides I picked up the sts from the side and knitted a slim eyelet edging without any increases.
The following is rather a recipe but a pattern, especially for the lace border, so you should dare to be a bit creative if you are going knit this. It is not difficult to knit, but it is difficult for me to describe it in a written form. If you have any questions, you are welcome to contact me via my ravelry account. I intended to knit the scarf in some classical (thin) merino, but I didn't find the color I was looking for, only in this bulky yarn. Therefore the scarf was finished much faster than I expected (-> Fast Forward...).
Abbreviations
RS: Right Side MC: Main Color CC: Contrast Color M1: Make One YO: Yarn over Pm: place marker Sm: slip marker CS: center stitch
Setup Rows (MC)
CO 7 sts Knit all sts Next Row: K1, YO, K1, YO, K1, pm, K2, YO, K1, YO, K1 (11 sts) Knit all sts Next Row: K1, YO, K4, YO, sm, K1, YO, K4, YO, K1 (15 sts) Knit all sts
Pattern:
Change tocontrast color. Row 1 (RS): K1, Y0, K2, M1, knit to marker, sm, sl center stitch purlwise together with an YO, knit to last 3 sts, M1, K2, YO, K1 (4 sts added) Row 2: knit to center stitch, slip center stitch and YO purlwise together with another YO, knit to end. Change toMaincolor Row 3: K1, YO, knit to marker, YO, knit CS together with the YOs of the two rows before, YO, knit to last st, YO, K1 (4 sts added) Row 4: knit to end Repeat Rows 1-4 until desired size. End with a Row 4 (in MC). Note 1: You won't need the marker after Row 4 because then the center stitch is clearly visible. Note 2: When I change color, I drop the actual thread and bring the new thread in front of it. Do the colorchange however you prefer, but it is a good idea to do it in a regular manner.
Scheme of increases for main part
| + | YO | + | + | + | ...knit... | SI+YO | ...knit... | + | + | + | YO | + | ||
| Row 4 | + | + | ...knit.. | + | + | + | + | + | ...knit... | + | + | |||
| + | YO | ...knit... | + | YO | + | YO | + | ...knit... | YO | + | Row 3 | |||
| Row 2 | + | ...+... | + | SI+YOs | + | ...+... | + | |||||||
| + | YO | ...knit... | SI+YO | ...knit... | YO | + | Row | |||||||
| + | ...+... | + | ...+... | + | 1 |
Lace Border (in MC):
Setup (Eyelet-Row): Row 1 (RS): k1, YO, k1, (YO, k2tog)\* until you arrive at the CS, knit CS, then: YO, k1, (YO, K2tog)\* to last 2 sts, YO, K1, YO, K1. Depending on your number of sts you might not be able to complete the last k2tog before the CS. If so, don't worry, just do this...(YO, K2tog)\*, YO, K1, YO, CS, YO, K1, (YO, K2tog)\* .. Row 2 (WS): knit to end. Main Lace Pattern: This is a simple 4-Row fan pattern (see chart below), worked for 8 Rows. I worked the increases for the border in the same alternating places, just as before: that is every 4th row two incs on either end, and every other 4th row one increase on either end and two increases around the center stitch. (But there is no more slipping of the center stitch in the lace border). I wanted the lace pattern to be mirrored at the center sts, so after the center stitch I continued in the "mirorred" lace pattern. (see left side of lace chart). Row 1 and Row 5: k1, YO, k2, knit in lace pattern Row 1 to one st before center stitch, k1, YO, knit CS, YO, k1, continue in “mirrored" lace pattern (left side of lace chart) to last 3 sts, k2, YO, k1. Row 2 and all other even rows: purl Row 3 and Row 7: k1, YO, K1, YO, K1, knit in lace pattern Row 3 to center stitch, knit CS, continue in "mirrored" lace pattern to last 3 sts, K1, YO, K1, YO, K1
| + | + | 0 | + | + | / | + | + | 0 | + | + | + | + | + | + | + + | + | 0 | + | + | + | + 0 | + | + | Row 7 | ||||||
| + | 0 | + | + | + | + | 0 | + | + | + | YO | + | YO + | + | + | 0 | + | + | + | + | 0 | + | Row 5 | ||||||||
| + | + | 0 | + | + | + | + | 0 | + | + | + | + | + + | + | 0 | + | + | 1 | + + | 0 | + | + | Row 3 | ||||||||
| + | 0 | + | + | + | + | 0 | + | + | YO | + | YO | + | + | 0 | + | + / | + | + | 0 | + | Row 1 |
Note: This is how the lace-pattern was centered on my scarf. Depending on your number of sts, the lace pattern will probably be shifted for some sts to the left or to the right on your scarf. Dare to be creative and add some additional YOs and k2togs around the center stitch if necessary, and don't worry: the border is only 8 Rows long, so after all it won't matter too much. End of Lace (Eyelet edging): Row 1: k1, YO, Kto last st, YO, k1 Row 2: knit to end Row 3: k1, YO, k1, (YO, k2tog)\* until you arrive at the CS, knit CS, then: YO, k1, (YO, K2tog)\* to last 2 sts, YO, K1, YO, K1. (If you cannot complete the last k2tog before the CS, just do ..(YO, K2tog)\*, YO, K1, YO, CS, YO, K1, (YO, K2tog)\*) Row 4: knit to end Cast of loosely from right side, don't break yarn! Finish (Eyelet edging on sides): With RS facing, pick up and knit 2 sts from every YO at the sides, beginning with the side where you ended with the former cast off. Row 1 (WS): Knit all stitches. Row 2 (RS): k2, (YO, k2tog)\* to last 2 sts, YO, k2 Row 3 (WS): knit all sts Cast off loosely from right side. Break yarn, weave in all ends. The lace border will curl inwards, as it is based on st st, so some moderate blocking (of the lace border only) might be a good idea.


