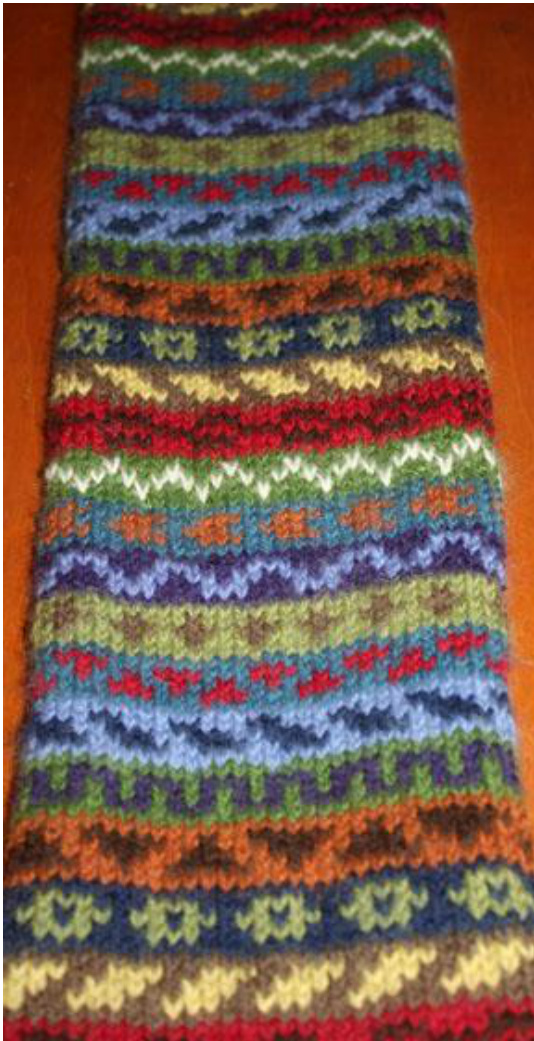
Peerie Scarf
Designed by Monta Morris
"Peerie" is a word from Orkney and Shetland that means "small" In knitting, it refers to the small bands of repeating design in Fair Isle patterns. Peeries are often used to separate larger design elements. This scarf is composed entirely of Peeries. This scarf is worked in the round with 12 colors of yarn. There are 11 Peerie patterns bands. With the patterns that are directional or asymmetrical, I sometimes reversed the pattern in subsequent repeats.
Materials
12-inch circular needle, size 6 12 colors of yarn (or you can use as few as 2 colors - or as many as you like) Stitch markers Rowcounter
Instructions
Color A · Using Color A, loosely cast on 60 stitches. · Join in the round, being careful not to twist stitches. ·Place Beginning of Round (BOR) marker and knit one round. · Work 4 rows in Seed Stitch. (Rows 1 and 3 - K1, P1 around. Rows 2 and 4 - P1, K1, around.) ·Continuing with Color A, knit until 10 stitches remain before BOR marker. · Place another marker here. We'll call this the Color Change (CC) marker. This is the point at which you will add new colors if you are weaving in as yougo. · Add your second color, and knit the remaining 10 stitches, weaving in every stitch, until you reach the BOR marker.
Check - Your new yarn should be secure and ready to work with. You are at the beginning of the round, and you have two yarns attached.
Peerie 1
ColorB-Background Color A -Foreground · You are ready to knit your first Peerie. · Drop Color A, but do not cut it. (You will use it as your foreground color in Peerie 1.) · Row 1 - Work one round with Color B. · Rows 2-4 - Starting at BOR marker, work Rows 2-4 of chart using Colors A and B. Keep your floats nice and loose in the back. At the end of Row 4, you are finished with Color A for a while. · Row 5 - Starting at the BOR marker, knit 10 stitches with Color B, weaving in Color A. Cut Color A and continue knitting Row 5 until you reach the CC marker. This is where you add Color C. · Finish knitting the last 10 stitches of Row 5 with Color B, while weaving in Color C. Check - You are back at your BOR marker and have finished knitting the first Peerie band. You have 2 yarns attached: Colors B and C. Peerie 2 have finished using Color B for a while, but you need to weave it in before you cut it. Row 6 - Starting at the BOR marker, knit 10 stitches with your new background color (Color C), weaving in Color B as you go. Cut Color B. Continue around with Color C until you reach the CC marker. This is where you add Color D, the new foreground color for your Peerie pattern. Finish knitting the last 10 stitches of Row 6 with Color C while weaving in your new color. Rows 7-9 - Starting at BOR marker, work rows 7-9 of chart using Colors C and D. At the end of Row 9, you are finished with Color D for a while. Row 10 - Starting at BOR marker, knit 10 stitches with Color C while weaving in Color D. Cut Color D and continue knitting row 10 until you reach the CC marker. This is where you add the background color for your nextPeerie.
And so on
Continue knitting the pattern as you did Peerie 2. · Add new colors by weaving in for 10 stitches, beginning at the CC marker. · When you are finished with a color, weave it in for 10 stitches beyond the BOR marker before cutting it. · Keep your floats loose so your work will lie flat. · Repeat patterns as necessary, until scarf is desired length. · End with a border in Color A: Knit 1 round; work Seed Stitch for 4 rounds. Knit 1 round. Bind off.
Additional Info
Needles
Use the longest circular needle that your stitches will stretch comfortably around. Having the work stretch a little - rather than bunch up - will help ensure that your work is smooth and even, not puckered. Weaving in is a simple technique that will make adding yarn easier and will virtually eliminate the dreaded task of working in ends. Depending on factors - yarn grabbiness, gauge, etc., I like to work in ends for about 10 stitches; more for slick or synthetic - less for grabby, rough wool. Look online for videos that show you how. For an excellent demo of using two colors, and weaving in the second color, visit The Philosopher's Wool site and watch the video. You won't be sorry. http://www.philosopherswool.com/Pages/Twohandedvideo.htm Keep track of where you are. I strongly recommend using a row counter for circular needles. It is also very helpful to use a sticky note or a magnet board to track where you are. I like to keep note or magnet above rather than below row I'm working on. Keeping it above helps you see where you've been.
How long?
A good working length for a scarf is the height of the wearer. So, for a 6-ft.-tall person, you would want your scarf about6 fe long.
Finishing
If you wove in ends as you went, there are no ends to weave in! You can close up the ends by adding fringe or whip stitching the ends closed.
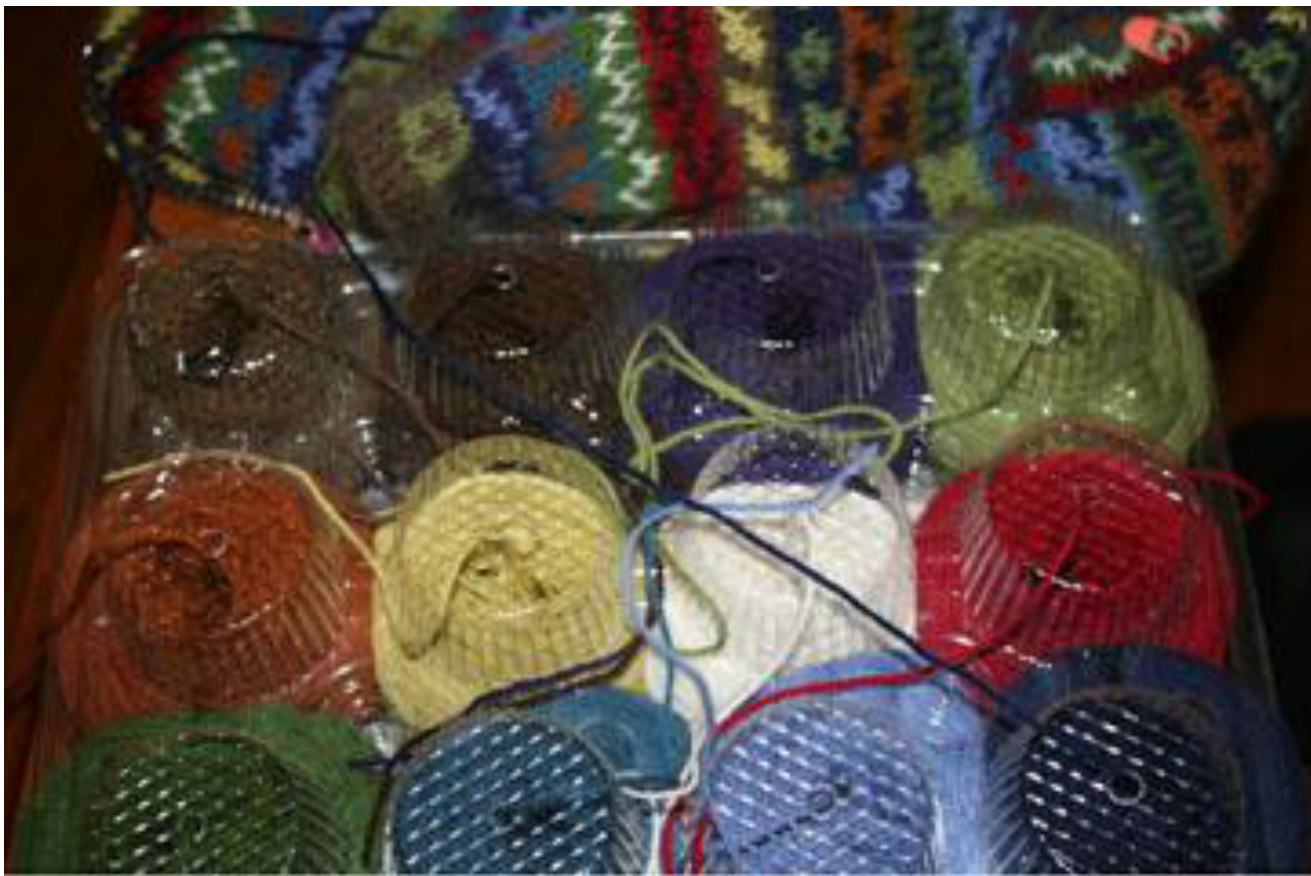
Contain your yarn
You only ever work with 2 strands of yarn at a time. Still, if you're using several balls of yarn, they can become a mess. Because I used an even dozen colors of yarn, a plastic cupcake container purchased from my grocer seemed a good solution. I used a flame to melt small holes in the center of each cupcake well. If you don't have a cupcake holder or don't need to contain that many colors, other holders can be improvised. Find a disposable container in which all yarn will fit snugly and punch holes in it to feed the yarn through. A shoebox might work. Or a large, clean carryout container. You can also contain your yarn and help prevent tangles by using yarn bras or baggies.
| Peacock Red | |||||||||||||||||||||
| 55 54 53 | |||||||||||||||||||||
| Band 11 Multiple of 6 52 51 50 | |||||||||||||||||||||
| 48 | |||||||||||||||||||||
| Periwinkle Navy | Band 10 48 Multiple of 5 47 46 | ||||||||||||||||||||
| Medium green Purple | 45 44 | Band 9 43 Multiple of 4 42 41 | |||||||||||||||||||
| Rust Dark brown | 40 | 39 Band 8 38 Multiple of 10 | |||||||||||||||||||
| 37 | |||||||||||||||||||||
| Navy Medium green | 36 35 | 34 Band 7 33 Multiple of 6 32 31 30 29 Band 6 28 Multiple of 5 | |||||||||||||||||||
| Taupe Light green | |||||||||||||||||||||
| 27 26 | |||||||||||||||||||||
| Red Dark brown | 25 24 Band 5 Multiple of 6 | ||||||||||||||||||||
| 23 22 | |||||||||||||||||||||
| Dark green Cream | 21 | ||||||||||||||||||||
| 3 | 20 19 Band 4 18 Multiple of 4 17 16 15 14 Band 3 13 Multiple of 5 12 11 10 6 Band 2 8 Multiple of 6 6 5 4 Band 1 3 Multiple of 5 2 1 2 | ||||||||||||||||||||
| Fresco Color # | ||
| 5343 | Light green | |
| 5315 | Medium green | |
| 5397 | Dark green | |
| 5349 | Peacock (teal) | |
| 5395 | Purple | |
| 5368 | Taupe | |
| 5348 | Periwinkle | |
| 5350 | Rust | |
| 5378 | Brown | |
| 5355 | Red | |
| 5301 | Cream | |
| 5310 | Navy |
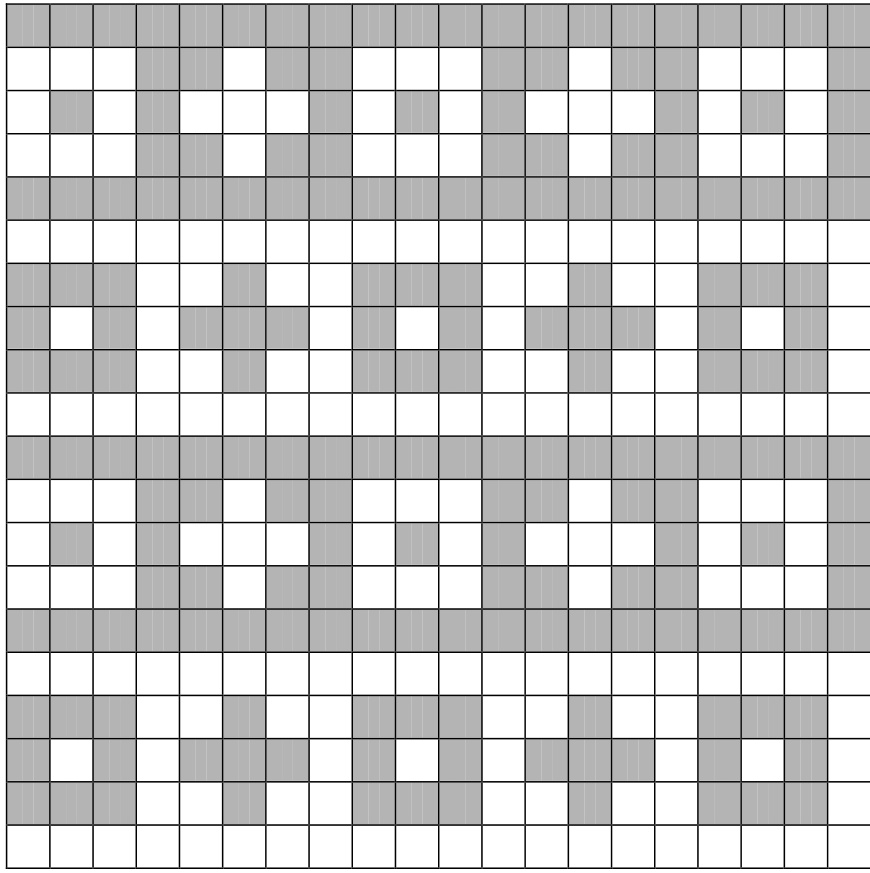
Design with your own colors
| 55 | 54 | |||||||||||||||||||||||
| Band 11 Multiple of 6 | ||||||||||||||||||||||||
| 51 | ||||||||||||||||||||||||
| 50 | ||||||||||||||||||||||||
| 48 48 Band 10 | ||||||||||||||||||||||||
| 47 46 45 | Multiple of 5 44 Band 9 Multiple of 4 Band 8 Multiple of 10 | |||||||||||||||||||||||
| 342 | ||||||||||||||||||||||||
| 41 | ||||||||||||||||||||||||
| 40 | ||||||||||||||||||||||||
| 39387 | ||||||||||||||||||||||||
| 37365 | ||||||||||||||||||||||||
| 3542 32332 Band 7 Multiple of 6 19 28 27126 Band 6 Multiple of 5 15242 2322 Band 5 Multiple of 6 20 19 18 Band 4 Multiple of 4 17 16 15 14 Band 3 13 Multiple of 5 12 11 10 987 Band 2 Multiple of 6 6 5 4 Band 1 3 Multiple of 5 2 1 | ||||||||||||||||||||||||
Creating your own design
You can use this pattern as a starting point to customize your own design. Use as few as two colors, switching background and foreground for each band. Or use as many colors as you desire. Use one pattern and repeat it. Or use a different pattern for each band. Here is information about the model scarf and ideas about how you can change it to suit you.
| ModelScarf | Customize | |
| Yarn | ClassicEliteFresco | Any yarn you like, although similarweightis simportant.You'll achieve better results if you use yarns from one line. |
| Colors | 12 colors | As few as 2 colors or as many as you like |
| Patterns | 11 five-row patterns, repeated | Onepatternrepeatedoverandover-oreachband different. |
| Needles | 16"circular,size 6 | Any size that works with your yarn. |
| Gauge | Approximately 5.5 stitches to the inch | Strive for a gauge that works with your yarn. |
Color
Choose a color or two to dominate. Yours might be predominantly blues or mainly warm colors. Pick colors that you like in combination. Choosing yarns from the same line is a good idea and will help ensure complimentary. colors and consistent gauge. Generally stay away from variegated yarn because it conceals rather than reveals pattern. The exception would be to use two or more striping yarns, such as Noro, for the background to get more color without using moreyarns.
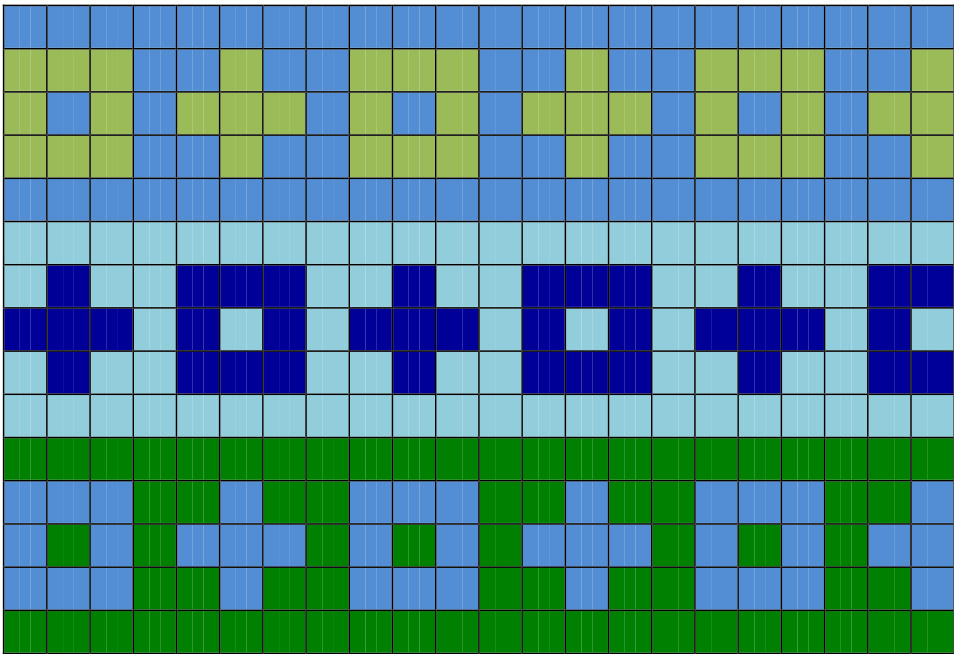
Pattern
Get some graph paper and start drawing! Create small, repeating patterns 5 rows high (or more or less). You could use 1 or 2 or 3 patters and just alter the color. Or you can use a different pattern for every band of the scarf. There are lots of sources of patterns online and in books. You need to ensure that your pattern fits in the number of stitches available. If you have a pattern with a 5-stitch repeat, but your total stitch count is 48, your numbers won't work out. A good way to proceed is to design your bands, and count the number of stitches in each repeat. Find all that aren't multiples of the others (if you have one 10-stitch repeat, you don't need to worry about your 5-stitch or 2-stitch repeats). Multiply a couple of the numbers and see what you come up with. If you end up with a design that doesn't work well with the rest of your count - for example, a 7-stitch repeat - you can shorten it lengthen it, or add or remove a space between pattern elements to make it work. The scarf I made is 60 stitches around. That count offers a lot of flexibility, allowing repeats of 2, 3, 4, 5, 6, 10, and 12 stitches. (You could also have repeats of 15, 20, and 30 stitches, but generally, you'll have smaller patterns, 6 stitches and under.)
Make a model
Unless you are very confident, adventurous, or wiling to frog, I recommend making a small pattern model if you are designing your own scarf. Use Magic Loop if you know how, or use DPNs. Try out your patterns and color combos to see if they work. CO about 20 stitches - your stitch count doesn't have to work out exactly for the model - you just want to get an idea how colors and pattern work together. This little model can help you decide which colors look good in the same row and in adjoining rows. And when you have it finished, it can serve as a guide to knitting your scarf. As its simplest, you could repeat the same pattern, and use as few as 2 colors, alternating background and foreground.
You can make small alterations, such as offsetting the pattern and adding a few colors, to add visual interest. Contrast light and dark; use several colors in the same family.
Get some graph paper and a rule and have fun designing your own scarf.
Sincelamusing12colors,acupcakeholdermakesagoodyarncaddy.
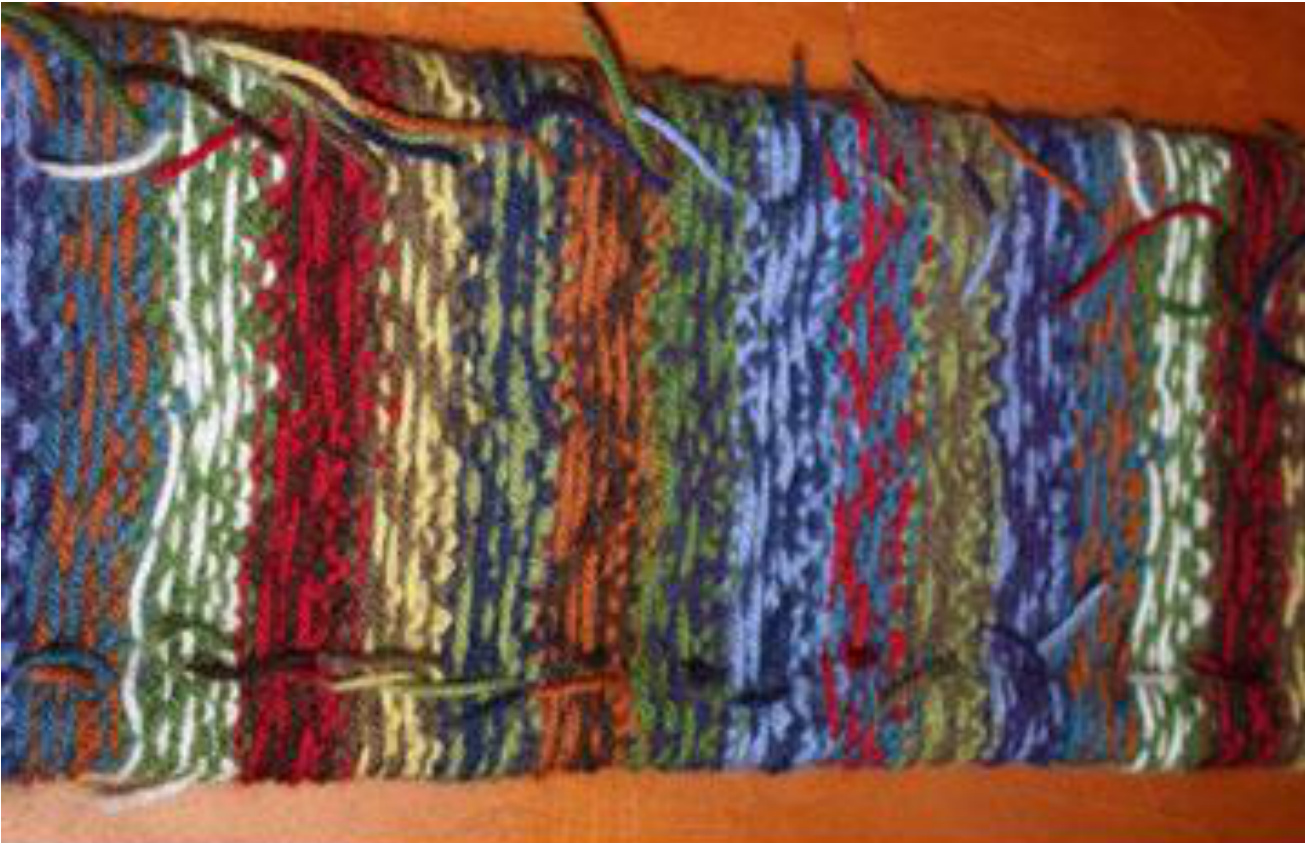
Theinsideof thescarf.All the ends areworkedin asIgo.


