HOLIDAY STOCKINGPATTERN
Patterncopyright $\circledcirc$ 2008 Barbara Kopacek and Pink Argyle (all rights reserved) See Terms of Use at end of pattern
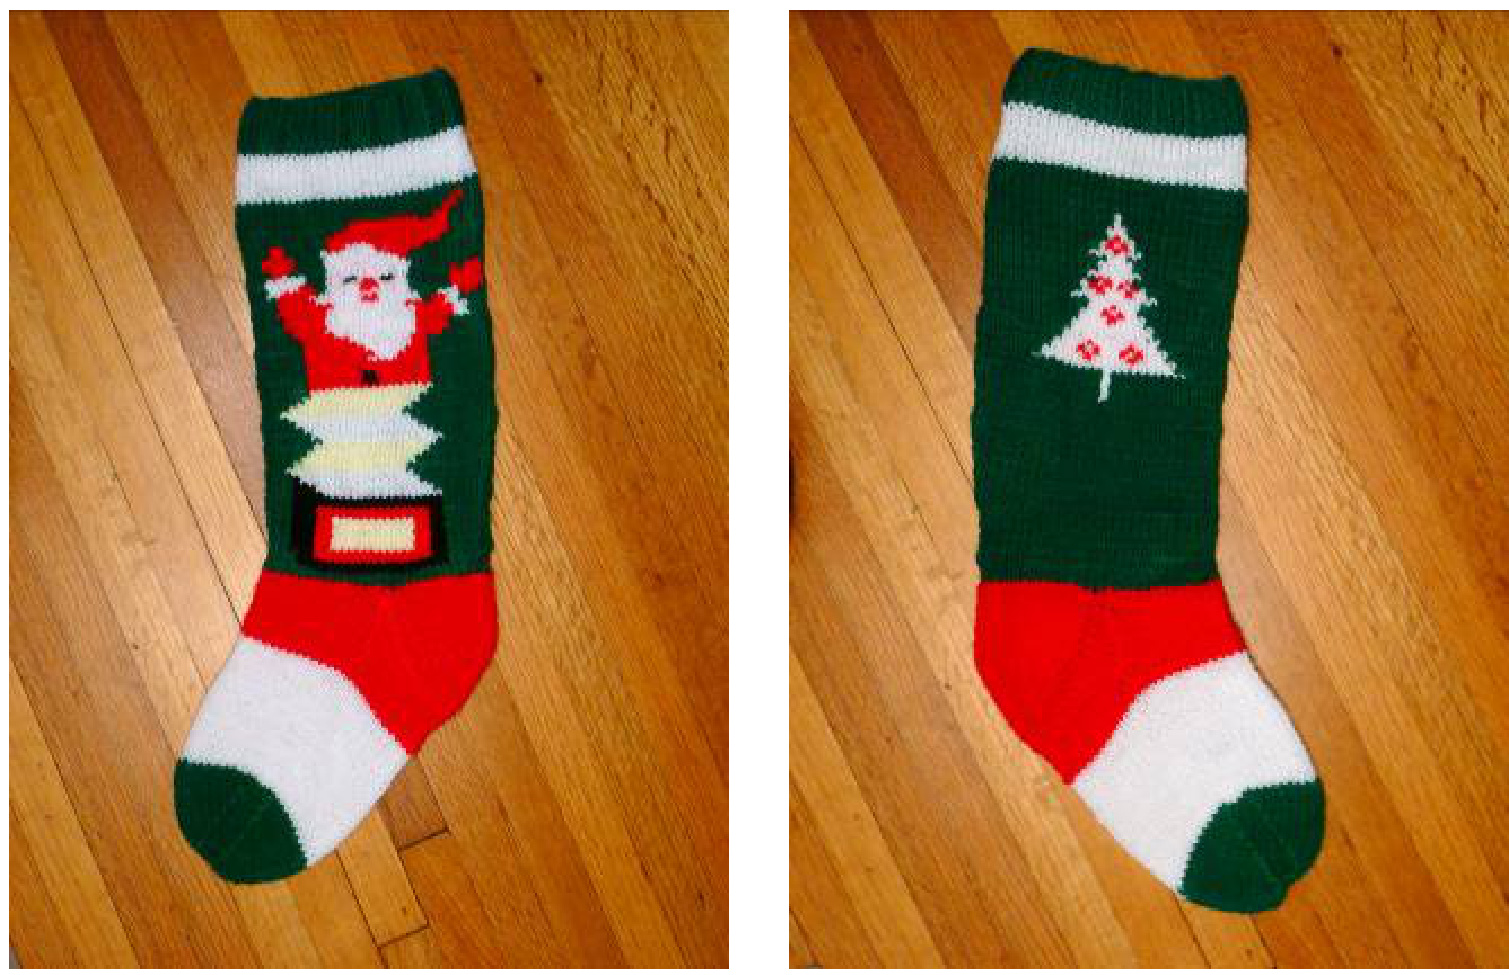
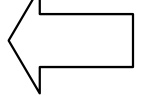
A friend came to me with a Holiday Stocking that had been knitted for her when she was a child by an elderly family friend who has since passed away. The original stocking was knitted flat, then stitched closed from toe to cuff; I chose to do it up with the leg knitted flat and then seamed, and the foot knitted in the round. Other than that, I tried to be true to the original. Difficulty level Moderate Finished length Approximately 22" from cuff to toe in sport weight yarn Yarn Anyfirmwashable colrfast acryli ya insor orworsted weight wrsted weight wil fcourse, give youalarer stocking) Green (main color) Red Light pink Yellow Black
Needles
Size 4 (small needle gives a tighter knit and firmer, less “drapey" stocking than you would get with larger needles). The leg of stocking is knitted flat and the foot is knitted in the round so you will need a set of size 4 straight needles or a 16" circular needle to knit the leg, plus 1 set of five size 4 double point needles or a second circular needle to knit the foot and toe. Gauge Not important; 10 st and 14 rows per $Z^{*}$ in sport weight Additional materials Stitch markers; you may want to use bobbins for small lengths of yarn; yarn needle for sewing back seam
Abbreviations
p-purl p2tog-purl 2 together k2tog-knit 2 together skp-slip-knit-passover (or if you prefer, use ssk-slip-slip-knit instead for left-leaning decreases) rnd-round pm-place marker sl-slip st-stitch dps-double point needles Cast on 60 stitches in main color (green) Ribbing Working back and forth on straight needles or one of the circular needles, complete 8 rows of k2, p2 rib in main color. Change to stockinette stitch Change to white and work 9 rows stockinete stitch (knit one row, purl back), ending with a knit row.
Place markers
Change to main color. Purl next row, placing stitch markers after each 10 stitches and place a distinct marker between stitches 30 and 31 to mark front center of stocking. This will make counting stitches and placing colors correctly a little easier. Stocking is knitted flat and seamed at the back. Go to Graph of Santa-ln-A-Box and Tree Motifs below.
GRAPHOFSANTA-IN-A-BOXANDTREEMOTIFS
Key for Pattern:
Begin at the bottom of the graph with Row 1.
A single dot is a stitch in the color shown; gray dots are a stitch in white, other colors are as shown. Each line of pattern shows 10 stitches, a space for the marker, then 10 stitches, space for a marker, etc. Extra space between 10-stitch sections of rows are just there to make reading the pattern easier. $\complement=$ Front Center of piece 人 $=$ decrease End of Pattern (52 stitches remaining). Go to next page to divide stitches and work heel flap. (CHRISTMAS TREE MOTIF SIDE)
After you have completed the pattern, you will begin using either the second 16" circular needle or switch to double-points. If using circulars, put a marker where the ends of the flat piece come together and join sides to begin working in the round with green. Work stockinette stitch in the round for one round, placing markers where the flat sides come together, and at then at each 13 stitches. As you knit the next round, reposition the stitches on your needles so you have K13-marker-K26; then K13 onto a second needle and knit the first 13 onto that needle so you now have 26 stitches on each of the two needles. You have now completed two rows (rows 71 and 72) in-the-round with green. The 26 stitches on the second needle will become the heel flap. (If using dps, you would divide stitches 13-13-26 if using a set of 4, or 13-13-13-13 if using a set of 5; other than that, instructions are the same.) Switch to red.
Heel Flap
Working back and forth on only the back 26 stitches on the second needle, work stockinette stitch back and forth for 13 more rows, ending in a purl row.
Turn Heel
With right side facing you, K15, skp, turn. Sl1, P5, p2tog,turn. SIl 1, K6, skp, turn. Repeat these two rows, increasing number of stitches worked by 1 each row, until alstitches are used up, end with right side facing you. You should have 16 stitches left on your needle.
Gusset
Sl1 stitch, k15, pick up and k7 along side of heel flap, pick up an extra stitch from the row below, where the heelflap and instep stitches meet (to avoid a hold), knit across the first needle's 26 stitches, again pick up an extra stitch from the row below, between where the instep stitches and the heel flap meet, and pick up and knit 7 stitches along the heel flap. You now have 58 stitches. If you're using dp needles, separate then as follows: 16 on needle 1, 26 on needle 2 (2 and 3 combined if using a set of 5) (instep), and 16 on needle 3 (4 if using a set of 5). If using circular needles, place markers at the beginning of the round (mid-back of piece), after 16 stitches, and after 42 stitches. Shape the gusset asfollows: Dec rnd: K to last 2 stitches before first marker (or last 2 stitches before end of needle 1 if using dps), k2 tog; knit next 26 stitches; skp, knit to end. You have decreased 2 stitches. Work1 rnd even. Repeat these two rounds 4 more times (you have decreased a total of 10 stitches, so you now have 48 stitches)
Foot
Change to white yarn and contiue kniting in the round for approximately 25 rounds (about 3 1/2 inches).
Toe
Change to green. Beginning at the center back, using dp needles: (needle 1) k13; (needle 2) k11; (needle 3) k11; (needle 4) k13. Continuing in the round, decreasing to shape toe as follows: Rnd 1: \*Needle 1: knit to last 3 sts, k2tog, k1; Needle 2: k1, skp, knit to end; rep from \* for Needles 3 and 4 (four sts decreased this round) Rnd 2: Knit Repeat rnds 1 and 2 four more times, then repeat Rnd 1 until 16 stitches remain. Cut a long tail and thread it through these 16 sts and draw them tight to close toe; tie off and weave end of yarn in.
Finishing
Being caretul to hide loose ends in stitches ot the same color, knot, weave in and trim all loose ends. Using mattress stitch and matching yarn, seam the back of the leg. Blockgently. If you wish, crochet or knit a chain or tab and attach it to the top of stocking, at the back seam, for hanging. Stitch name in red or green yarn on the white band around top of stocking if you wish to personalize it.
Terms of Use
This pattern is free for unlimited personal, noncommercial use. You may print it for your own use, but you may not reproduce or sell the pattern, or sell items knitted from the pattern. If you are interested in any other use of the pattern or have questions about these terms, please contact barb at pinkargyle dot com. Your use of this pattern constitutes your agreement to these terms.


