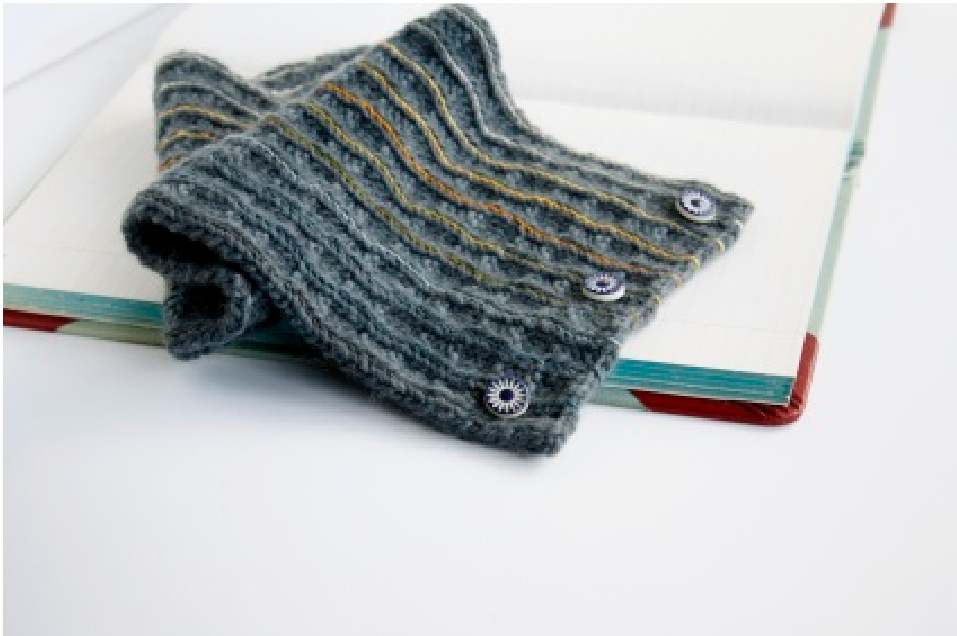
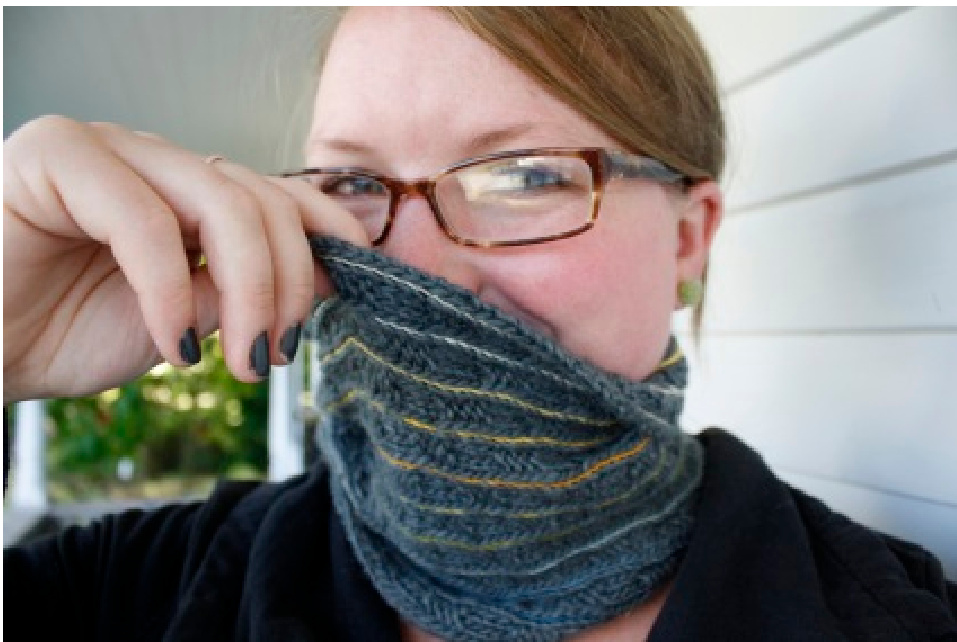
the cursive cowl

I first encountered this stitch in a gloriously simple pattern for fingerless gloves, and I was so smitten with it that I knit at least three pairs of those gloves before turning the stitch on its side and working it into the pattern for my Button Up Gloves. The original author called it "the wave stitch," but, when turned sideways, I think there's something so elegant about the way those rows of knit stitches scroll along the fabric that I've nicknamed it "the cursive stitch." Old-fashioned, eloquent, and comfy as can be, that stitch gives this cowl a lovely drape, while still holding its shape against the wind. To that backdrop, I added buttons and embroidery (worthy additions to almost any project). While I went for a gradient look when selecting my embroidery thread, you could work two or three colors in a striped pattern, or simply use one to give your cowl the slightest whiff of personality. Honestly, even a bit of embroidery floss in the same color as your yarn would add that much texture and interest and would look, I dare say, dashing. But I digress. My hope is that you'll find this project simple and satisfying. Perhaps you'll learn a new technique or two along the way. And if you have any questions, any at all, please feel free to email me: thea@twobluebuttons.com. Most of all, though, I hope that you have fun. Enjoy!
Materials
Brown Sheep Lamb's Pride (15% Merino, 85% Wool), 1 skein Pacific Pine US 8 needles, or size needed to obtain gauge 3 buttons, 1/2" or larger Tapestryneedle Sewingneedle 6-ply embroidery thread in desired colors Gauge 16 sts and 21 rows = 4" Dimensions Width: 6" Length: 21"
Abbreviations
Co=caston WS = wrong side of your cowl RS = right side of your cowl yo (yarn over) = bring the yarn to the front of your work as if to purl, but (surprise!) knit the next stitch. (This will add a stitch, while simultaneously creating a buttonhole.) p2tog (purl 2 together) = with your yarn in front, insert your right hand needle into the next 2 stitches as if to purl. Now, purl both of those stitches as one, and move on. (This decreases. your work by one stitch, thereby compensating for the one you added to make the buttonhole.) BO =bind off
Care
Hand wash with mild soap. Lay flat to dry.
the pattern
CO 33 sts. Row 1 (WS): p1, repeat \*p4, k2\* to last stitch, p1 Row 2 (RS): k1, repeat \*k4, p2\* to last stitch, k1 Row 3: repeat row 1. Row 4: repeat row 2. Row 5 (buttonholes): p5, yo, p2tog, p3, k2, yo, p2tog, p3, k2, p4, yo, k2tog Row 6: k1, repeat \*p2, k4\* to last stitch, k1 Row 7: p1, repeat \*p4, k2\* to last stitch, p1 Row 8: repeat row 6. Repeat rows 1-8, substituting Row 7 for the buttonhole row, until cowl measures approximately 21". BO on either Row 4 or 8 (whichever is closest), continuing to work the pattern as you bind off. Weave in ends; block, if desired.
Embroidery
Get your thread out. If you're using a lot of colors like I did, you may find it helpful to lay them out and fiddle with them a bit to be sure that you're happy with the arrangement before you start sewing. Once you're sure, start sewing!
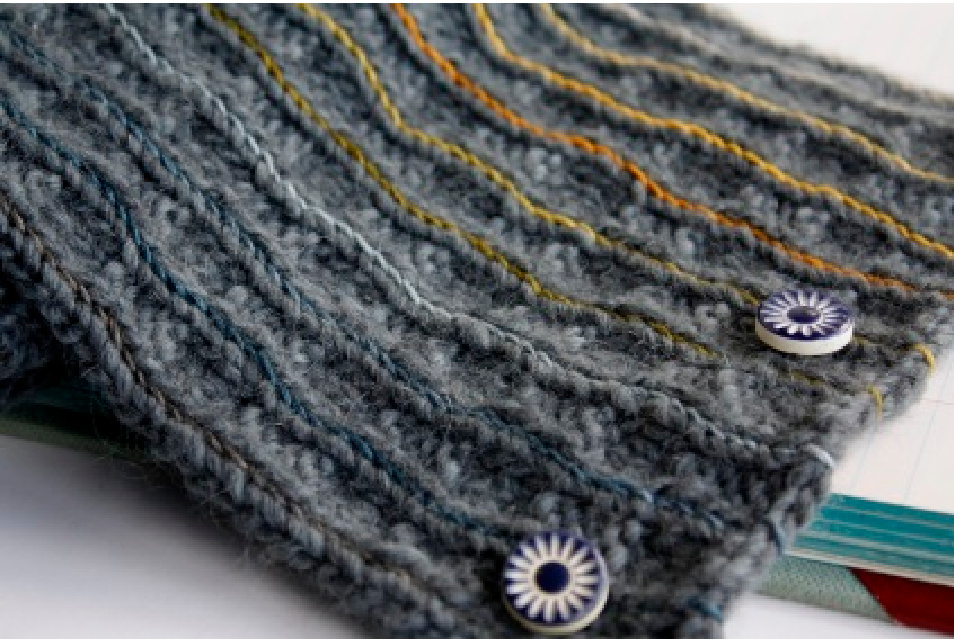
For this part, we'll be using the outline stitch and we'll be working along those pretty knit stitches. If you gently pull the stitches apart (with the bind off edge of the fabric toward you), you should be able to see what looks like a ladder running up the column of knit stitches. You'll be working up this, moving your needle in and out in the spaces between the “rungs."
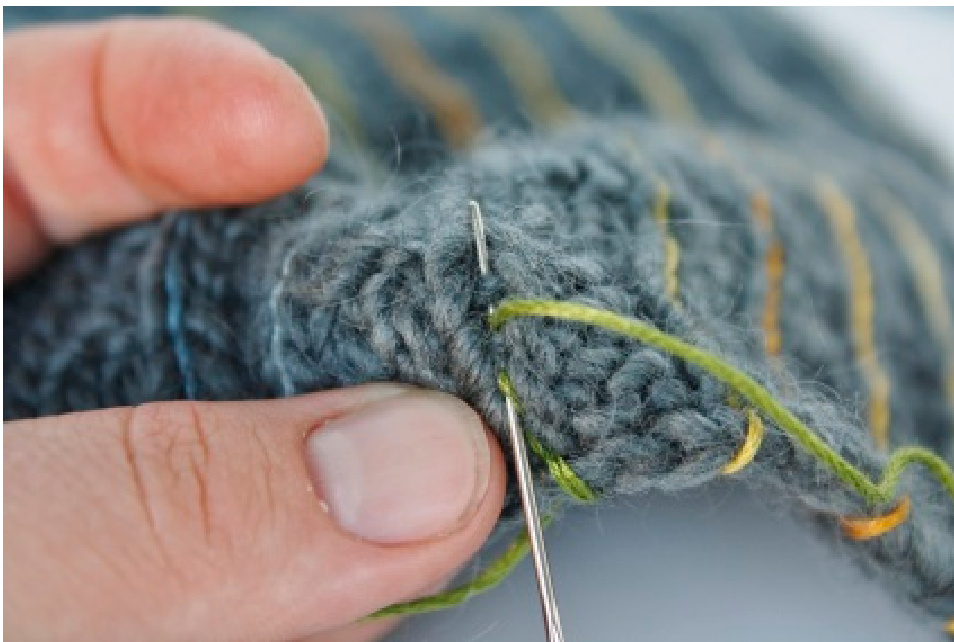
Cut a piece of thread about 2' long. This won't get you to the end of your work, but anything longer will be - let's face it - awkward. Thread your needle, and begin with the bind off edge of your work. Bring thread up through the stitch nearest the end, and back down around the edge ofyourwork. Now bring it up through the 2nd stitch from the end, and back down through the first, and so on. It should look a little like this:
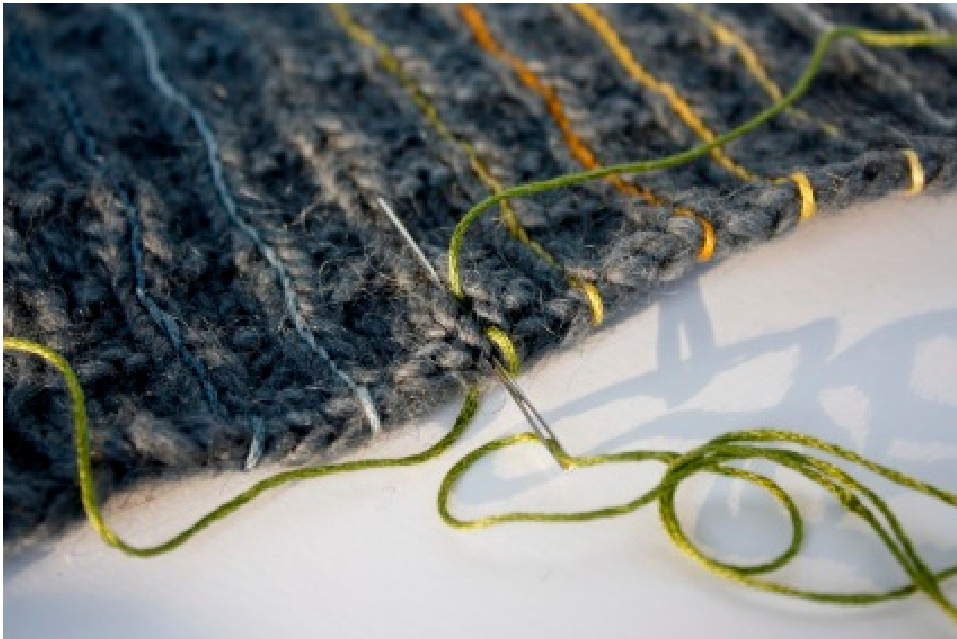
Continue on in this fashion until you run out of thread. Join a new piece and work to the end, dodging artfully around buttonholes (on the wrong side of your fabric) by sneaking your thread up through the yarn at the top of each hole, weaving carefully so it won't show through on the right side. Once you've embroidered to your satisfaction, cut threads, weave in ends and tidy things up a bit. Attach buttons. Call it done. Put it on!
Pattern and Photographs @ Thea Rosenburg. Pattern is intended for personal use only; please do not duplicate or sell any part of pattern without previous consent.


