
Yarn: Luomu-Puffa DK or some other yarn of same weight. You'll need 50 - 75 grams depending on how large headpiece you want to knit. Needles: 5 mm short (40 cm) circular needles and double pointed needles of same size. Gauge: 21 st or 30 rows per 10 cm in stockinette stitch.
@ Crafting Koukuttaja Marika Lepisto mai@iki.fi
Legend:

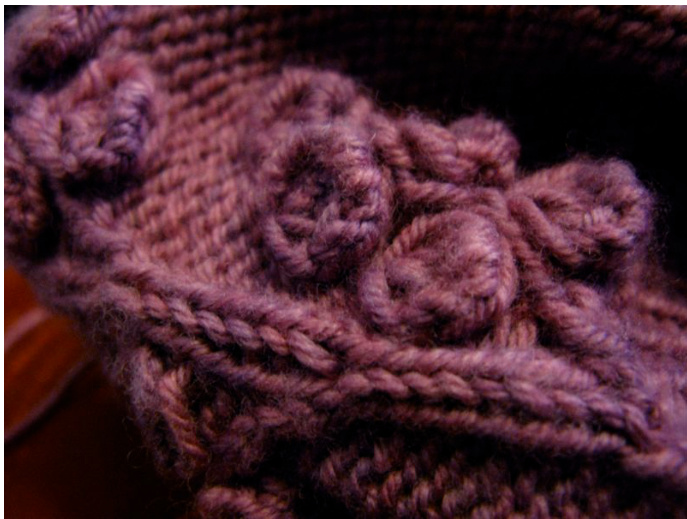
RT/PRT = put one st on to cable needle and hold in back. Knit next stitch and then knit the stitch on the cable needle. LT/PLT = put one st on to cable needle and hold in front. Knit next stitch and then knit the stitch on the cable needle. cabpr = put one st on to cable needle and hold in back, purl next stitch and knit the stitch onthecableneedle. bobble = knit, purl, knit, purl, knit in to same stitch. One stitch multiplies by five. Turn work, purl 5, turn work, knit 5, turn work, purl 5. Lift second, third, fourth and fifth stitch one by one over the first one. Turn work and knit one remaining stitch from the back of the loop. You can also replace bobbles with pearls if you want to. cabpl= put one st on to cable needle and hold in front, purl next stitch and knit the stitch on the cable needle. k1/p1 = knit k-1-b/p1-b = knit from the back of the loop p1/k1 = purl

@ Crafting Koukuttaja Marika Lepisto mai@iki.fi
Pattern:
By this instruction you can knit either beanie shaped headwear or more slouchy one. Instructions concerning slouchy hat are written in cursive. Tighter beanie shaped headwear instructions are written in lighter font colour. Instructions for all sized hats are written in noncursived black font.
Ribbing:
Cast on 90 stitches. Do knit 1, purl 1 -ribbing (all stitches from the back of the loop) for 10 rows. You might want to mark row changing point with stitch marker.
Increasing row:
Slouchier hat: \*knit 3, M1 (increase one stitch by picking up yarn loop from previous row and knitting it from the back of the loop), knit 1\*, repeat \*-\* 21 times. Knit remaining 2 stitches. You should have 112 stitches on your needles at this point. Beanie shaped hat: \*knit 9, M1\*, repeat \*-\* 9 times. You should have 100 stitches on your needles at this point.
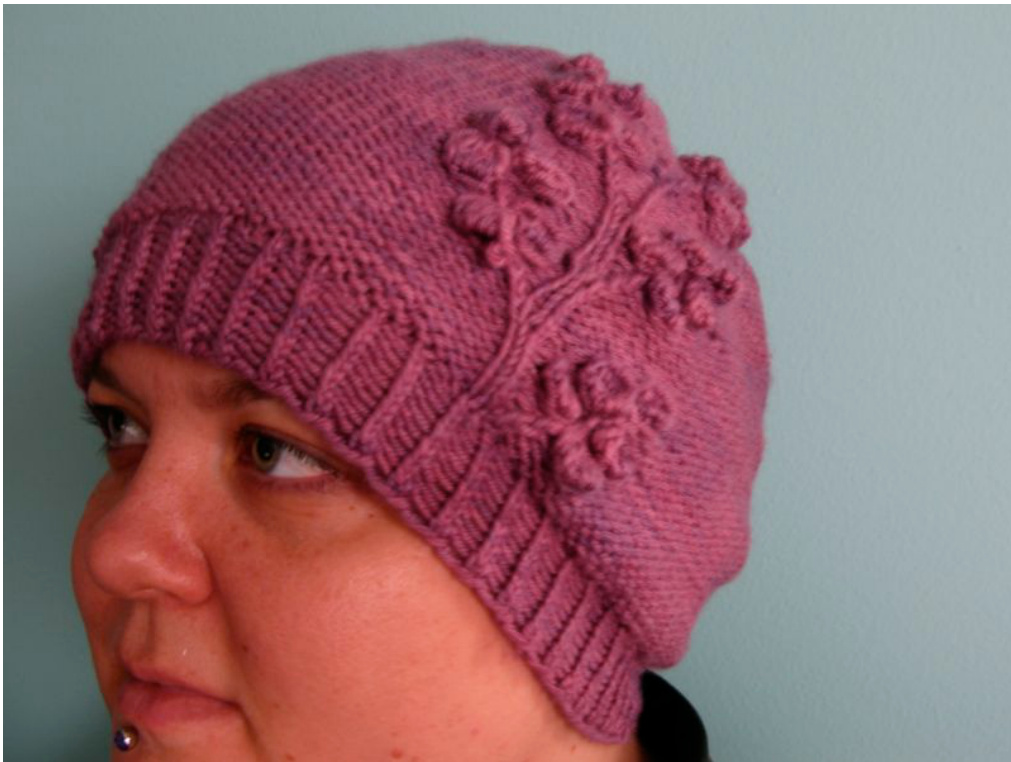
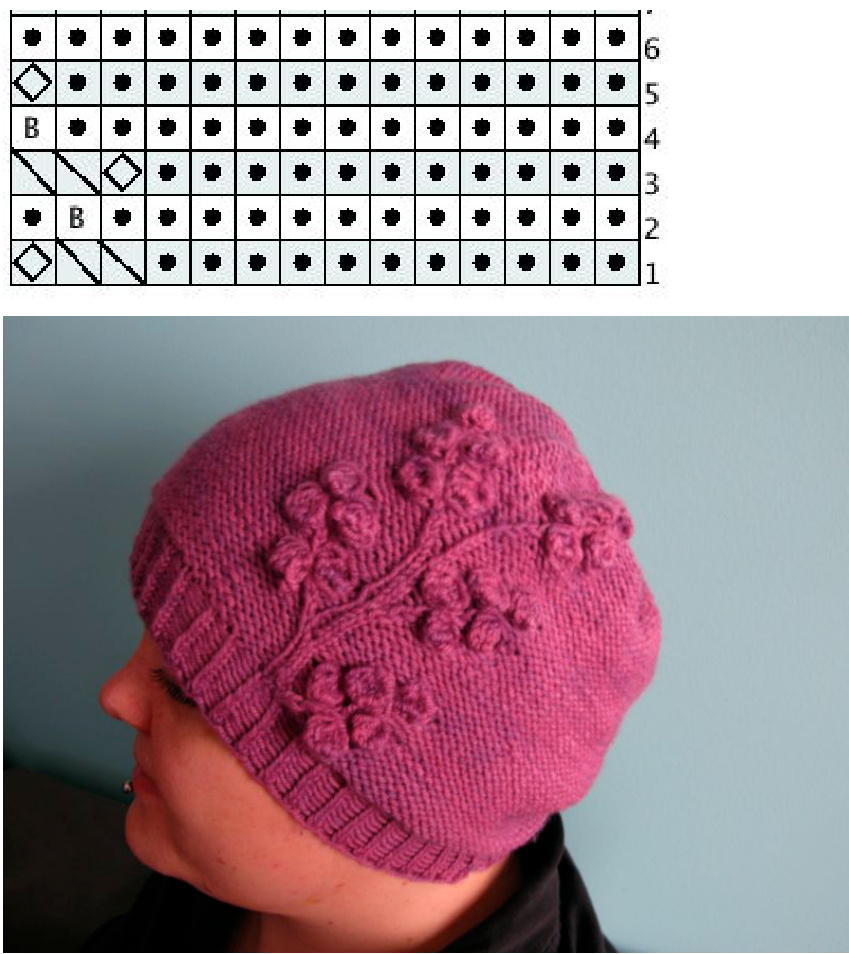
Flower branches:
Motif for flower branches is placed to begin 20 stitches from row changing point. In one row you should purl 20 stitches, knit motif from chart in question and purl to the end of row. Motif is 14 stitcheswide. Knit chart 1 once no matter what sized headwear you are knitting. Chart 1:
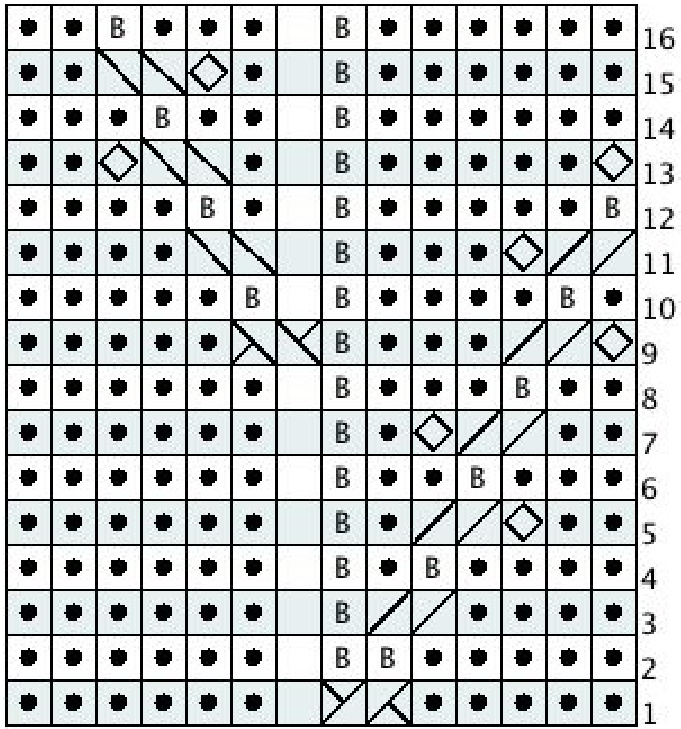
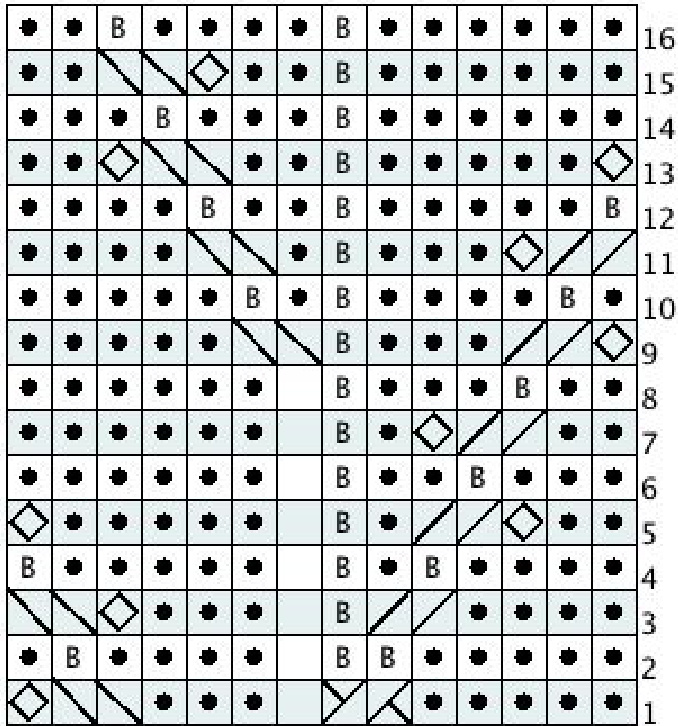
If you are knitting the slouchier hat, knit next charts 2 and 3 (once).
Chart 2:
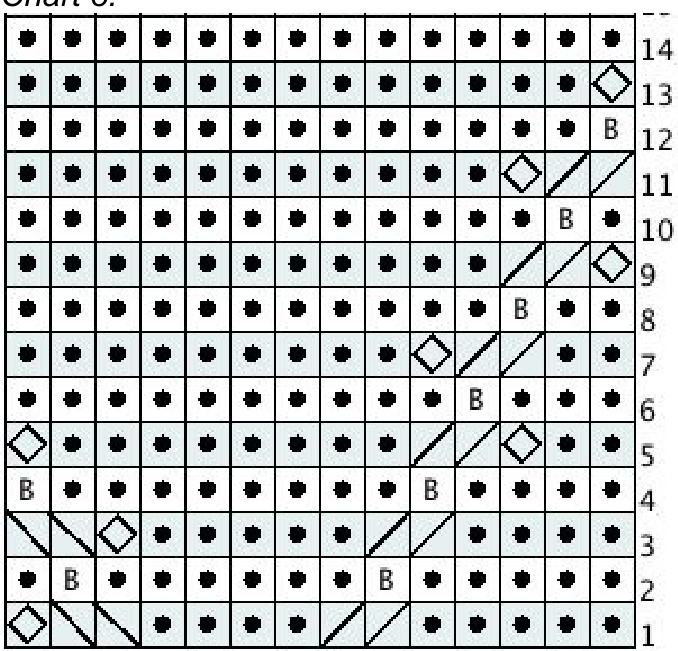
)u are knitting more fited beanie, knit once charts 4 and 5 after knitting chart
Chart 4:
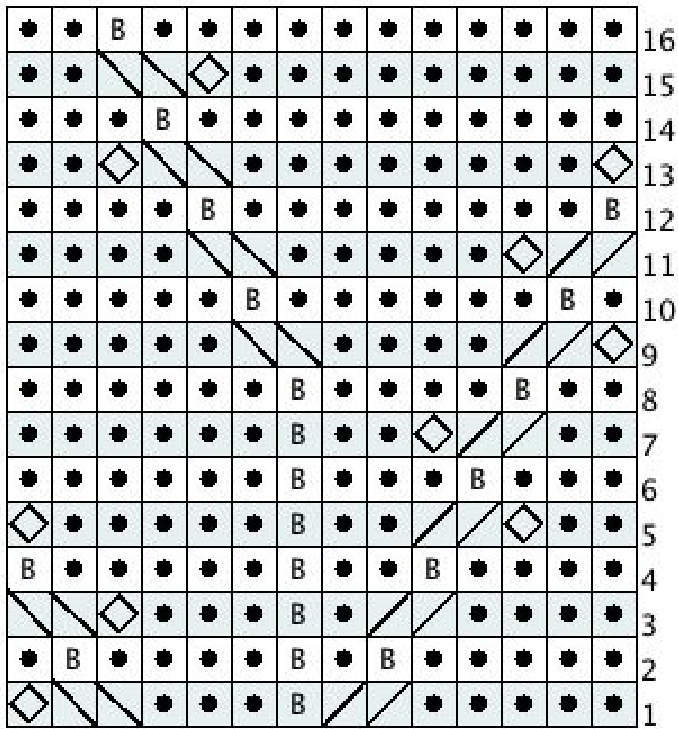
Chart 5:
Decreasing rows:
Slouchier hat:
1. row: \*purl 6, purl 2 together\*, repeat \*-\* until the end of row. 2. - 3. row: purl all stitches. 4. row: \*purl 5, purl 2 together\*, repeat \*-\* until the end of row. 5. - 6. row: purl all stitches. 7. row: \*purl 4, purl 2 together\*, repeat \*-\* until the end of row. 8. row: purl all stitches Start using the double pointed needles. 9. row: \*purl 3, purl 2 together\*, repeat \*-\* until the end of row. 10. row: purl all stitches 11. row: \*purl 2, purl 2 together\*, repeat \*-\* until the end of row. 12. row: purl all stitches 13. row: \*purl 1, purl 2 together\*, repeat \*-\* until the end of row. 14. row: purl all stitches 15. row: purl 2 together until the end of row. 16. row: purl all stitches 17. row: purl 2 together until the end of row. Tighter beanie: 1. row: \*purl 8, purl 2 together\*, repeat \*-\* until the end of row. 2, 4. and 6. row: purl all stitches. 3. row: \*purl 7, purl 2 together\*, repeat \*-\* until the end of row. 5. row: \*purl 6, purl 2 together\*, repeat \*-\* until the end of row. 7. row: \*purl 5, purl 2 together\*, repeat \*-\* until the end of row. Start using the double pointed needles. 8. row: \*purl 4, purl 2 together\*, repeat \*-\* until the end of row. 9. row: \*purl 3, purl 2 together\*, repeat \*-\* until the end of row. 10. row: \*purl 2, purl 2 together\*, repeat \*-\* until the end of row. 11. row: \*purl 1, purl 2 together\*, repeat \*-\* until the end of row. 12. row: purl 2 together until the end of row.
'arn and pull it through remaining stitches. Weave all ends and enjoy your ha


