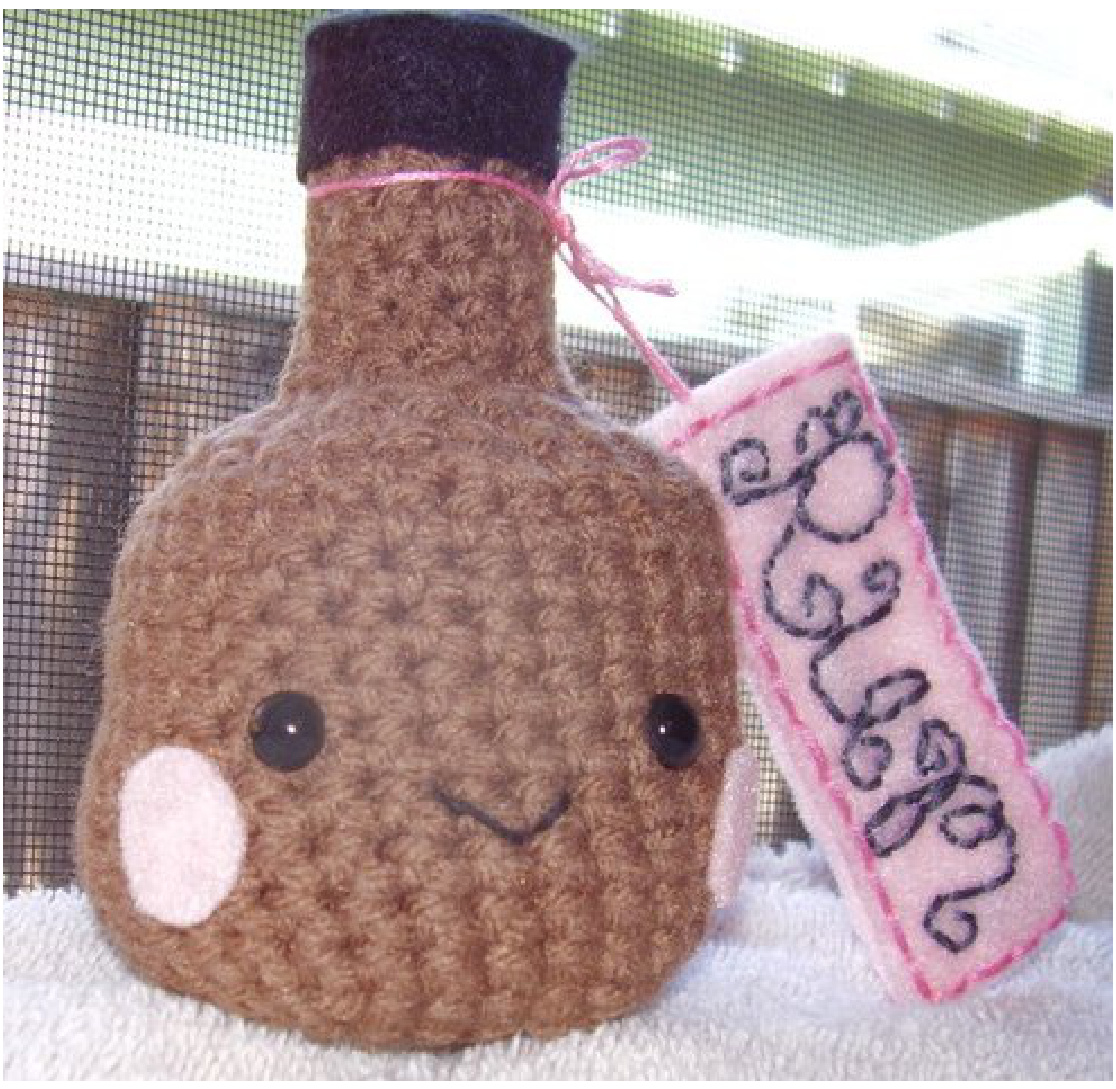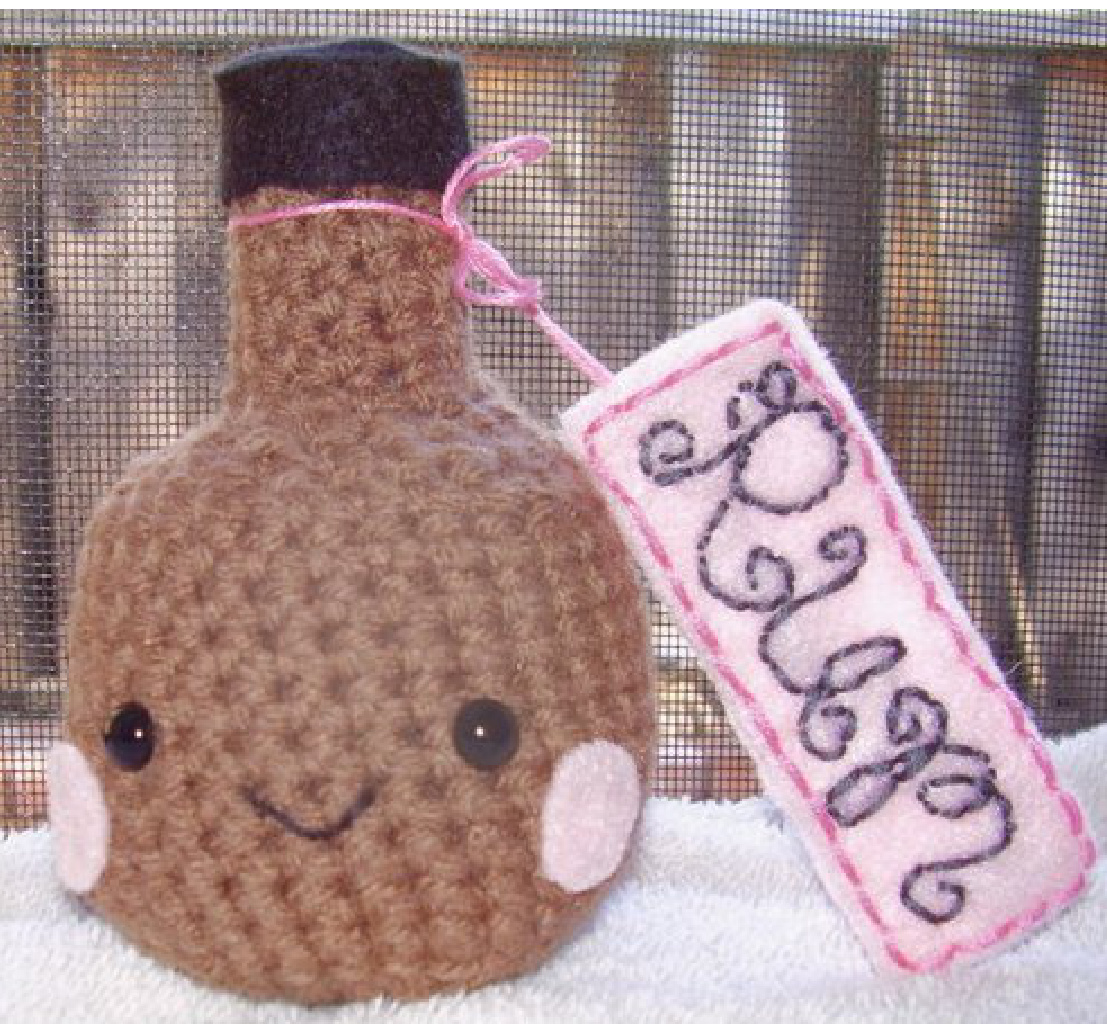
Crochet Amigurumi Rum Bottle Pattern by Tiffany Evans Beachbunnysales@gmail.com http://beachbunny.etsy.com http://www.ravelry.com/designers/tiffany-evans Patterns are for personal use only. You may not sell a creation from this pattern. Ifhave any questions or need help with this pattern, please email me and I'd be happy to help! I'd also like to thank all my wonderful pattern testers $\circledast$
Abbreviations:
ch $=$ chain $\;\mathbf{{s}}\mathbf{{c}}=$ single crochet $\mathsf{s t}=$ stitch Dec $=$ decrease
Supplies: -F Hook
- Any color yarn. You can really be creative on this part, use brown for gold rum, gray for silver rum, white for coconut rum, yellow for mango rum etc. -Stuffing - Safety eyes. Or you can use felt/embroidery. - Felt for the tag, the bottle cap, and the cheeks. - Embroidery thread to embroider "Rum" on the tag, for the bow, and the mouth. - A stitch marker, I use a safety pin and it works perfect. This pattern is wrtten in the round, with no joining, and working from bottom to top.
The body:
-round 1: ch 2, 6 sc in 2nd ch from hook (6) -round 2: 2 sc in each sc around (12) -round 3: \*sc 1, $^{2}\,\mathsf{s c}^{\star}$ in each st around (18) -round 4: \*sc 2, $^{2}\,\mathsf{s c}^{\star}$ in each st around (24) -round 5: \*sc 3, $^{2}\,\mathsf{s c}^{\star}$ in each st around (30) -round $6.14:^{\star}{\tt s c}\;30^{\star}$ around (30) -round 15: $\star_{\tt S C}3$ , dec $1^{\star}$ (24) -round 16: \*sc 2, dec $1^{\star}$ (18) - You might want to insert the safety eyes and embroider the mouth here, also start to stuff. You can add weights at the bottom either with pellets, pennies, anything really. $\star_{\tt S C}\ 1$ $1^{\star}$ -round $18–23:\;^{\star}80$ $12^{\star}$ around (12) - Finish stuffing. -row 24: dec allthe way around, FO. Dont worry about it looking perfect here, the black cap will cover it. Place your black felt piece on top of the bottle neck (where the cap would go) and trace the circle size with a pen/pencil or just cut it out. Then cut out a strip that is long enough to wrap around the top. Glue your circle to the top, then glue your strip all the wayaround.
Cheeks:
Cut out 2 circles with the pink felt and glue on the cheeks.
Take your pink felt and write the word “Rum" on it with a pen. You can write in cursive, block lettering, regular, whatever is easiest for you. Then cut out a rectangle around the lettering to be the front of your tag, then cut another piece the same size for the back. Embroider over your letting using your favorite stitch, I used the back stitch. You don't have to embroider it if you don't want to, you could also:
-Spell out rum in glue, then glitter the lettering. -Paint. -Glue the lettering on with yarn. -Buy those foam letter cut-outs and just glue those on. For the bow: Tie a bow using embroidery thread, leaving 2 long tailsthat will be glued in between the 2 peices of felt on the tag. Then take your other piece of pink felt, (make sure to glue the ends of the bow in the middle of the 2 pieces of felt!) and just whipstitch it to the first. You can put a few drops of glue to hold them together, it just makes it a litle easier.