Thorin's Hooded Cowl
Supplies: 530+ yards of a worsted weight yarn (weight of yarn doesn't effect finished size all that much, it just results in a difference in density of the finished fabric) Size 10 US 24" circular needle 1 size 10 US straight needle, or DPN (if you are a tight knitter you may want an 11 or 12, this is for the bind off) Abbreviations used: k - knit p- purl YO - yarn over PM - place marker SM - slip marker Gauge: Gauge really isn't a huge issue with this design, as the cowl section is very loose with lots of drape, and the hood is worked flat, so you can try it on as you go and see how deep you would like it to be. My samples measured at around 4.5 stitches by 5 rows per inch in the round and 4.5 stitches by 6 rows in the flat stockinette section. There are variations for the cowl section of this pattern. Cast on 140 stitches in your favorite cast on. I use a long tail cast on, but any stretchy style should work fine. Join being careful not to twist.
| Variation 1: | Variation 2: | Variation 3: |
| k 1 round | k 1 round | p 1 round |
| p 1 round | p 1 round | k 1 round |
| k 2 rounds | k 2 rounds | p 2 rounds |
| p 3 rounds | p 1 round | k 3 rounds |
| k 5 rounds | k 3 rounds | p 5 rounds |
| p 8 rounds | p 1 round | k 8 rounds |
| k 13 rounds | k 5 rounds | p 13 rounds |
| p 21 rounds | p 1 round | k 21 rounds |
| k 13 rounds | k 8 rounds | p 33 rounds |
| p 8 rounds | p 1 round | (85 rounds worked) |
| k 5 rounds | k 13 rounds | |
| p 3 rounds | p 1 round | |
| k 2 rounds | k 21 rounds | |
| (85 rounds worked) | p 1 round k 13 rounds | note: for a deeper hood you will need |
| to make a larger cowl. The sample made | ||
| p 1 round | for Variation 1 is a cast on of 140 stitches, | |
| k 8 rounds | creating a 70 stitch hood. | |
| p 1 round | ||
| k 5 rounds | ||
| p 1 round | sample made for Variation 2 is a cast on 0 | |
| 120 stitches, creating a 60 stitch hood. | ||
| k 3 rounds | ||
| p 1 round | I would not recommend doing fewer thar | |
| k 2 rounds | ||
| 120 for this project, the resulting hood | ||
| (95 rounds worked) | may be too shallow. |
like a shorter cowl, eliminate the rounds in bold type in the variations For a longer cowl, the formula used to get the row repeats is Fibonacci Numbers. Take the last two numbers in the sequence and add them together. (21 + 33=54) etc. Just remember you will need more yardage to do this. Once you have your cowl to the length you desire, remove the marker and bind off 70 stitches on a right side round. From here, you'll be working flat. k11, PM k 24, PM (this should be the center back of the hood) k 24, PM k11 turn k11, SM p 48, slipping center marker as needed k11 This gives you an 11 stitch wide garter stitch edge. Feel free to use this 11 stitch border to do a simple cable repeat or some other decorative stitch. This is your playground. Have fun. of stockinette in the above fashion. (for a deeper hood, add rows here) Begin increases: Row 1: knit to one stitch before the center stitch marker YO k 1, SM k 1 YO k remaining sts Row 2 and all remaining even rows: p, remembering to k the 11 border stitches on either end. Row 3: knit to one stitch before the yarn over of the previous row YO k3, SM k3 YO k remaining sts Row 5: knit to one stitch before the yarn over of the previous row YO k5, SM k5 YO k remaining sts Work all remaining odd rows, adding yarn over increases one stitch before the previous yarn over before the center marker, and one stitch after the previous rows yarn over after the center marker. This should increase the center knitted section by 2 with each pass until you reach the edge of your 11 stitch garter stitch border. At any time during these increases that you feel the hood is deep enough for you, discontinue the increase section and flip the project so the purl side is facing you. Fold your hood flap in half, right sides together, and using the straight needle or DPN do a 3 needle bind off from the front edge of the hood to the back. I pulled the extra loop of the circular needle out of the center back of the project to facilitate the 3 needle bind off. Three Needle Bind Off: I don't know how others do it, but this is how I do it. Holding the two halves together knit through the front loop of one stitch on each needle, knitting the two stitches together. Knit the next pair of stitches together and pass the first stitch on the straight needle or DPN over the second stitch. Continue in this fashion until you bind off all stitch pairs. 3reak the yarn, pull the tail through the last stitch and weave in all end NOTE: If you are versed in the ways of kitchner stitch, this will give you a seamless join. Tassel: To get the two tone tassel I held the two colors together and wrapped them around my spread fingers about 2 times. For the single color tassel I wrapped about 44 times. I cut a length of yarn double what I wanted for the length of the tassel string. I folded it in half and tied it through the middle of the wraps of yarn on my hand to secure it. I then wrapped yarn around the upper one quarter of the tassel a number of times with another length of yarn and tied it with a square knot. I used a tapestry needle to weave the ends of the wrapped bit around and through the wrapping to secure it. TIP: If you are using a slick yarn or are afraid the knot could work free, put a dab of fabric glue on the knot and allow it to dry. Clip the ends of the tassel, and tidy them up if you want to. Thread one end of your long string through the tip of your hood, and the other end through a couple stitches over from the first. Turn the hood inside out and tie a knot in the ends to secure it to the hood. Again, use a dab of fabric glue to secure the knot if you so desire. Block if you want to. Wear and keep warm! Starbright Blessings! \~Summer Star
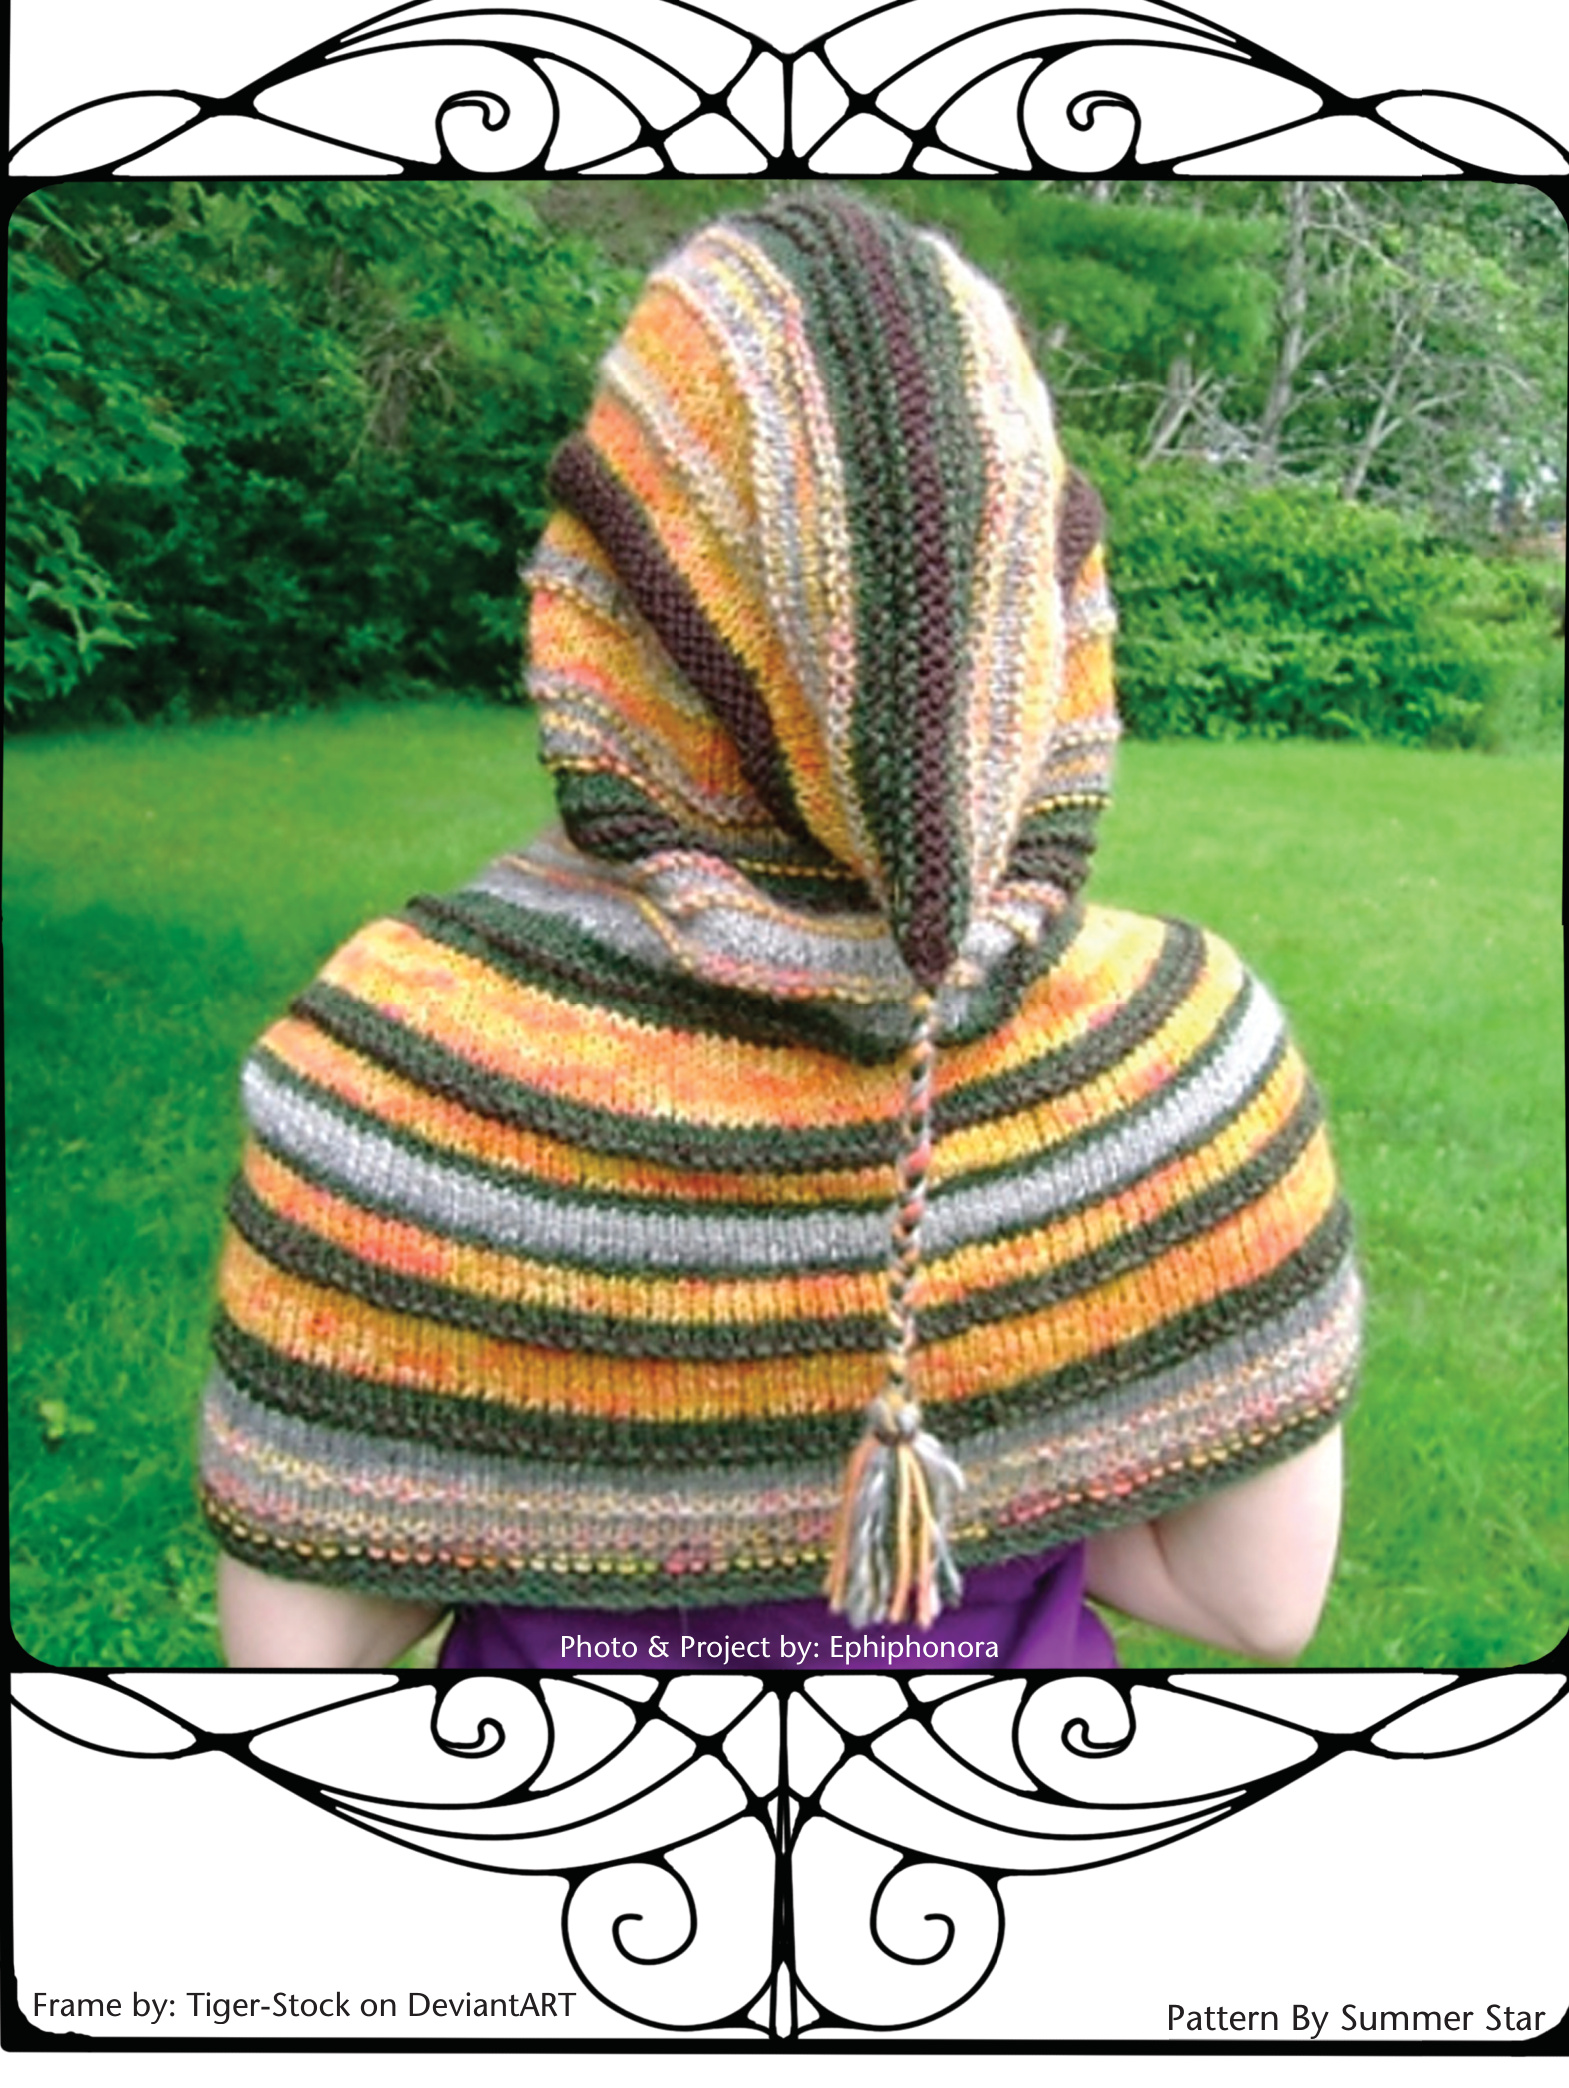
About the designer: Summer Star is a tattooed misfit who lives in the beautiful PNW with her Viking and a cat named Grover. She knits, spins, crochets and sews. She also loves to dabble in photography. A heartfelt thank you goes out to Jenefur for her help testing the pattern and to SquidWidget for her read through to makes sure I didn't make a fool of myself, and Ephiphonora for letting me use her photo for the cover. @ StarGrrl Spinworks, Summer Star. This pattern is free to distribute, if proper credit is given.