f you see a faery ring In a field of grass, Very ligh ly step around, Tiptoe as you pass: Last night faeries frolicked there, And they're sleeping somewhere near. William Shakespeare
Tuilich Faery Ring
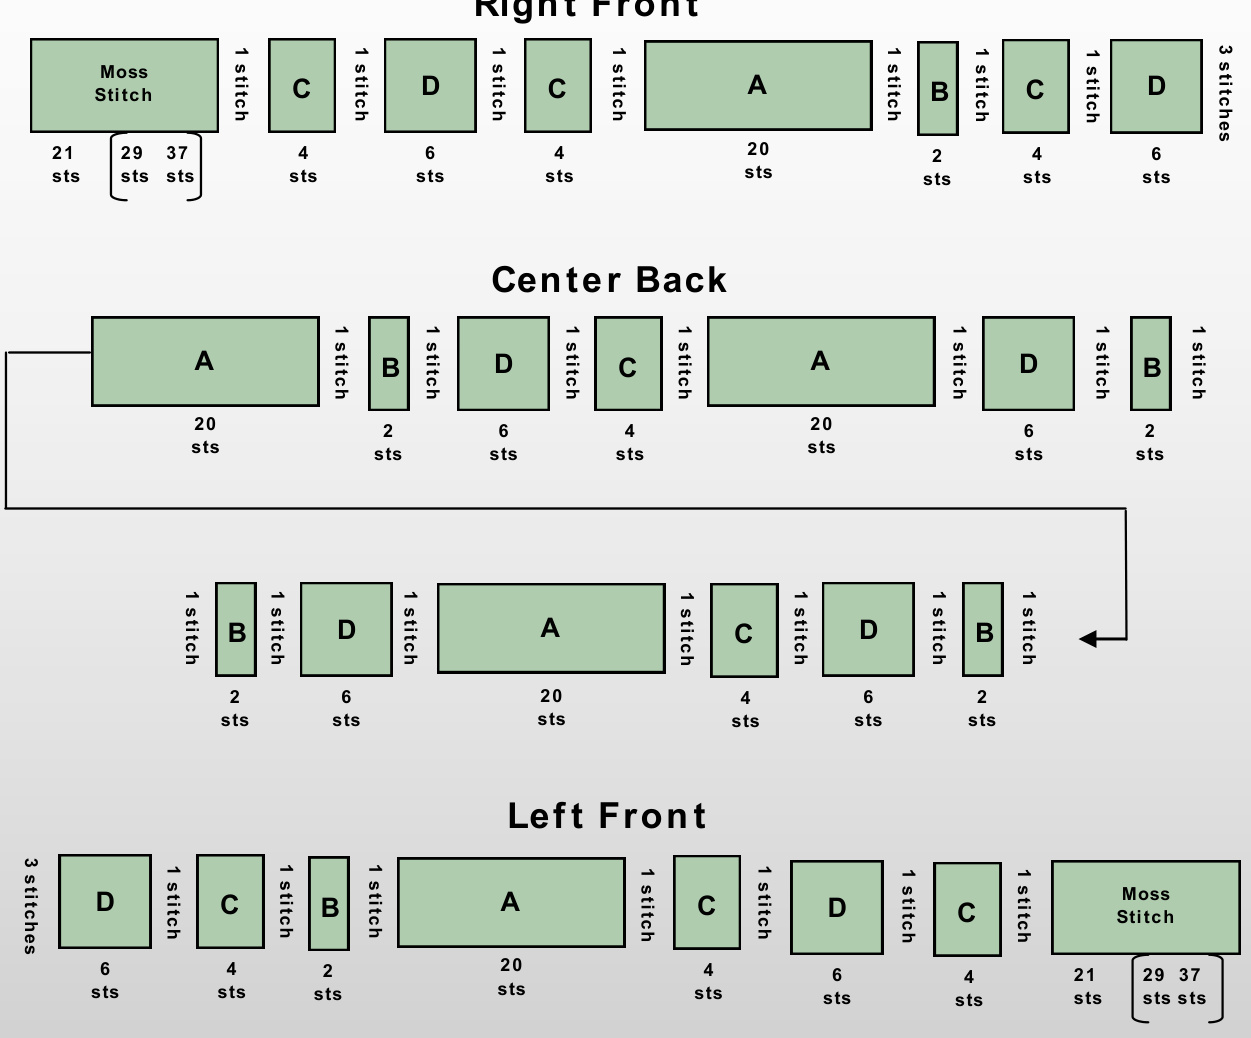
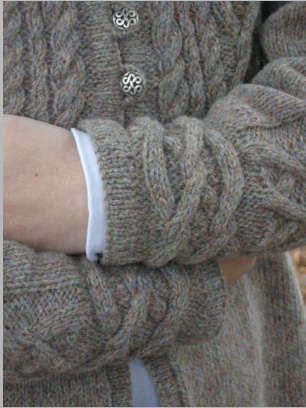
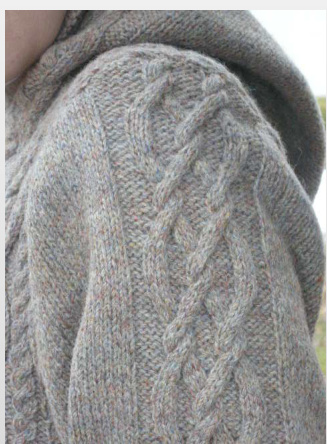
Bodice Cable Arrangement
Right Front
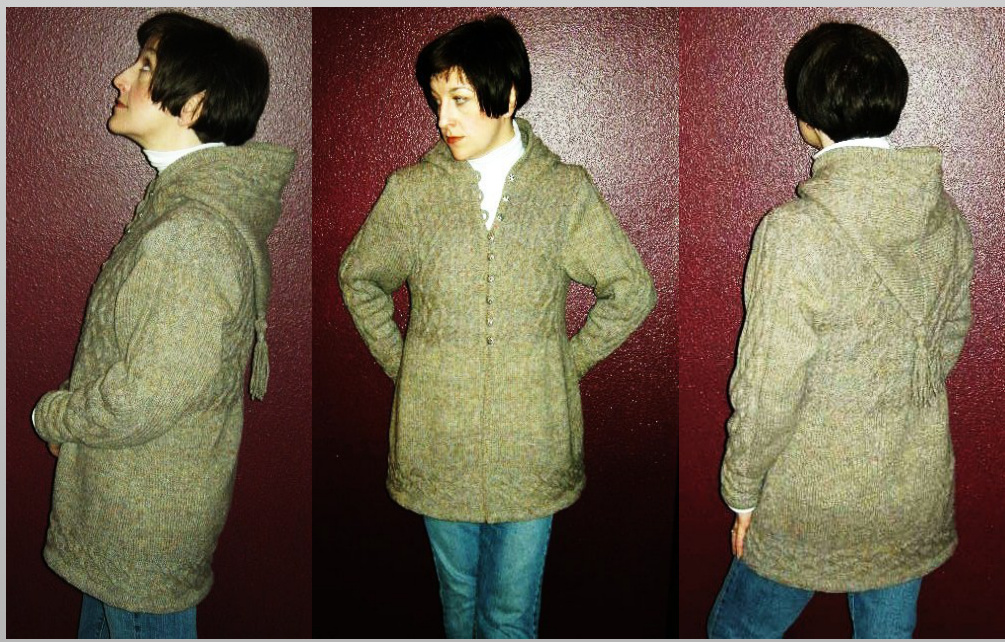
Tuilich Faery Ring
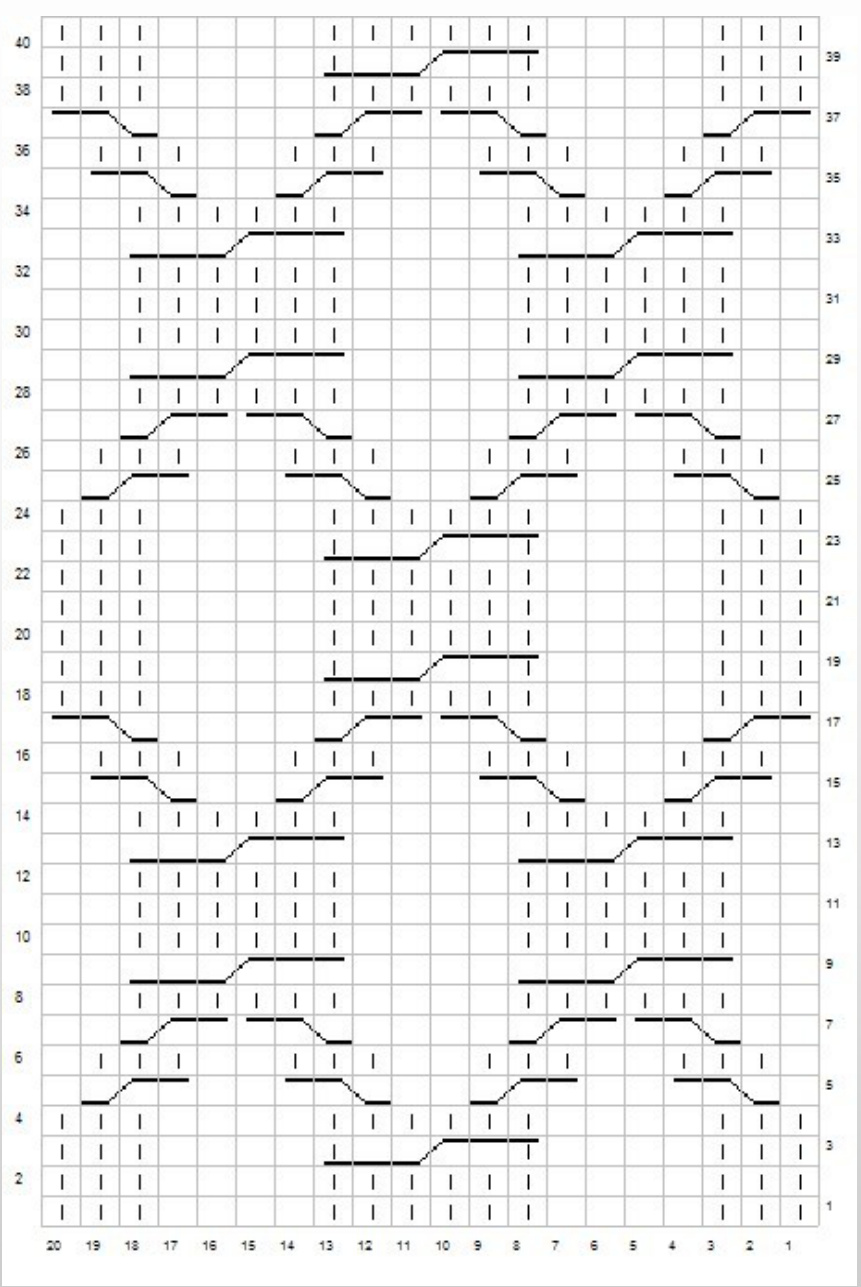
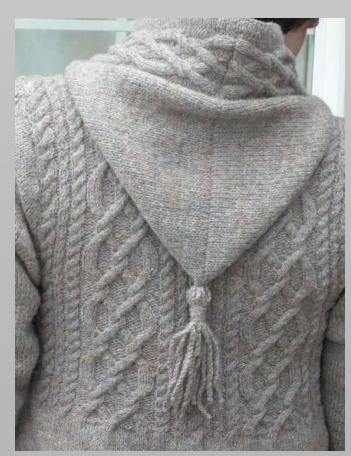
Note: Cable A is worked with 3 rev st st stitches on either side for lower border, cuffs, sleeves and hood. Cable A is worked as shown for bodice. This chart depicts two repeats.
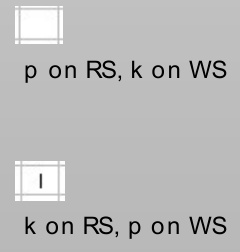
Stitch Key
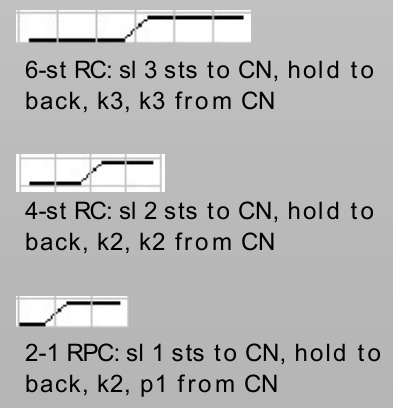
2-1 LPC: sl 3 sts to CN, hold to front, p1, k2 from CN 2-st RC: k 2nd st on L needle, k 1st st on L needle, move both sts to R needle.
Tuiltich Faery Ring
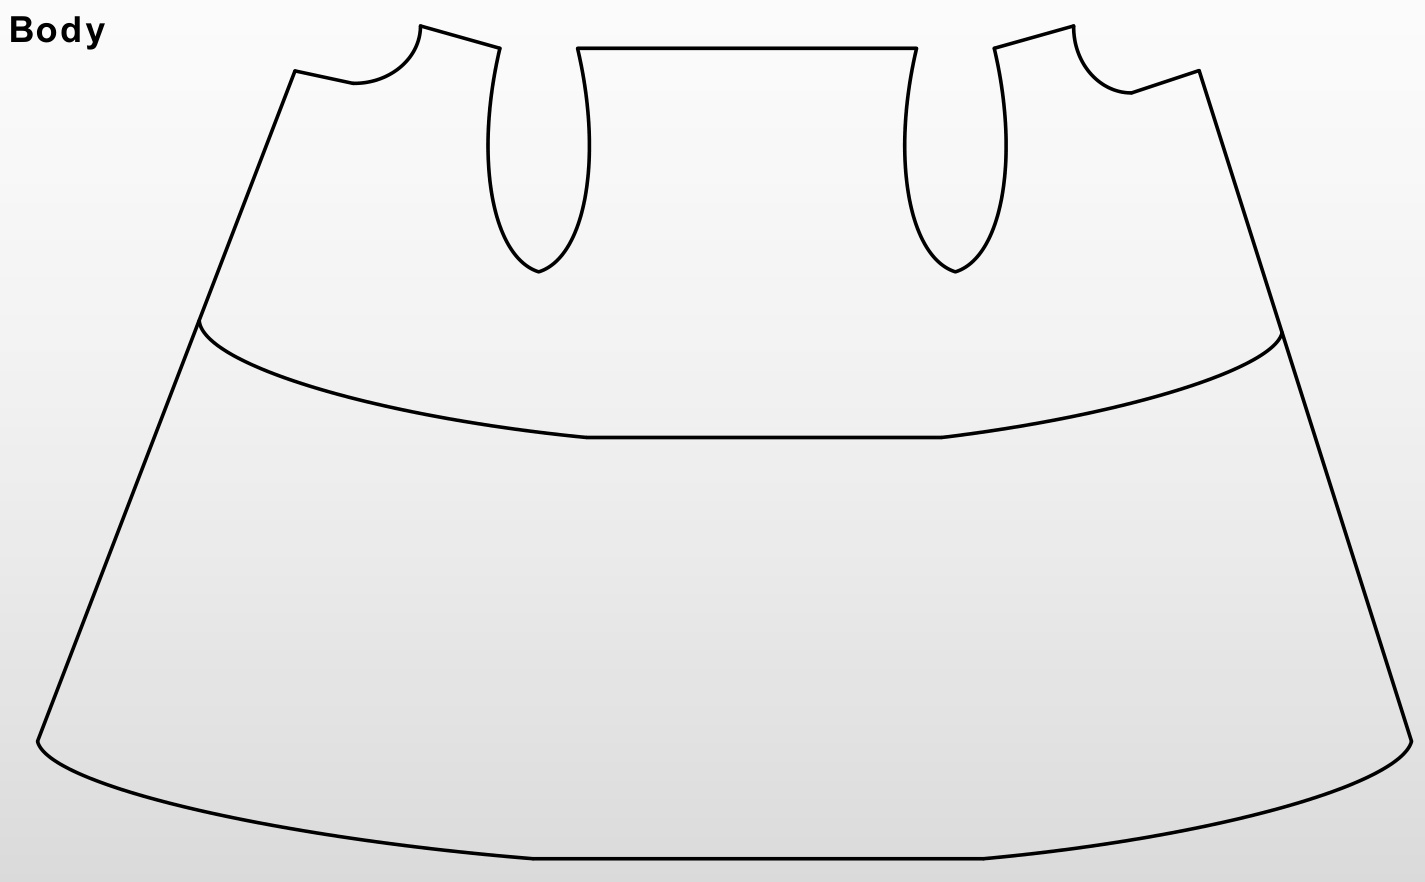
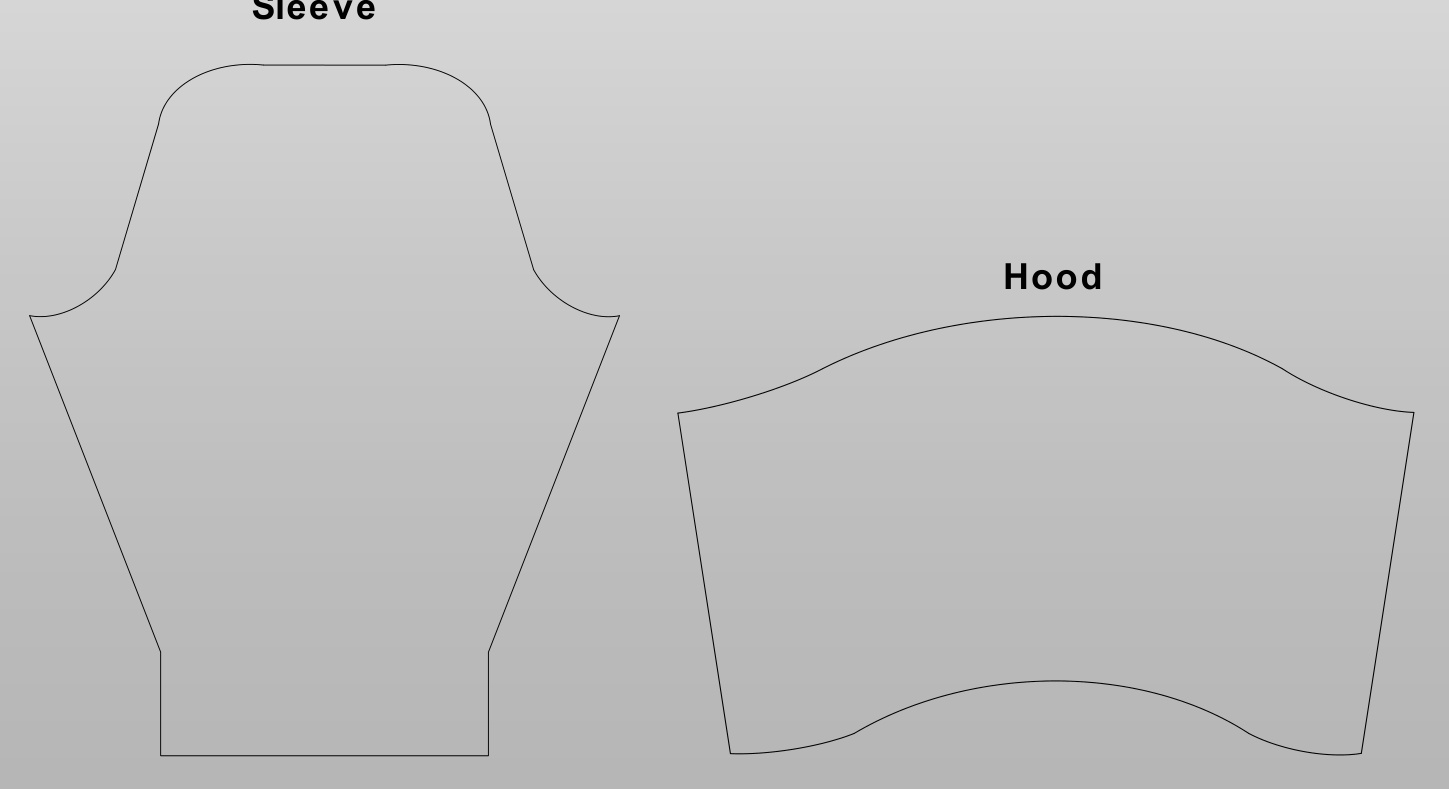
Blocking Schematics
Blocking measurements not yet updated for Tuilich as of 07-29-09—-msh
Tuilich Faery Ring
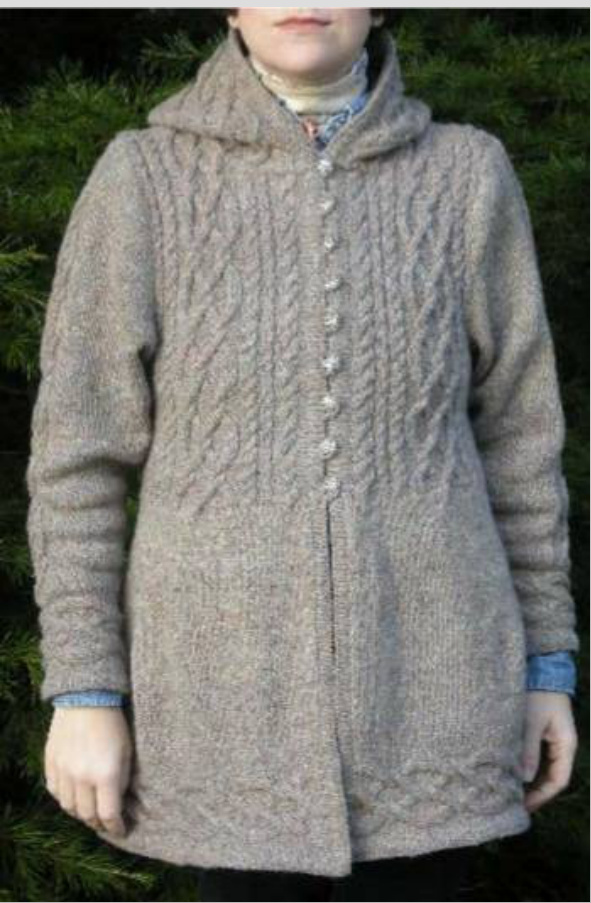
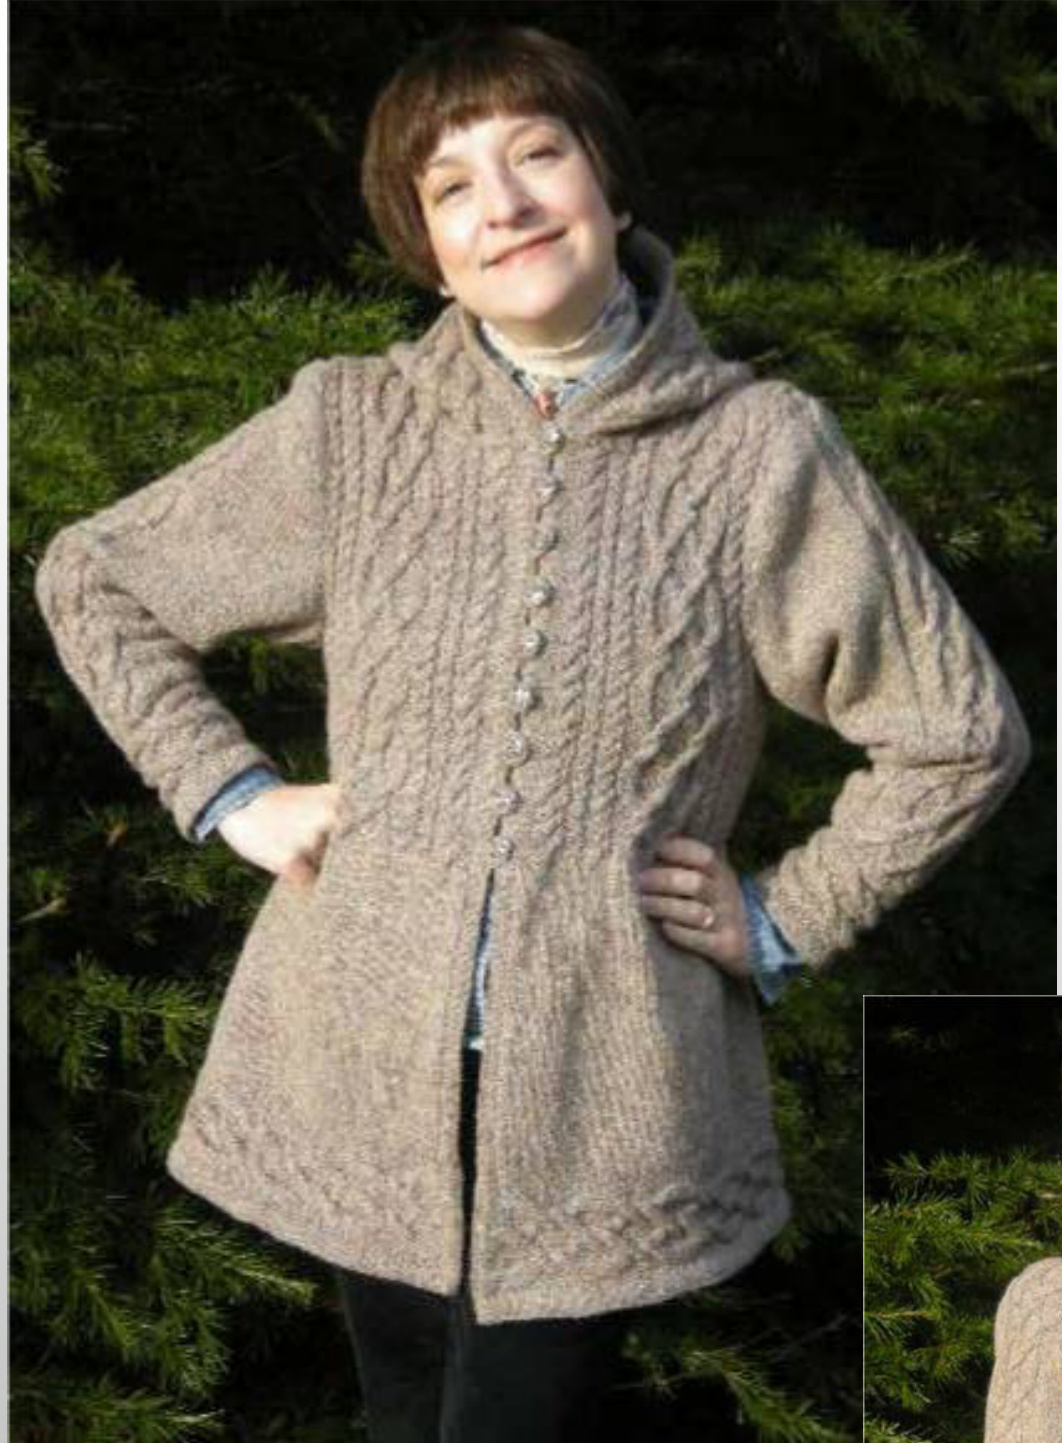
Finished Size
45 (48, 51)" [114 (122, 129.5) cm] chest circumference 30" (31",32") [76.2(,78.7,81.3) cm] center back length $25\%^{\,\ast\!}$ (26 ",26/2") [64.8(66,67.3) cm] sleeve length
Yarn

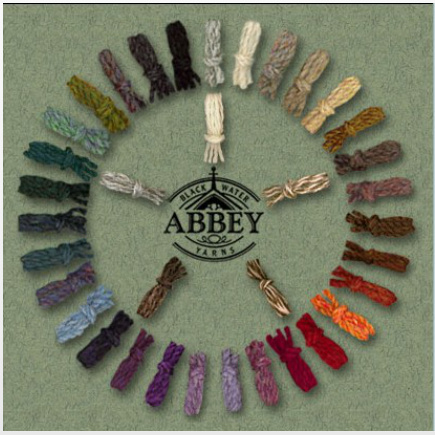
Worsted
Shown Here: Black Water Abbey 2-Ply Worsted $100\%$ wool; 220 yd/4 oz, Bracken, 11 (12,13) skeins 2420 (2640, 2860 yds)
Needles
Body, Sleeves & Hood size 7 $(4.5\ m\,\mathsf{m})$ , Edgings size 5 $(3.75\;\mathsf{m}\,\mathsf{m})$ ,or sizes to obtain gauge. Note: It is helpful to have two $40\,^{\mathfrak{N}}$ circular needles in size 5 $(3.75\ m\,\mathsf{m})$ ), as the front and hood edgings are knit continuously.
Notions
Stitch holders or waste yarn, stitch markers, cable needle, tapestry needle, sewing thread & needle, 9 size 5/8"( $14\ \mathsf{m}\,\mathsf{m})$ I shank buttons (JHB International #92072 “Antico" shown).
Gauge
18 stitches and $24\,\,\mathsf{r o w s}\,=\,4\,^{\ast}\,\,(10\,\,\mathsf{c m})$ in stockinette
Notes
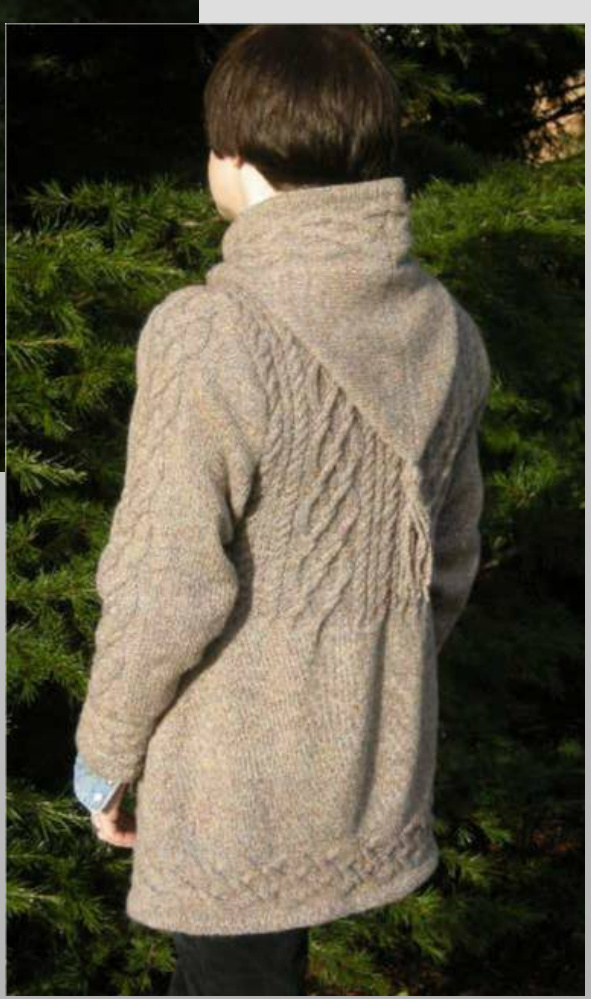
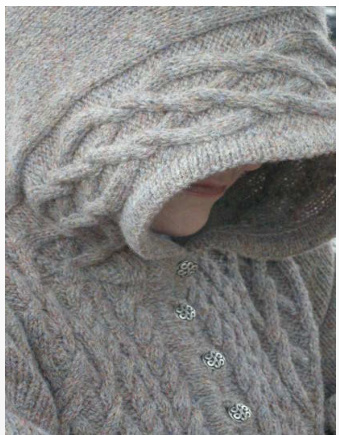
Body is worked in one piece back and forth to armholes, then neckline and armhole shapings continue separately. Sleeves are knit individually and sewn in place. Hood is picked up and knitted from neck edge.
Special Abbreviations
M1R: Bring the tip of the left needle under the strand between stitches, from back to front. Knit this loop. M1L: Bring the tip of the left needle under the strand between stitches, from front to back. Knit through the back of the loop. PM: Place Marker
Tuilich Faery Ring
Lower Cable
With larger needles, CO 26 sts. Set up cable pattern A (RS): p3, k3, p4, k6, p4, k3, p3. Continue cable pattern A as established, working 3 rev st st sts on each side of pattern. Repeat 20 (21, 22) times, until cable measures about 60 (63, 66)" [129.5 (137, 145) cm], ending with row 21. B.O.
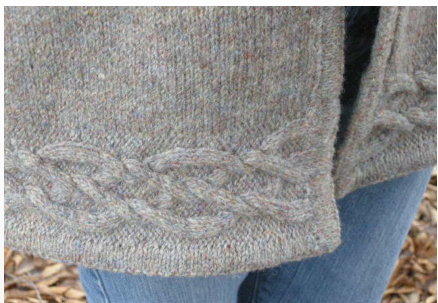
With smaller needles. Pick up and knit 308 (324, 340) sts. along one long edge of cable. Work 5 rows back and forth in st. st. k 1 row from WS to form a turning ridge. Work 5 rows st. st. B.O. Fold hem up along turning ridge and sew in place by hand, invisibly from Ws.
Body
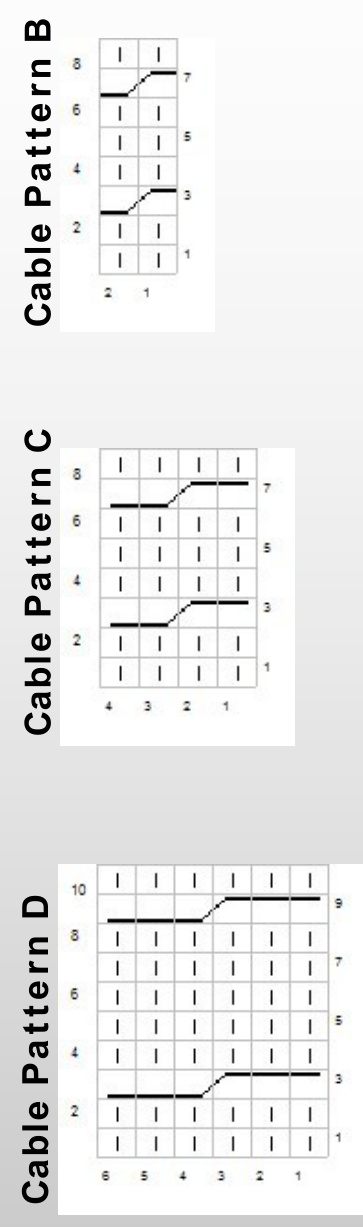
Using larger needles, pick up and knit 308 (324, 340) sts along unhem med edge. PM after 77 (81, 85) and 154 (162, 170) sts. Work back and forth in st. st for 5 rows. Next and every following $6^{\mathrm{th}}$ (RS) row, work decreases as follows: k to 7 sts before M, SSK, k5 , slip M, k5, k2tog. Repeat at $2^{\mathsf{n d}}\,\mathsf{M}$ Repeat decreases 9 more times, 268 (284, 300) sts. Work 5 rows. Next row (RS) set up bodice cable arrangement, referring to chart. Cable pattern arrange ment is the same for all sizes except for Moss stitch areas, which have 21 (29,37) stitches on each side. Work even in pattern until bodice measures 7 (71/2,8") [18 (19, 20) cm] from beginning, ending with a WS row. Armhole Shaping: Next row (RS) work 59 (68, 72)sts, BO 5, work 130 (138, 146), B0 5, work 59 (68, 72). Place sts for Right Front and Back Left Front: Continue working in pattern, shaping armholes as follows: Decrease 1 st at beginning of next 5 RS rows. 59 (63, 67) sts. Work even until bodice measures 14 (14 1/2, 15)" [35.5 (37, 38)cm] from beginning, ending with a RS row.

Shape Neckline: Next row (WS); BO 24 (26, 28) sts, work to end of row. Dec 1 st at beg of next 5 RS rows. 30 (32, 34) sts. Work even until bodice measures 17 (171/2, 18)" [43 (44.5, 45.5) cm] from beginning. Place shoulder sts on holders or waste yarn.
Tuilich Faery Ring
Right Front: With WS facing, rejoin working yarn and work 1 row. Work as for Left Front, reversing shaping. Place shoulder sts on holders or waste yarn. Back: With WS facing, rejoin working yarn and work 1 row. Decrease 1 st at the beginning of the next 10 rows. 120 (128, 136) sts. Work even in patt until bodice back measures 17 (17 1/2, 18)" [43 (44.5, 45.5) cm]. Place all sts on holders orwaste yarn. Block body, referring to sche matic.
Sleeves
With larger needles, CO 26 sts. Work Cable Pattern A as for lower body cable for 3 repeats, until cable measures about 9" [23 cm], BO. With smaller needles, pick up and knit 49 sts along one edge of cable. Work 5 rows in st st. k 1 row from WS to form a turning ridge. Work 5 rows in st. st, BO. Using larger needles, pick up and knit 60 sts along unhem med edge. Next row (Ws), set up cable pat- tern: p 17, k 3, work 20 sts of Cable Pattern A, k3, p17.
Tuitich Faery Ring