DWARVEN MITTS
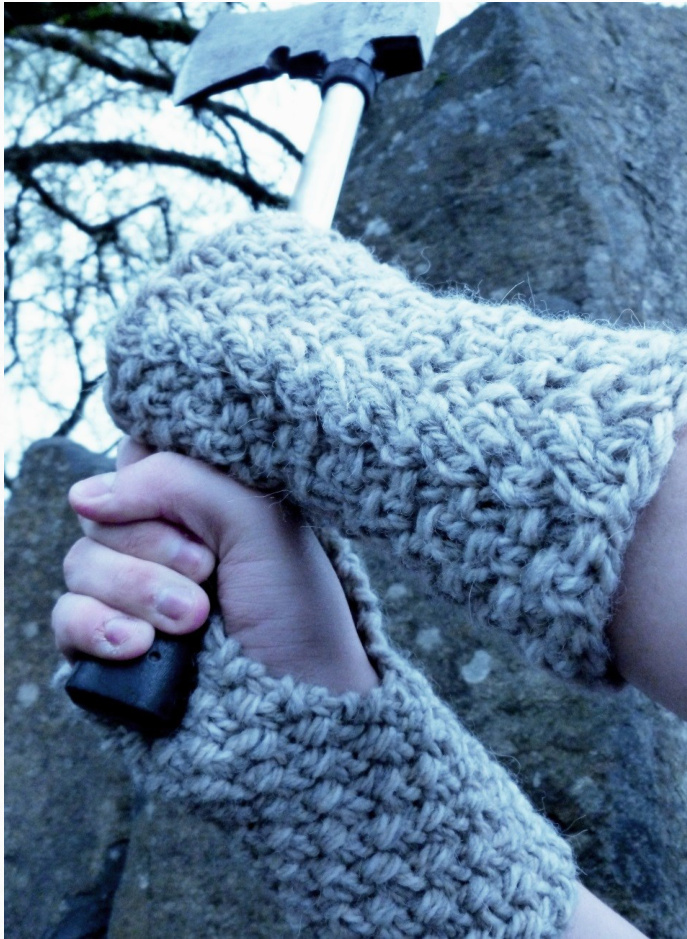
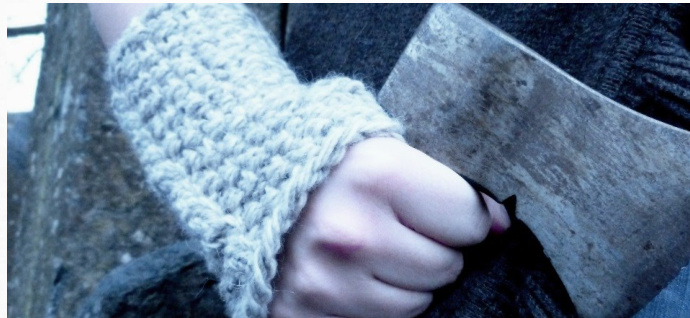
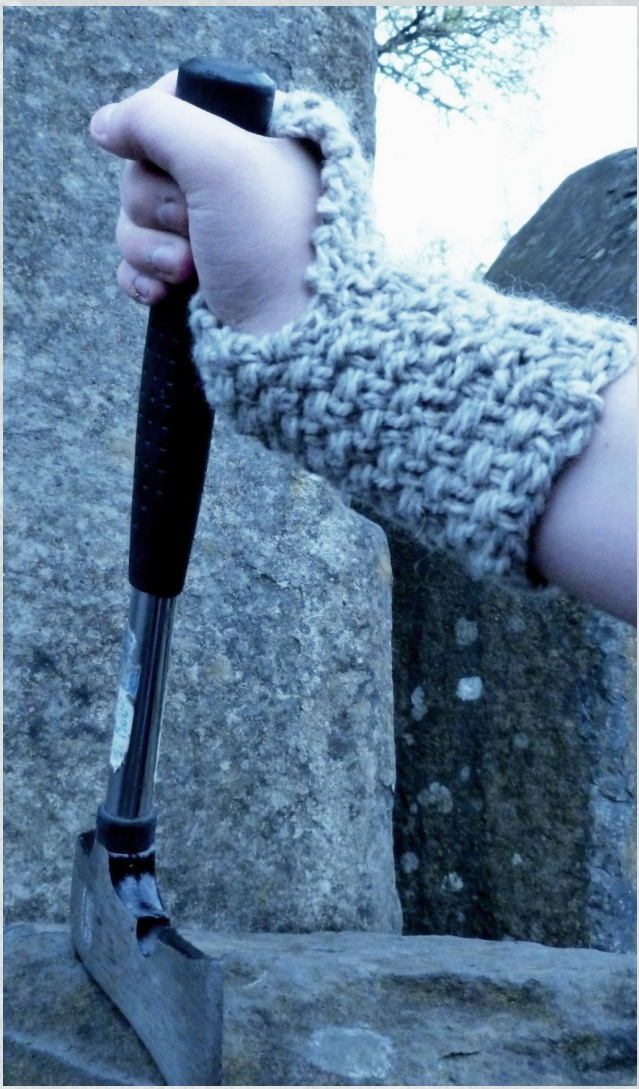
Hyde Co. Designs hydecodesigns@gmail.com Based on the chunky gloves worn by Thorin's company of dwarves in The Hobbit, these mitts will warm your hands through the Misty Mountains while keeping your fingers free to fight the perils of Mirkwood! These mitts are worked in a rustic double seed stitch pattern with a side accent cable to echo the dwarves' braids. m This pattern includes instructions for working the mitts in the round, flat, or two at a time.
DETAILS
Gauge: 3 sts = 1" (2.5cm) in double seed stitch Yarn: 50 yards super bulky weight (pictured in Crystal Palace Sequoia) Needles: Us 10.75 (7mm) or size needed to obtain gauge. Note that 7mm needles aren't generally available in the Us. 10.5 (6.5mm) or 11 (8mm) are the closest alternatives.
SIZE
This pattern is sized to fit a wrist circumference of 6" (15cm) and knuckle circumference of 7" (18cm). To alter sizing, simply work more or less sts on either side of the accent cable. Note that the cable is currently slightly offset from center. To preserve the placement of the cable, add or remove sts from each side in equal increments.

CAST-ON TIP
For a more invisible edge, I recommend the long-tail cast on for 1-1 rib. You can view how to do this here: http://www.dailymotion.com/video/x9bc5e longtail -Cast-on-in-ribbing_people#.UwhhRGeLd5o CO 22 sts following the knit/purl directions for row 1. If you do this cast on, it takes the place of rnd/row 1. Begin on rnd/row 2. photos by Alice Hyde for Hyde Co. Designs
INSTRUCTIONS
IN THE ROUND
CO 22 sts and join in the round, being careful not to twist.
MitA
Round 1: (pl, kl) five times, k3, (kl, pl) four times, kl. Round 2: (pl, kl) five times, C2R, (kl, pl) four times, k1. Round 3: (kl, pl) five times, k3, (pl, kl) four times, p1. Round 4: (kl, pl) five times, k3, (pl, kl) four times, p1. After round 4, turn your work to knit back. You are now splitting the mitts to work flat for the thumb hole. Row 5 (ws): pl, (kl, pl) four times, p3, (pl, kl) five times. Row 6 (RS): (p1, kl) five times, C2R, (kl, p1) four times, k1. Row 7: kl, (p1, kl) four times, p3, (kl, pl) five times. Row 8: (kl, pl) five times, k3, (pl, kl) four times, p1. Repeat these four rows until mitts measure about 3" (7.5cm) from CO edge. The top of the split should rest comfortably at the webbing of your thumb; the bottom of the split should be at the base of your wrist. When the thumb hole is the desired length, resume working mitts in the round. After finishing either row 6 or 8, do not turn, but proceed to round 3 or 1, respectively. Continue working in the round, repeating rounds 1-4, until mitts are the desired length, ending afterrow2.
MittB
Round 1: kl, (pl, kl) four times, k3, (kl, p1) five times. Round 2: kl, (p1, kl) four times, k3, (kl, pl) five times. Round 3: pl, (kl, pl) four times, C2L, (pl, kl) five times. Round 4: pl, (kl, pl) four times, k3, (pl, kl) five times. After round 4, turn your work to knit back. You are now splitting the mitts to work flat for the thumb hole. Row 5 (ws): (kl, pl) five times, p3, (p1, k1) four times, p1.
ABBREVIATIONS
C2R: Slip next st onto cable needle and hold in back. K 2 sts from Ihn. K st from cable needle. C2l: Slip next 2 sts onto cable needle and hold in front. K 1 st from lhn. K 2 sts from cable needle. ssk: slip 2 sts kwise, then knit those sts together. Some modifications to this decrease instruct you to slip the second st pwise. However, this results in a twisted second st, which will decrease the BO's invisibility. Row 6 (RS): (kl, p1) four times, kl, C2L, (kl, pl) five times. Row 7: (pl, kl) five times, p3, (kl, pl) four times, kl. Row 8: pl, (kl, pl) four times, k3, (pl, kl) five times. Repeat these four rows as many times as you did for mitt A. After finishing either row 6 or 8, do not turn, but proceed to round 3 or 1, respectively. Continue working in the round, repeating rounds 1-4, until mitts are the desired length, ending affer row 2.
Bind Off
Study your sts. If the second st on the Ihn is a p st, p the first two sts tog. If it's a k st, ssk. Return the st on the rhn to the lhn. Now the second st should be the opposite. P2tog or sk as appropriate. Repeat, alternating ssk and p2tog, until you reach the cable column. work ssks over these three sts, then continue the ssk/p2tog pattern till the end. Cut yarn, and pull
FLAT - ONE AT A TIME
CO 22 sts on straight needles. Be sure to leave a long tail for seaming.
Mitt A
Row 1 (ws): pl, (kl, pl) four times, p3, (pl, kl) five times. Row 2 (RS): (p1, kl) five times, C2R, (kl, p1) four times, kl. Row 3: kl, (pl, kl) four times, p3, (kl, pl) five times. Row 4: (kl, p1) five times, k3, (p1, kl) four times, p1.
MittB
Row 1 (ws): (kl, p1) five times, p3, (pl, k1) four times, p1. Row 2 (RS): (kl, p1) four ftimes, kl, C2L, (kl, pl) five times. Row 3: (pl, kl) five times, p3, (kl, pl) four times, kl. Row 4: pl, (kl, pl) four times, k3, (p1, kl) five times. Repeat these four rows until mitts are desired length, ending after row 2. Follow bind off instructions as written for in-the-round mitts.
Finishing
Instructions are written assuming that the CO edge will be at the top (around your palm).I like to have a stretchy edge around my palm for ease of mobility, but if your mitts turned out very long, it may be better to have that stretch around your forearm. If that's the case, just seam things that way instead. The world is youroyster. Using the CO tail, seam the top 1/2" (1.5cm) of your mitts. This creates a mitt that's long enough to cover your palm without obstructing finger use. Secure the yarn and weave in the end. Using the BO tail, seam the wrist portion of the mitt up, stopping about 2.5-3" (6-8cm) before the top seamed portion. You may wish to try the mitts on to test how much of a gap you need for optimal thumb usage. Secure the yarn and weave in the end.
FLAT - TWO AT A TIME
Wind your yarn in a center-pull ball or skein so you have two working ends, one coming from the center of the ball and one from the outside. We'll call the center end yarn A and the outer end yarn B. Using yarn B, CO 22 sts on straight needles. Drop yarn B. On the same needle, CO 22 sts with yarn A. Be sure to leave a long tail for seaming on both mitts.
Both Mitts
Row 1 (ws): With yarn A, (pl, kl) four times, p4, (p1, k1) five times. Drop yarn A. with yarn B, (kl, pl) five times, p4, (kl, pl) four times. Turn. Row 2 (RS): With yarn B, (kl, pl) four times, kl, C2L, (k1, pl) five times. Drop yarn B. with yarn A, (p1, k1) five times, C2R, (kl, pl) four times, kl. Turn. Row 3: with yarn A, (kl, p1) four times, kl, p3, (kl, pl) five times. Drop yarn A. With yarn B, (pl, kl) four times, kl, p3, (kl, pl) four times, kl. Turn. Row 4: With yarn B, (p1, kl) four times, pl, k3, (p1, kl) five times. Drop yarn B. with yarn A, (kl, p1) five times, k3, (p1, kl) four times, pl. Turn. Repeat these four rows until mitts are desired length, ending after row 2. Follow bind off instructions as written for in-the-round mitts and finishing instructions as written for one-at-atime mitts.


