Materials
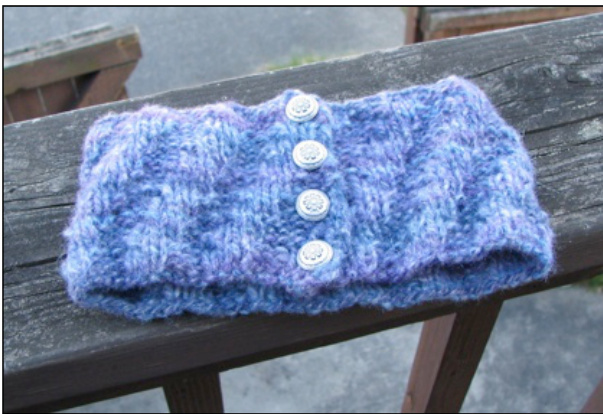
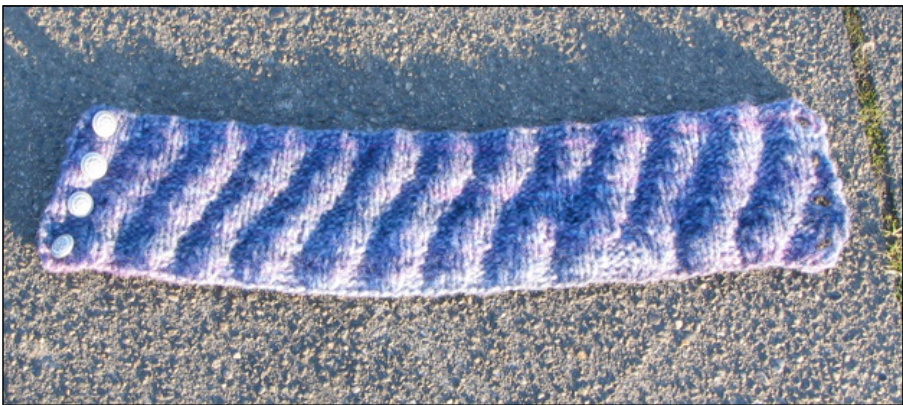
1 ball Jo-Ann Sensations Bellezza Collection Cosetta, in Cosetta Purple (68% wool, 32% nylon, 127 yards/117 meters—you will need about half a ball) US 10.5/6.5mm, 10/6mm, and 9/5.5mm needles (either 14" straights or circulars are fine) 4 buttons, 5/8 inch / 1.6cm Gauge 16 sts to 23 rows measured over 10cm (4 inches) in diagonal rib pattern stitch, stretched and blocked. Unblocked, the gauge is closer to 20 sts / 20 rows. Designer ①2006 Wendi Dunlap \* litlnemo@slumberland.org \* http://slumberland.org/ This pattern is Worthware: if you like it, please send whatever you think it is worth to my PayPal account, which is rt@rubbertrouble.com, or send something by mail to: Wendi Dunlap PO Box 24131 Seattle WA98124
UhirQuind by Wendi Dunlap
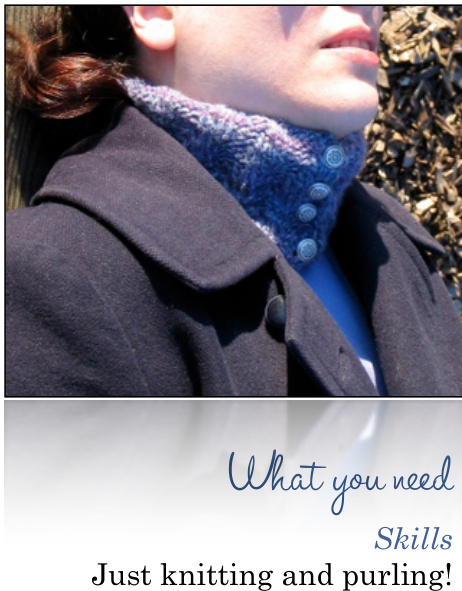
Scarves are wonderful, but sometimes they just aren't right; the long ends get in the way, or the knot bunches or works loose and doesn't keep you warm. To stay warm in the breeziest of times, this neckwarmer does the trick. Like many neckwarmers, it's ribbed - but in a diagonal rib pattern that will make you think of a whirlwind. It knits up like a whirlwind, too!
Size:
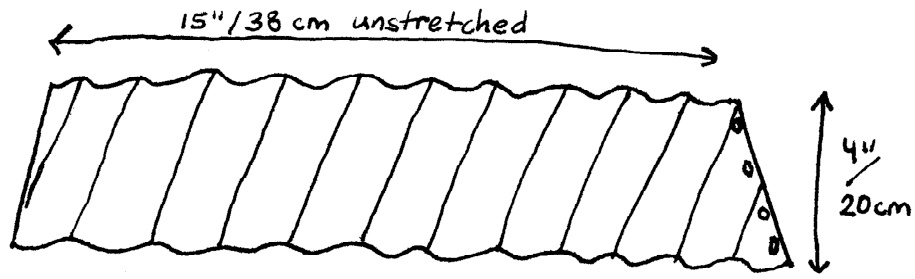
15 inches / 38 cm lengthwise around neck, unstretched and unblocked; 4 inches / 20cm tall. The neck stretches to 20 inches / 50.8 cm. If you wish to make this bigger, it can be done; just increase the cast-on stitches by a multiple of 6.
Pattern notes:
yo: yarn over (wrap yarn around the needle, so it ends up in back of the needle before the next stitch. This is used before a purl stitch). yf: yarn forward (just bring yarn forward between the needles, then do the next stitch. This is used before a knit stitch). The three successively smaller needle sizes are used so that the neckwarmer will be slightly smaller at the top edge than at the bottom edge.
Getting Started:
Cast 78 sts onto US 10.5 / 6.5mm needle. Row 1: \*k3, p3, repeat from \* to end of row Row 2: \*k3, p3, repeat from \* to end of row
Buttonhole 1 and onward:
Row 3: knit 2 together (k2tog), yf, k1, p3, \*k3, p3, repeat from toendof row Row 4: \*p1, k3, p2, repeat from \* to end of row Row 5: \*k2, p3, k1, repeat from \* to end of row Row 6: \*p1, k3, p2, repeat from \* to end of row Row 7: \*k1, p3, k2, repeat from \* to end of row Row 8: \*p2, k3, p1, repeat from \* to end of row
Changing needles, and Buttonhole 2:
Change to US 10 / 6mm needles at this point. Row 9: k2tog, yo, p2, k2, \*k1, p3, k2, repeat from \* to end of row Row 10: \*p3, k3, repeat from \* to end of row Row 11: \*p3, k3, repeat from \* to end of row Row 12: \*p3, k3, repeat from \* to end of row Row 13: \*p2, k3, p1, repeat from \* to end of row Row 14: \*k1, p3, k2, repeat from \* to end of row
Buttonhole 3:
Row 15: k2tog, yf, k3, p1, \*p2, k3, pl, repeat from \* to end of row Row 16: \*k2, p3, k1, repeat from \* to end of row Changing needles one more time: Change to US 9 / 5.5mm needles at this point. Row 17: \*p1, k3, p2, repeat from \* to end ofrow Row 18: \*k2, p3, k1, repeat from \* to end ofrow Row 19: \*k3, p3, repeat from \* to end of row Row 20: \*k3, p3, repeat from \* to end of row Buttonhole 4 and the end: Row 21: k2tog, yf, k1, p3, \*k3, p3, repeat from \* to end of row Row 22: \*p1, k3, p2, repeat from \* to end of row Row 23: \*k2, p3, k1, repeat from \* to end of row Bind off in \*p1, k3, p2 pattern.
Finishing
Weave in ends. Sew on buttons. Avoid blocking this item if possible, as the spiral ridges look best if unblocked.


