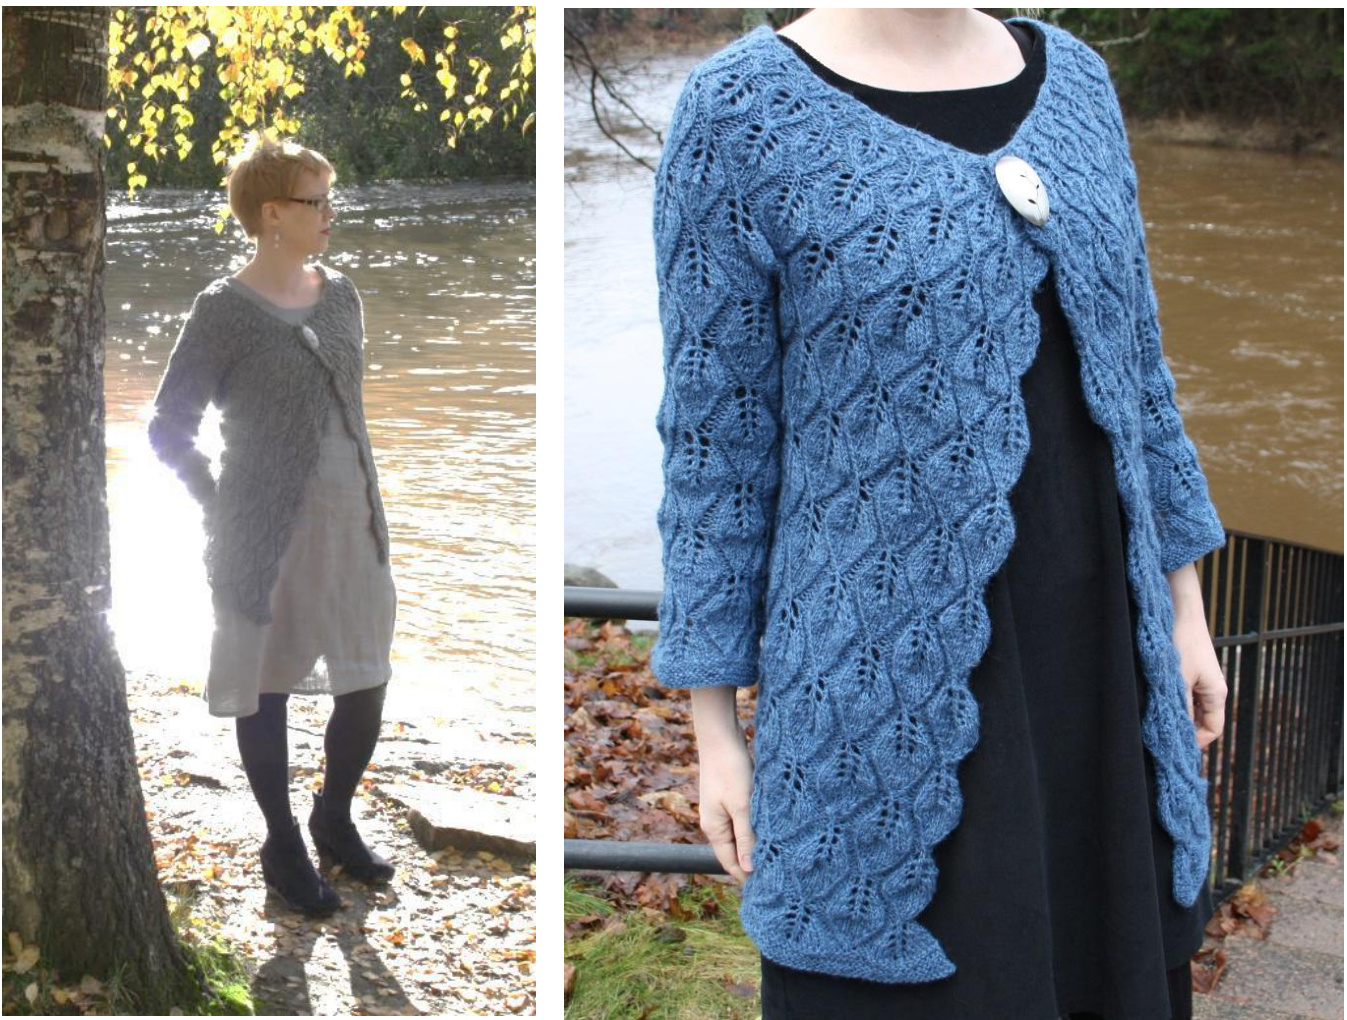
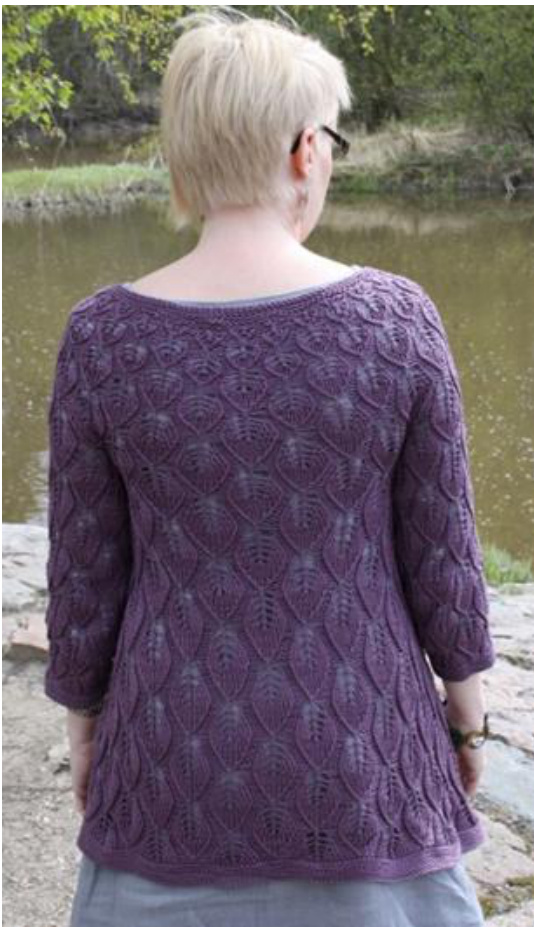
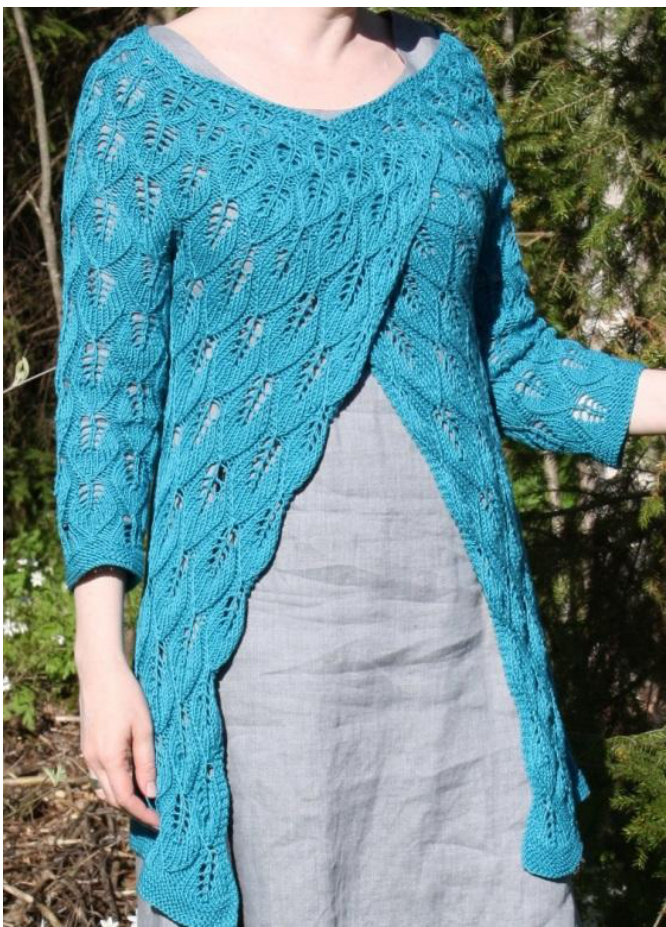
Leaves Cardigan
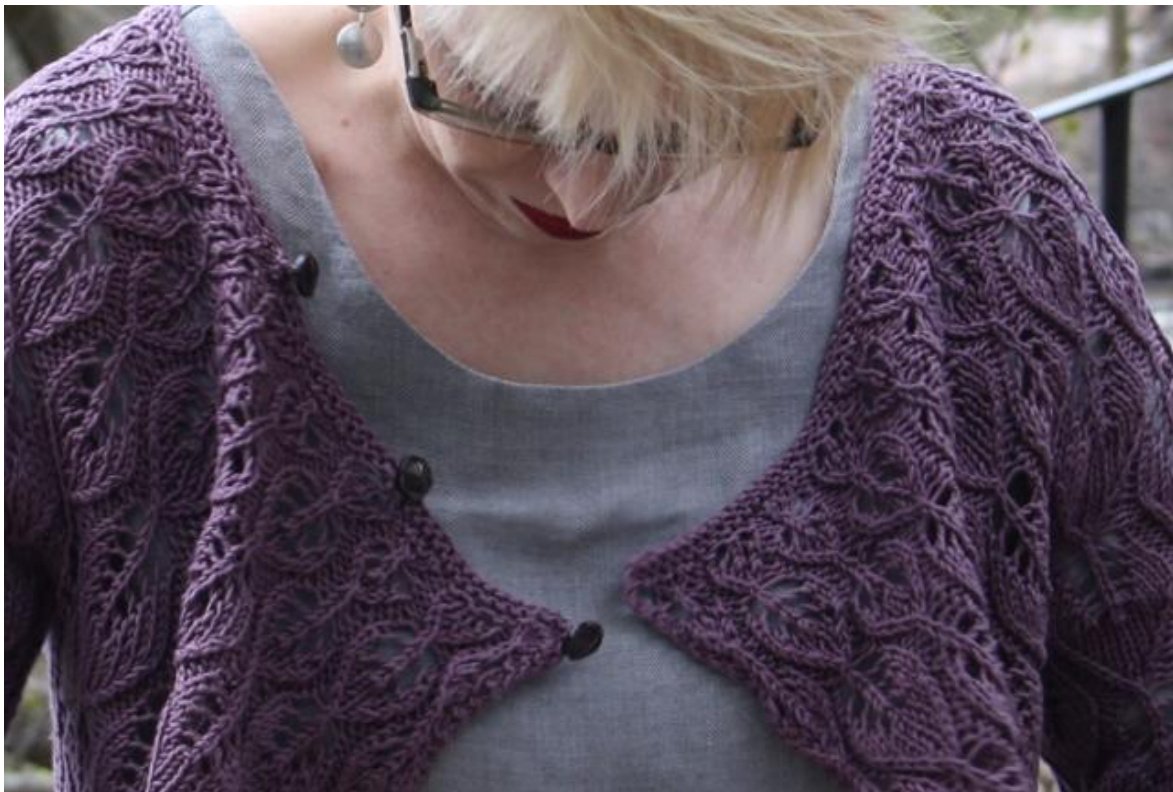
Leaves Cardigan is a simple blanket style cardigan featuring a leaf lace pattern. It is knitted from the top down, without seams. All increases are embedded in the lace pattern. You can wear Leaves Cardigan without any fastening or sew three small buttons along the neck edge. The holes in the lace pattern act as button holes.
READ THISBEFOREYOUSTART:
Originally, I designed this cardigan only for myself and have knitted several versions just for myself. After I had published them on my blog and Ravelry I was asked to write a pattern time and time again. The instructions for the Leaves Cardigan are for one size only (S-M, bust measurement 90-96 cm/ 35"-38"). If you need a larger size you can use thicker yarn or add one leaf motif repeat in back, sleeves, and front pieces. I'm a loose knitter but if you are on a tighter side you may need to try larger needle sizes. Also note that even the row gauge matters in this cardigan as it affects the height of the yoke. The key is to try the cardigan on frequently! The most important thing to remember is that the yoke must fit you perfectly. Otherwise, the cardigan does not stay on you. English is not my native language and I'm not a professional designer nor a translator. Therefore I apologize in advance that my written English is not perfect. I (try to) use American knitting terminology here and give the measurements in both metric and imperial system. Any corrections on the terminology and general wording are much appreciated!
WHAT YOU'LL NEED:
I've knitted this cardigan-using fingering weight yarn (Aade carded wool 8/2) and DK weight yarn (Rico Design Essentials Cotton DK)-the same gauge both yarn. It is important that the fabric is fluffy, airy, and loose. If your knitting style is tight choose bigger needles and thicker yarn. · 350 g / 1400 m [1550 yd] of fingering weight wool yarn (350-400m [380-440 yds]/100 g) 0R 350 g / 1200 m [1330 yd] of DK weight cotton yarn (260 m [285 yds]/100 g). circular needles 3.0 mm [US 2] and 3.5 mm [US 4] 100 cm/40" (or sizes to get the gauge) circular needle 3.5 mm [US 4], 40 cm/ 16" or a set of double-pointed needles for the sleeves (or sizes to get the gauge) stitch markers tapestry needle for weaving in ends three little buttons, if you wish
SIZING:
finished bust measurement 91 cm/36" length of the body 70 cm/28" Copyright @ Mia Saranen 2016 The pattern is for personal use. Do not reproduce or sellthe pattern, or sell items that are knitted from this pattern. For any questions, please contact lepopuikko@ gmail.com. · sleeve length from shoulder down: 34 sleeve 56 cm/22" and full-length sleeve 67 cm/27". GAUGE: 20 sts x 28 rows = 10 x 10 cm [4"x 4"] in lace pattern. USEFUL TIPS: Work first and last 2 stitches of every row in garter stitch. If you wish to have a button attachment in your cardigan, make one buttonhole at the neck edge of the cardigan. That's the only one you need to make. Other two buttons can be fastened in the lace holes. You may also want to knit a couple of short rows on the back of the neckline to improve the fit of the cardigan. I have used the wrap & turn technique for short rows. You can find many videos about wrap & turn technique on Youtube. (For example: https://www.youtube.com/watch?v=zccglfV4pZM) The chart shows only the right side rows. All wrong side rows are worked as follows: knit 2 edge stitches at both ends of a row, purl all yarn overs and knit all knit stitches and purl all purl stitches. One lace pattern repeat is marked with a red line on the chart. The stitch count varies from row to row because the lace pattern has been prepared to be symmetrical and in the last pattern repeat there is only half of the full pattern. The front edges of the cardigan make curves for the same reason.-Stitch counts are given in the written instructions before and after all increase rows to keep you on track. I recommend that you work the sleeves before finishing the hem. Sleeves may change the fit and shape of this cardigan. If you are using rough unwashed carded wool with remaining lamb lanoline (such as Aade 8/2), it is recommended that you wash the garment by hand and block it gently to measurements. Rough wool softens in the wash and the lace pattern opens up beautifully. Softer yarns don't need washing. Steaming and blocking to measurements is enough to open up a the lace pattern.
ABBREVIATIONS:
CO: cast on k: knit k2tog: knit two sts together PM: place marker p: purl st: stitch sts: stitches yo: yarn over
INSTRUCTIONS:
Yoke:
Using the smallest circ needle size (3.0 mm/US 2), C0 159 sts. Do not join. Work 4 rows in garter stitch (knit every row). Make an optional buttonhole (YO, k2tog) in the beginning of the third row after the egde stitches.
Short rows (optional):
Knit 109 sts. \*Bring yarn to the front of the work, and slip one stitch purlwise from the left hand needle to the right needle. Bring yarn to the back, and slip the stitch back to the left hand needle. Turn work.\* = wrap & turn. The pattern is for personal use. Do not reproduce or sell the pattern, or sell items that are knitted from this pattern. For any questions, please contact lepopuikko@gmail.com. Knit 59 sts, wrap & turn. Knit 51 sts, wrap & turn. Knit 43 sts, wrap & turn. Knit 35 sts, wrap & turn. Knit 27 sts, wrap & turn. Knit 19 sts, wrap & turn. Knit 11 sts, wrap & turn. Knit to end. Close the short row gaps by knitting the wrap and the stitch together. Knit 1 row. Close the rest of the short row gaps by knitting the wrap and the stitch together. Start lace pattern: Start the lace pattern by following row 1 of the chart as follows: k work two edge sts in garter st, k repeat the lace pattern (10 sts) 15 times, and follow the chart to the end of the row 1. Continue following the chart. After you have finished row 7 of the chart, change to larger needles. Row 12 (WS): The total number of sts is 155. Row 13 (Rs): First increase row. Increase rows are marked with the symbol \*. At the end of the row there should be 185 sts on the needle.] Row 26: The total number of sts is 185. Row 27: Second increase row. At the end of the row there should be 215 sts on the needle. Row 44: The total number of sts is 215. 'ease row. At the end of the row there should be 245 st: Row 56 (Ws): Set up row for separating sts for sleeves: Place stitch markers as follows: work 2 edge stitches and then 60 stitches (a total of 62 sts : = right front), place marker (PM), work 35 stitches (= sleeve), PM, work 61 stitches (back piece), PM, work 35 stitches (= sleeve), PM, work 60 stitches and 2 edge sts (a total of 62 sts - = left front). Try the yoke on. If it fits you it's time to separate the sts for sleeves and body. If it doesn't fit you, continue following the chart and work until you have finished row 65 of the chart. Try the yoke on again. After finishing row 65 start following the chart between rows 47 and 65. The pattern is for personal use. Do not reproduce or sell the pattern, or sellitems that are knitted from this pattern. For any questions, please contact lepopuikko@gmail.com. Separating sts for sleeves and body: Work the left front stitches (62 sts), remove marker, place next 35 sts on a holder for sleeve, remove marker, C0 5 sts and continue working back piece stitches (61 sts). Remove marker, place next 35 sts on a holder for another sleeve, remove marker, CO 5 sts and continue working the right front piece stitches (62 sts). The 5 stitches cast on for underarm will form one more leaf motif chain Work a few more rows following the chart and make sure that the back width fits you and the armhole openings arewide enough. When there are two full leaf motifs one above the other under the arm (18 cm/7"), increase 1 stitch in every purled stripe (a total of 22 sts increased). The total number of stitches is now 211. If you need more room for your hips, you can add one more stitch in every purled stripe after a couple of rows. Continue following the chart (with the increases just made). At this stage, leave the hem stitches on hold and work sleeves before finishing the hem.
Sleeves:
Transfer 35 sts from the holder onto a 40 cm/16" circular needle or dpns. Pick up every loop you can find to get 21 sts along the underarm edge, mark the 11th st for beginning of round (=56 sts). Start following the chart of the largest leaf (rows 47 to 65). When you come across the 21 sts picked up along the underarm for the first time, notice that there are not enough stitches for an entire leaf motifs. Continue as follows: purl 1 st, knit 7 sts, purl 2 sts, make 1 yarn over, knit 1 st, make 1 yarnover, slip marker, purl 2 sts, knit 7 sts, purl 1 st = 23 stitches, 2 sts increased. Continue following rows 47-65 except for two groups of 7 stitches which are worked in stockinette st for the next two rows. After that you can follow the main chart with all picked up stitches. For 3/ length sleeves, follow the chart until there are 4 complete leaf pattern repeats from underarm or to the desired length. Work 10 rows in garter sts in the round (k one row, p one row). Cast off. For long sleeves, continue working the lace pattern until you are satisfied with the sleeve length. Work 10 rows in garter sts in the round (k one row, p one row). Cast off. Continue working the hem in lace pattern to the desired length. Work 10 rows in garter st and cast off loosely. (Optional: Sew three buttons along the neckline edge about 10 cm/4 inches apart from each other.) Weave in ends. Wash or steam and block if desired. Wear with pride.
Stitch Guide
1 Knit stitch, knit on right side, purl on wrong side - Purl stitch, purl on right side, knit on wrong side + Edge stitch, work garter stitch O Yarn over Left-leaning decrease: slip one, knit one, pass the slipped stitch over 1 Right-leaning decrease: knit two stitches together ∩ Slip one, knit two together, pass slipped stitch over No stitches \* Increase row
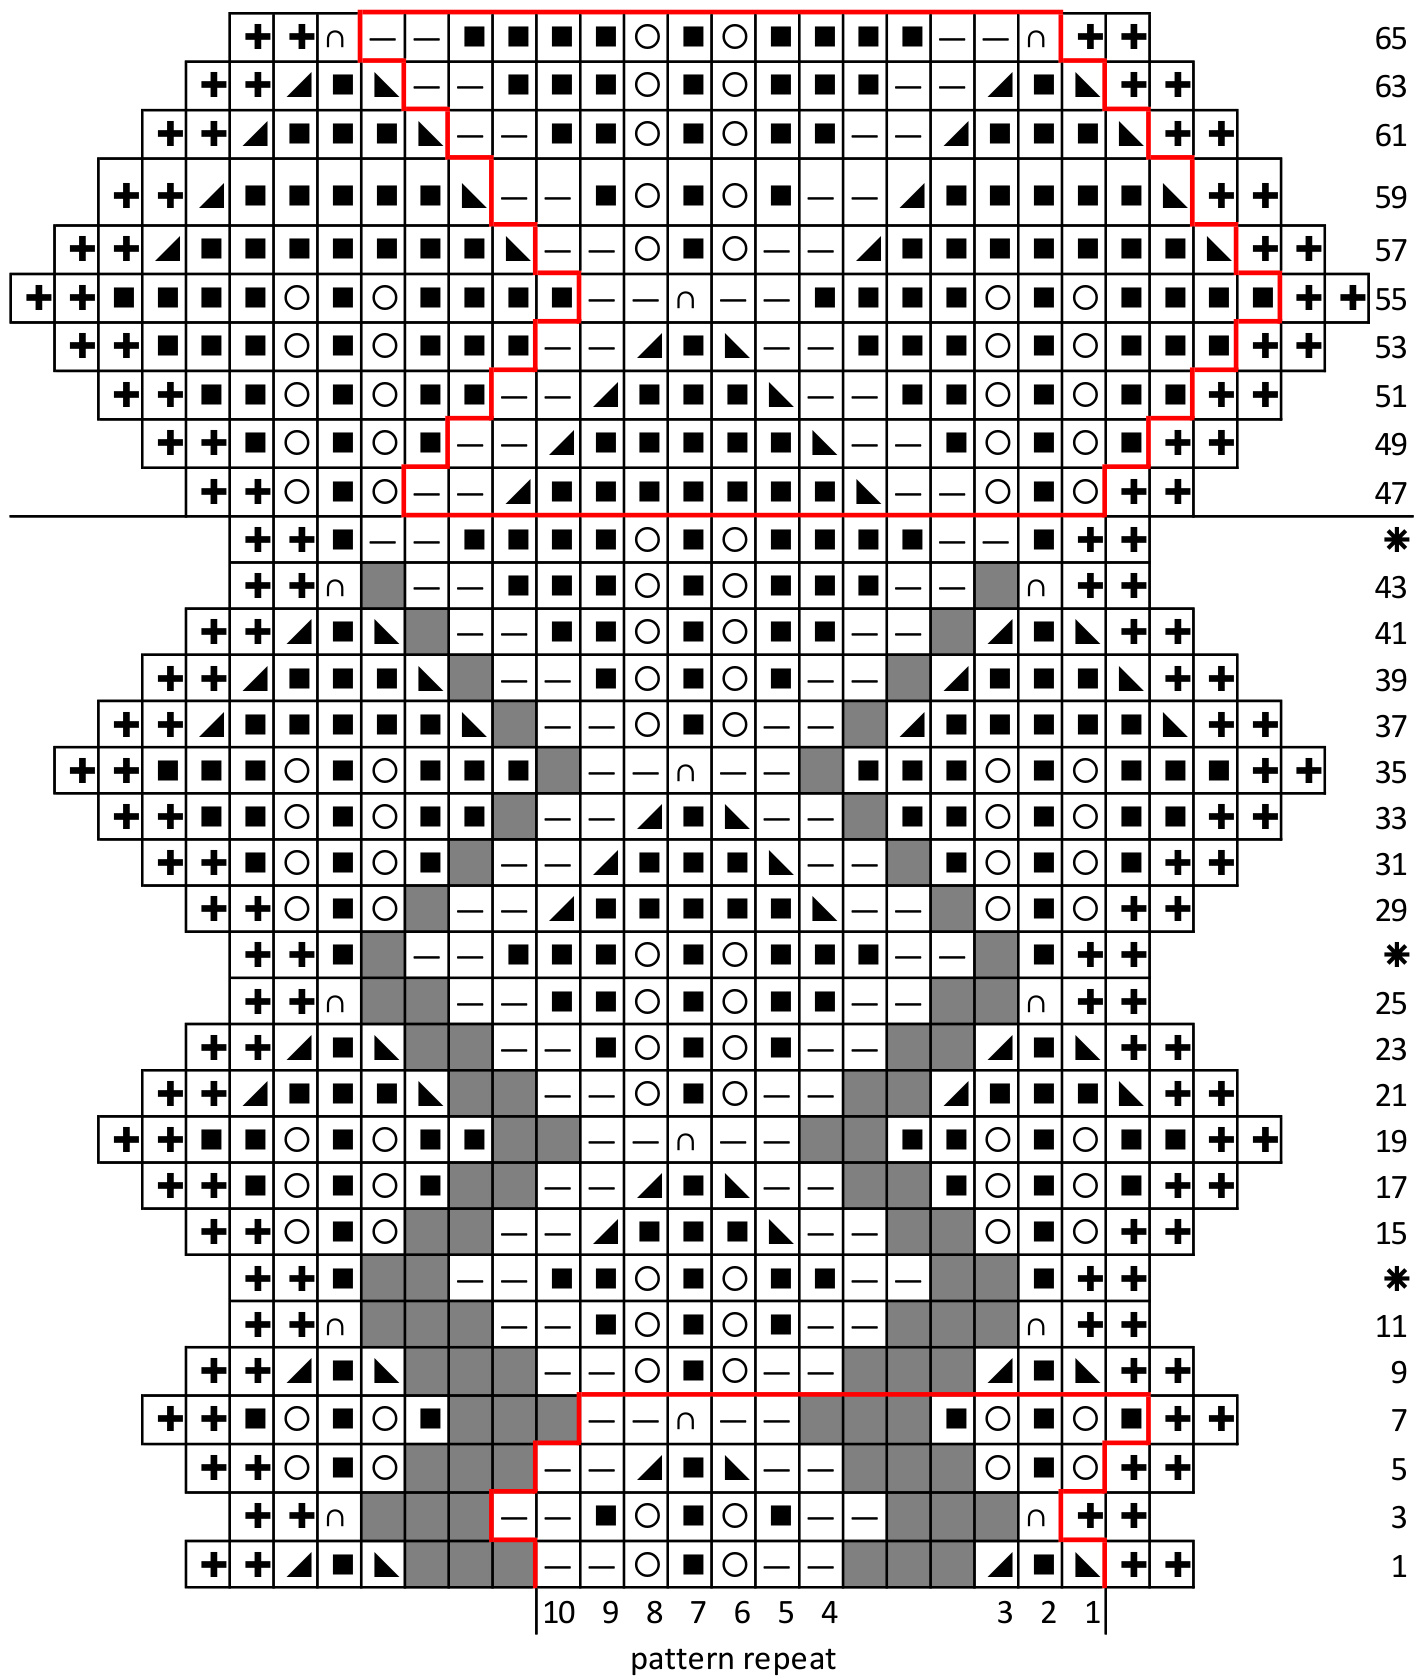
Chart 1


