Midsummer Night's Shrug
by Melissa Michelitsch
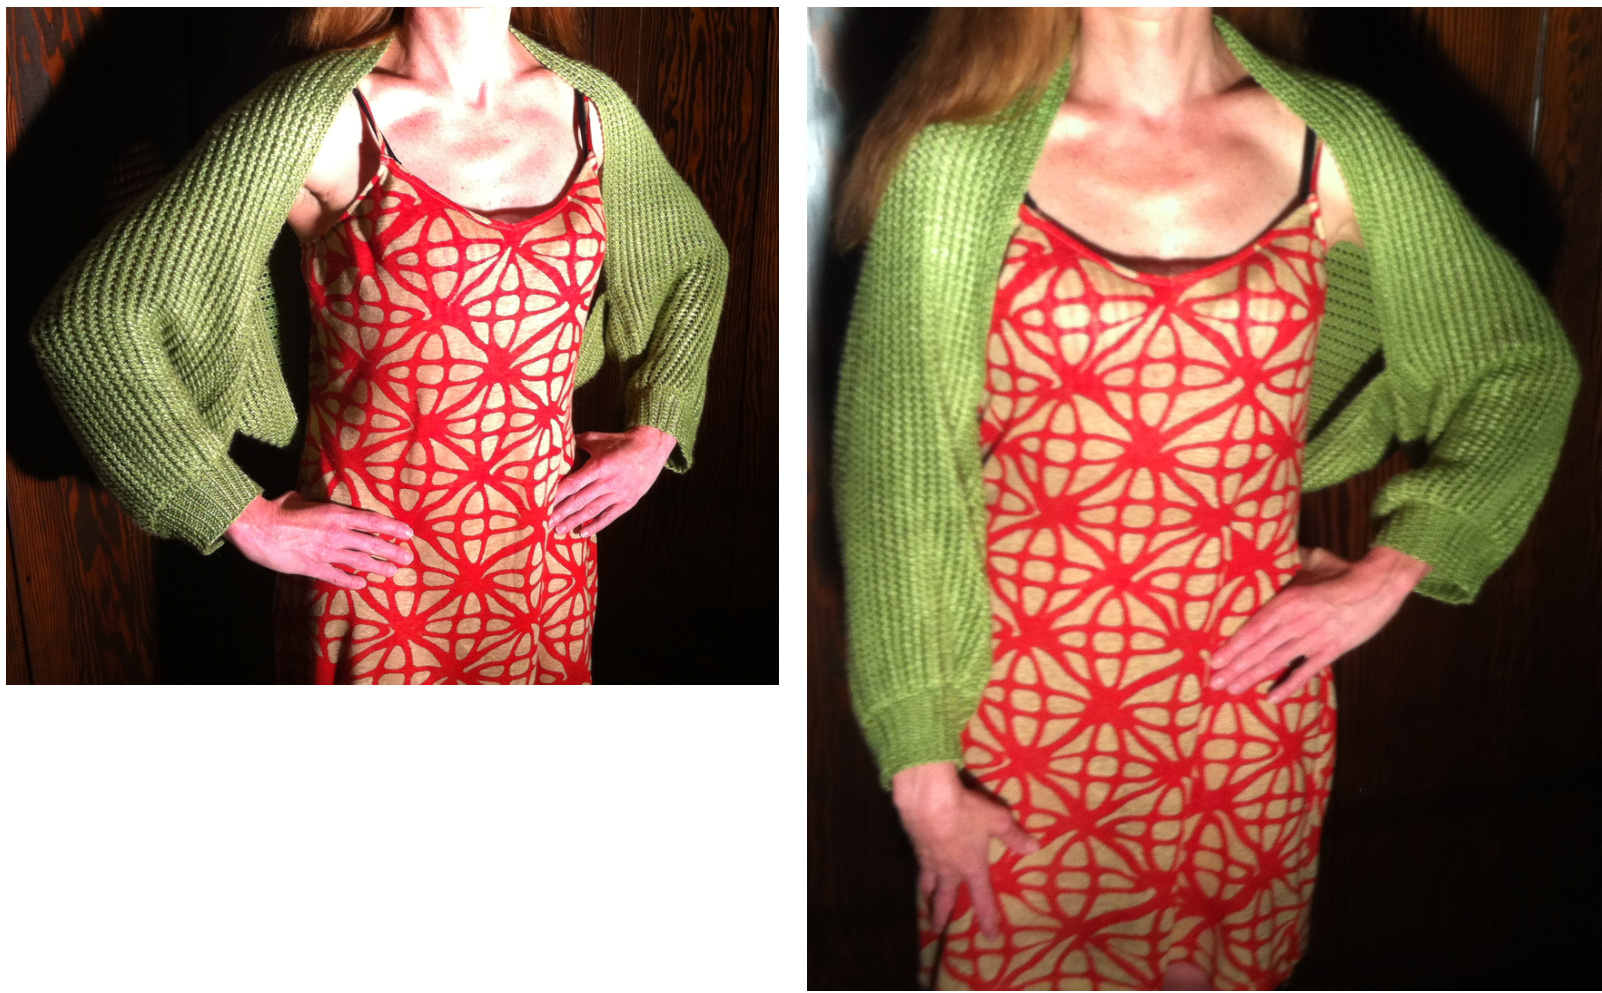
My mom wanted a cozy outer layer for cool summer evenings outdoors that would look good a sundress and not be too warm, so I made the Midsummer Night's Shrug. If you have the skill to make a simple hat and the patience to make twenty or thirty of them, then this project should be doable for you. I've included links to tutorials at the end of this pattern for anything that you would not encounter making a basic stockinette stitch cap. The stitch pattern is called Pillar Openwork. The eyelets formed by yarn overs keep it airy, but the passed over stitches give it a double thickness that keeps it cozy. It is knitted from cuff to cuff as one piece. Although it's easy to adapt the pattern to do the closed parts of the sleeves in the round and eliminate seaming entirely, I recommend knitting it flat since this will make it much easier to block. Also, the seam runs along the seed stitch which provides great camo for minor errors. The finished dimensions of the shrug shown are 48" x 20". (20" is at back). As designed it should fit most women in sizes US 4-14. Shortening the arms or adding extra length is easy to do as there is hardly any shaping involved in this garment.
Materials:
· Size US 6 needles. (The pattern is knitted as for straight needles, but I used Addi Lace Clicks with the 20" and 24" cables attached and large (US 11) needles on the opposite end to act as stoppers since I find stiff needles long enough for 144 stitches to be unruly.) · Paton's Silk Bamboo Yarn in Moss. (I used 10 skeins/480 yds.) ·A tapestry needle. Safety-pin style stitch markers work well for pinning the sleeves together for seaming.
Directions:
Cast on/Cuff: · Note: For tighter cuffs, use size 5 needles for the cuffs and switch to 6 for the body. Cast on 48 stitches. Work ribbed single stitch (repeat k1 p1 on RS or p1 k1 on WS) for 15 rows or to desired cuff length. Increase for sleeves/body: Increase every stitch by knitting into the front and back of each stitch. (kfb\*) You should have 9 stitches when you're done with this. ·Purl every stitch. ·Increase every other stitch by knitting into the front and back of every other stitch. (kfb k1 \*) You'll have 144 stitches when you're done with this step.
Sleeve/body:
Note: The border of the garment is a three stitch wide seed stitch which is made by k1p1k1 on both the RS and Ws. The rest of the body of the garment is a pattern called pillar openwork that is established on the RS and then you purl every stitch on the WS. RS: k1 p1 k1 (yo s(p) k2 pssok2)\* k1p1k1 \* = repeat 46 times (or until 3 from end of row if you are doing a different width). In plain English now: do seed stitch for 3 stitches. The repeat consists of a yarn over, slipping a stitch purlwise, knit two stitches, and pass the slipped stitch over both of the knitted stitches. Repeat this until you are 3 stitches from the end, and work 3 more seed stitches. · WS: k1 p1 k1 p138 k1 p1 k1 0 In plain English now: do seed stitch for 3 stitches, purl every stitch until you are 3 stitches from the end, and work 3 more seed stitches. Repeat RS and WS pattern until the body of your garment has reached its desired length. Tip: Plan for a small amount of stretch (an inch or two) when you block if you are using the yarn suggested. Ifyou are using a different yarn, make sure that you know how much it will grow when blocked. There is a lot of weight on this fabric since it is not seamed. You can easily pin it together to see how it is fitting and stretching once you have enough material to reach from arm to arm. Reduce for other cuff: RS: (k2tog k1)\* i.e. k2tog every other stitch. (You'll have 96 stitches.) WS:p96 i.e. Purl every stitch RS: (k2tog)\* i.e. k2tog all of the stitches. (You'll end w/ 48 stitches.) Other cuff/bind off: Work ribbed single stitch (repeat k1 p1 on RS or p1 k1 on WS) for 15 rows or to desired cuff length. Bind off in pattern using a much larger needle (I used 8, and 10 might have been even better.) Note: Expect the bind off cuff to be a bit less stretchy than the cast on cuff. You can stitch a thread through the backside of the first cuff to give it a similar stiffness if you prefer. I just took care to block the second cuff in a more stretched out shape and scrunched up the first one a bit so they'd match.
Tutorials:
Pillar Openwork: http://newstitchaday.com/pillar-openwork-lace-stitch/ kfb: http://www.youtube.com/watch?v=ILcTB5hc0XM Seed Stitch: http://www.youtube.com/watch?v=xR2-23rOi01 Mattress Stitch (seam stitch): http://www.youtube.com/watch?v=NvAS-HCWk91


