Stafford Mitres
Designed by Chrissy Bristow 2012
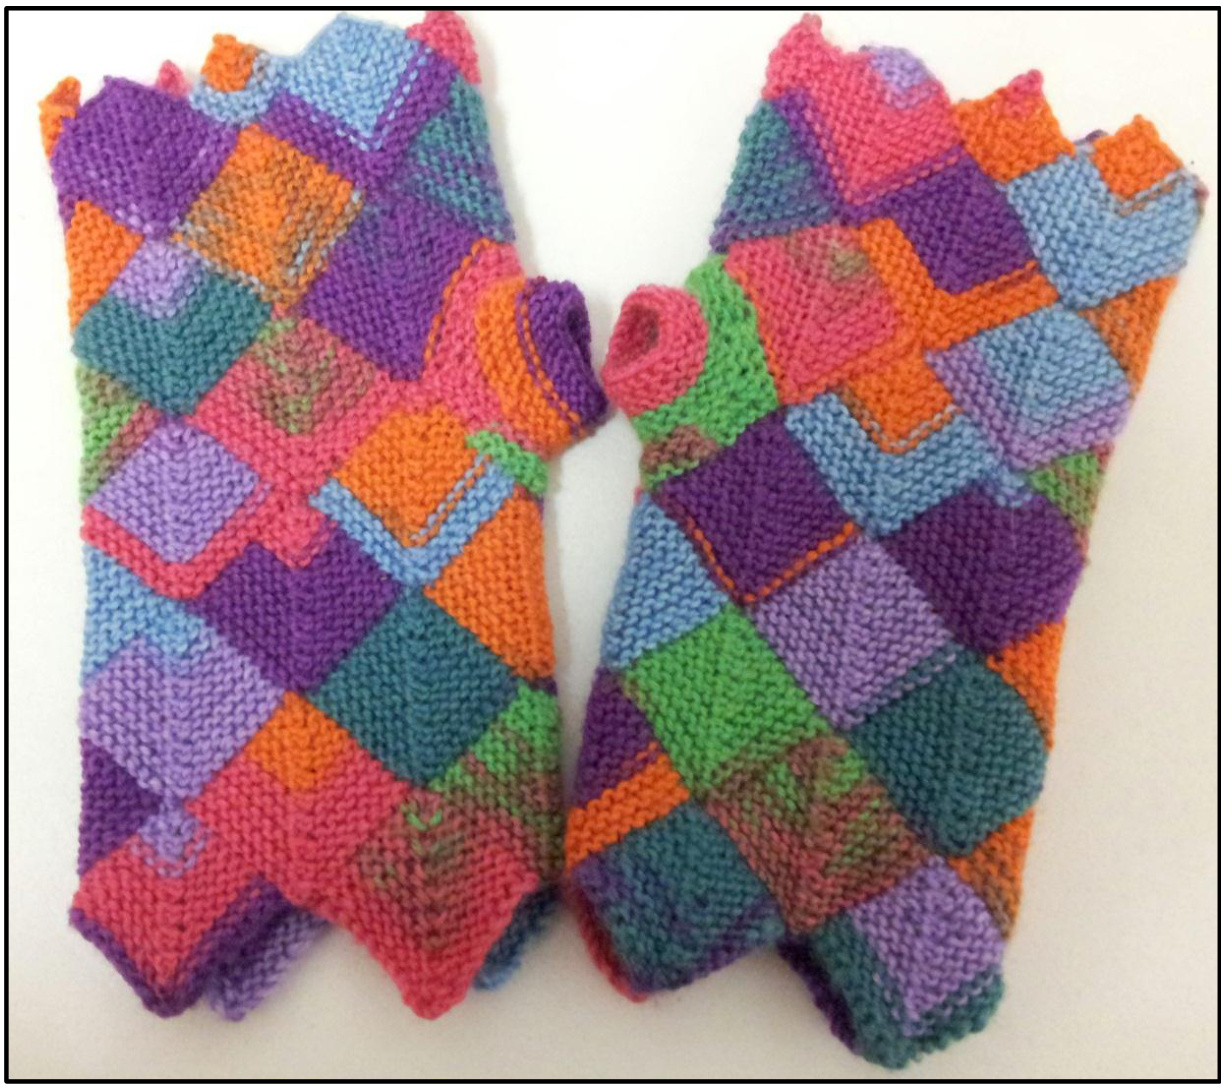
These fingerless gloves came about when we were travelling up to Stafford in our Motor Home for a dog show.
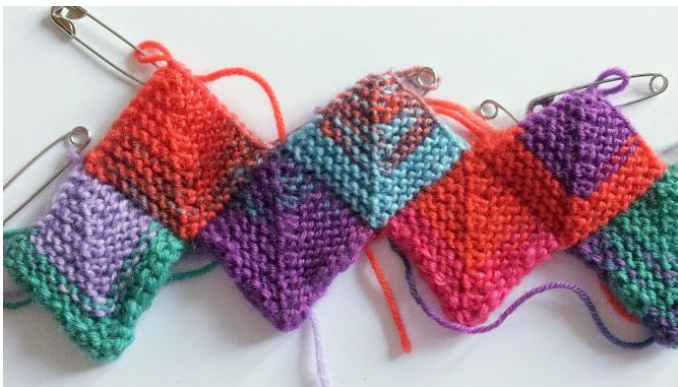
Modular, Domino or Mitred Knitting.
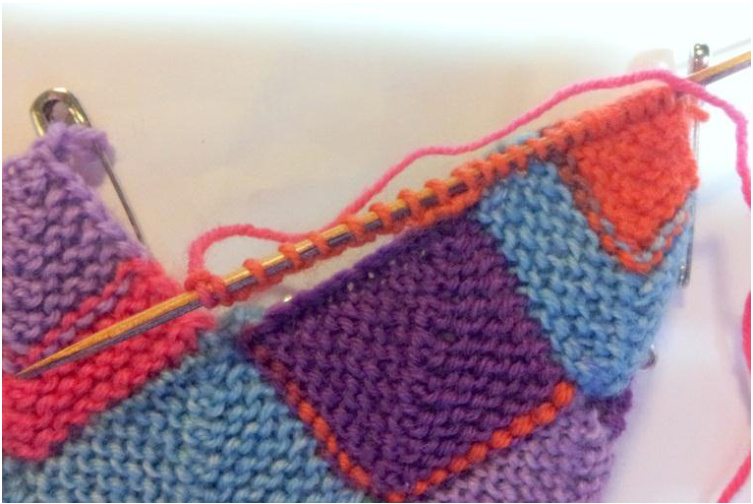
Mitres are shaped by decreasing, starting with an uneven number of stitches and decreasing until there is just 1 stitch left. They are joined together by picking up the edge stitches of another mitre.
Abbreviations:
Materials:
cO = cast on BO = cast off RS = right side wS = wrong side SL KWISE = slip 1 st as if to knit SL 1, K2TOG, PSSO = Slip 1, knit 2 together, pass slip st over P =purl K = knit ST = stitch Suitable yarn is short colour run sock yarn in a light fingering I used Regia design Line Jazz Color by Erica Knight 064451 - 2 balls These gloves used 265m Needle size 2.25 Short needles are best (DPNS) Safety pins
Pattern notes:
Always slip the first stitch knit wise and purl last stitch. This gives a nice chain on the edge to pick up from. Knit the ends in as you go. I have a small hand but the mitts can be made larger by increasing the number of stitches, and needle sizes. But remember to always have an uneven number of stitches. It can be helpful to mark the right side of your work with a safety pin.
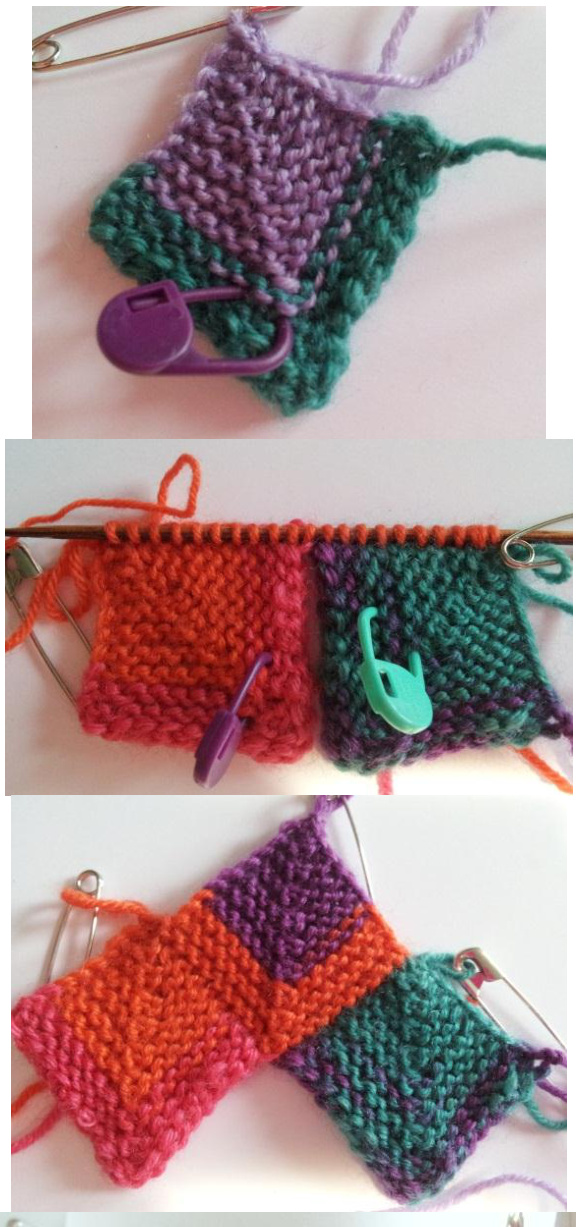
Mitre:
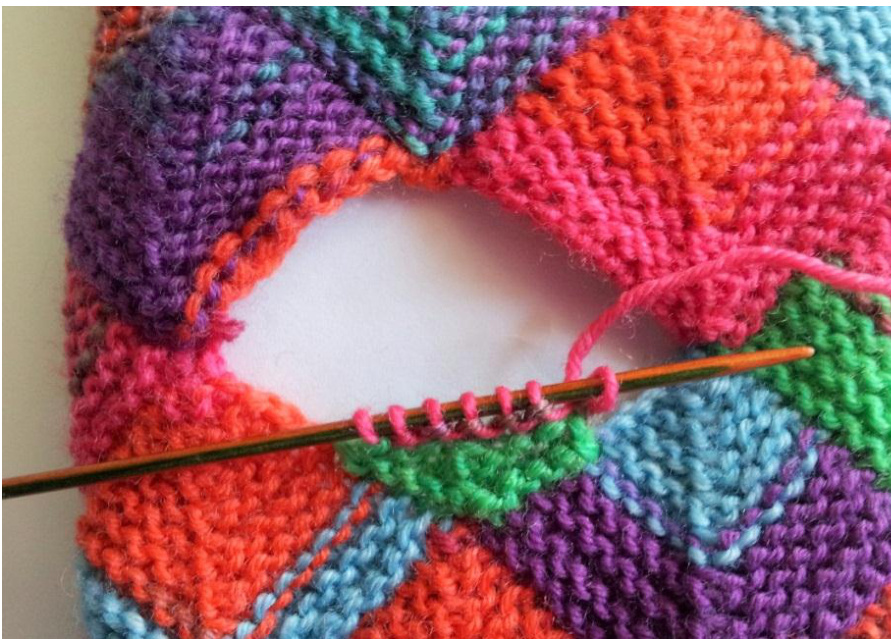
Cast on 21 sts using knitted cast on Row 1: (wS): k to last st p. Row 2: (RS): sl1 kwise k 8, sl1 k2tog, psso, k 8 p1. Row 3: and all wS rows: Sl1 kwise, k to last st p1. Row 4: Sl1 kwise, k7, sl1, k2tog,psso,k7,p1 Continue in this way working all RS rows with 1 less st on each side of the double decrease, until there is 1 stitch left. Pull thread through but leave st on a safety pin. Cut yarn. Knit another 3 mitres. Join the mitres by picking up sts down the RS side of one mitre (10sts) make 1 st by picking up the very edge of both mitres, then pick 10 sts up the RS side of the next mitre (21sts) Row 1: K until the last st p Continue to make the mitre as before, filling in the gaps. Connect all 4 base mitres by this method.
Continue with the mitres until there are 5 rows and 20 mitres, now make 3 mitres in the next row to leave spaceforthethumb.
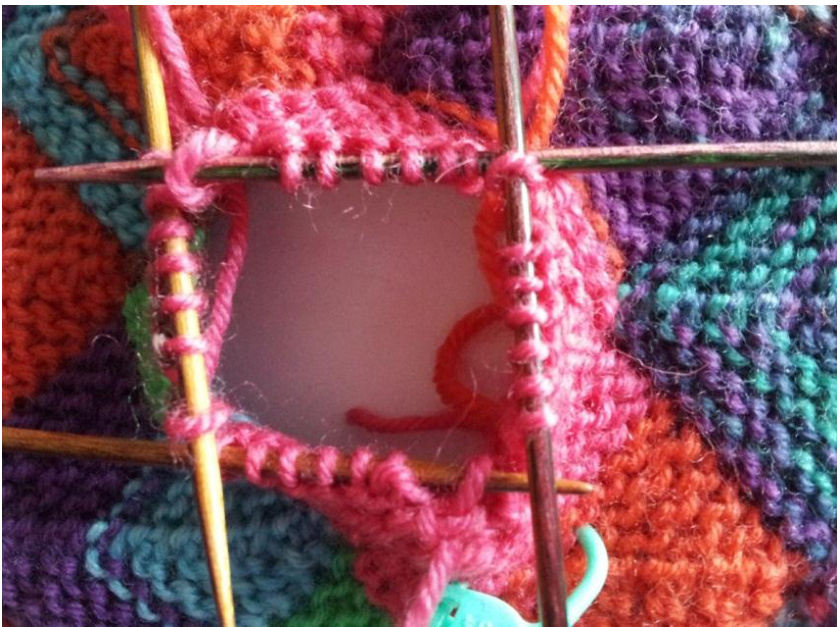
Now make the mitres over the thumb:
On the right hand side, pick up 10 sts down the side as usual, then pick up the st from the safety pin from the mitre below. Cast on 10 sts more, making a total of 21 sts. Knit the mitre as usual.
On the left hand side, cast on 10 sts, pick up the st from the safety pin from the mitre below. Pick up 10 sts more making a total of 21 sts. Knit the mitre as usual.
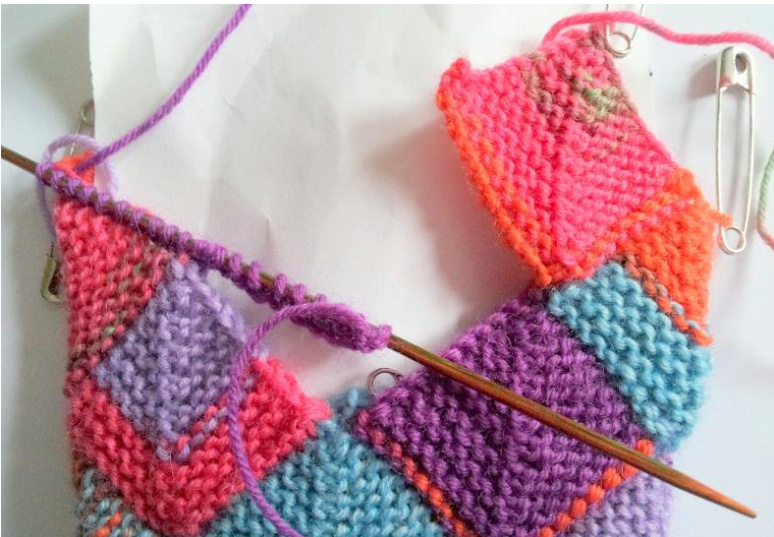
When the left & right mitres are finished, connect them by knitting another mitre. This will make the thumb space.
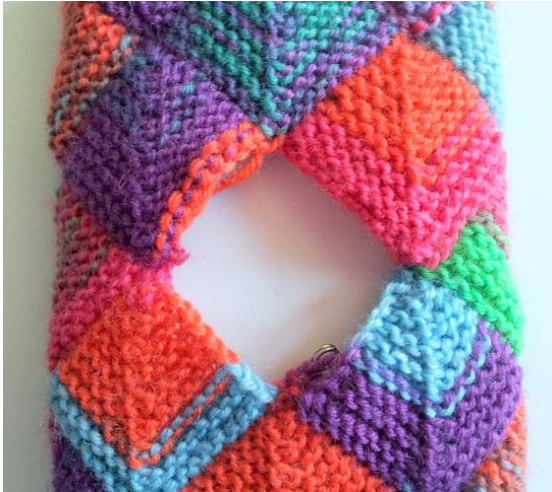
The thumb is made by 4 small half size mitres in each of the corners Pick up 5 sts from one side, pick up an end (on safety pin) st, and pick up 5. K the mitre until there are 7 sts on needle put on a holder. Make another 3 in the same way. Using DPNS join the 28 sts from the 4 half size mitres in a round. Knit 1 round with all 4 mitres. The thumb will be worked in garter stitch, so you will need to alternate K & P rows asfollows Row 1 purl decrease 4 sts evenly around. (24st) Row 2 knit Row 3 purl Row 4 knit Row 5 purl Row 6 knit. Decrease 4 sts evenly around (20 sts) Row 7 purl Row 8 Knit Row 9 Purl Row 10 cast off knit wise. There will be 4 holes where the mitres are joined and can easily be sewn up. Knit another row of mitres. This makes total of 36 mitres. A nice touch is to fill in the final row with half mitres, just picking up 5 st, the st from the safety pin, and 5 sts more. (as thumb). Sew in all ends. Make a second mitt to match the first.